


本篇博文针对的是ffmpeg4.0.1版本进行(音频重采样代码都能分离出来,其他部分不是肯定可以嘛,往后ffmpeg就可以分而食之,我们可以把它变成我们自己的代码)
ffmpeg解压缩之后会有一个doc目录,此目录中有示例程序,就在doc/examples。
要想编译examples中的测试程序,可以先编译整个ffmpeg(生成主要的库,如:libavcodec.a libavdevice.a libavfilter.a libavformat.a libavutil.a libswresample.a libswscale.a。当然动态库静态库都是可以配置的,我选择默认静态库编译),然后在ffmpeg主目录中执行make examples即可(make examplesclean可以清除编译文件)。
针对于resampleaudio.c这个文件,编译完了之后,直接执行./resampleaudio out即可(out文件查看代码可以知道它的采样率为44100,channel为3,格式为signed16bit),使用audacity工具导入查看如下:
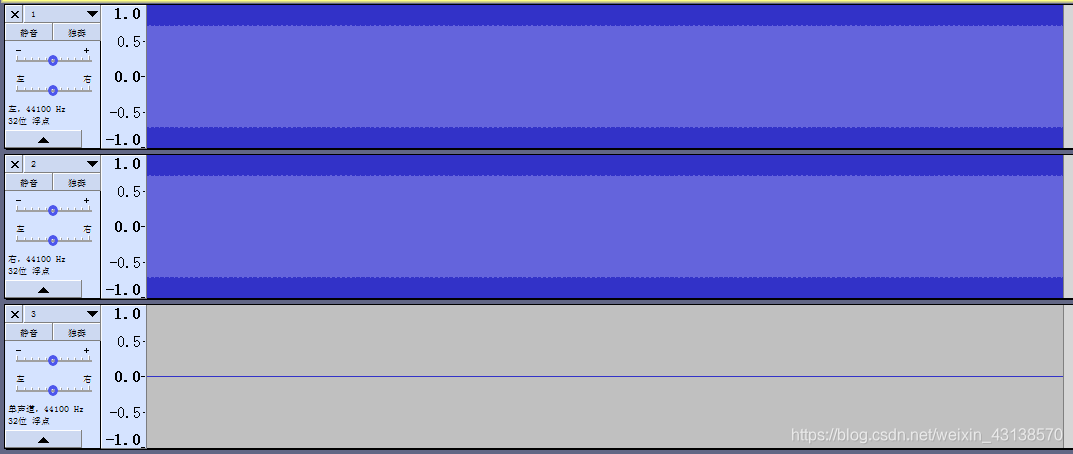 其中前两个通道左右声道都是由正玄波产生,正玄波是代码中写好的src_data数据,查看resampleaudio.c的fill_samples函数就能知道,如下:
static void fill_samples(double *dst, int nb_samples, int nb_channels, int sample_rate, double *t)
{
    int i, j;
    double tincr = 1.0 / sample_rate, *dstp = dst;
    const double c = 2 * M_PI * 440.0;

    /* generate sin tone with 440Hz frequency and duplicated channels */
    for (i = 0; i < nb_samples; i++) {
        *dstp = sin(c * *t);      //这就是正玄波生成的采样点赋值的地方(为什么没有输入源数据?因为代码中已经自己产生了数据)
        for (j = 1; j < nb_channels; j++)
            dstp[j] = dstp[0];
        dstp += nb_channels;
        *t += tincr;
    }
}
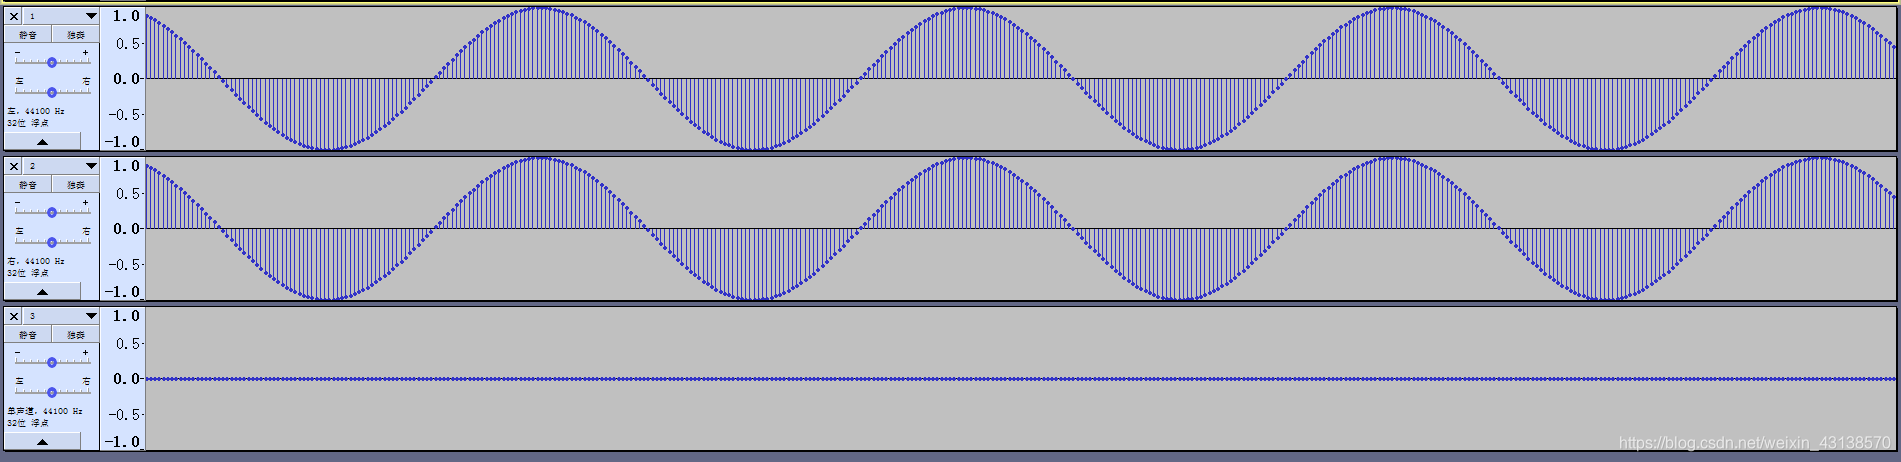
你刚开始看上面的波形可能会觉得那里是正玄波,一点儿也看不出来,其实放大之后就可以看到了,如下:
数据时间为10s,代码中是通过do{} while(t<10)来控制的,为什么t<10就是10s,你仔细看fill_samples函数里面代码实现就能知道,对于这个示例程序,程序中写死了最终输出数据的采样率为44100,也就是说1s秒钟会有44100个采样点,tincr = 1.0 / sample_rate,什么时候t会等于1(也就是1s),那就要t自加sample_rate(44100)次才是一秒的数据量。由于nb_samples程序中写死了是1024(其实就是1024个采样点),1024对应于src_date采样率48000的数据量,通过程序执行时的打印看出*t=0重复出现了46次,其它都一样(*t=1,2,3…),我们计算一下就知道了48000/1024=46(46.875),而每次输入1024个采样点同样会输出941个采样点,这941个采样点对应的是dst_data的44100采样率数据,再次计算,44100/941=46(46.865037194473963868225292242295),这就对上了。
程序中核心函数,也就是实际进行采样率转换的函数就是swr_convert函数,我们只需要会使用这个函数就行,与之相关的函数还有如下:
(1)swr_alloc 创建resample context
(2)av_opt_set_int av_opt_set_sample_fmt 设置相关属性(通道,采样率,格式)
(3)swr_init 初始化resample context
(4)av_get_channel_layout_nb_channels av_samples_alloc_array_and_samples 分配内存
(5)fill_samples 填充数据
(6)swr_convert 转换采样率
(7)av_samples_get_buffer_size 获取转换之后的buffer大小,之后就是写入数据到文件中
非常符合我们日常实际开发中的代码逻辑:创建,初始化,设置参数,分配内存,进行数据处理,结果输出这个过程。
好了,代码也看了,也能正常运行,下面就是修改代码了,来个简单的,我要输入数据为48000,格式为signed16bit,通道为1(单声道),输出采样率为44100,格式为signed16bit,通道为1的数据,怎么搞?很简单,就是上面的fill_samples函数,你把数据填到里面就可以了,具体修改如下:
static int fill_samples(short *dst, int nb_samples, int nb_channels, int src_sample_rate, int dst_sample_rate, double *t, FILE* src_file)
{
    int i, j;
	int ret = 0;
    double tincr = 1.0 / src_sample_rate;
	short* dstp = dst;
    const double c = 2 * M_PI * 440.0;

    /* generate sin tone with 440Hz frequency and duplicated channels */
    /*for (i = 0; i < nb_samples; i++) {
        *dstp = sin(c * *t);
        for (j = 1; j < nb_channels; j++)
            dstp[j] = dstp[0];
        dstp += nb_channels;
        *t += tincr;
    }*/


	ret = fread(dst, 2, nb_samples, src_file);
	if (ret == 0) {
		printf("read complete, end of file...\n");
		return 0;
	} else if (ret < 0) {
		printf("read error...\n");
		return -1;
	}
	printf("---- ret = %d\n", ret);
	//memcpy(dst, );
	for (j = 1; j < nb_channels; j++)
		dstp[j] = dstp[0];

	return ret;
}

int main(int argc, char **argv)
{
    int64_t src_ch_layout = AV_CH_LAYOUT_MONO, dst_ch_layout = AV_CH_LAYOUT_MONO;
    int src_rate = 48000, dst_rate = 44100;
    uint8_t **src_data = NULL, **dst_data = NULL;
    int src_nb_channels = 0, dst_nb_channels = 0;
    int src_linesize, dst_linesize;
    int src_nb_samples = 1024, dst_nb_samples, max_dst_nb_samples;
    enum AVSampleFormat src_sample_fmt = AV_SAMPLE_FMT_S16, dst_sample_fmt = AV_SAMPLE_FMT_S16;
    const char *dst_filename = NULL;
	const char *src_filename = NULL;
    FILE *dst_file;
	FILE *src_file;
    int dst_bufsize;
    const char *fmt;
    struct SwrContext *swr_ctx;
    double t;
    int ret;

    if (argc != 3) {
        fprintf(stderr, "Usage: %s output_file\n"
                "API example program to show how to resample an audio stream with libswresample.\n"
                "This program generates a series of audio frames, resamples them to a specified "
                "output format and rate and saves them to an output file named output_file.\n",
            argv[0]);
        exit(1);
    }
    dst_filename = argv[1];
    src_filename = argv[2];

    dst_file = fopen(dst_filename, "wb");
    if (!dst_file) {
        fprintf(stderr, "Could not open destination file %s\n", dst_filename);
        exit(1);
    }

	src_file = fopen(src_filename, "rb");
    if (!src_file) {
        fprintf(stderr, "Could not open destination file %s\n", src_filename);
        exit(1);
    }

    /* create resampler context */
    swr_ctx = swr_alloc();
    if (!swr_ctx) {
        fprintf(stderr, "Could not allocate resampler context\n");
        ret = AVERROR(ENOMEM);
        goto end;
    }

    /* set options */
    av_opt_set_int(swr_ctx, "in_channel_layout",    src_ch_layout, 0);
    av_opt_set_int(swr_ctx, "in_sample_rate",       src_rate, 0);
    av_opt_set_sample_fmt(swr_ctx, "in_sample_fmt", src_sample_fmt, 0);

    av_opt_set_int(swr_ctx, "out_channel_layout",    dst_ch_layout, 0);
    av_opt_set_int(swr_ctx, "out_sample_rate",       dst_rate, 0);
    av_opt_set_sample_fmt(swr_ctx, "out_sample_fmt", dst_sample_fmt, 0);

    /* initialize the resampling context */
    if ((ret = swr_init(swr_ctx)) < 0) {
        fprintf(stderr, "Failed to initialize the resampling context\n");
        goto end;
    }

    /* allocate source and destination samples buffers */

    src_nb_channels = av_get_channel_layout_nb_channels(src_ch_layout);
    ret = av_samples_alloc_array_and_samples(&src_data, &src_linesize, src_nb_channels,
                                             src_nb_samples, src_sample_fmt, 0);
    if (ret < 0) {
        fprintf(stderr, "Could not allocate source samples\n");
        goto end;
    }

    /* compute the number of converted samples: buffering is avoided
     * ensuring that the output buffer will contain at least all the
     * converted input samples */
    max_dst_nb_samples = dst_nb_samples =
        av_rescale_rnd(src_nb_samples, dst_rate, src_rate, AV_ROUND_UP);

    /* buffer is going to be directly written to a rawaudio file, no alignment */
    dst_nb_channels = av_get_channel_layout_nb_channels(dst_ch_layout);
    ret = av_samples_alloc_array_and_samples(&dst_data, &dst_linesize, dst_nb_channels,
                                             dst_nb_samples, dst_sample_fmt, 0);
    if (ret < 0) {
        fprintf(stderr, "Could not allocate destination samples\n");
        goto end;
    }

    t = 0;
    do {
        /* generate synthetic audio */
        if (fill_samples((short *)src_data[0], src_nb_samples, src_nb_channels, src_rate, dst_rate, &t, src_file) <= 0)
			break;

        /* compute destination number of samples */
        dst_nb_samples = av_rescale_rnd(swr_get_delay(swr_ctx, src_rate) +
                                        src_nb_samples, dst_rate, src_rate, AV_ROUND_UP);
        if (dst_nb_samples > max_dst_nb_samples) {
            av_freep(&dst_data[0]);
            ret = av_samples_alloc(dst_data, &dst_linesize, dst_nb_channels,
                                   dst_nb_samples, dst_sample_fmt, 1);
            if (ret < 0)
                break;

            max_dst_nb_samples = dst_nb_samples;
        }

        /* convert to destination format */
        ret = swr_convert(swr_ctx, dst_data, dst_nb_samples, (const uint8_t **)src_data, src_nb_samples);
        if (ret < 0) {
            fprintf(stderr, "Error while converting\n");
            goto end;
        }
        dst_bufsize = av_samples_get_buffer_size(&dst_linesize, dst_nb_channels,
                                                 ret, dst_sample_fmt, 1);
        if (dst_bufsize < 0) {
            fprintf(stderr, "Could not get sample buffer size\n");
            goto end;
        }
        printf("t:%f in:%d out:%d\n", t, src_nb_samples, ret);
        fwrite(dst_data[0], 1, dst_bufsize, dst_file);
    } while (1);

    if ((ret = get_format_from_sample_fmt(&fmt, dst_sample_fmt)) < 0)
        goto end;
    fprintf(stderr, "Resampling succeeded. Play the output file with the command:\n"
            "ffplay -f %s -channel_layout %"PRId64" -channels %d -ar %d %s\n",
            fmt, dst_ch_layout, dst_nb_channels, dst_rate, dst_filename);

end:
    fclose(dst_file);
    fclose(src_file);

    if (src_data)
        av_freep(&src_data[0]);
    av_freep(&src_data);

    if (dst_data)
        av_freep(&dst_data[0]);
    av_freep(&dst_data);

    swr_free(&swr_ctx);
    return ret < 0;
}
修改之后编译运行:
./resampleaudio out say_48.pcm  (say_48.pcm为采样率为48000,signed16bit,单声道格式)
结果如下,上图:

这个能实现,其他的所有格式转换都可以,直接修改代码即可,那怎么进行二次开发(此处就针对于音频重采样代码),单独编译resampleaudio.c文件如下:
gcc resampling_audio.c -o resampling_audio -I …/…/_install_gcc/include/ -L …/…/_install_gcc/lib/ -lswresample -lavutil -lm -lrt
…/…/_install_gcc/include/为编译ffmpeg之后的头文件安装目录,…/…/_install_gcc/lib/为编译ffmpeg之后的库文件安装目录,由此可以看出要编译resampling_audio.c需要用到libavutil和libswresample的库,好,那下面就把这一块儿代码直接从程序中抽出来,让我们能单独编译resampling_audio.c这个文件,而不用依赖库文件。
。。。。。。
。。。。。
。。。。。。
经过了一天的折腾,最终把这块儿代码抽了出来,成功编译通过运行通过,如下为编译指令(Makefile有时间再写):
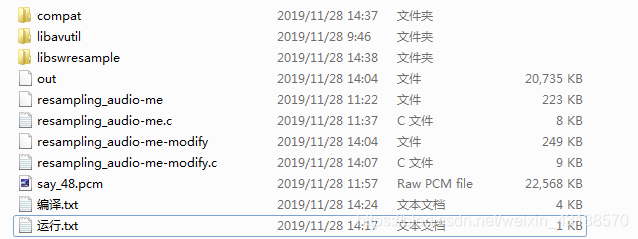
目录如下:
gcc -std=c99 -s -O2 resampling_audio-me.c libavutil/samplefmt.c libavutil/mem.c libavutil/log.c libavutil/bprint.c libswresample/options.c libavutil/opt.c libavutil/parseutils.c libavutil/rational.c libavutil/intmath.c libavutil/log2_tab.c libavutil/time.c libavutil/avstring.c libavutil/dict.c libavutil/pixdesc.c libavutil/channel_layout.c libavutil/eval.c libavutil/reverse.c libavutil/mathematics.c libavutil/error.c libswresample/swresample.c libswresample/audioconvert.c libswresample/resample.c libavutil/cpu.c libavutil/x86/cpu.c libswresample/resample_dsp.c libswresample/x86/resample_init.c libswresample/rematrix.c libswresample/dither.c libavutil/random_seed.c libavutil/sha.c -o resampling_audio-me -I ../../../_install_gcc/include/ -lm
运行如下:
./resampling_audio-me-modify out.pcm say48.pcm
往后要用到音频重采样,直接把这一块儿代码编译成库再使用即可。


 4080
4080


 被折叠的 条评论
为什么被折叠?
被折叠的 条评论
为什么被折叠?
 到【灌水乐园】发言


