


第一节: 安装与配置
一、安装
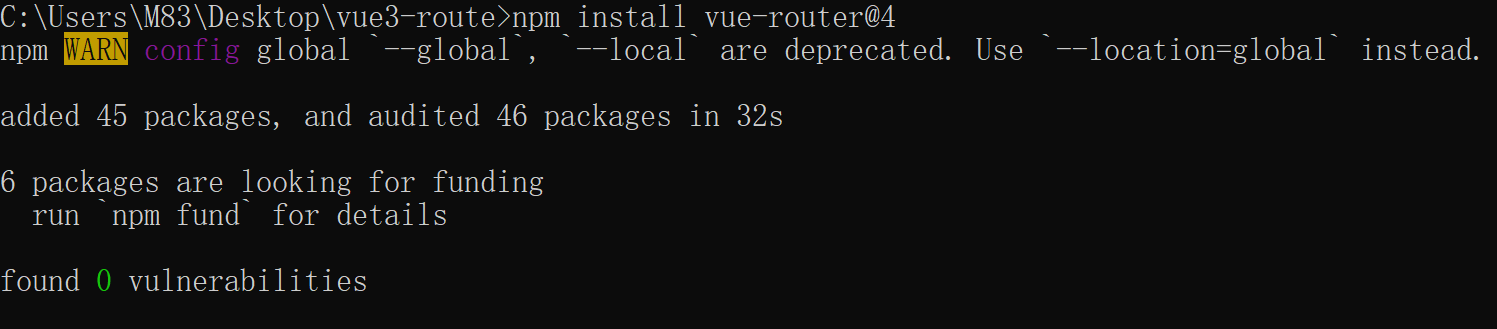
npm安装 Vue-Router
npm:  npm install vue-router@4
yarn: yarn add vue-router@4
pnpm: pnpm add vue-router@4
二、配置
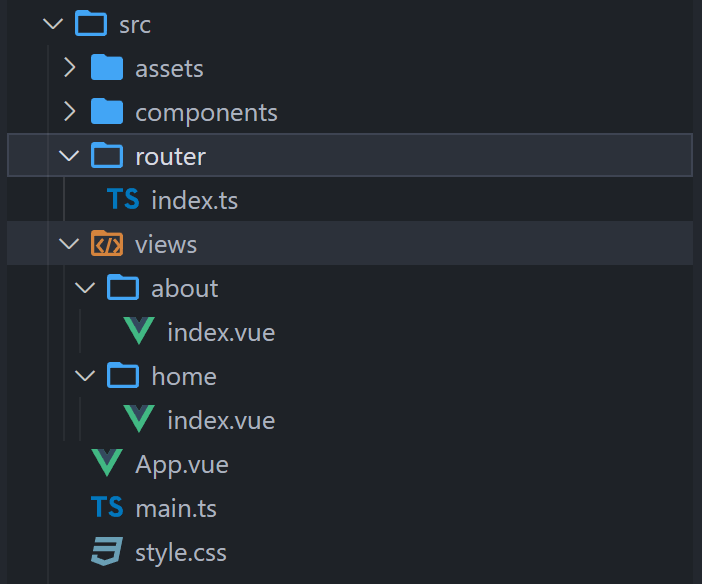
1、定义路由
- 在 src 目录下创建一个 router 文件夹放路由配置文件,在文件夹里创建 index.ts 文件
- 在 src 目录下创建 views 文件夹,在里面放组件页面
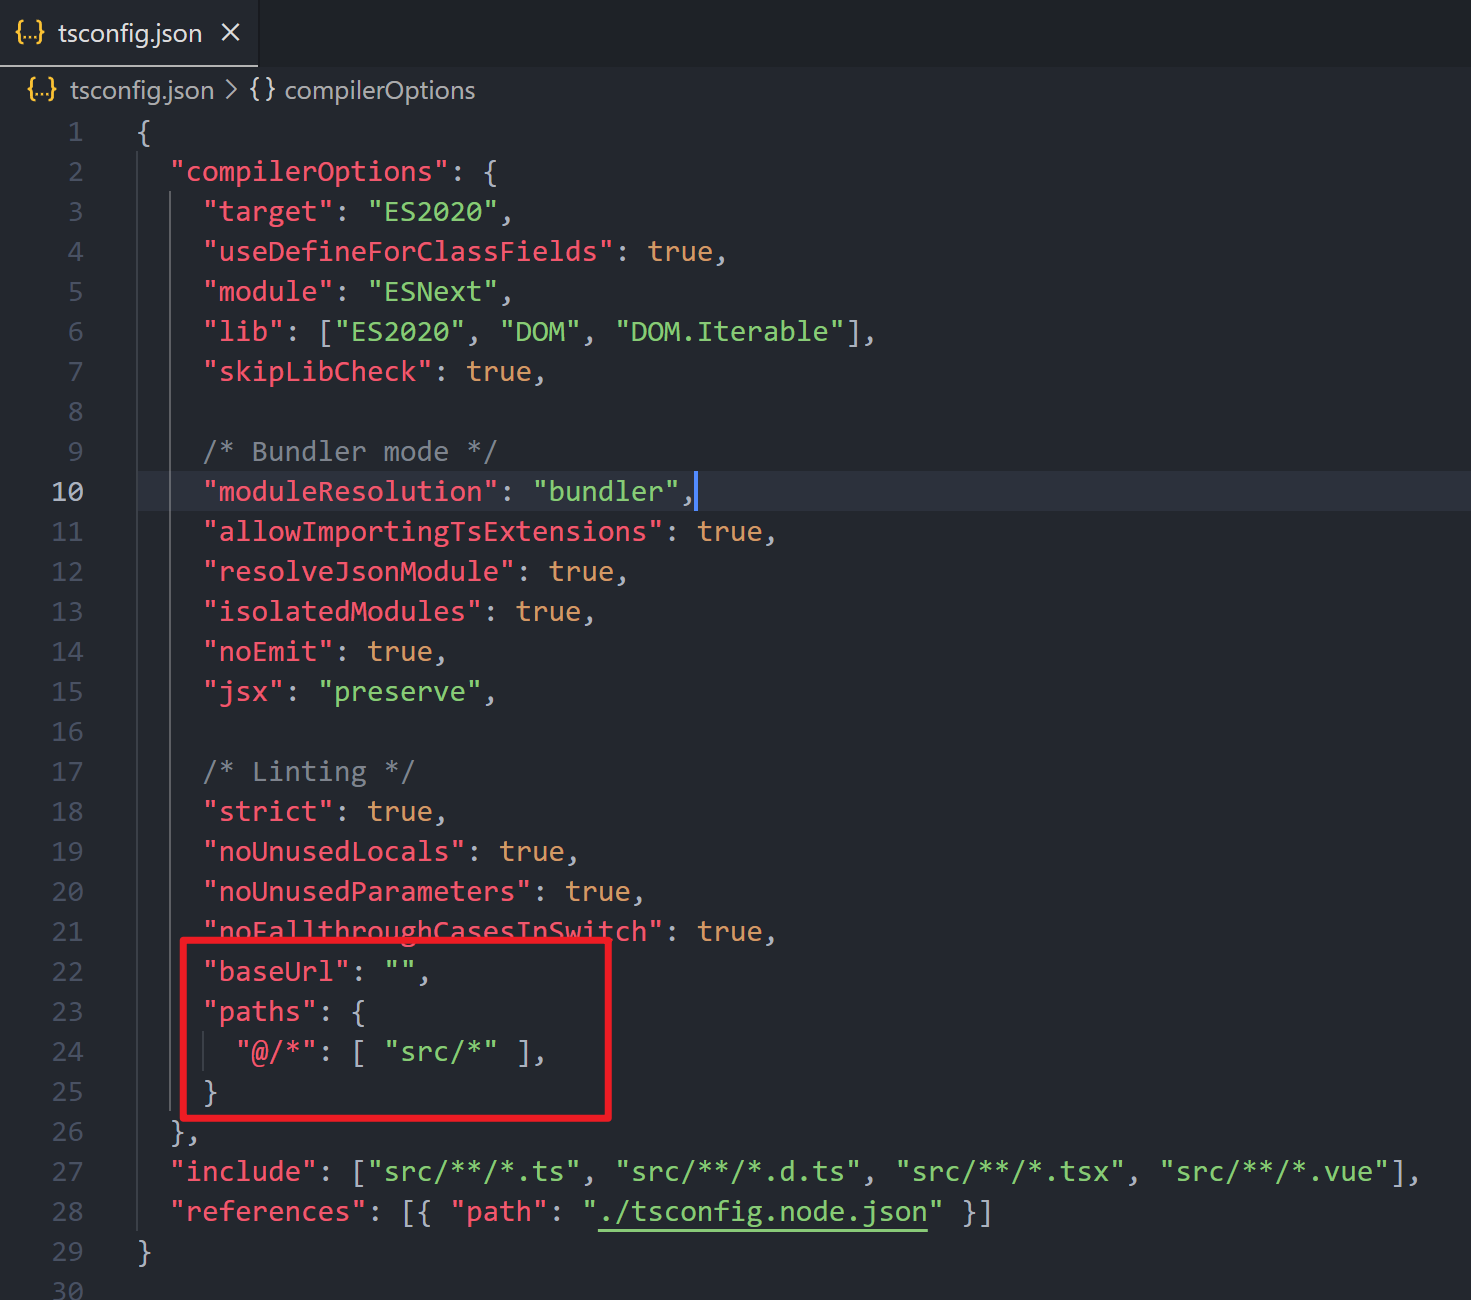
- 配置资源访问路径
第一步: 打开 tsconfig.json 配置文件,在/* Linting */下添加
// tsconfig.json 文件

"baseUrl": "",
"paths": {
  "@/*": [ "src/*" ],
}
第二步: 在 vite.config.ts 添加配置
// vite.config.ts

resolve: {
  // 设置文件./src路径为 @
  alias: {
    '@': resolve(__dirname, 'src') // 设置@指向src目录
  }
},
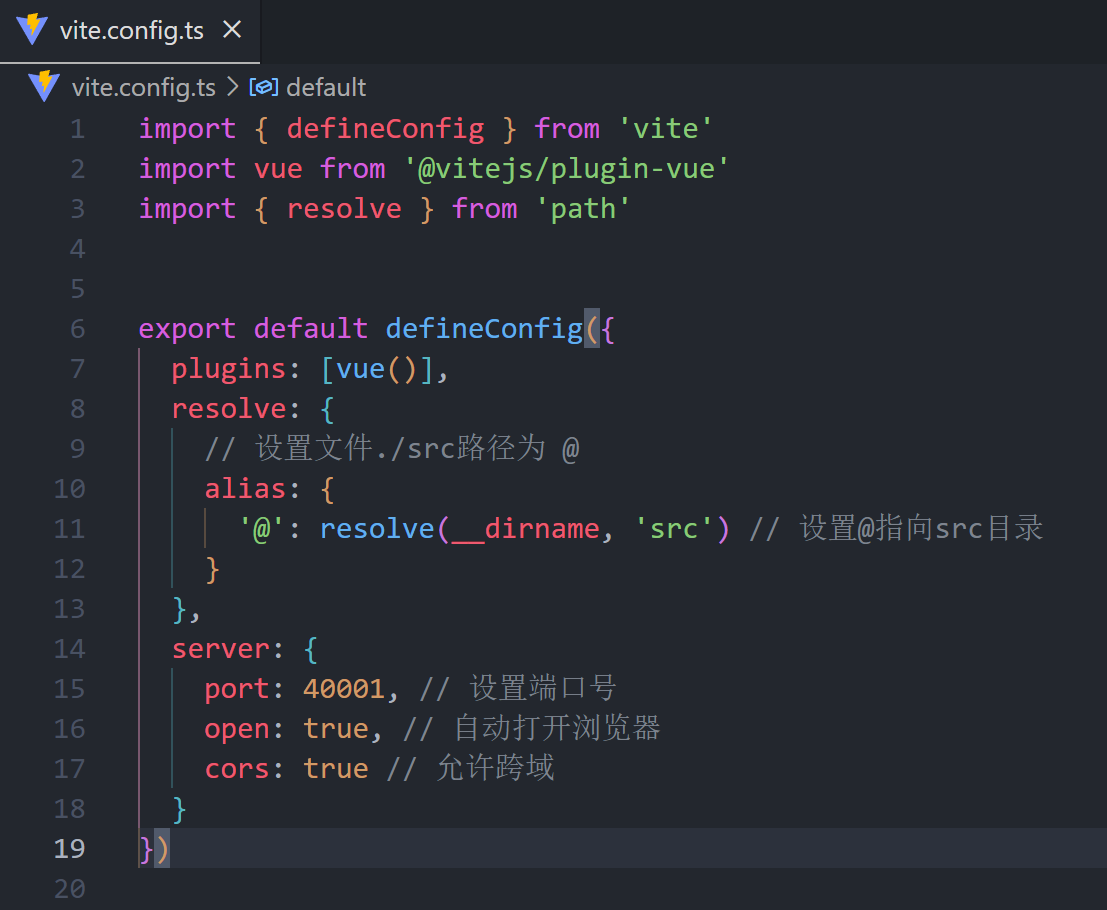
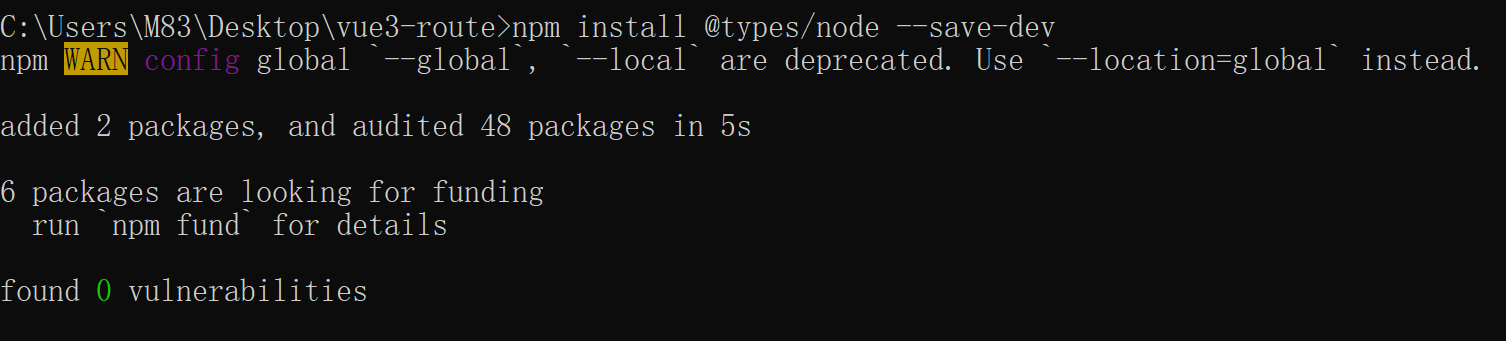
第三步: 如果报错找不到path以及相关声明
npm install @types/node --save-dev
- 定义路由并创建路由实例进行全局挂载
// router/index.ts
import { createRouter, createWebHistory,RouteRecordRaw} from "vue-router";
// 1、定义路由 每个路由都需要映射到一个组件。
const routes: Array<RouteRecordRaw> = [
    // 可直接导入或者引入
    {
        path: '/',
        component: () => import("@/views/home/index.vue"),
    },
    {
        path: '/about',
        component: () => import("@/views/About/index.vue"),
    }
]

// 2、创建路由实例并传递routes
const router = createRouter({
    // 路由的模式:  vue2:
    // vue2 mode  history | vue3  createWebHistory
    // vue2 mode  hash    | vue3  createWebHashHistory
    history: createWebHistory(),
    routes
})

// 导出
export default router
import { createApp } from 'vue'
import './style.css'
import App from './App.vue'
import router from './router'

createApp(App).use(router).mount('#app')
如遇到错误: 找不到该模块或其相应的类型声明
① 首先在src目录下创建一个vite-env.d.ts的文件
② 在文件中引入这些代码
/// <reference types="vite/client" />
// 配置这个文件是 解决错误:找不到模块“@/views/login/index.vue”或其相应的类型声明。ts(2307)
// 这段代码告诉 TypeScript,所有以 .vue 结尾的文件都是 Vue 组件,可以通过 import 语句进行导入。这样做通常可以解决无法识别模块的问题。

declare module '*.vue' {
    import { Component } from 'vue'; const component: Component; export default component;
}
2、router-view
将显示与 URL 对应的组件。你可以把它放在任何地方,以适应你的布局。
现在我们想开启项目显示 Home ,我们就需要在 APP.vue 添加 router-view
<template>
  <div>
    <h1>Home</h1> // 显示与 URL 对应的组件
  </div>
</template>

<script setup>

</script>

<style scoped>
</style>
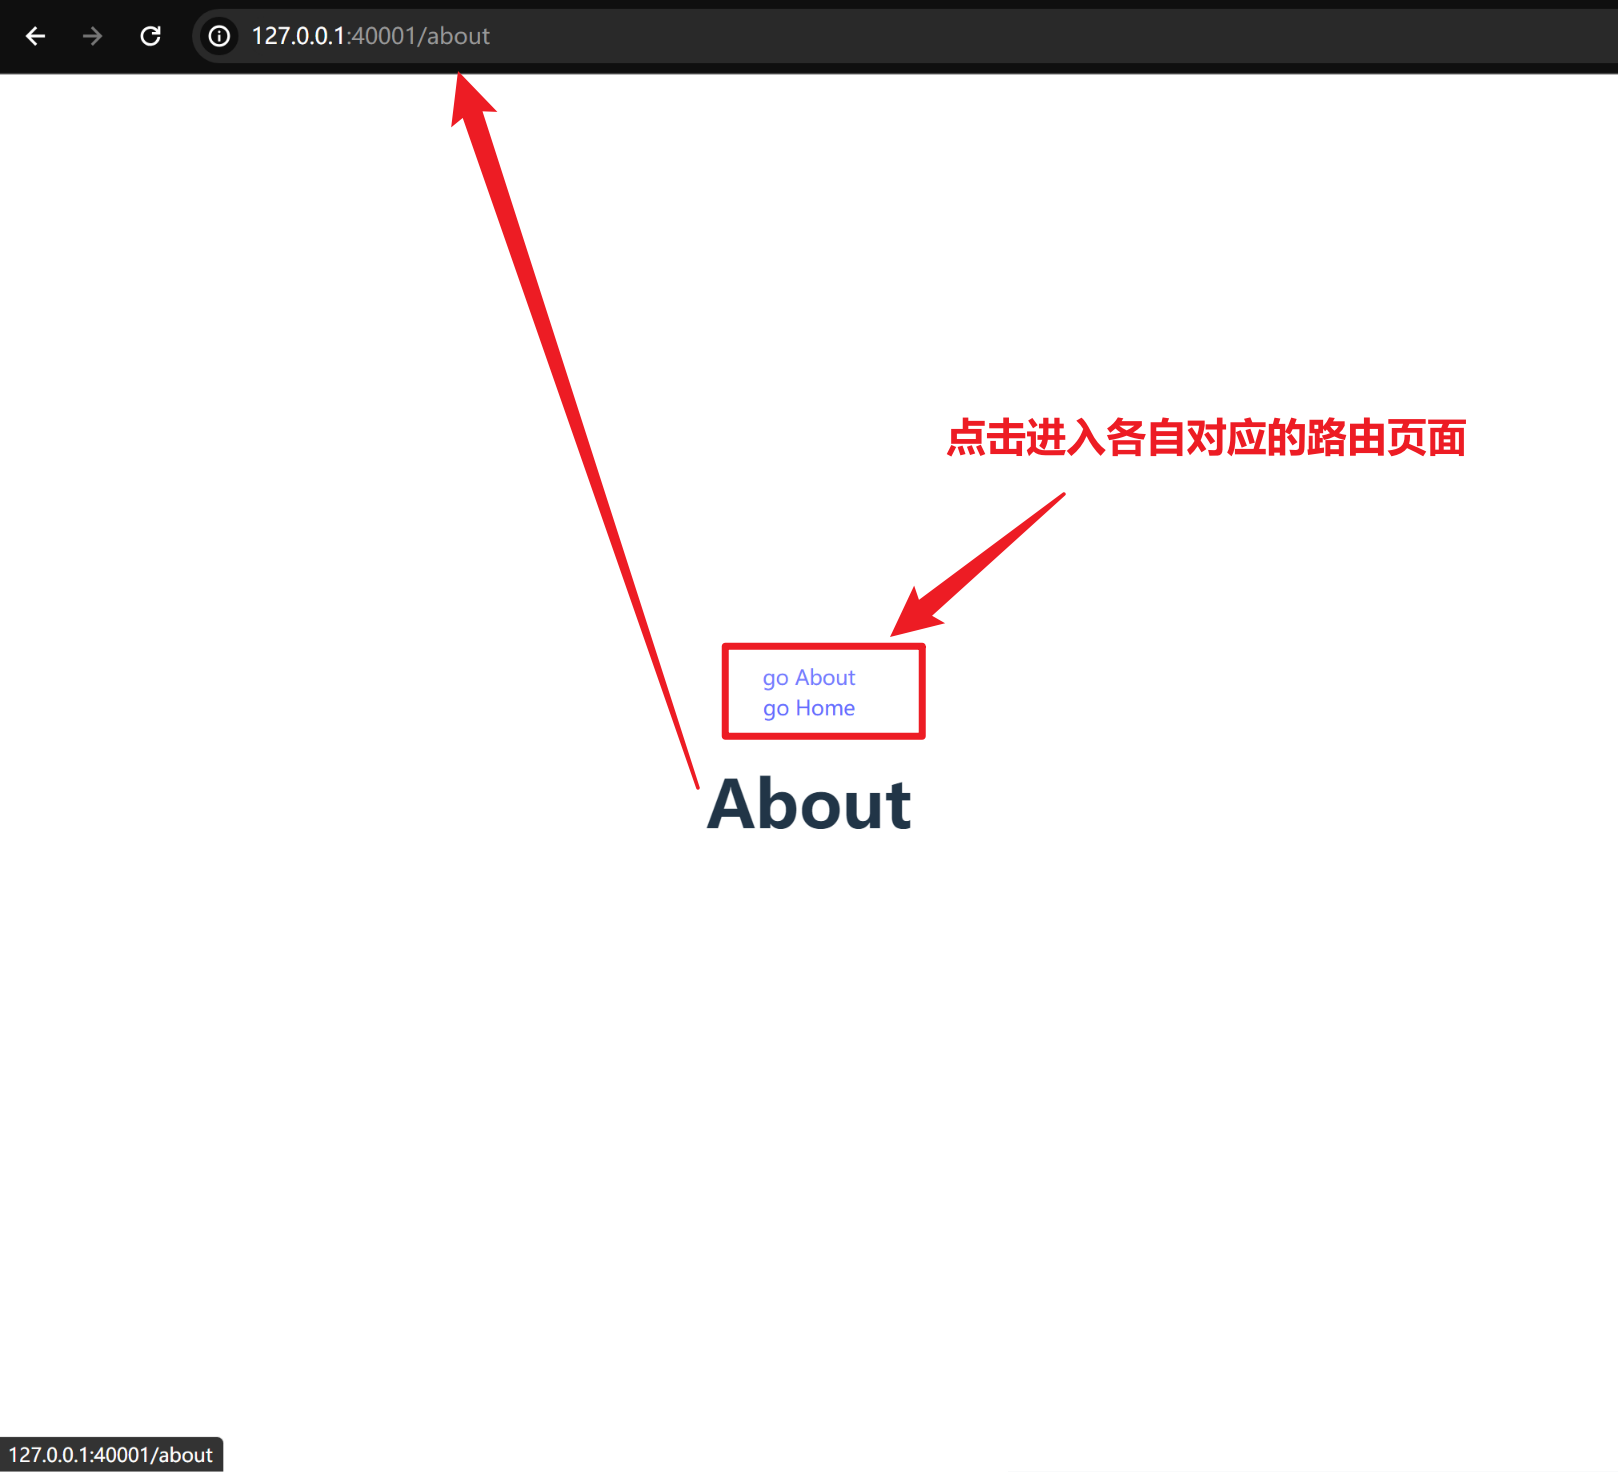
3、router-link
使用 router-link 来进行导航,其相当于一个带有 href 属性的 a 标签。它是通过 to 来制定路径。
<template>
  <div>
    <router-link to="/about">go About</router-link>


    <router-link to="/">go Home</router-link>


    <router-view />
  </div>
</template>

<script setup></script>

<style scoped></style>
第二节: 动态路由
1、动态路由
在日常开发中,我们可以用动态路由实现点击不同的文章进入到相关的文章详情页面;在路由配置时,使用一个动态字段来实现,称之为路径参数。
- 创建页面组件article
- 添加/article/:id的动态路由
// router/index.ts

const routes: Array<RouteRecordRaw> = [
  // 可直接导入或者引入
  {
    path: '/',
    component: () => import('@/views/home/index.vue'),
  },
  {
    path: '/about',
    component: () => import('@/views/about/index.vue'),
  },
  {
    // 动态字段以:开始 这里就是id
    path: '/article/:id',
    component: () => import('@/views/article/index.vue'),
  },
];
像article/101,article/102等这些url都会进入这个路由组件中。
- 点击这两个路由都可以进入我们的article组件中。在我们article组件中可以通过$route.params来获取我们传的id参数。
- 在这种使用情况下,组件重复使用肯定是比卸载再创建高效多,所以此组件的生命周期是无效的,我们要监听其参数的变化,就可以来监听$route.params。
<template>
<div>
<router-link to="/about">go About</router-link>
<router-link to="/">go Home</router-link>
<router-view />
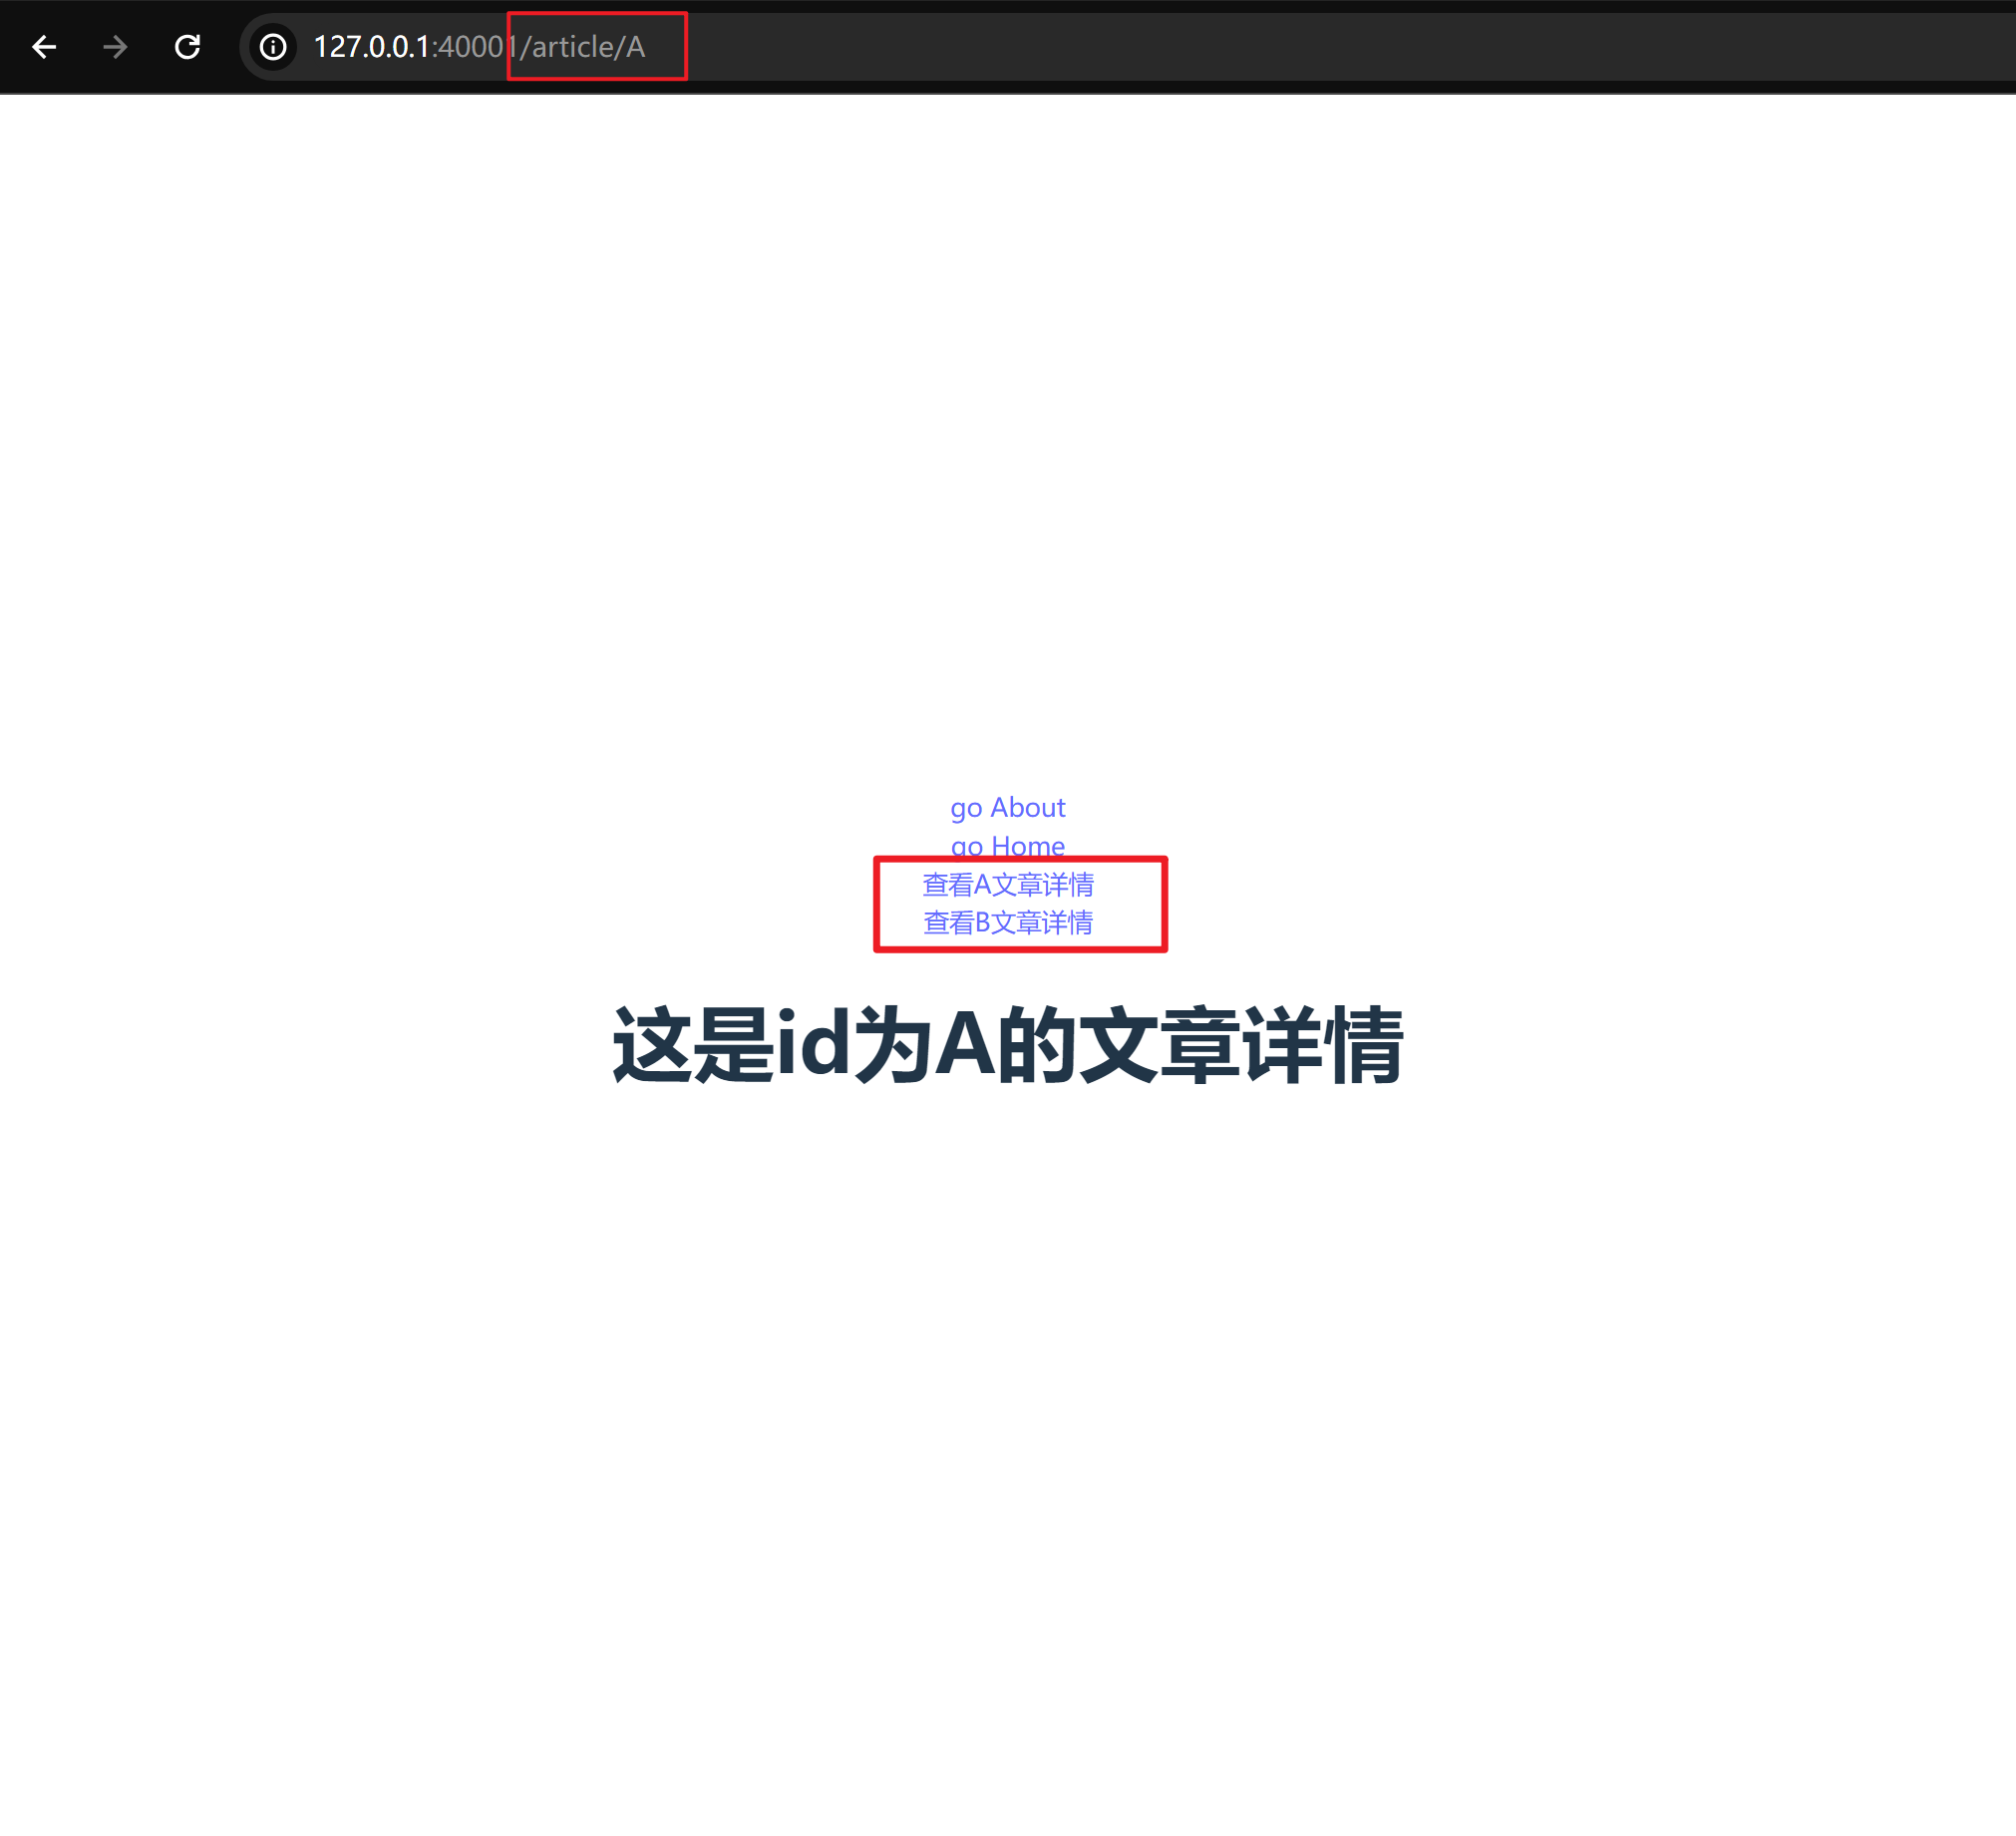
<router-link to="/article/A">查看A文章详情</router-link>
<router-link to="/article/B">查看B文章详情</router-link>
</div>
</template>
<script setup></script>
<style scoped></style>
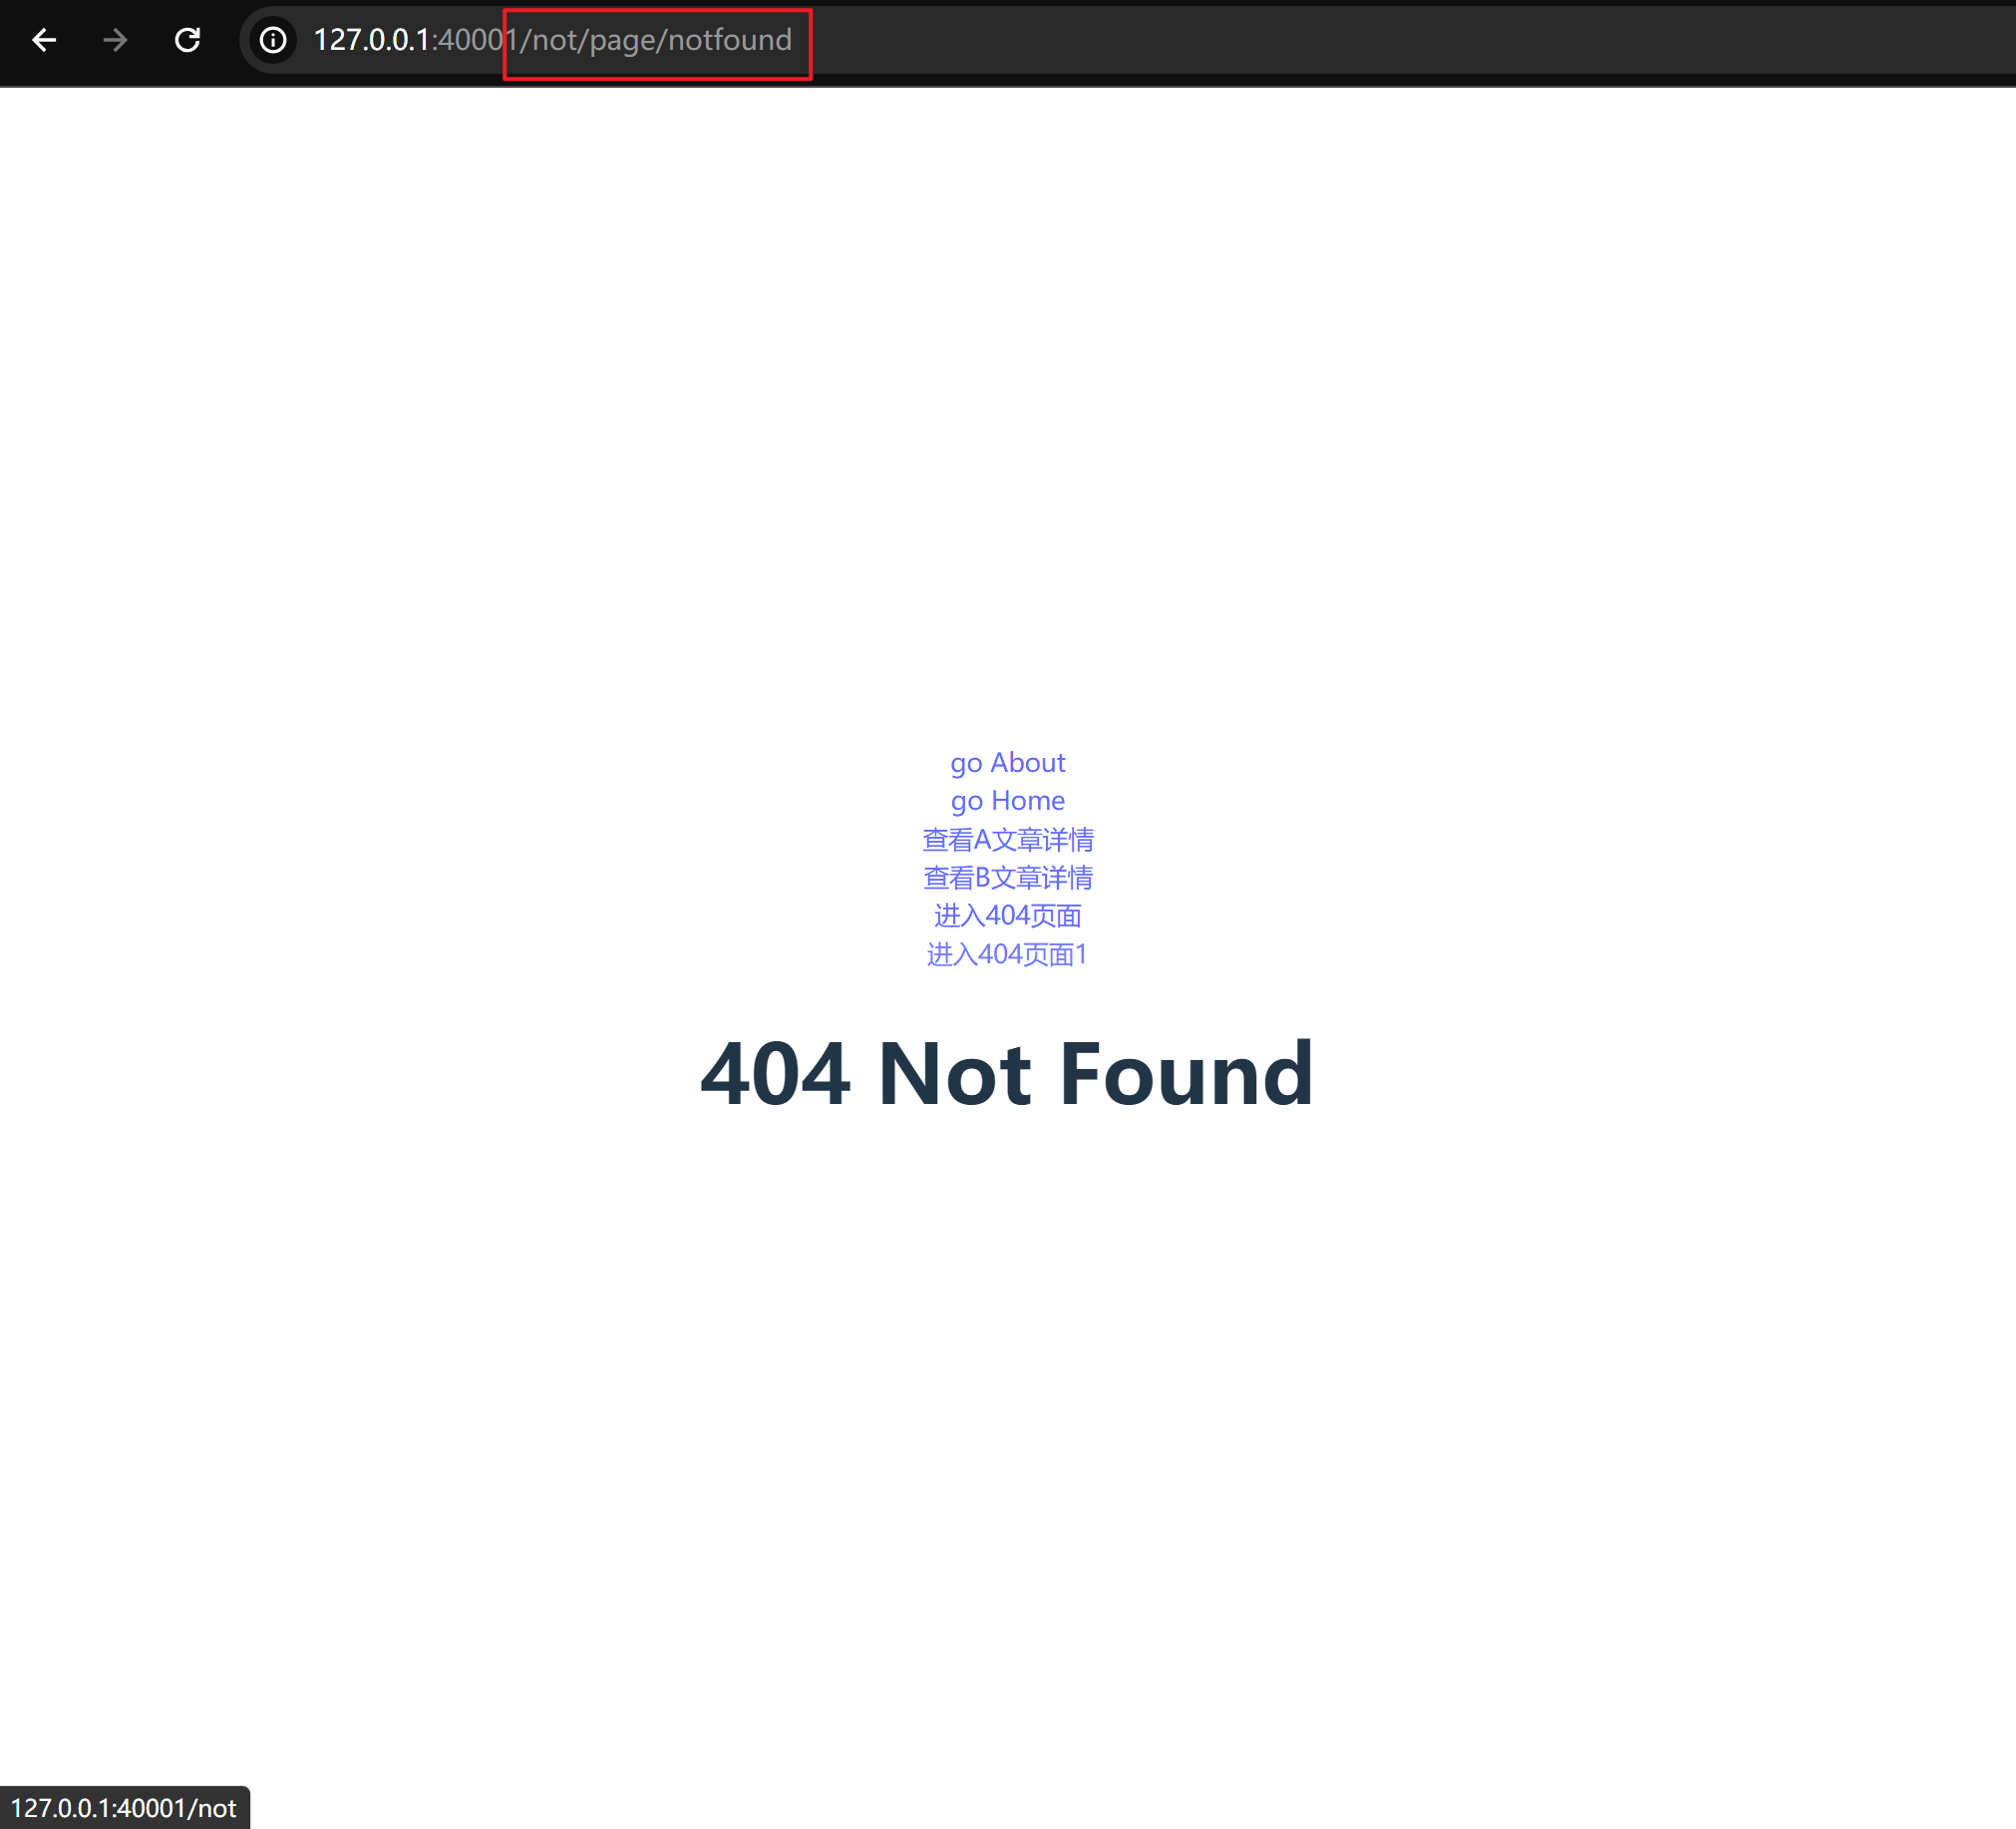
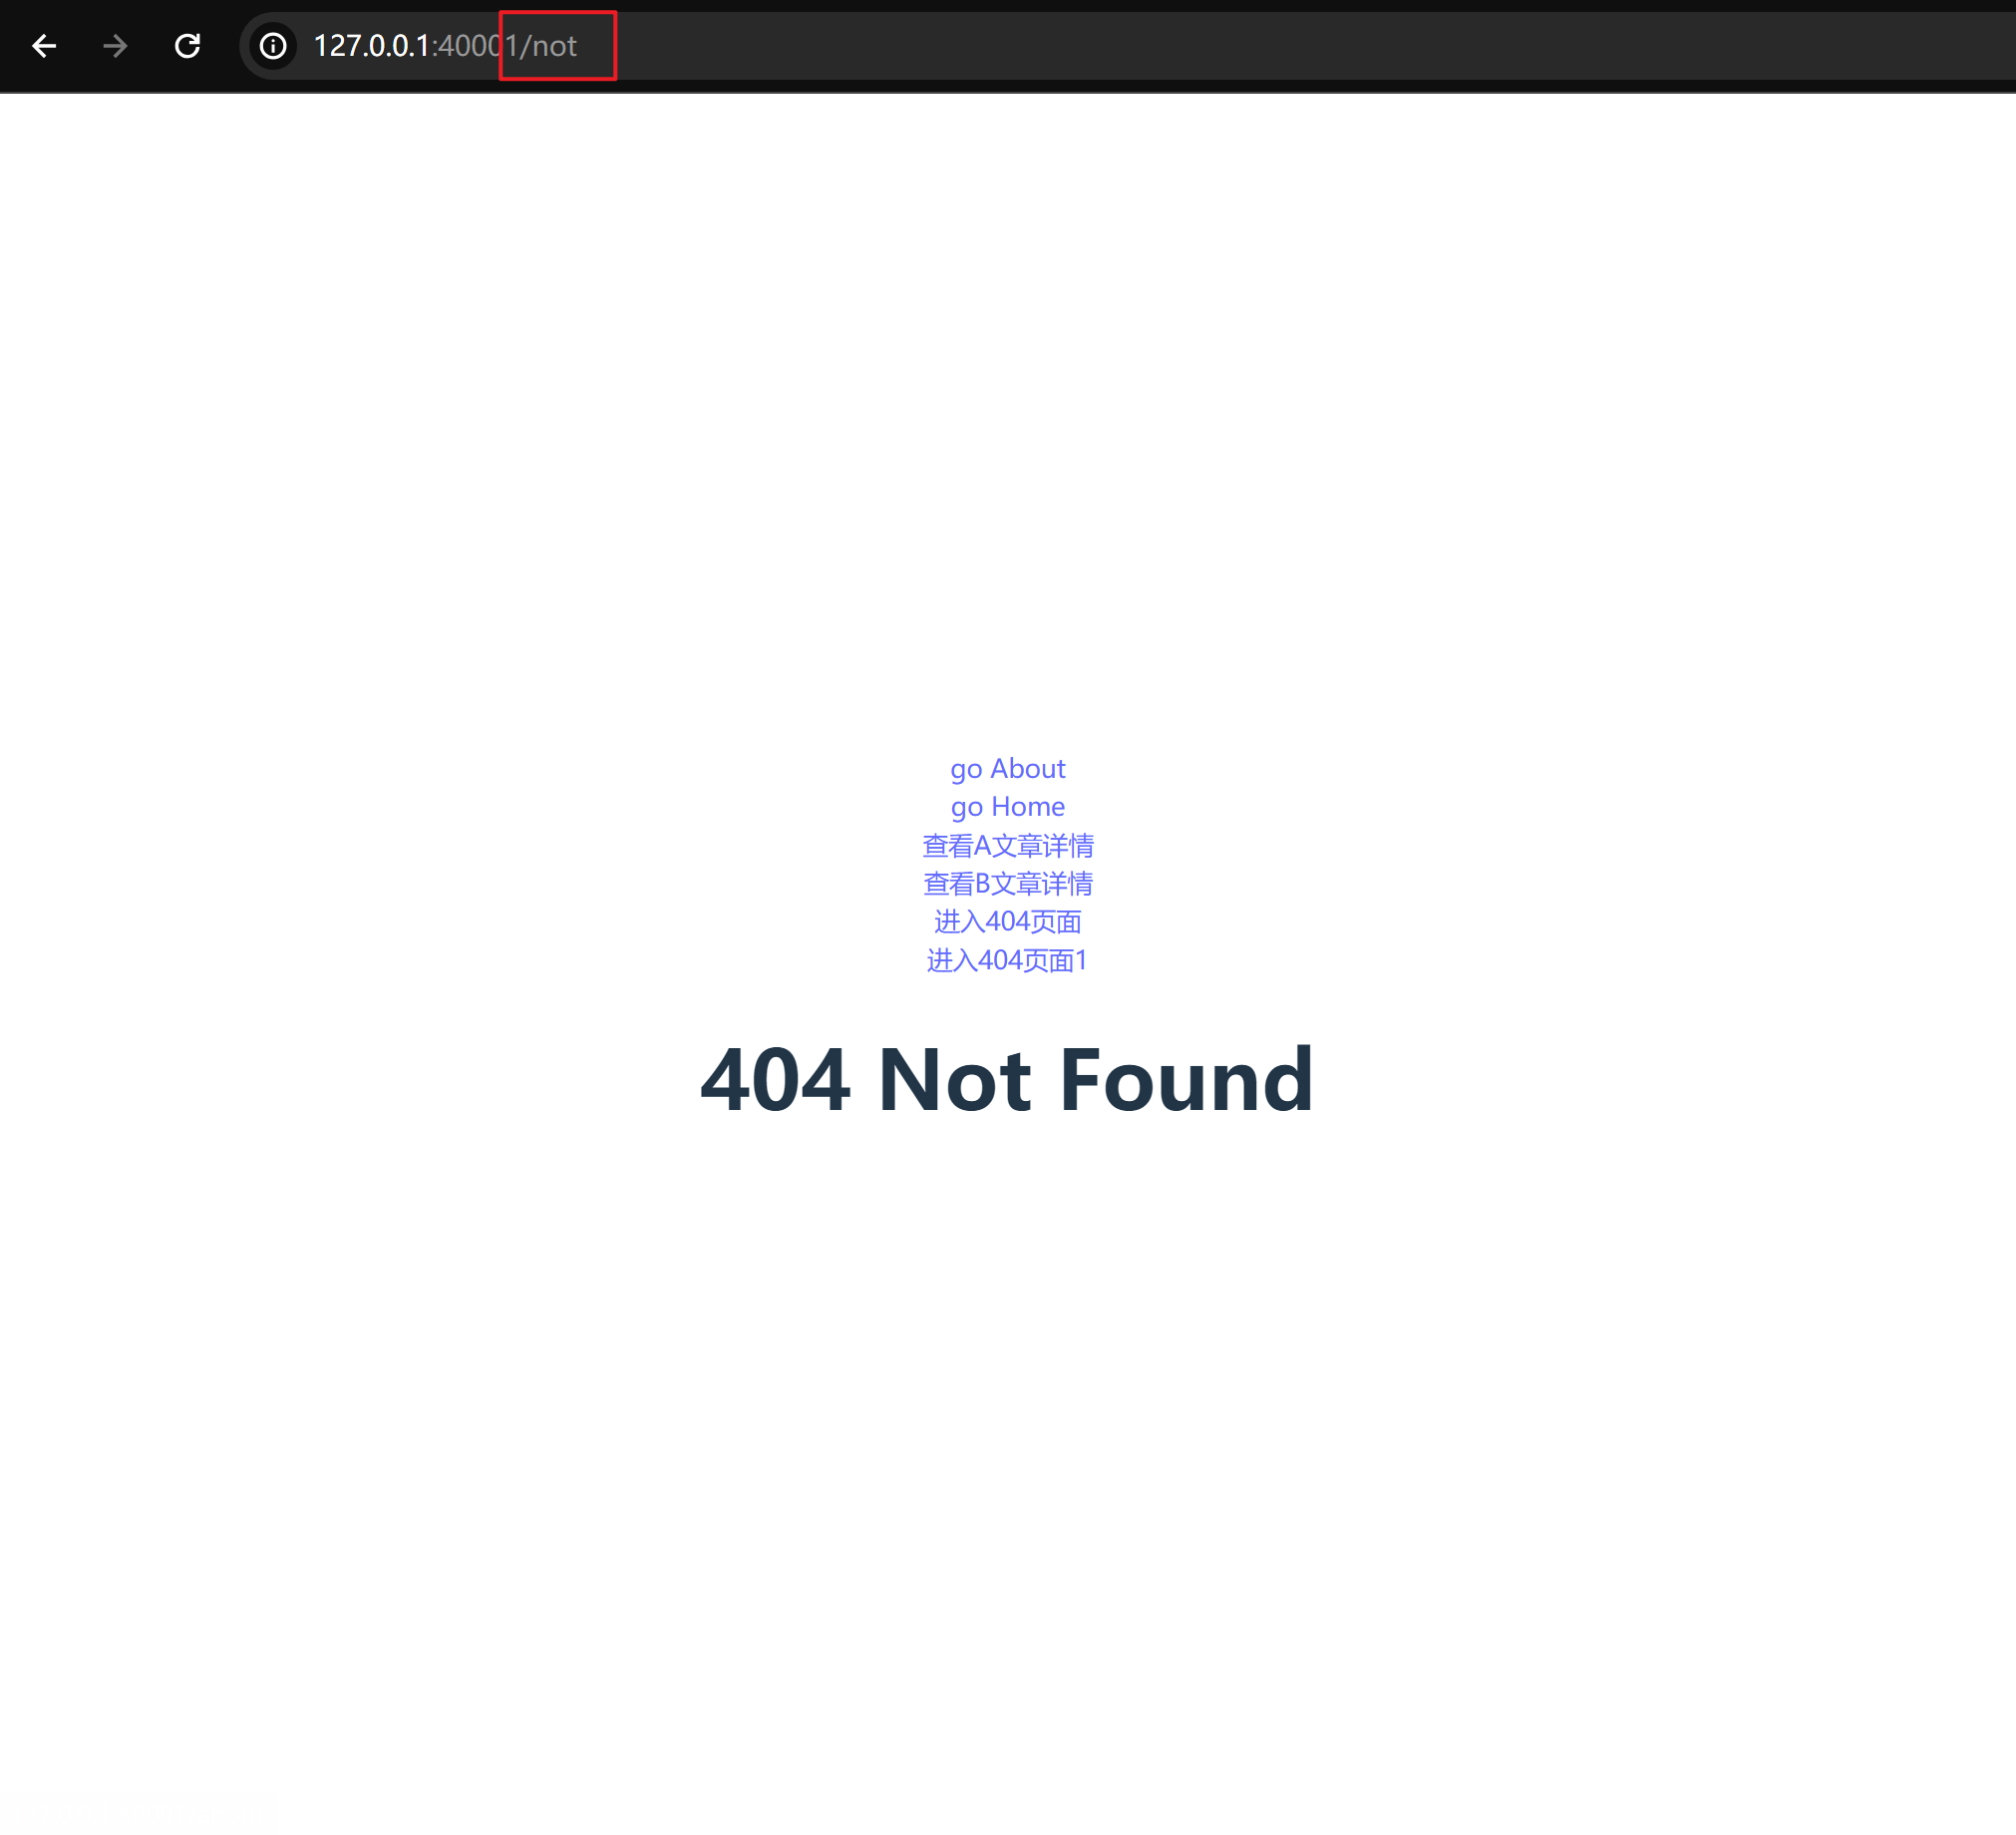
2、匹配404 Not found路由
当我们想匹配所有路径的路由,使用正则表达式来匹配URL
const routes: Array<RouteRecordRaw> = [
  // 可直接导入或者引入
  {
    path: '/',
    component: () => import('@/views/home/index.vue'),
  },
  {
    path: '/about',
    component: () => import('@/views/about/index.vue'),
  },
  {
    // 动态字段以:开始 这里就是id
    path: '/article/:id',
    component: () => import('@/views/article/index.vue'),
  },
  {
    path: '/:pages(.*)*', // 使用正则表达式来匹配URL (.*)表示可以匹配任何数量的任何字符 *表示前面的元素(.*)可以出现零次或多次
    component: () => import('@/views/notfound/index.vue'),
  },
];
<router-link to="/not/page/notfound">进入404页面</router-link>
<router-link to="/not">进入404页面1</router-link>
第三节: 路由的匹配语法
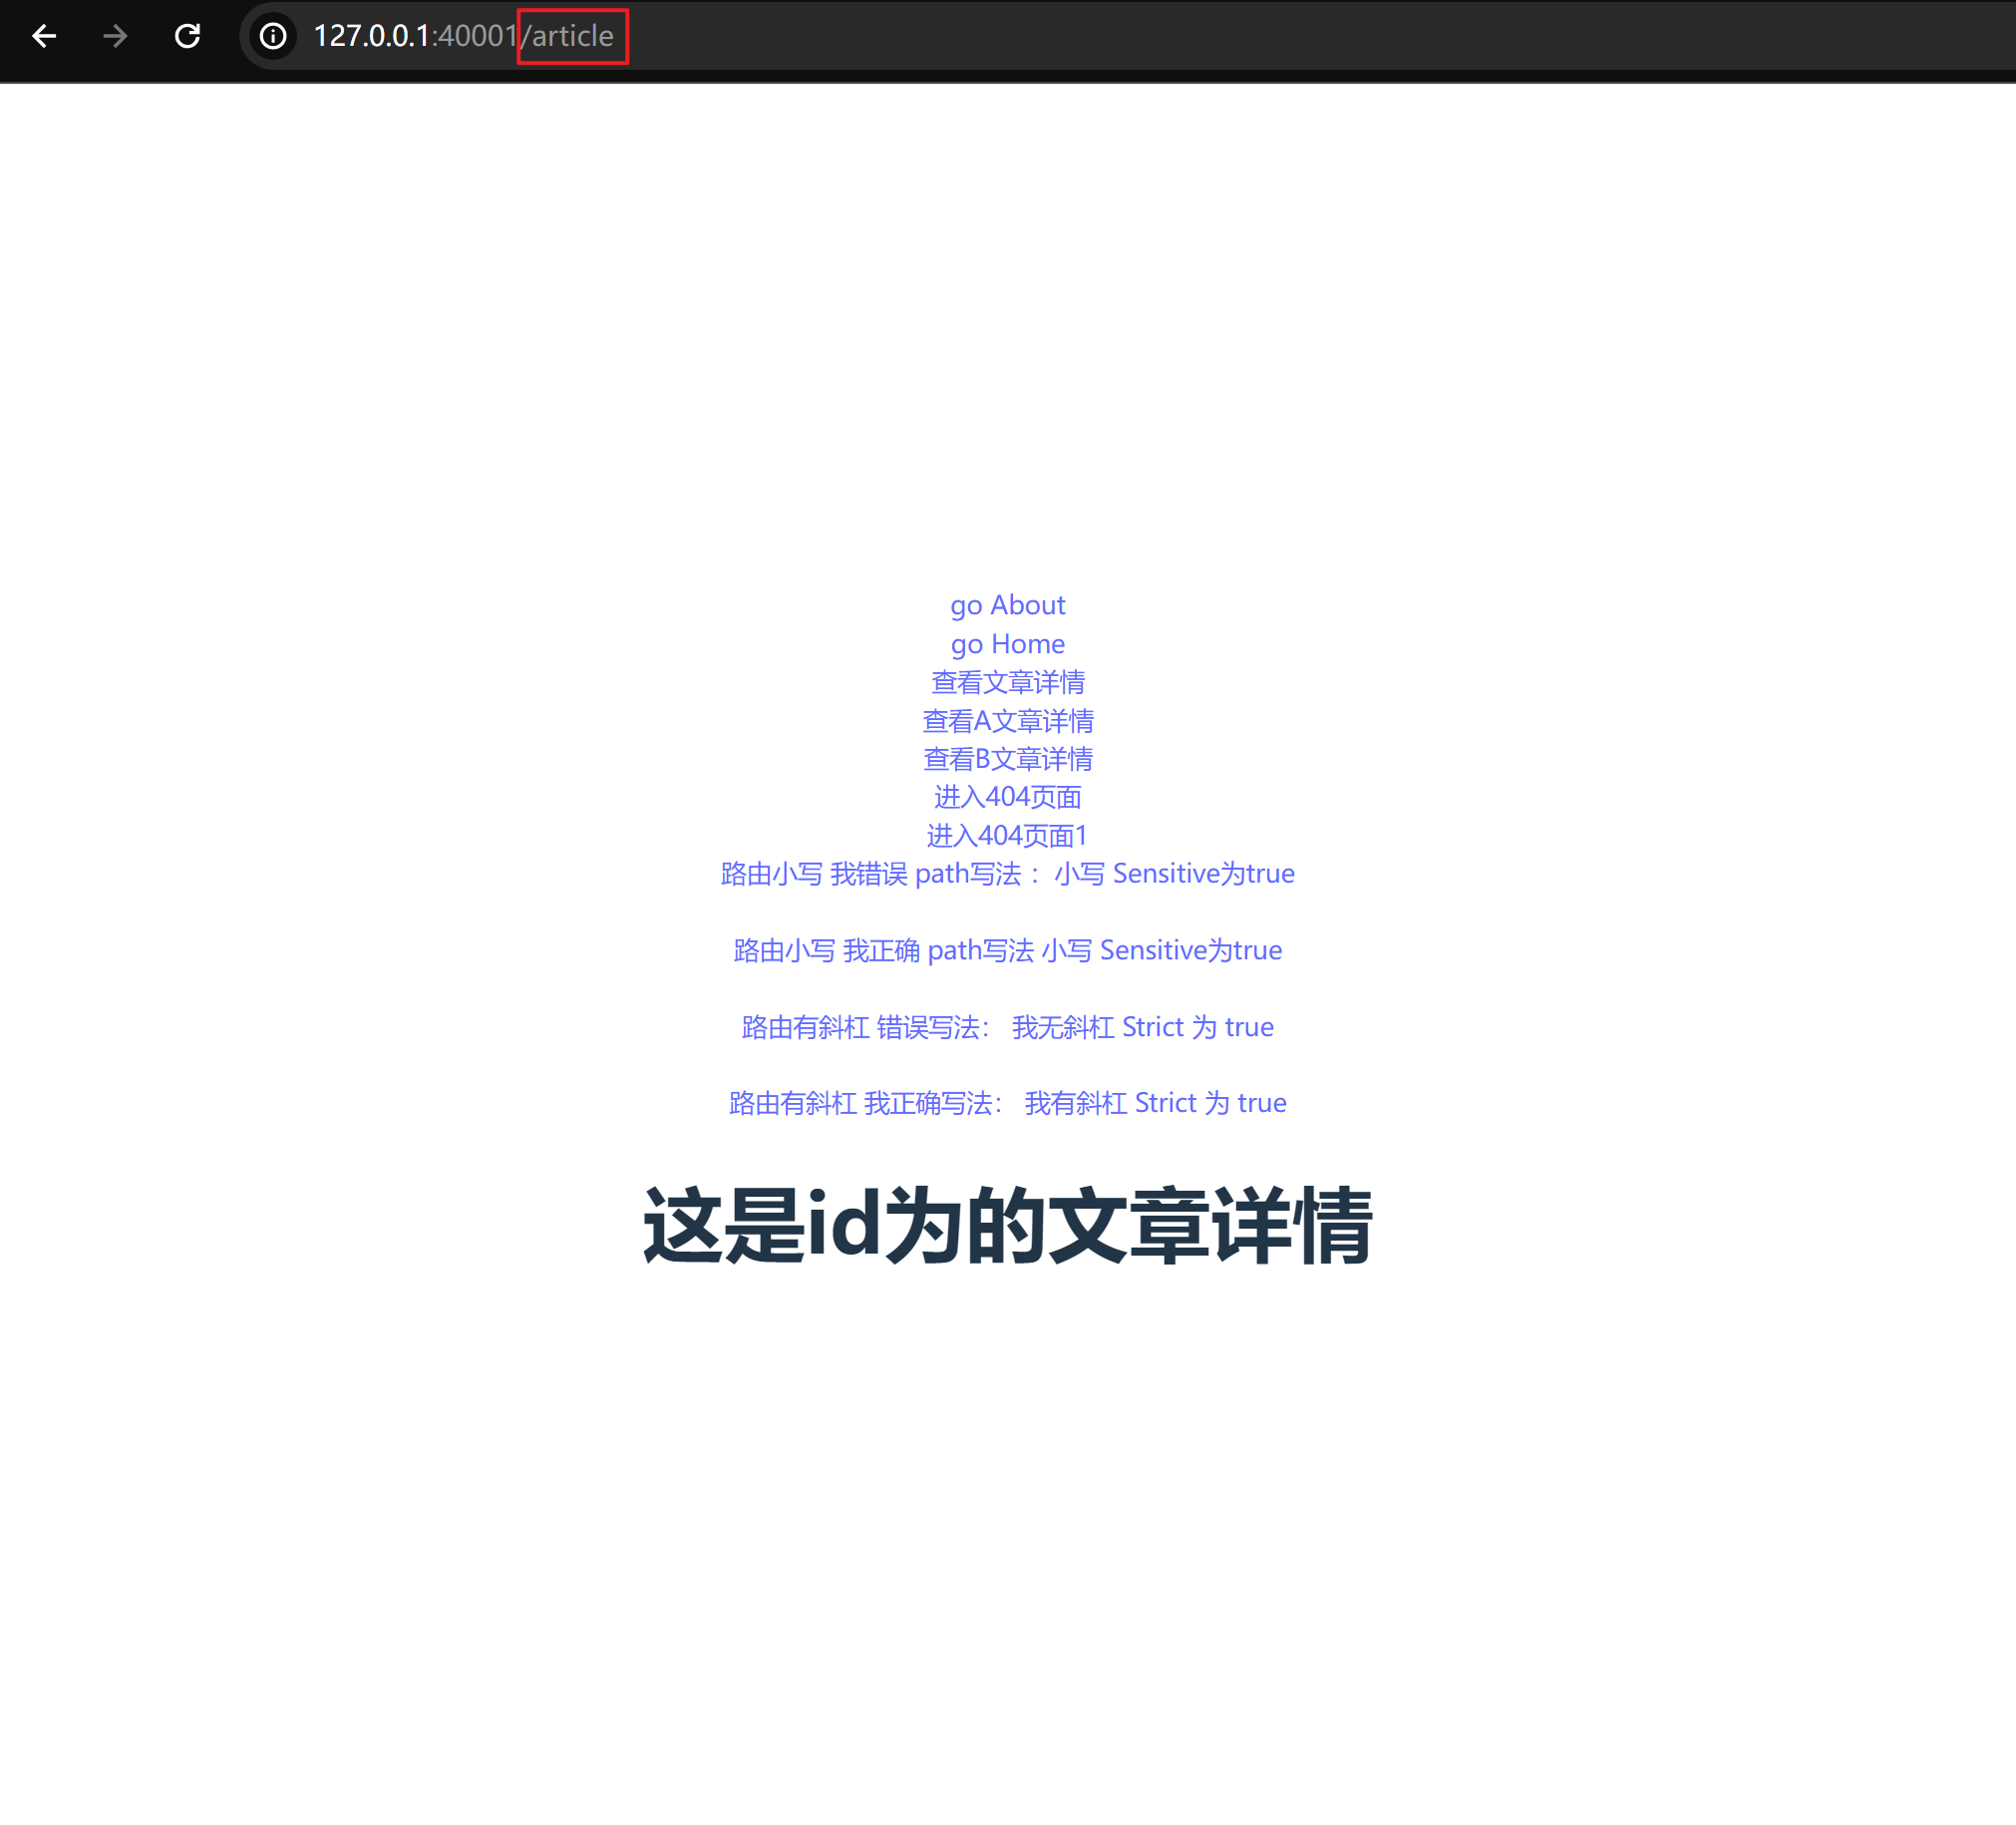
1、sensitive 与 strict 路由配置
sensitive: 主要控制路由匹配是否大小写敏感,默认情况下,路由匹配是不区分大小写的,即路径中的大写和小写字符都被视为相同。如果将Sensitive设置为true,那么路由匹配将变得大小写敏感,这意味着路径中的大写和小写字符将被视为不同,需要精确匹配。
Strict: 则控制路由的路径最后是否包含斜线(/),即是否进行严格匹配。默认情况下,路由匹配是非严格的,也就是说,路径最后是否包含斜线并不会影响匹配结果。如果将Strict设置为true,那么路由匹配将变得严格,要求路径最后必须包含斜线才能进行匹配。
// router/index.ts
{
  path: '/names',
  sensitive: true, // 此匹配项将变得大小写敏感.大小写被视为不同,需要精确匹配。
  component: import('@/views/notFont/index.vue'),
},
{
  path: '/user/',
  strict: true, // 此匹配项将要求路径最后必须包含斜线才能进行匹配。
  component: import('@/views/user/index.vue'),
},
<!-- 错误写法将进不去匹配路由页面 -->
<router-link to="/Names">路由小写 我错误 path写法 :小写 Sensitive为true </router-link>
<router-link to="/names">路由小写 我正确 path写法 小写 Sensitive为true </router-link>
<!-- 错误写法将进不去匹配路由页面 -->
<router-link to="/user">路由有斜杠 错误写法: 我无斜杠 Strict 为 true</router-link>
<router-link to="/user/">路由有斜杠 我正确写法: 我有斜杠 Strict 为 true</router-link>
2、可选参数
可以通过使用 ? 修饰符(0 个或 1 个)将一个参数标记为可选,即为可有可无:
// router/index.ts
{
  // 动态字段以:开始 这里就是id, id参数非必须(?)
  path: '/article/:id?',
  component: () => import('@/views/article/index.vue'),
},

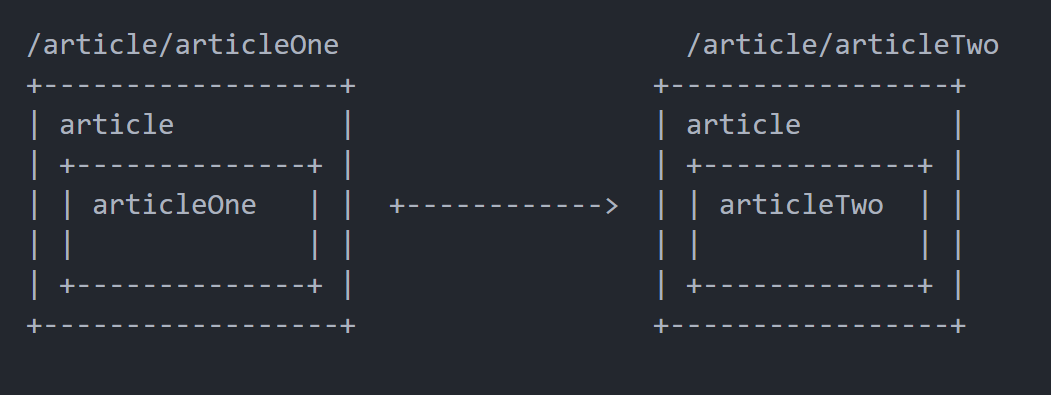
第四节: 嵌套路由
一些应用程序的 UI 由多层嵌套的组件组成。在这种情况下,URL 的片段通常对应于特定的嵌套组件结构,例如:
// router/index.ts 页面
// 嵌套路由
{
// 动态字段以:开始 这里就是id, id参数非必须(?)
path: '/article/:id?',
component: () => import('@/views/article/index.vue'),
children: [
// 如果想要打开此页面直接看见articleOne, 可以加一个空的嵌套路径
// { path: '', component: () => import('@/views/article/articleOne.vue') },
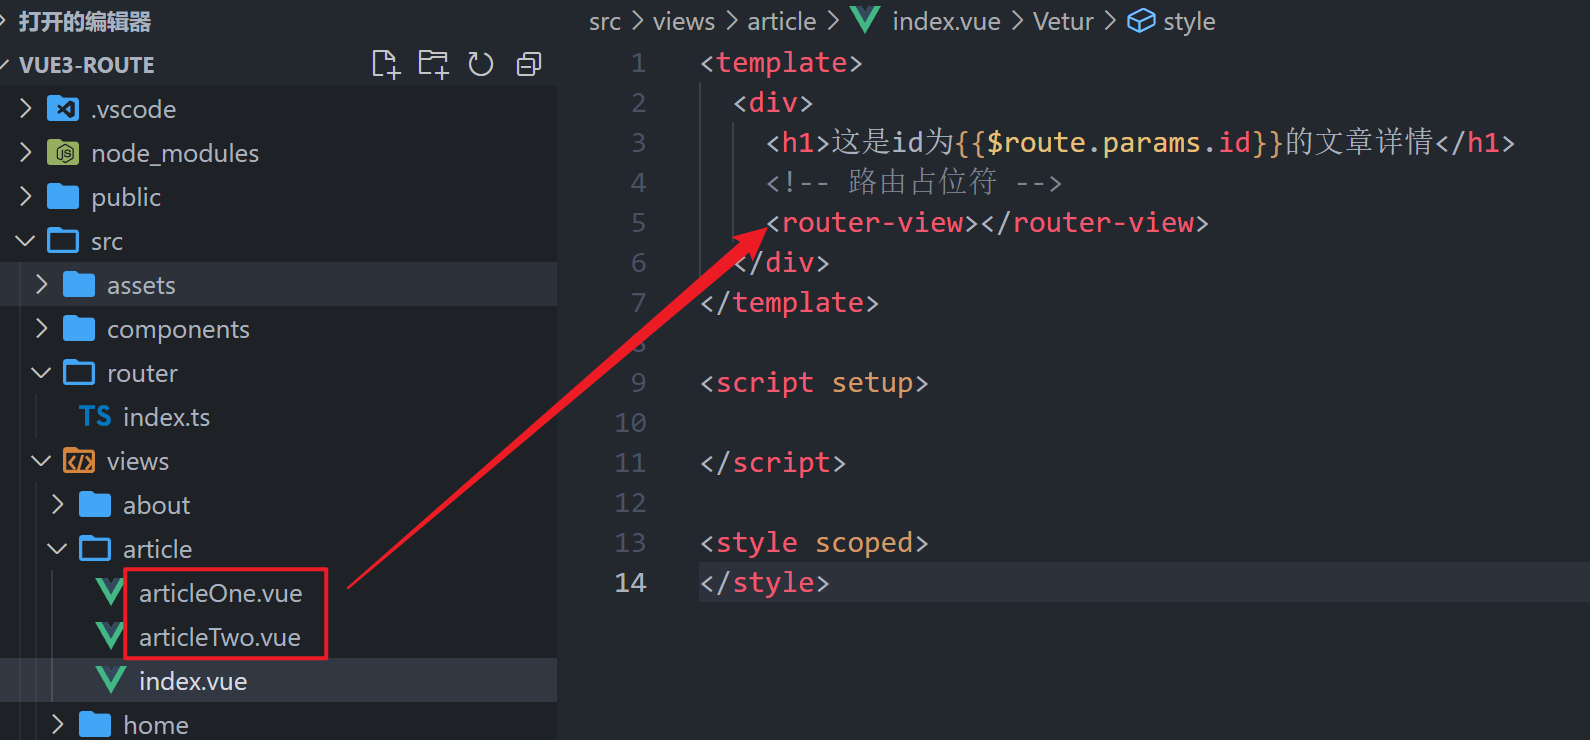
{ path: 'articleOne', component: () => import('@/views/article/articleOne.vue') },
{ path: 'articleTwo', component: () => import('@/views/article/articleTwo.vue') },
]
},
// App.vue
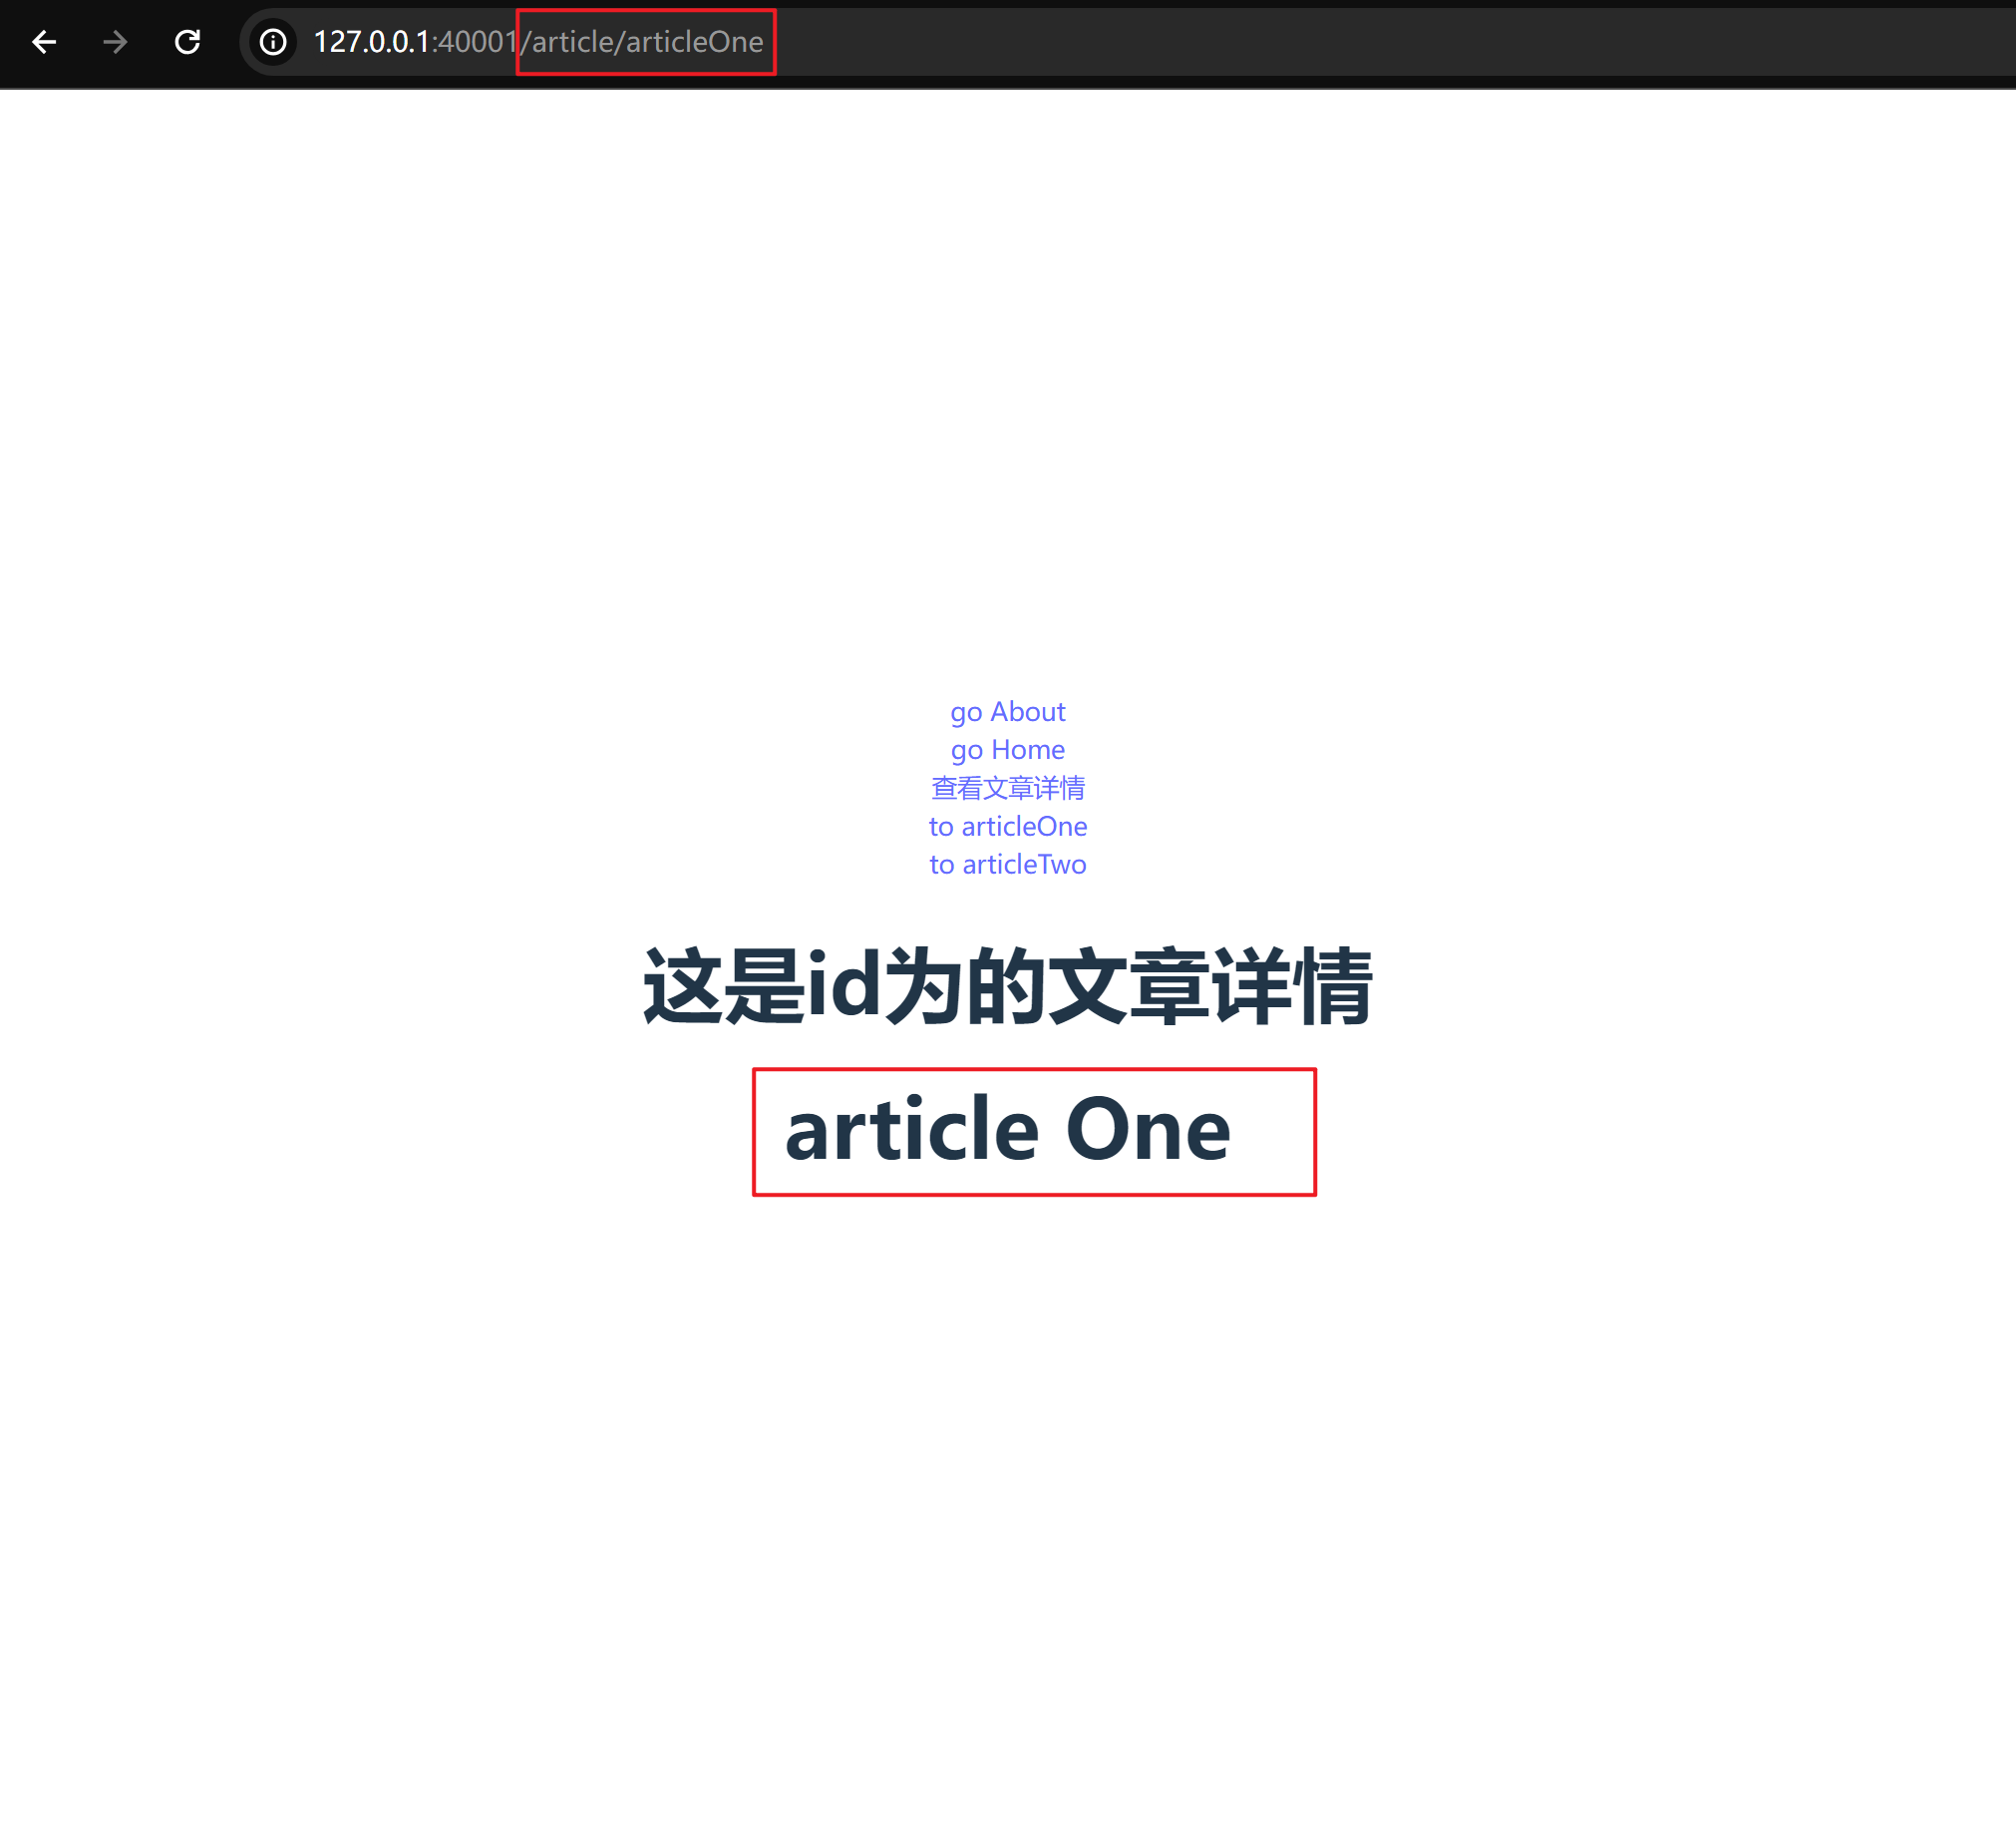
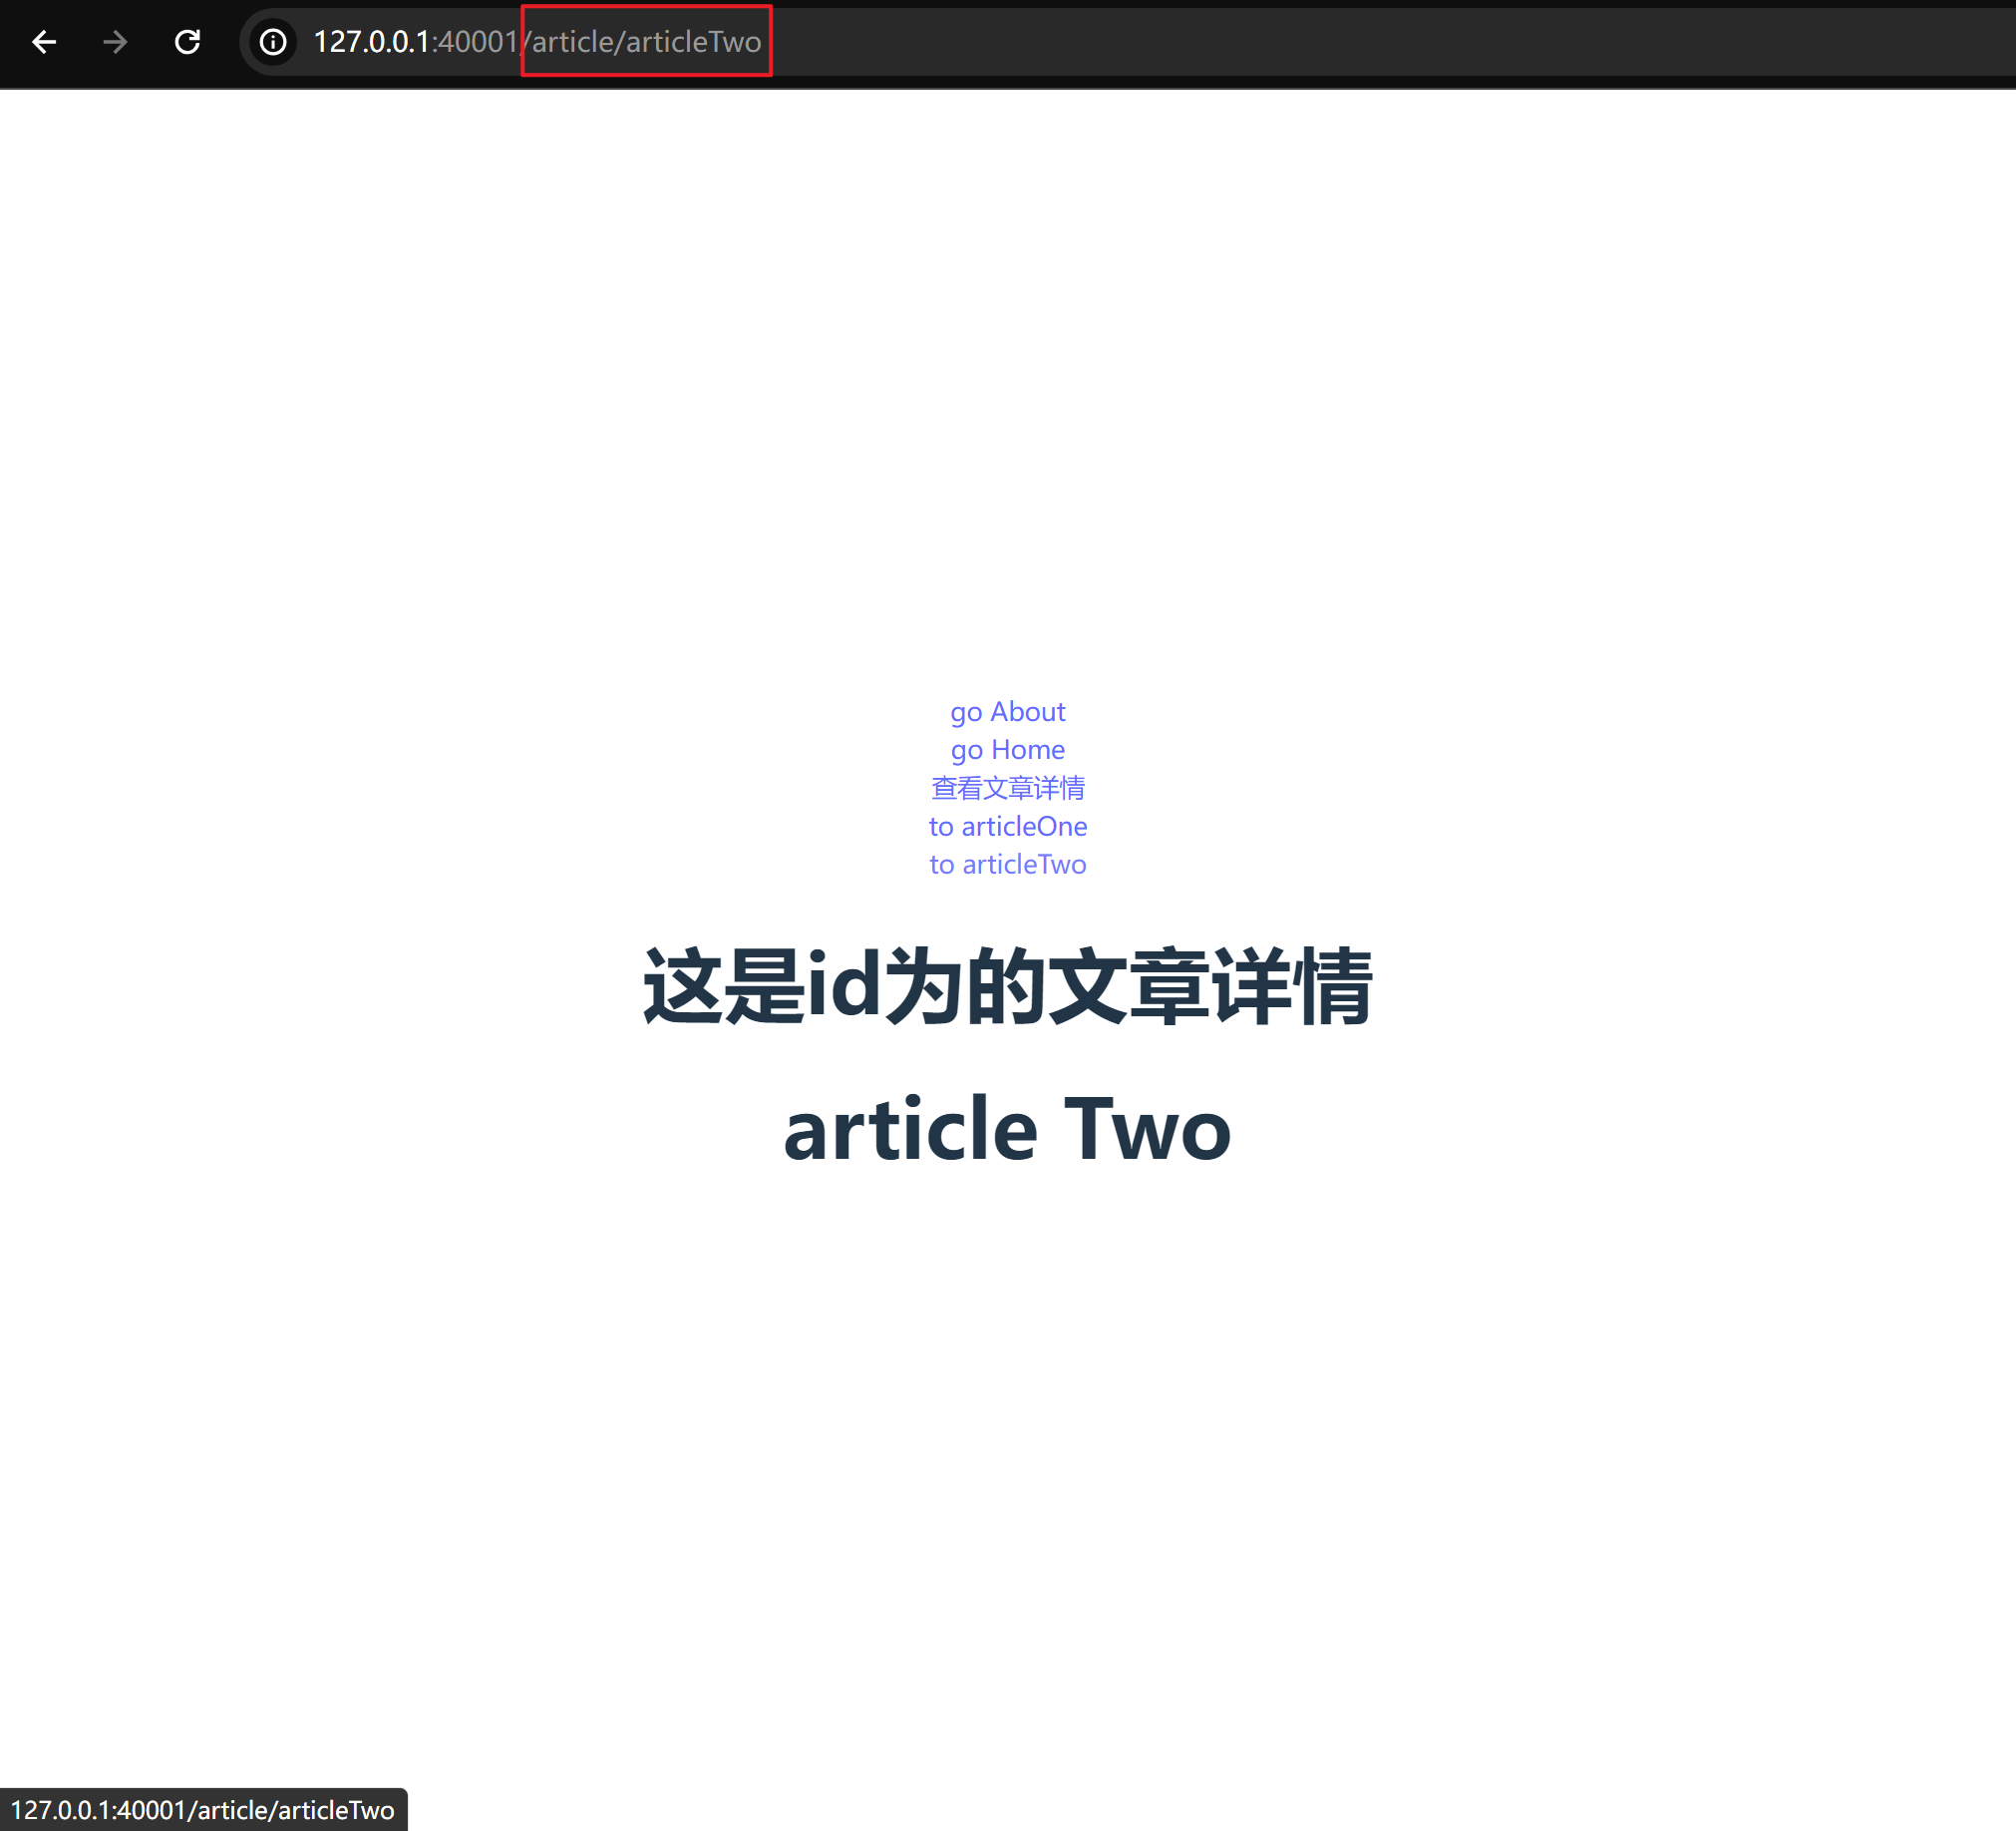
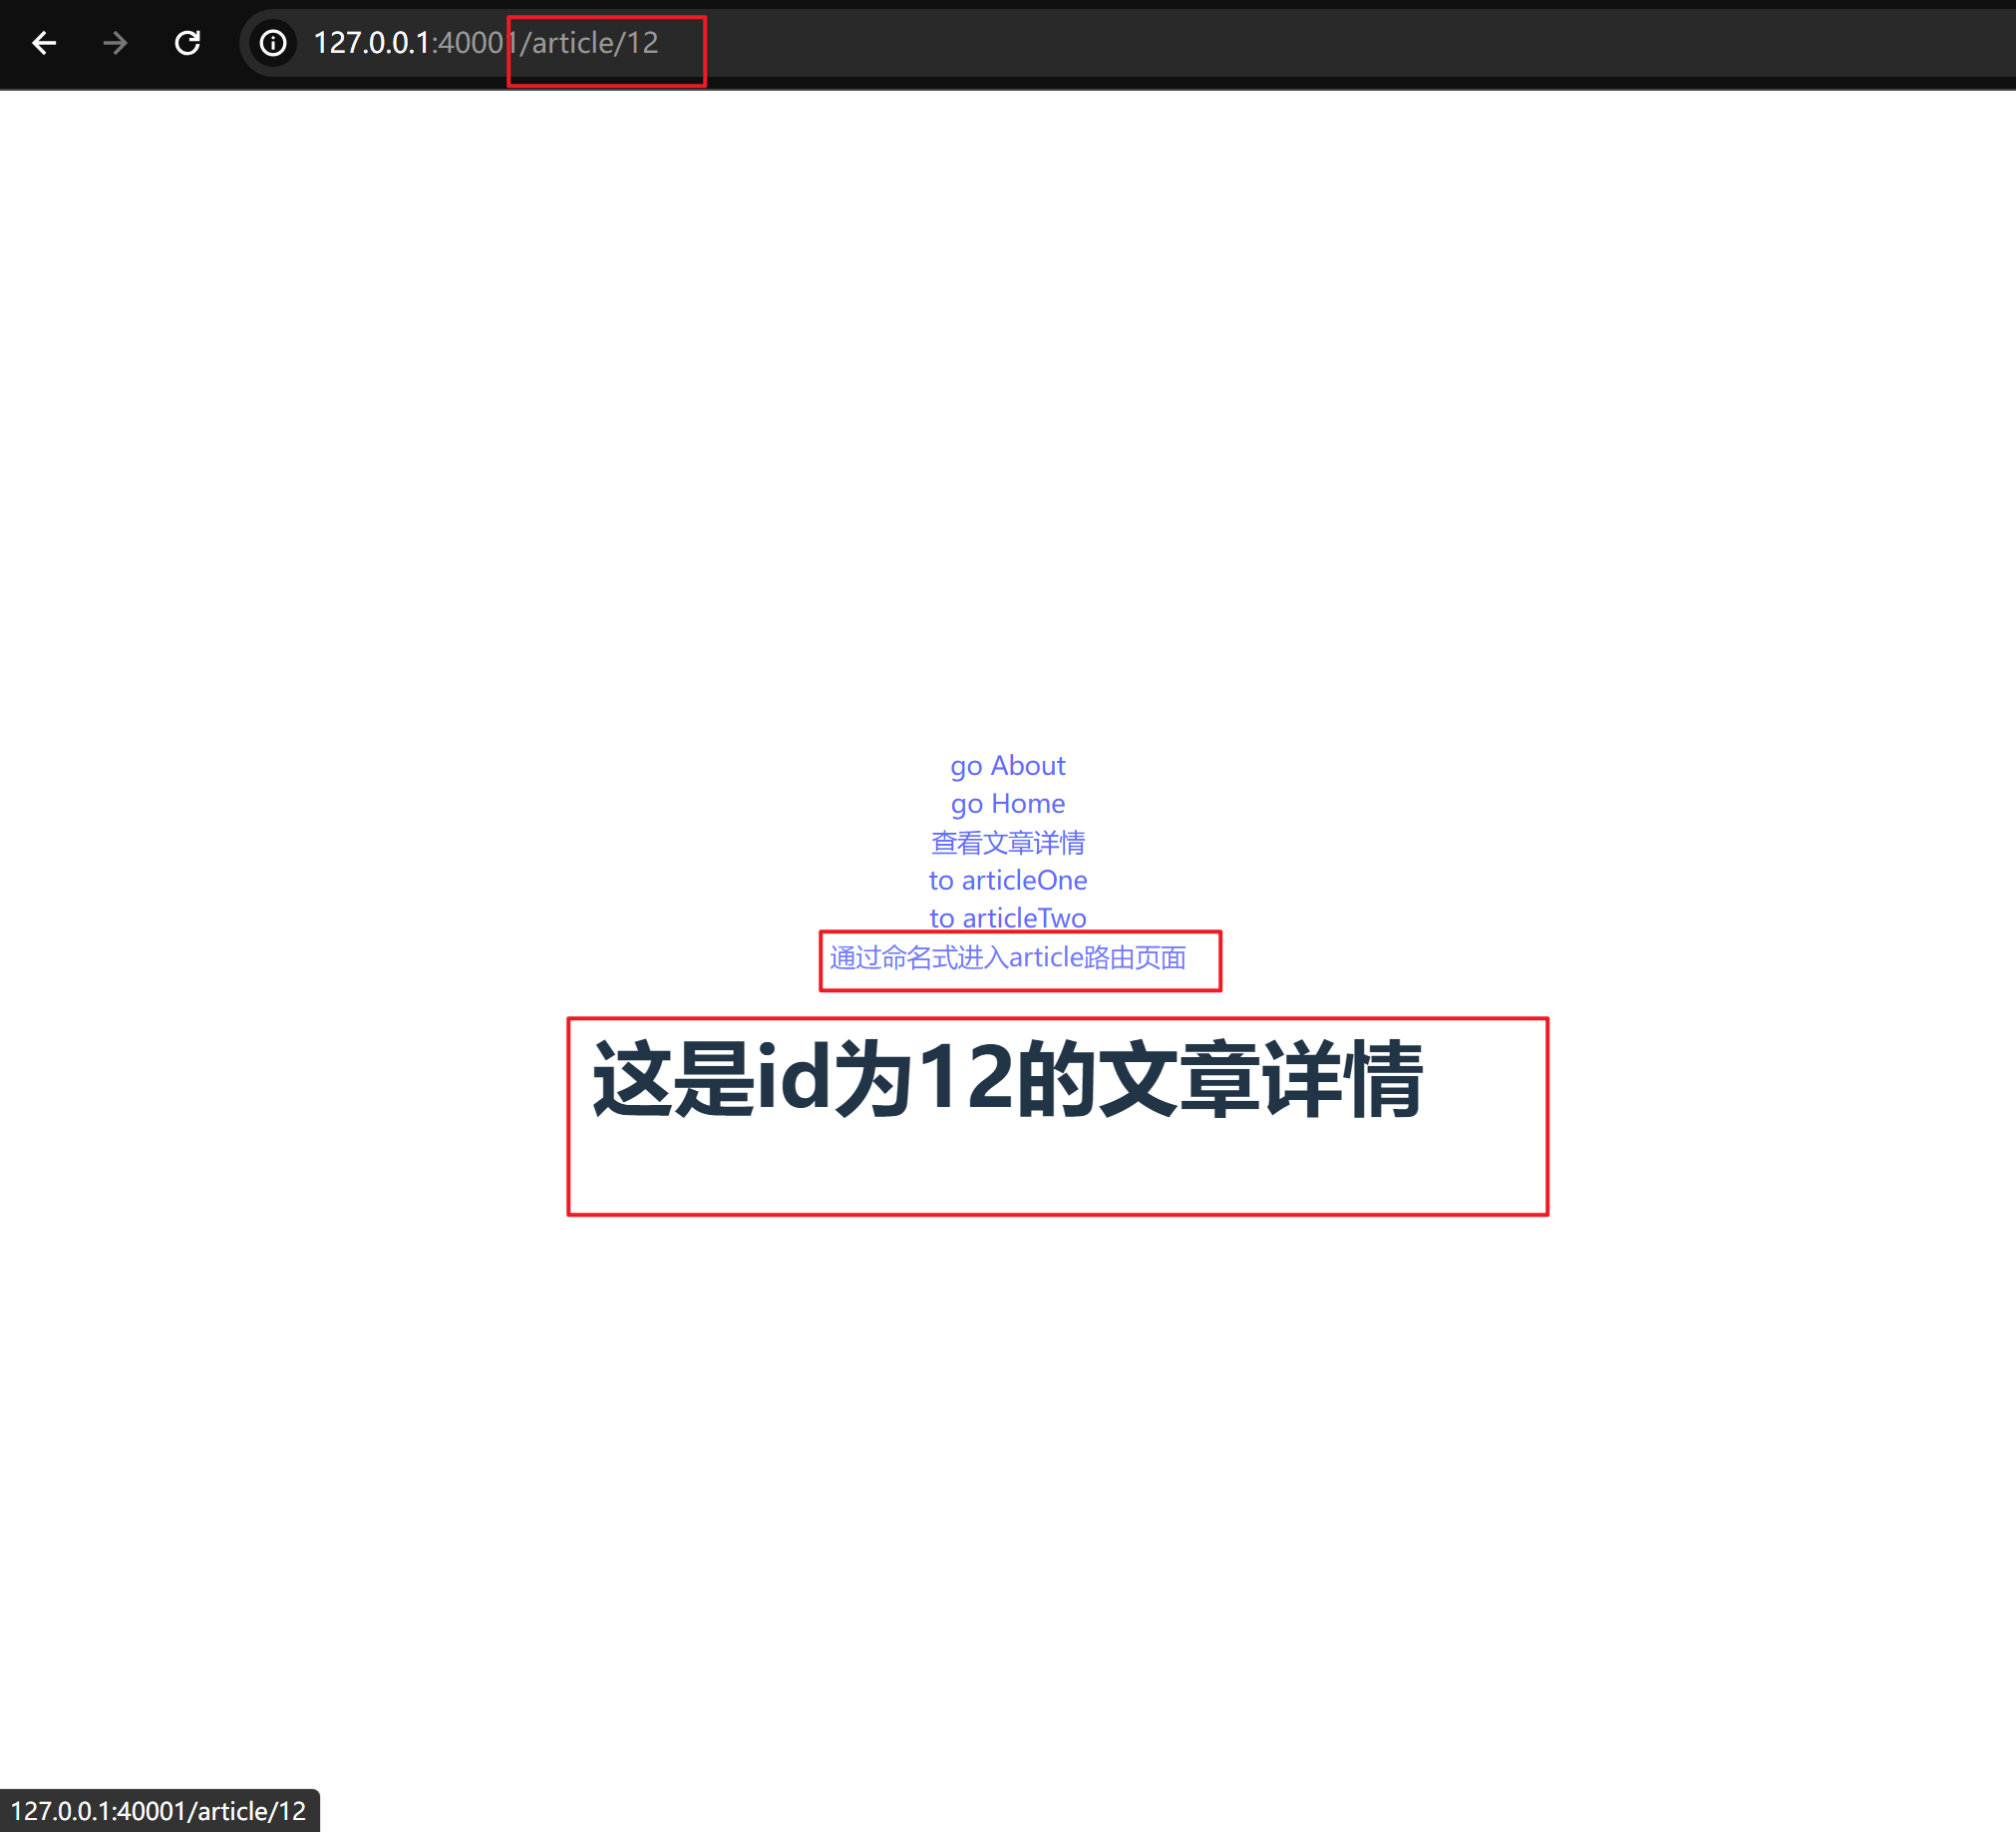
<router-link to="/article">查看文章详情</router-link>
<router-link to="/article/articleOne">to articleOne</router-link>
<router-link to="/article/articleTwo">to articleTwo</router-link>
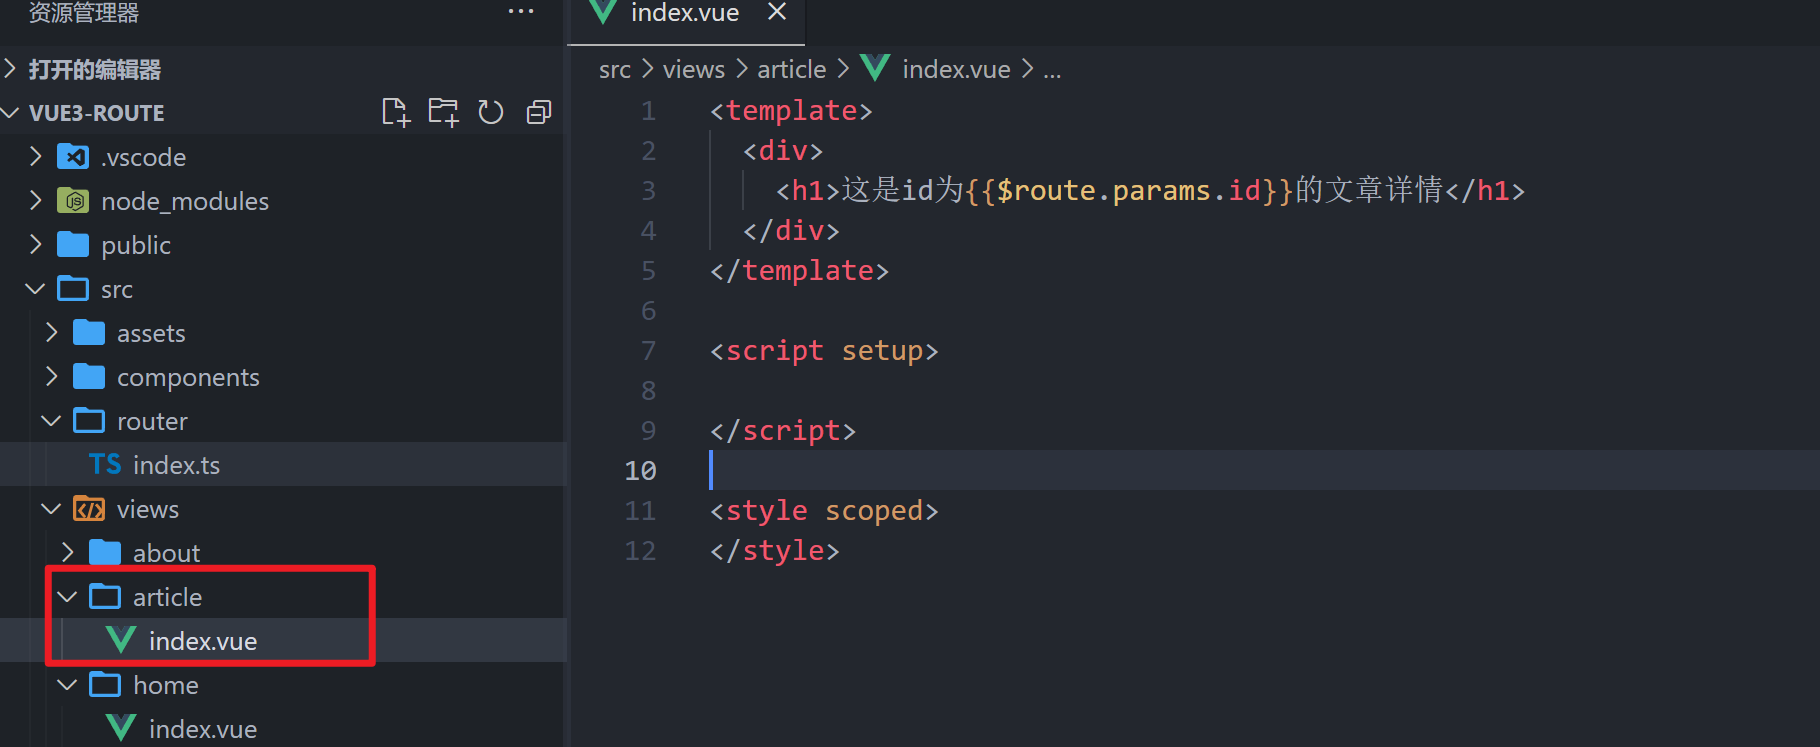
<!-- user/index.vue -->
<template>
<div>
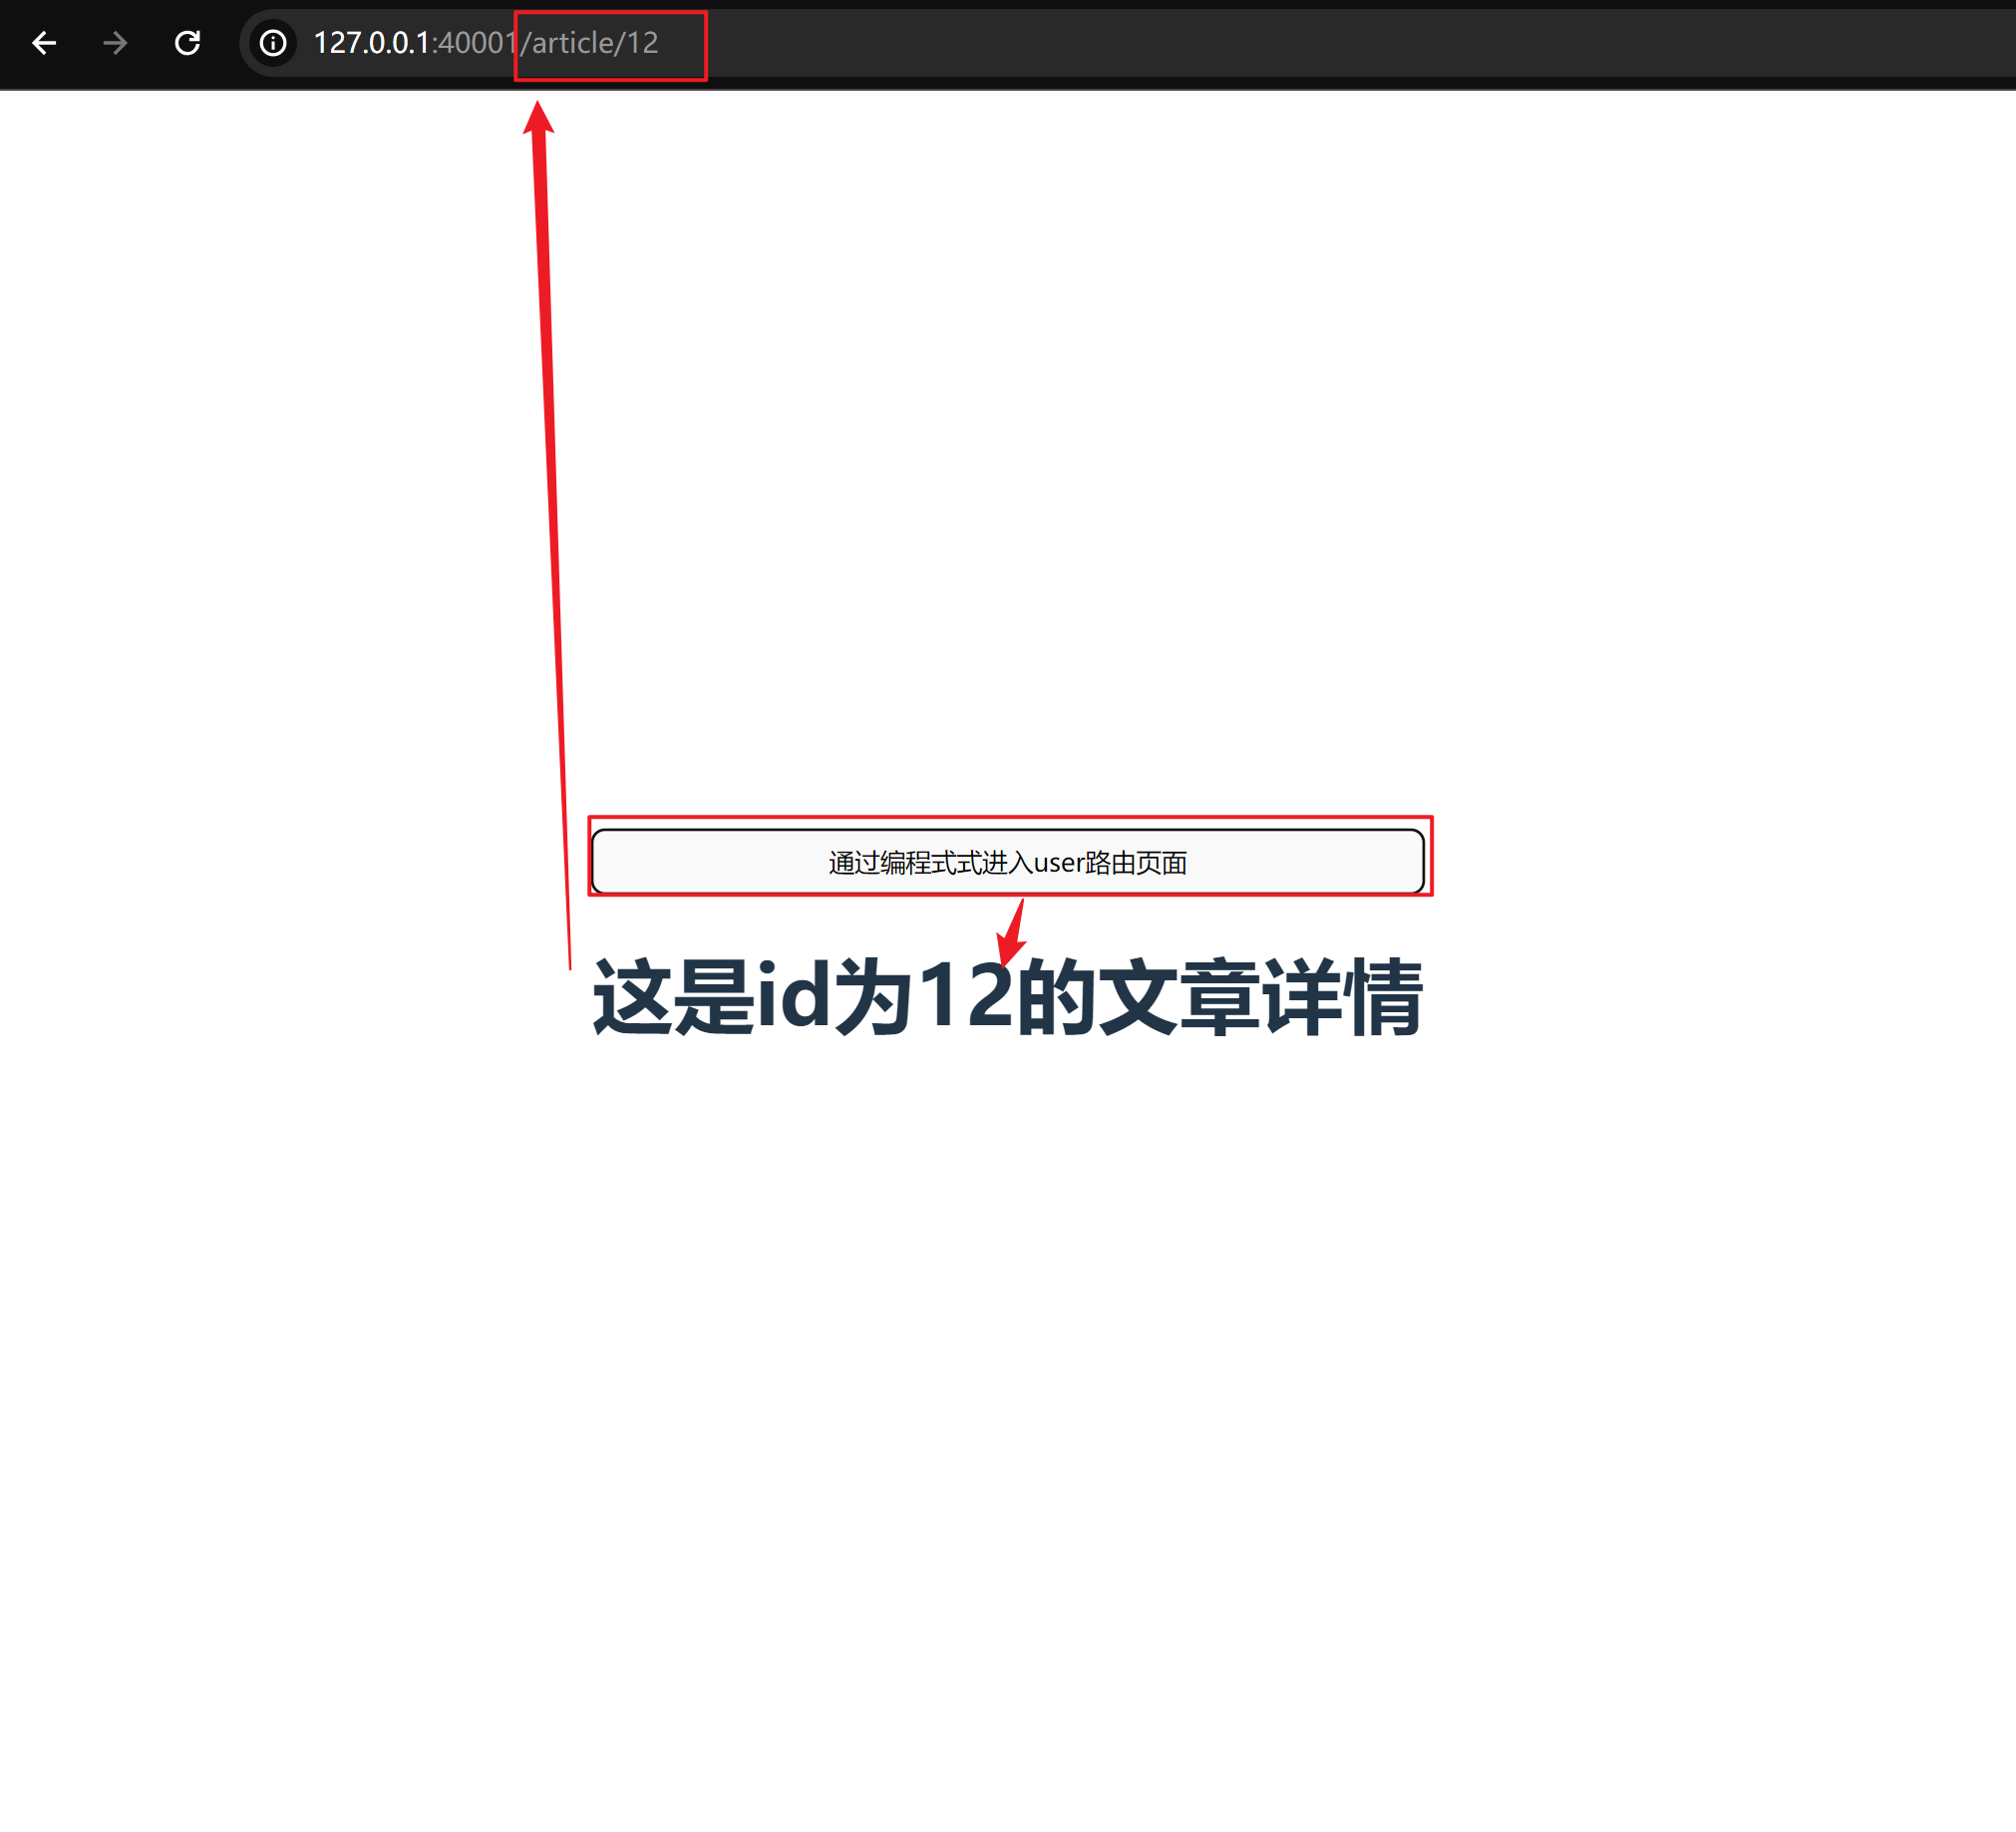
<h1>这是id为{{$route.params.id}}的文章详情</h1>
<!-- 路由占位符 -->
<router-view></router-view>
</div>
</template>
<script setup>
</script>
<style scoped>
</style>
第五节: 命名路由和编程式导航
一、命名路由
除了 path 之外,你还可以为任何路由提供 name。这有以下优点:
- 没有硬编码的 URL
- params 的自动编码/解码。
- 防止你在 url 中出现打字错误。
- 绕过路径排序
{
  path: '/article/:id?',
  name: 'article',
  component: () => import('@/views/article/index.vue'),
},
<!--  App.vue -->
<router-link :to="{ name: 'article', params: { id: '12' } }">通过命名式进入article路由页面</router-link>
二、编程式导航
声明式导航:通过点击链接实现导航的方式,叫做声明式导航
例如:普通网页中的 链接 或 vue 中的** **
编程式导航:通过调用JavaScript形式的API实现导航的方式,叫做编程式导航。借助Router的实例方法来实现
1、导航到不同位置
<!-- App.vue -->
<template>
  <div class="flex">
    <button @click="toPages">通过编程式式进入article路由页面</button>
    <router-view />
  </div>
</template>

<script setup lang="ts">
import { useRouter } from 'vue-router'
const router = useRouter()
const toPages = () => {
  router.push('/article/12')
  // router.push({name:'user',params:{id:'12'}})
  // router.push({path:'/user',query:{id:'12'}})
}
</script>
- push的参数可以是一个字符串路径也可以是一个对象。
// 一个字符路径
router.push('/article/12');
// 带有路径的对象
router.push({ path: '/article/12' });
// 命名的路由,并加上参数,让路由建立url
router.push({ name: 'article', params: { id: '12' } });
// 带查询参数, 结果是 /article?id=12
router.push({ path: '/article', query: { id: '12' } });
// 带hash,结果是/article#12
router.push({ path: '/article', hash: '12' });
- 路由传参方式区别: query、params
- query 传参配置的是 path,而 params 传参配置的是name,在 params中配置 path 无效
- query 在路由配置不需要设置参数或者写为可选?,而 params 必须设置
- query 传递的参数会显示在地址栏中,** 只能接受对象** 。
- 使用params传参刷新会无效,但是 query 会保存传递过来的值,刷新不变 ;如果要用params进行传参, 使用动态传参, 刷新不丢失同query作用一致。(当浏览器刷新的时候,路由的实例会重新创建,会对地址栏上的地址做劫持,如果参数在地址栏上则不会丢失)
2、替换当前位置
它的作用类似于 router.push,唯一不同的是,它在导航时不会向 history 添加新记录,正如它的名字所暗示的那样——它取代了当前的条目。
也可以直接在传递给 router.push 的 to 参数中增加一个属性 replace: true :
router.push({ path: '/home', replace: true })
// 相当于
router.replace({ path: '/home' })

<router-link :to="..." replace>
// 相当于
router.replace(...)
3、横跨历史
该方法采用一个整数作为参数,表示在历史堆栈中前进或后退多少步,类似于 window.history.go(n)。
// 向前移动一条记录,与 router.forward() 相同
router.go(1)

// 返回一条记录,与 router.back() 相同
router.go(-1)

// 前进 3 条记录
router.go(3)

// 如果没有那么多记录,静默失败
router.go(-100)
router.go(100)
4、篡改历史
router.push、router.replace 和 router.go 是 window.history.pushState、window.history.replaceState 和 window.history.go 的翻版,它们确实模仿了 window.history 的 API。
无论在创建路由器实例时传递什么 history 配置,Vue Router 的导航方法 (push、replace、go) 都能始终正常工作。
第六节: 命名视图
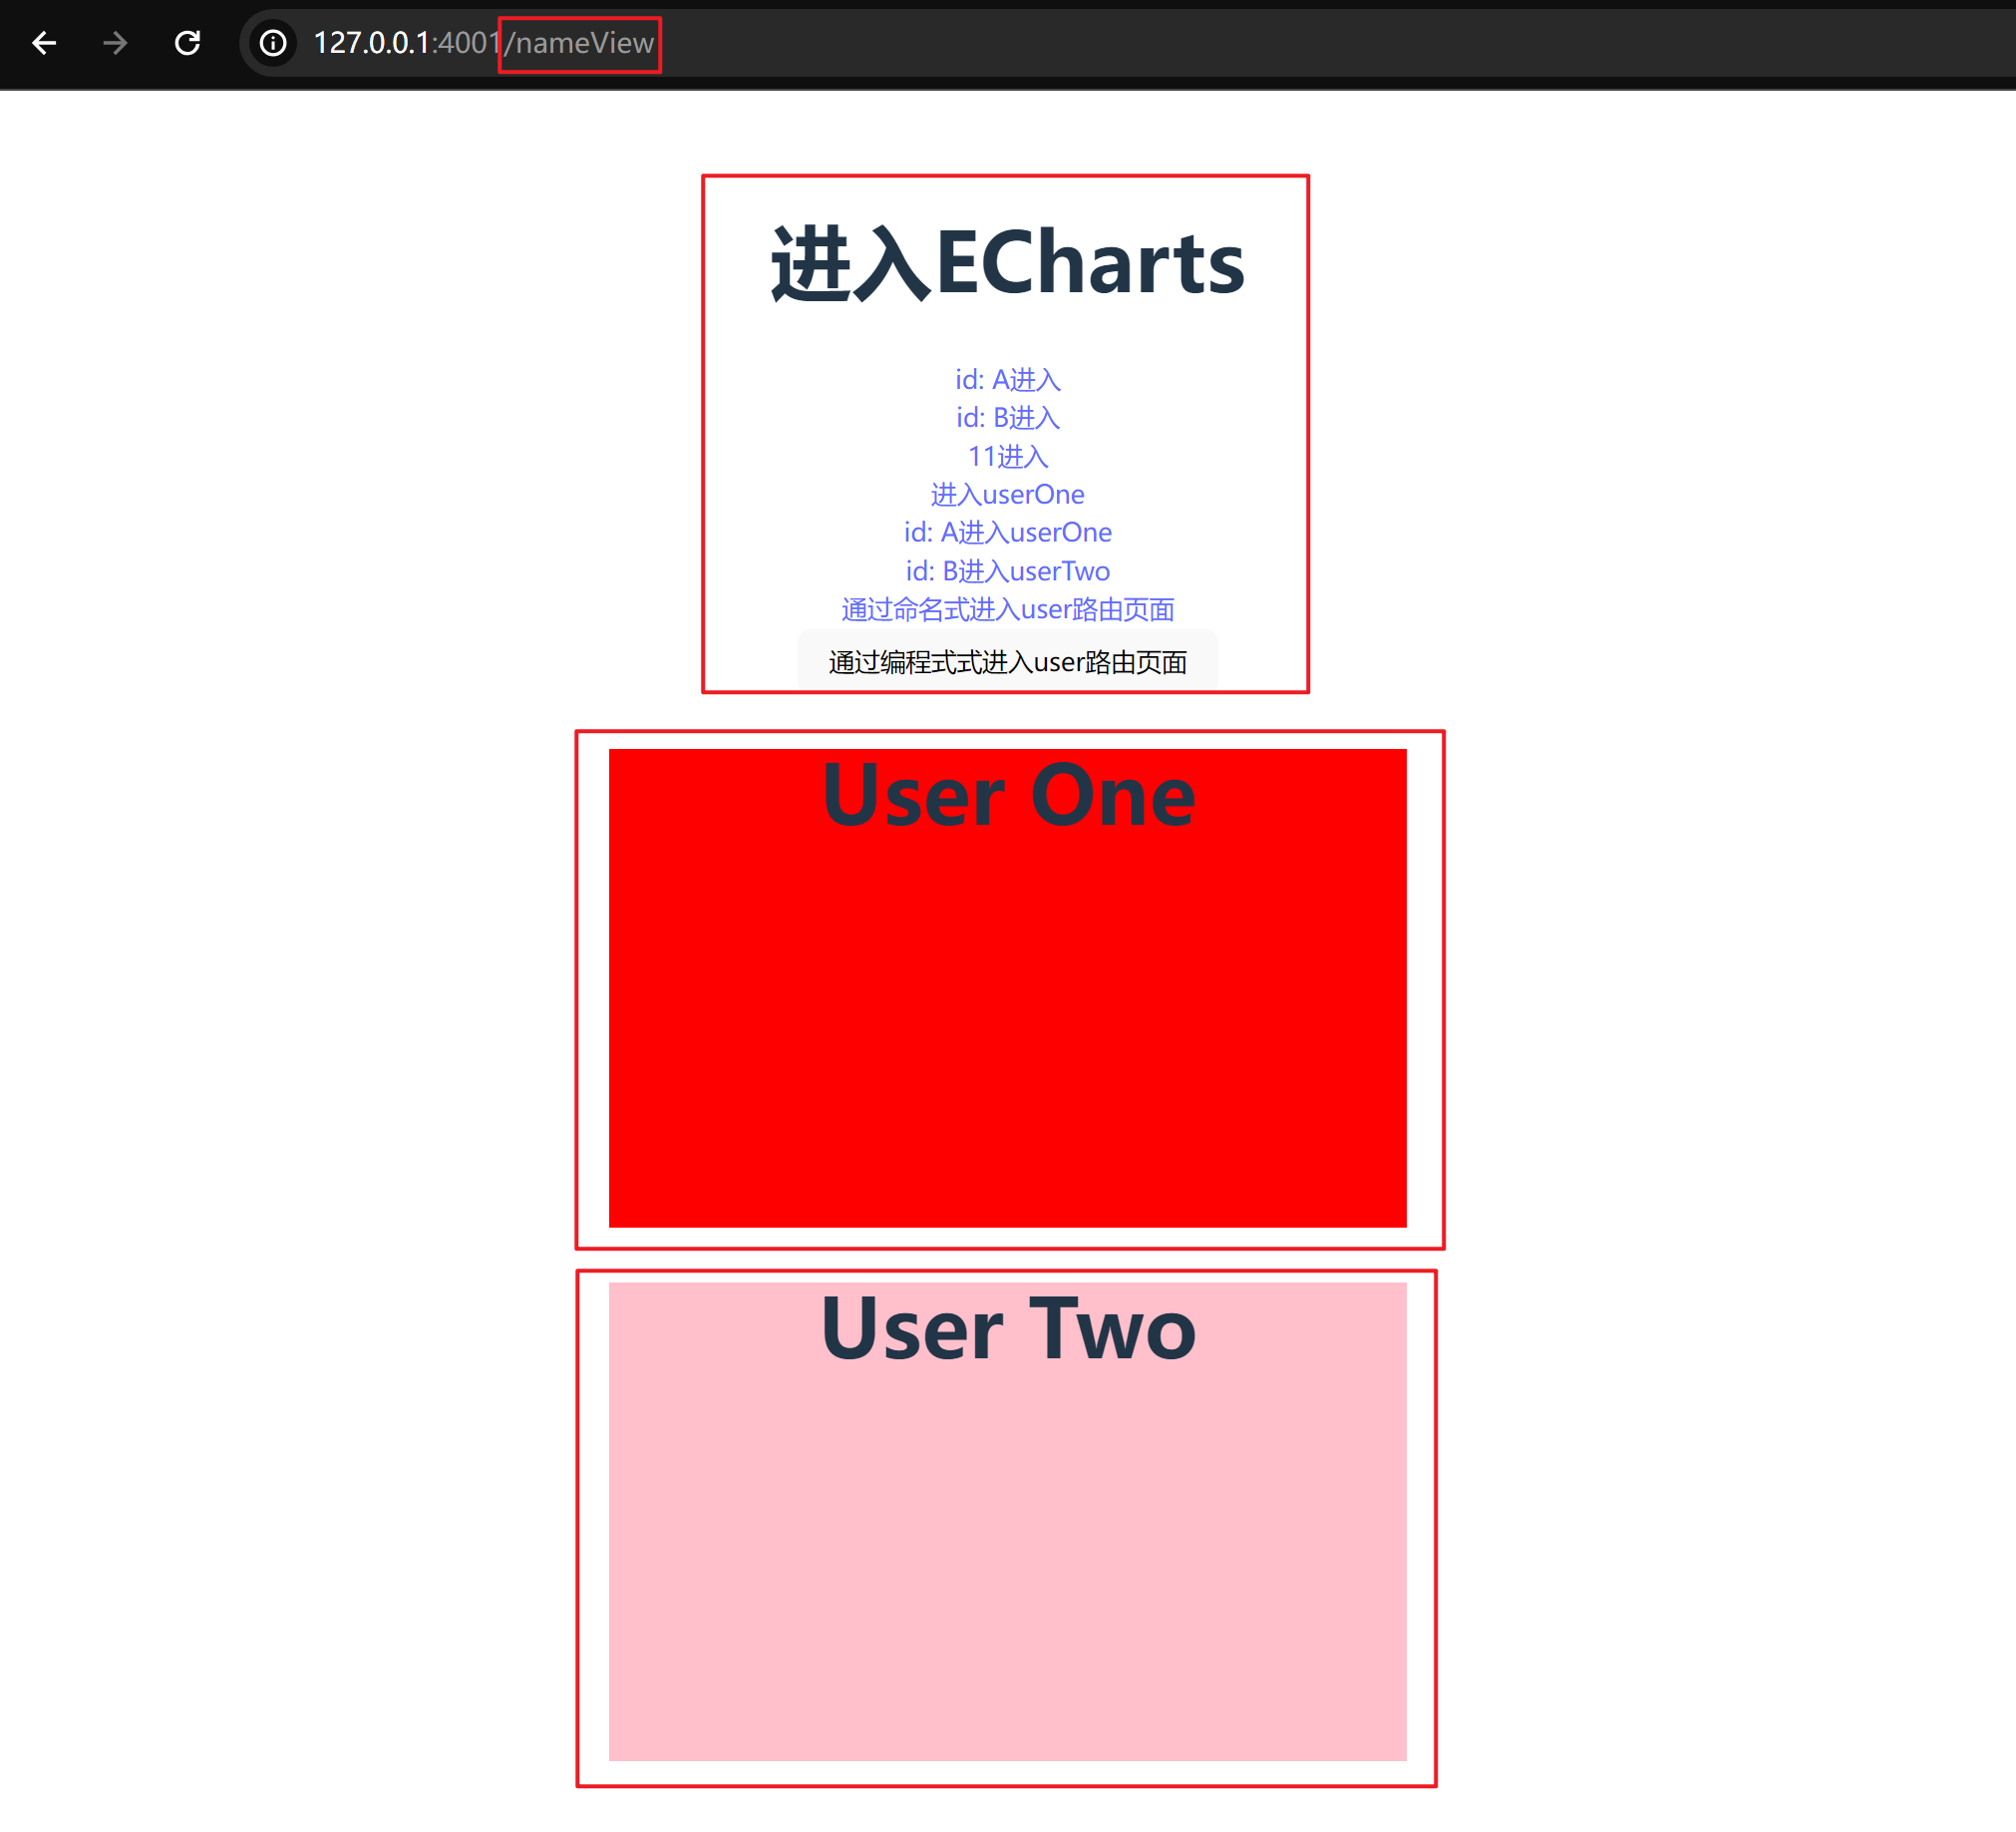
有些时候,我们需要在一个组件里,展示多个路由视图,而不是嵌套显示。命名视图可以让我们实现一个组件中具有多个路由渲染出口,这对很多布局很有用,例如一般系统的首页(侧导航、主内容)。
如果 router-view 没有设置名字,那么默认为 default。
// router/index.ts
{
	path: '/nameView',
	components:{  // 命名视图: 注意:component 改为 components
		default: () => import("@/views/home.vue"), //  默认路由
		one: () => import("@/views/user/userOne.vue"),
		two: () => import("@/views/user/userTwo.vue"),
	}
},
<template>
  <router-view></router-view>
  <!-- 命名视图 -->
  <router-view name='one' />
  <router-view name='two' />
</template>
第七节: 重定向和路由别名
一、重定向
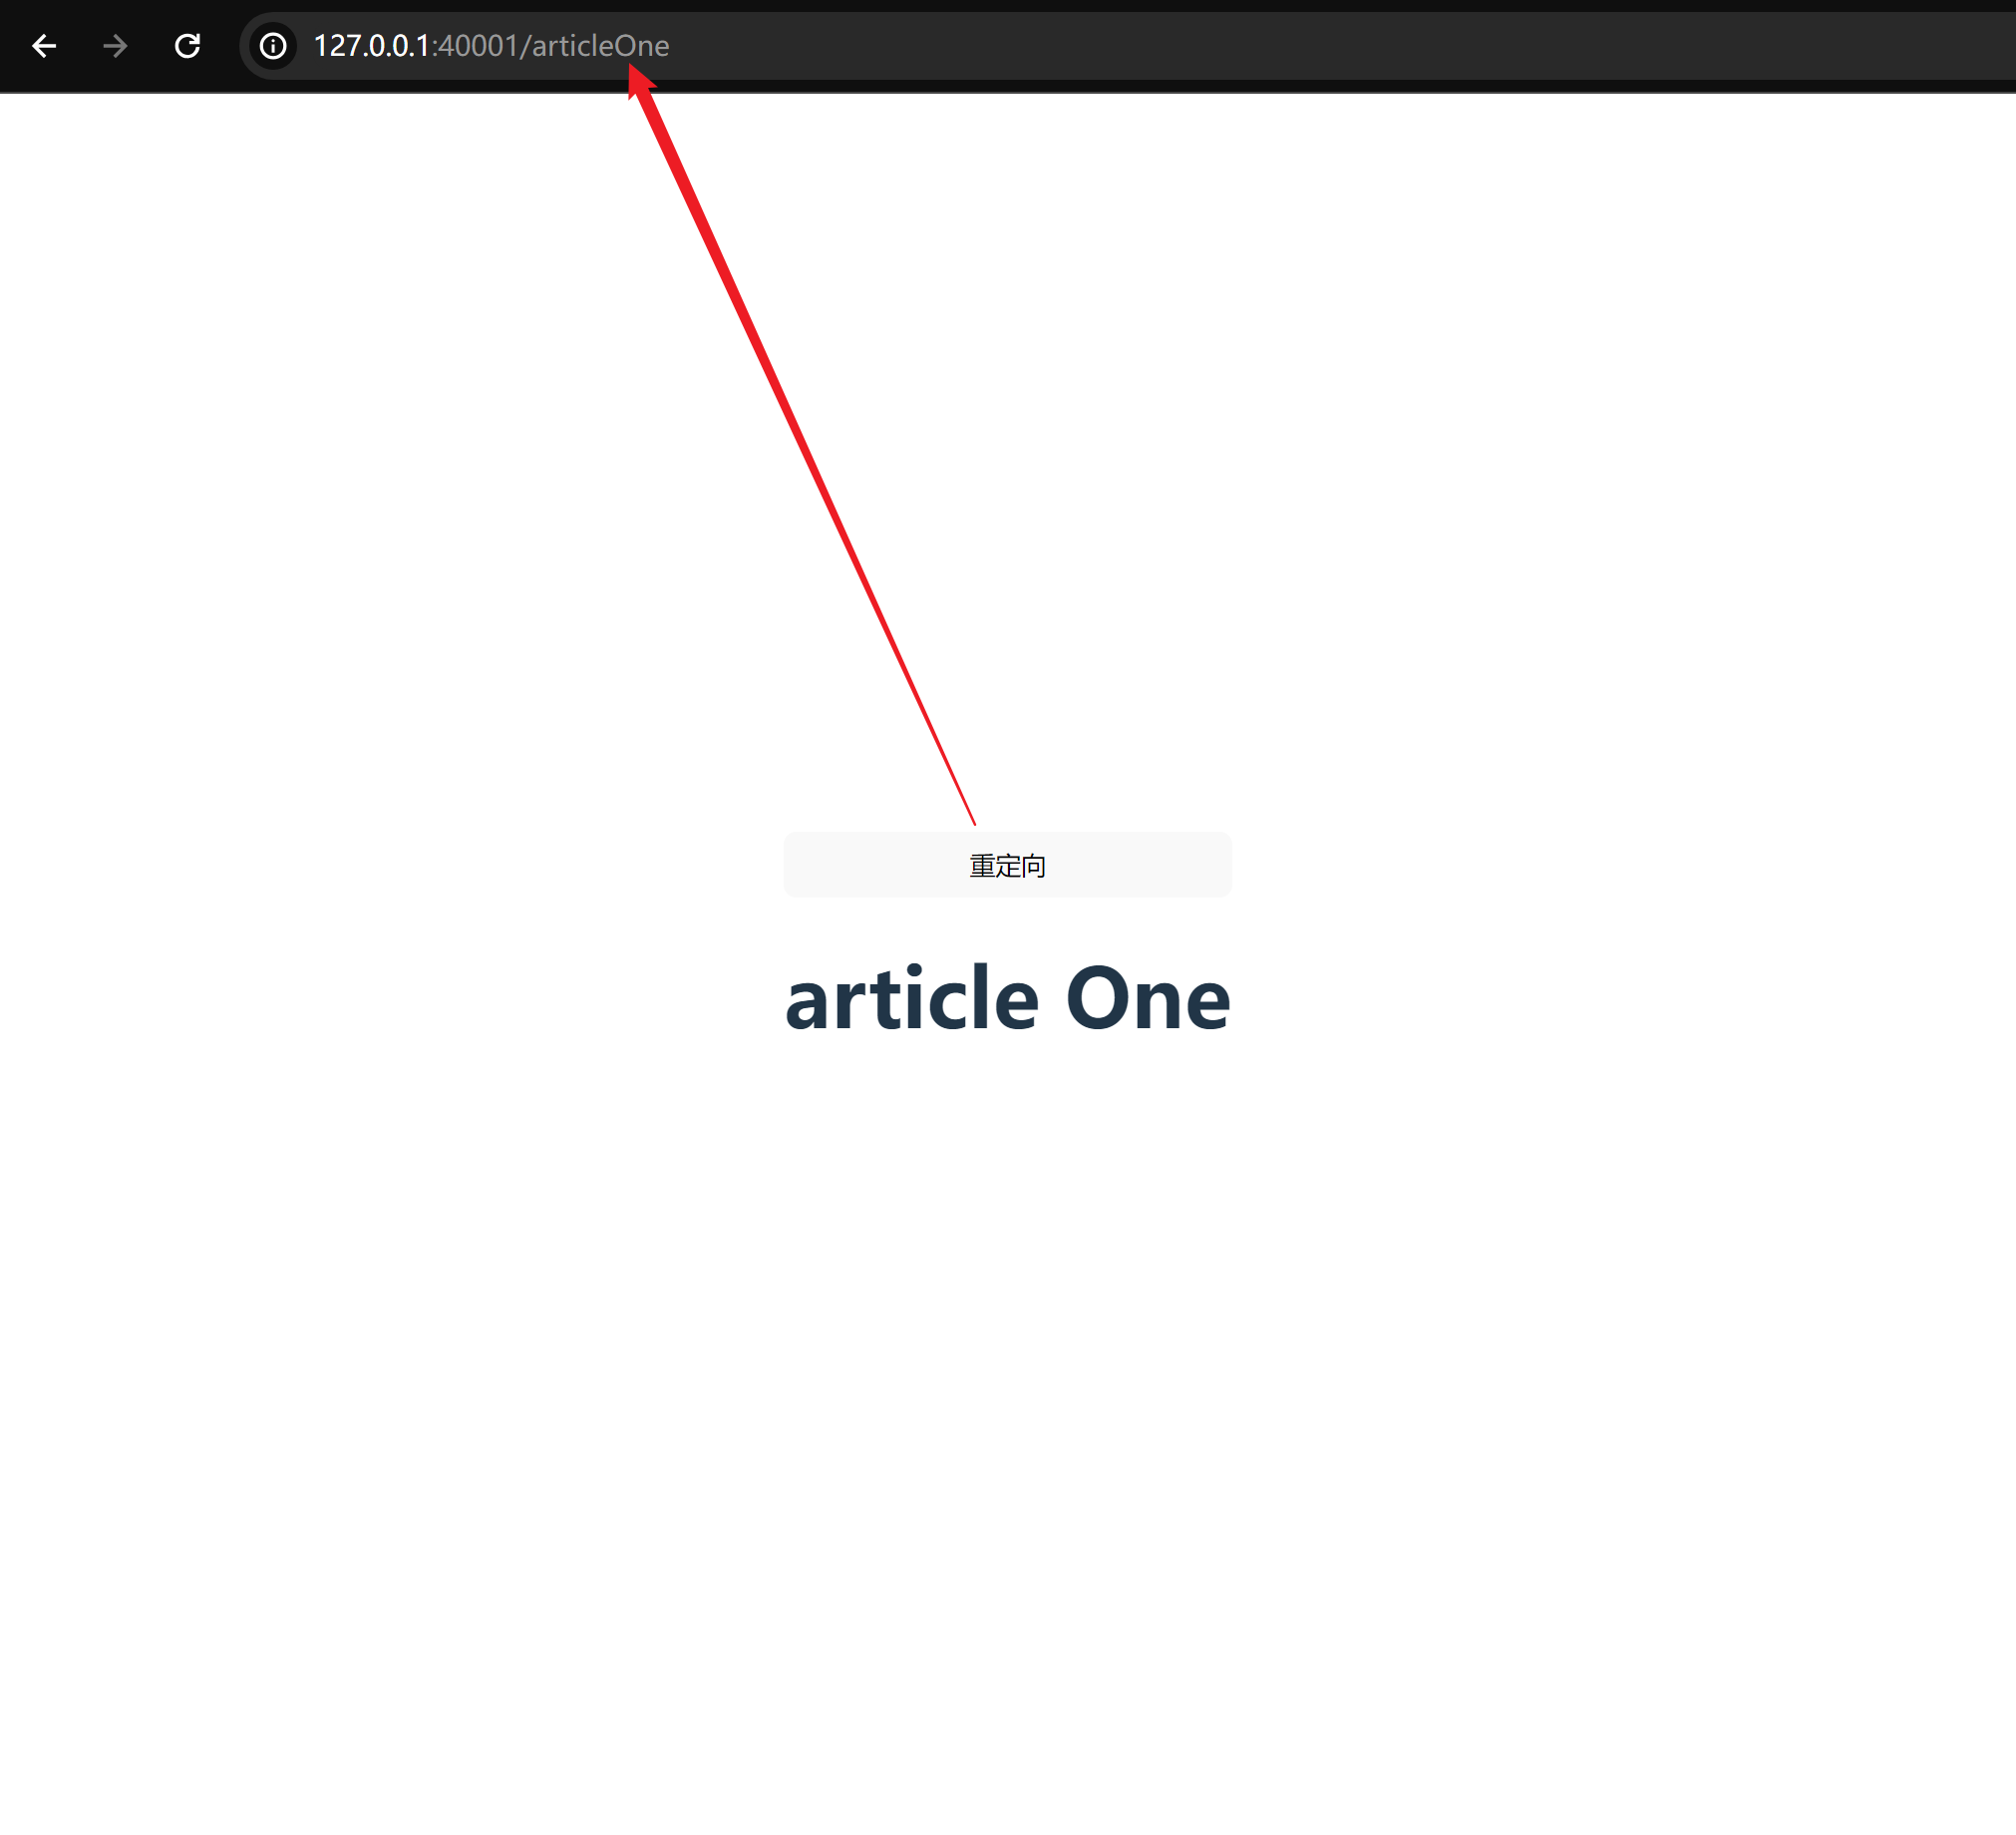
路由重定向就是将此路由 (‘/article’ ) 配置到想要进入的路由 (‘article/articleOne’ ) 使用redirect
分为三种写法: 字符串形式、对象形式、函数形式
1、字符串形式
// router/index.ts
import { createRouter, createWebHistory, RouteRecordRaw } from 'vue-router';
// 1、定义路由 每个路由都需要映射到一个组件。
const routes: Array<RouteRecordRaw> = [
  // 可直接导入或者引入
  {
    path: '/',
    component: () => import('@/views/home/index.vue'),
  },
  {
    path: '/article',
    redirect: '/articleOne'   // 路由/user重定向到 /userOne
    // 可以省略 component 配置,因为它从来没有被直接访问过,所以没有组件要渲染。
  },
  {
    path: '/articleOne',
    component: () => import('@/views/article/articleOne.vue'),
  },
];
// 2、创建路由实例并传递routes
const router = createRouter({
  // 路由的模式:  vue2:
  // vue2 mode  history | vue3  createWebHistory
  // vue2 mode  hash    | vue3  createWebHashHistory
  history: createWebHistory(),
  routes,
});
export default router;
可以省略 component 配置,因为它从来没有被直接访问过,所以没有组件要渲染。但在嵌套路由里,如果一个路由记录有 children 和 redirect 属性,它也应该有 component 属性。
<template>
  <div class="flex">
    <button @click="toPages">重定向</button>

    <router-view />
  </div>
</template>

<script setup lang="ts">
  import { useRouter } from 'vue-router';
  const router = useRouter();
  const toPages = () => {
    router.push({ path: '/article' });
  };
</script>

<style scoped>
  .flex {
    display: flex;
    flex-direction: column;
    justify-content: space-around;
  }
</style>
2、对象形式
// router/index.ts
import { createRouter, createWebHistory, RouteRecordRaw } from 'vue-router';
// 1、定义路由 每个路由都需要映射到一个组件。
const routes: Array<RouteRecordRaw> = [
  // 可直接导入或者引入
  {
    path: '/',
    component: () => import('@/views/home/index.vue'),
  },
  {
    path: '/article',
    redirect: { path: '/articleOne' }   // 路径对象
    //  redirect: { name: 'articleOne' }  命名对象
  },
  {
    path: '/articleOne',
    name: 'articleOne',
    component: () => import('@/views/article/articleOne.vue'),
  },
];
// 2、创建路由实例并传递routes
const router = createRouter({
  // 路由的模式:  vue2:
  // vue2 mode  history | vue3  createWebHistory
  // vue2 mode  hash    | vue3  createWebHashHistory
  history: createWebHistory(),
  routes,
});
export default router;
3、函数形式
// router/index.ts
import { createRouter, createWebHistory, RouteRecordRaw } from 'vue-router';
// 1、定义路由 每个路由都需要映射到一个组件。
const routes: Array<RouteRecordRaw> = [
  // 可直接导入或者引入
  {
    path: '/',
    component: () => import('@/views/home/index.vue'),
  },
  {
    path: '/article/:id',
    redirect: (to) => {
      return {
        path: '/articleOne',
        query: {q:to.params.id}  // 传参
      }
    }
  },
  {
    path: '/articleOne',
    name: 'articleOne',
    component: () => import('@/views/article/articleOne.vue'),
  },
];
// 2、创建路由实例并传递routes
const router = createRouter({
  // 路由的模式:  vue2:
  // vue2 mode  history | vue3  createWebHistory
  // vue2 mode  hash    | vue3  createWebHashHistory
  history: createWebHistory(),
  routes,
});
export default router;
二、路由别名
路由别名就是 为URL为 ‘/’ 的路由起别名为 ‘/article’ ,虽然我访问的URL是 ‘/article’ ,但是它真正访问的还是 ‘/’ 匹配的组件。
他与路由重定向的区别在于: 路由重定向就会访问重定向后匹配的路由,而别名还是会访问原本匹配的路由。
我们使用:alias来进行路由别名的配置。
// router/index.ts
{
  path: '/articleOne',
  name: 'articleOne',
  component: () => import('@/views/article/articleOne.vue'),
  alias:['/article1', '/articleYi']  // 定义/user 别名为 : /user1,/userIndex
}
第八节: 路由传参
1、query路由传参
router.push({ path: '/user', query: {
  name: '张全蛋',
  age: 18,
  hobby: '吃饭'
})
2、params路由传参
// router/index.ts
{
  // params传参必须在路由配置设置占位符参数,添加了一个:id占位符,就传递一个为id的参数。这里添加了两个id和type
  path: '/article/:id/:type',
  name: 'article',
  component: () => import('@/views/article/index.vue'),
},
router.push({ name: 'article', params: { id: 12345, type: 'game' } })
3、params和query的区别
- query 传参配置的是 path,而 params 传参配置的是name,在 params中配置 path 无效
- query 在路由配置不需要设置参数,而 params 必须设置占位符参数(传递的参数也会在地址栏中显示)
- query 传递的参数会显示在地址栏中, 只能接受对象
- params传参刷新会无效,但是 query 会保存传递过来的值,刷新不变(当浏览器刷新的时候,路由的实例会重新创建,会对地址栏上的地址做劫持。如果参数在地址栏上则不会丢失)
第九节: 导航守卫
:::tips
- 全局导航守卫
- vue.router.beforeEach 全局的前置导航守卫
- vue.router.afterEach 在路由跳转完成后调用的钩子函数
- vue.router.beforeResolve 所有的守卫和异步路由解析之后才会进行调用
- 路由独享的守卫
- vue.router.beforeEnter
- 组件内的守卫
- vue.router.beforeRouterEnter 在组件渲染创建之前进行调用
- vue.router.beforeRouterUpdate 在路由发生改变,并且该组件进行复用时才会被调用
- vue.router.beforeRouterLeave 在离开组件时进行调用
:::
第十节:不同的历史模式
1、Hash模式
- 特点
- URL中包含符号"#"
在 Hash 模式下,URL 中始终包含一个以"#“为前缀的部分。例如:http://example.com/#/home。这个”#"号是 Hash 模式的显著标志。
2. Hash不包括在HTTP请求中
与传统的服务端路由不同,Hash 不会被包括在 HTTP 请求中。换句话说,在进行路由切换时,不会向服务器发送额外的请求。这使得前端能够完全掌控路由的变化。
3. 页面切换不触发完整页面的重新加载
一个显著的特点是,在 Hash 模式下,页面的切换不会导致完整页面的重新加载。仅仅通过改变 URL 中的 Hash 部分,前端可以实现页面内容的动态更新,这有助于提供更流畅的用户体验,特别适用于单页面应用(SPA)。
- 实现原理
- 利用 window.onhashchange 事件监听 hash 值的变化
- 当 URL 的 hash 发生变化时,触发 hashchange 事件
- 示例代码
const router = new VueRouter({
  mode: 'hash',	// 指定使用 Hash 模式, vue-router 的默认模式
  routes: [
    { path: '/', component: Home },
    { path: '/about', component: About }
    // 更多路由配置
    ]
})
2、History模式
- 特点
- URL 更规范,不包含"#"
- 基于 HTML5 的新特性,通过 history.pushState() 和 replaceState() 修改历史记录栈
History 模式是基于 HTML5 的新特性而来的。通过使用 history.pushState() 和 replaceState() 这两个 API,我们可以在不重新加载页面的情况下修改浏览器的历史记录栈,从而改变当前地址栏的 URL。
3. 在使用 History 模式时,确保服务器配置正确,以便在直接访问页面时能够正确路由到对应的页面。如后端没有配置对应的路由处理,则会返回404错误。
- 实现原理
- 利用 history.pushState() 和 replaceState() API 操作实现 URL 的变化
- 通过监听 popstate 事件来捕获 URL 的变化
为了捕获到 URL 的变化并进行相应的页面跳转和渲染,我们需要监听 popstate 事件。
3. 示例
const router = new VueRouter({
  mode: 'history',
  routes: [
    { path: '/', component: Home },
    { path: '/about', component: About }
    // 更多路由配置
  ]
})
3、两者区别
- 形式上
:::info
- Hash 模式:URL 包含“#”。例如:http://example.com/#/home。
- History 模式:URL 更规范,不包含“#”。例如:http://example.com/home。
:::
- 功能上
:::info
- Hash 模式:适用于单页应用,通过在 URL 中的 Hash 部分进行路由切换。
- History 模式:需要服务器支持,更适用于传统多页应用,通过 HTML5 的新特性实现页面切换。(动态加载路由)
:::
- 原理上
:::info
- Hash 模式:
- 利用 window.onhashchange 事件监听 hash 值的变化
- History 模式:
- 通过监听 popstate 事件来捕获 URL 的变化
- 利用 history.pushState() 和 replaceState()修改历史记录栈
:::


 355
355

 被折叠的 条评论
为什么被折叠?
被折叠的 条评论
为什么被折叠?
 到【灌水乐园】发言


