


文章目录
canvas笔记
1.初识canvas
- 什么是canvas?
html5新增加的绘图工具,如何使用?先获得canvas画布对象,创建绘制上下文,调用不同的绘制方法和属性进行图像的绘制,案例:如下代码
<html>
    <body>
        <canvas width="600" height="400"></canvas>
        <script>
            // 获取canvas对象
        	const canvas = document.querySelector('canvas')
            // 创建绘制上下文
    		const ctx  = canvas.getContext('2d')
        </script>
    </body>
</html>
2.绘制矩形
- 绘制填充矩形
<html lang="en">
<body>
  <canvas width="600" height="400"></canvas>
  <script>
    const canvas = document.querySelector('canvas')
    const ctx  = canvas.getContext('2d')
    ctx.fillStyle = 'red'
    // 设置画笔的落点,起始点,x和y 以及矩形的宽和高
    ctx.fillRect(100,50,300,10)
  </script>
</body>
</html>
- 绘制矩形路径
<html lang="en">
<body>
  <canvas width="600" height="400"></canvas>
  <script>
    const canvas = document.querySelector('canvas')
    const ctx  = canvas.getContext('2d')
    ctx.fillStyle = 'red'
    // 设置画笔的落点,起始点,x和y
    // 绘制矩形路径
    ctx.strokeRect(20,20,100,100)
    // 清楚画布 要清楚的起始位置,要清楚的宽高
    setTimeout(() => {
      ctx.clearRect(20,20,100,100)
    }, 1000);
  </script>
</body>
</html>
- 绘制api拆开来写
<html lang="en">
<body>
  <canvas width="600" height="400"></canvas>
  <script>
    const canvas = document.querySelector('canvas')
    const ctx  = canvas.getContext('2d')
    ctx.fillStyle = 'red'
    // 定义矩形路径 但是不填充,也不绘制
    ctx.beginPath()  // 开始一个路径
    ctx.rect(10,10,100,100)
    // 填充矩形
    ctx.fill()
    ctx.closePath() // 结束或者说断开一个路径
    ctx.rect(10,120,100,100)
    ctx.stroke()
  </script>
</body>
</html>
矩形绘制api整理
| 属性/方法名称 | 使用说明 | 属性类型 | 备注 |
|---|---|---|---|
| fillStyle | 设置或返回当前填充颜色 | String | |
| strokeStyle | 设置或返回当前绘制颜色 | String | |
| beginPath() | 开始一个路径 | Function | |
| closePath() | 结束一个路径 | Function | |
| rect(x,y,width,height) | 定义矩形路径 但是不填充,也不绘制 | Function | |
| fill() | 填充一个已经定义的路径 | Function | |
| stroke() | 绘制一个已经定义的路径 | Function | |
| fillRect(x,y,width,height) | 定义并填充一个矩形 | Function | |
| strokeRect(x,y,width,height) | 定义并绘制一个矩形 | Function | |
| clearRect(x,y,width,height) | 清除画布,从起始点开始,清除固定的宽高 | Function |
3.绘制弧形和圆形
- 弧形绘制
<html lang="en">
<body>
  <canvas width="500" height="500"></canvas>
  <script>
    const canvas = document.querySelector('canvas')
    const ctx = canvas.getContext('2d')
    // ctx.arc(圆心x,圆心y, 半径, 开始的角度(默认是从3点方向开始), 结束的角度, 是否逆时针(默认是false))
    // 传入pi 函数内会计算,pi直接等于180度
    // .arc(250,250,100,0,Math.PI,true) // 绘制半弧形
    ctx.arc(250,250,100,0,Math.PI/2,true)
    // ctx.fill() // 如果填充,那么默认会从开始点到结束点进行闭合连接
    ctx.stroke()
  </script>
</body>
</html>
- 绘制一个笑脸
<html lang="en">
<body>
  <canvas width="500" height="500"></canvas>
  <script>
    const canvas = document.querySelector('canvas')
    const ctx = canvas.getContext('2d')
    // 绘制整个头部
    ctx.arc(250,250,200,0,Math.PI*2)
    ctx.stroke()
    ctx.beginPath()
    // 绘制嘴巴
    ctx.arc(250,280,100,0,Math.PI)
    ctx.stroke()
    // 绘制左眼睛
    ctx.beginPath()
    ctx.arc(150,150,30,0,Math.PI*2)
    ctx.stroke()
    // 绘制右眼
    ctx.beginPath()
    ctx.arc(350,150,30,0,Math.PI*2)
    ctx.stroke()
  </script>
</body>
</html>
- 使用moveTo绘制不连续的路径 移动画笔到指定的位置
<html lang="en">
<body>
  <canvas width="500" height="500"></canvas>
  <script>
    const canvas = document.querySelector('canvas')
    const ctx = canvas.getContext('2d')
    // ctx.moveTo 绘制一条不连续的额路径
    // 绘制整个头部
    ctx.arc(250,250,200,0,Math.PI*2)
    ctx.moveTo(350,250) // 移动画笔到指定位置
    // 绘制嘴巴
    ctx.arc(250,250,100,0,Math.PI)
    // 绘制左眼睛
    ctx.moveTo(180,150)
    ctx.moveTo(120,150)
    ctx.arc(150,150,30,0,Math.PI*2)
    // 绘制右眼
    ctx.moveTo(380,150)
    ctx.moveTo(320,150)
    ctx.arc(350,150,30,0,Math.PI*2)
    ctx.fillStyle = 'yellow'
    ctx.fill()
    ctx.strokeStyle = 'red'
    ctx.stroke()
  </script>
</body>
</html>
- 使用arcTo绘制
<html lang="en">
<body>
  <canvas width="500" height="500"></canvas>
  <script>
    const canvas = document.querySelector('canvas')
    const ctx = canvas.getContext('2d')
    ctx.moveTo(250,250)
    ctx.arcTo(250,300,200,250,20)
    ctx.stroke()
    ctx.moveTo(250,250)
    ctx.lineTo(250,300)
    ctx.lineTo(200,250)
    ctx.stroke()
  </script>
</body>
</html>
弧形绘制api整理
| 属性/方法名称 | 使用说明 | 属性类型 | 备注 |
|---|---|---|---|
| arc(x,y,r,起始角度(0是从3点位置开始),结束的角度,是否逆时针(默认是false)) | 定义弧形路径 | Function | |
| fill() | 填充 | Function | |
| stroke() | 绘制 | Function | |
| beginPath() | 开始一个新的绘制点 | Function | |
| moveTo() | 将画笔移动到指定的位置 | Function | |
| arcTo(x1,y1,x2,y2,r) | 根据三个点形成的内角绘制圆弧 |
4.绘制直线
<html lang="en">
<body>
  <canvas width="500" height="500"></canvas>
  <script>
    const canvas = document.querySelector('canvas')
    const ctx = canvas.getContext('2d')
    // //  将画笔移动到指定的位置
    // ctx.moveTo(250,250)
    // // 连接到指定位置
    // ctx.lineTo(400,250)
    // // 绘制路径
    // ctx.stroke()

    // 绘制一个三角形
    ctx.moveTo(250,250)
    ctx.lineTo(350,250)
    ctx.lineTo(300,300)
    ctx.lineTo(250,250)
    ctx.fill() // 如果不连接第三条线 在填充时也会自动的闭合
    ctx.stroke()
  </script>
</body>
</html>
直线绘制api整理
| 属性/方法名称 | 使用说明 | 属性类型 | 备注 |
|---|---|---|---|
| moveTo(x,y) | 画笔移动到指定位置 | ||
| lineTo(x,y) | 从当前点连接到指定的点 | ||
| fill() | 填充 | ||
| stroke() | 绘制 |
5.贝塞尔曲线
- 二次贝塞尔曲线
什么是二次贝塞尔曲线?由一个起点p1,一个控制点p1和一个终点p2组成的路径,并根据这个路径绘制一个弧形线段
绘制一个贝塞尔曲线
<html lang="en">
<body>
  <canvas width="600" height="400"></canvas>
  <script>
    const canvas = document.querySelector('canvas')
    const ctx = canvas.getContext('2d')
    ctx.moveTo(200,300)
    ctx.quadraticCurveTo(150,300,150,200)
    ctx.stroke()
  </script>
</body>
</html>
效果
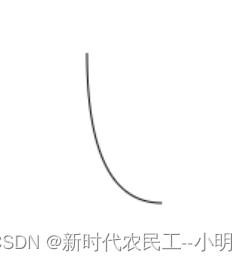
大致的绘制及基点位置

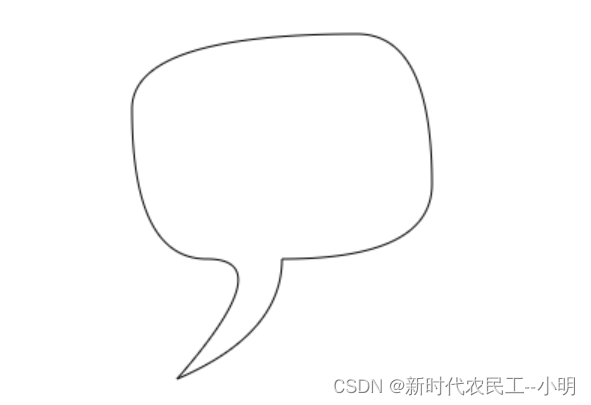
- 使用二次贝塞尔曲线绘制一个聊天气泡图案
<html lang="en">
<body>
  <canvas width="600" height="400"></canvas>
  <script>
    const canvas = document.querySelector('canvas')
    const ctx = canvas.getContext('2d')
    ctx.moveTo(200,300)
    ctx.quadraticCurveTo(150,300,150,200)
    // 当前的起点就是上一个曲线的终点
    ctx.quadraticCurveTo(150,150,300,150)
    ctx.quadraticCurveTo(350,150,350,250)
    ctx.quadraticCurveTo(350,300,250,300)
    ctx.quadraticCurveTo(250,350,180,380)
    ctx.quadraticCurveTo(250,300,200,300)
    ctx.stroke()
  </script>
</body>
</html>
效果
- 贝塞尔三次曲线
什么是贝塞尔三次曲线?通过一个起点p0,控制点p1,途径点p2,结束点p3,根据这几个节点绘制弧形线段
- 绘制一个贝塞尔三次曲线
<html lang="en">
<body>
  <canvas width="1280" height="800"></canvas>
  <script>
    const canvas = document.querySelector('canvas')
    const ctx = canvas.getContext('2d')
    ctx.moveTo(300,300)
    ctx.bezierCurveTo(400,200,600,400,300,600)
    ctx.stroke()
  </script>
</body>
</html>
效果
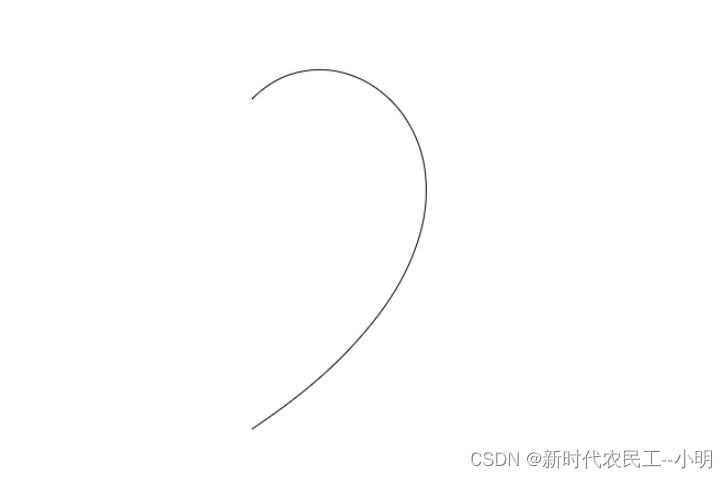
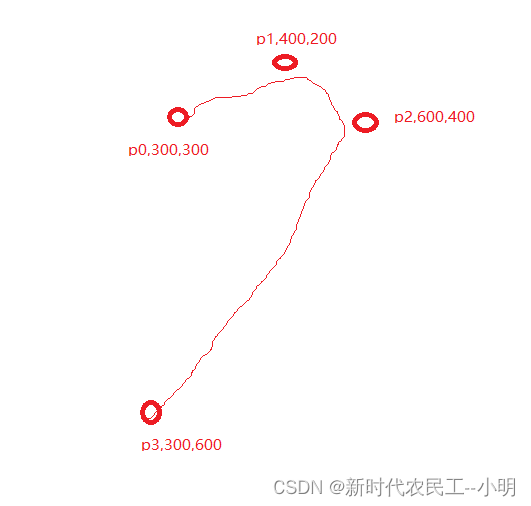
大致的绘制及基点位置
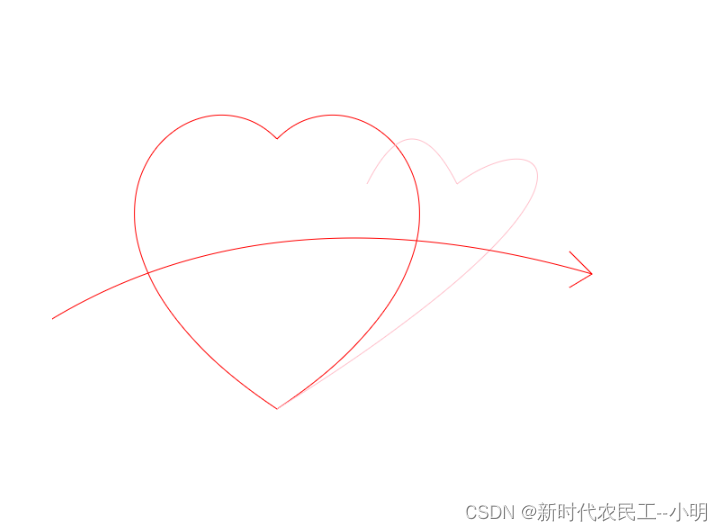
- 使用三次贝塞尔曲线和二次贝塞尔曲线绘制桃心
<html lang="en">
<body>
  <canvas width="1280" height="800"></canvas>
  <script>
    const canvas = document.querySelector('canvas')
    const ctx = canvas.getContext('2d')
    ctx.moveTo(300,300)
    ctx.bezierCurveTo(400,200,600,400,300,600)
    ctx.moveTo(300,300)
    ctx.bezierCurveTo(200,200,0,400,300,600)
    ctx.strokeStyle = 'red'
    ctx.stroke()
    ctx.closePath()
    ctx.beginPath()
    ctx.moveTo(400,350)
    ctx.quadraticCurveTo(450,250,500,350)
    ctx.moveTo(500,350)
    ctx.bezierCurveTo(600,275,700,350,300,600)
    ctx.strokeStyle = 'pink'
    ctx.stroke()
    ctx.closePath()
    ctx.beginPath()
    ctx.moveTo(50,500)
    ctx.quadraticCurveTo(300,350,650,450)
    ctx.strokeStyle = 'red'
    ctx.stroke()
    ctx.closePath()
    ctx.beginPath()
    ctx.moveTo(625,425)
    ctx.lineTo(650,450)
    ctx.lineTo(625,465)
    ctx.stroke()
  </script>
</body>
</html>
效果
贝塞尔曲线api整理
| 属性/方法名称 | 使用说明 | 属性类型 | 备注 |
|---|---|---|---|
| quadraticCurveTo(x1,y1,x2,y2) | 根据两个点绘制弧线 | ||
| bezierCurveTo(x1,y1,x2,y2,x3,y3) | 根据三个点绘制弧线 |
6.路径封装 Path2D
- 将需要绘制的路径先存储到一个对象中,最后在交给绘制上下文进行绘制
<html lang="en">
<body>
  <canvas width="1280" height="800"></canvas>
  <script>
    const canvas = document.querySelector('canvas')
    const ctx = canvas.getContext('2d')
    const bardPath = new Path2D()
    console.log(bardPath);
    // 先进行路径存储
    bardPath.moveTo(300,300)
    bardPath.bezierCurveTo(400,200,600,400,300,600)
    bardPath.moveTo(300,300)
    bardPath.bezierCurveTo(200,200,0,400,300,600)
    // 最后就行绘制
    ctx.stroke(bardPath)
  </script>
</body>
</html>
7.颜色设置
| 属性/方法名称 | 使用说明 | 属性类型 | 备注 |
|---|---|---|---|
| globalAlpha | 设置或返回全局的透明度 | Number | |
| fillStyle | 设置或返回填充颜色,支持单位:16进制,rgba,颜色单词 | String | |
| strokeStyle | 设置或返回路径绘制颜色 | String |
8.渐变色设置
canvas的渐变需要先创建渐变对象,然后将渐变对象设置给渲染style
创建一个渐变
ctx.createLinearGradient(x,y,width,height)
将渐变对象设置给渲染style
ctx.fillStyle = jianbian
线性渐变
<body>
    <canvas width="1280" height="800"></canvas>
    <script>
    	const canvas = document.querySelector('canvas')
    	const ctx = canvas.getContext('2d')
        // 想要使用家变必须先创建一个渐变 , 然后把渐变对象赋值给画笔的style
        // 创建一个线性渐变
        // const jianbian = ctx.createLinearGradient(x,y,width,height)
        // const jianbian = ctx.createLinearGradient(100,200,400,500)
        // 设置对0到1不同区域的颜色
        // jianbian.addColorStop(0,'red')
        // jianbian.addColorStop(0.5,'pink')
        // jianbian.addColorStop(1,'blue')
        // ctx.fillStyle = jianbian
        // ctx.fillRect(100,200,300,300)

        // 过度效果
        let index =0
        function render(){
          ctx.clearRect(0,0,1200,800)
          index+=0.01
          if(index>=1){
            index=0
          }
          const jianbian = ctx.createLinearGradient(100,200,400,500)
          jianbian.addColorStop(0,'red')
          jianbian.addColorStop(index,'pink')
          jianbian.addColorStop(1,'blue')
          ctx.fillStyle = jianbian
          ctx.fillRect(100,200,300,300)
          requestAnimationFrame(render)
        }
        requestAnimationFrame(render)
    </script>
</body>
镜像渐变
<html lang="en">
<body>
  <canvas width="600" height="400"></canvas>
  <script>
    const canvas = document.querySelector('canvas')
    const ctx = canvas.getContext('2d')
    // 想要使用家变必须先创建一个渐变 , 然后把渐变对象赋值给画笔的style
    // 创建一个镜像渐变
    // const jianbian = ctx.createRadialGradient(x,y,r,x1,y1,r)
    const jianbian = ctx.createRadialGradient(250,150,10,300,200,100)
    jianbian.addColorStop(0,'pink')
    jianbian.addColorStop(1,'red')
    ctx.fillStyle = jianbian
    ctx.arc(300,200,100,0,Math.PI*2)
    ctx.fill()
  </script>
</body>
</html>
圆锥渐变
< lang="en">
<body>
  <canvas width="600" height="400"></canvas>
  <script>
    const canvas = document.querySelector('canvas')
    const ctx = canvas.getContext('2d')
    // 想要使用家变必须先创建一个渐变 , 然后把渐变对象赋值给画笔的style
    // 创建一个圆锥渐变
    // const jianbian = ctx.createConicGradient(角度,x,y)
    const jianbian = ctx.createConicGradient(0,300,200)
    jianbian.addColorStop(0,'pink')
    jianbian.addColorStop(0.5,'yellow')
    jianbian.addColorStop(1,'red')
    ctx.fillStyle = jianbian
    ctx.arc(300,200,100,0,Math.PI*2)
    ctx.fill()
  </script>
</body>
</html>
渐变api整理
| 属性/方法名称 | 使用说明 | 属性类型 | 备注 |
|---|---|---|---|
| ctx.createLinearGradient(x,y,width,height) | 创建线性渐变 | 返回渐变对象 | |
| ctx.createRadialGradient(x,y,r,x1,y1,r) | 创建镜像渐变 | 返回渐变对象 | |
| ctx.createConicGradient(角度(Math.PI默认3点方向),x,y) | 创建圆锥渐变 | 返回渐变对象 |
9.填充图片为背景
<html lang="en">
<body>
  <canvas width="600" height="400"></canvas>
  <script>
    const canvas = document.querySelector('canvas')
    const ctx = canvas.getContext('2d')
    // 用图片作为填充背景
    const img = new Image()
    img.src = '../img/2.jpg'
    // 在图片加载完成后
    img.onload = function(){
      // ctx.createPattern(img/canvas对象,'平铺方式-同css')
      const imgBg = ctx.createPattern(img,'no-repeat')
      ctx.fillStyle = imgBg
      ctx.fillRect(0,0,600,400)
    }
  </script>
</body>
</html>
填充图片为背景api整理
| 属性/方法名称 | 使用说明 | 属性类型 | 备注 |
|---|---|---|---|
| ctx.createPattern(img/canvas对象,‘平铺方式-同css’) | 创建图片为填充背景 | 返回style对象 |
10 线条样式
<html lang="en">
<body>
  <canvas width="600" height="400"></canvas>
  <script>
    const canvas = document.querySelector('canvas')
    const ctx = canvas.getContext('2d')
    ctx.moveTo(300,200)
    ctx.lineTo(400,300)
    ctx.lineTo(500,200)
    // 设置线段的粗细
    ctx.lineWidth = 10
    // 设置线段两端的点的样式. butt平齐,round半圆, square正方形
    ctx.lineCap = 'square'
    // 设置两个线段连接点的样式 (mitter默认,round带有一点圆润效果, bevel把尖角弄平)
    ctx.lineJoin = 'bevel'
    ctx.stroke()

    ctx.lineWidth = 1
    ctx.moveTo(100,100)
    ctx.lineTo(400,100)

    // 设置虚线
    ctx.setLineDash([20,5])
    ctx.lineDashOffset = 40
    ctx.stroke()
  </script>
</body>
</html>
- 带有过度效果的偏移
<html lang="en">
<body>
  <canvas width="600" height="400"></canvas>
  <script>
    const canvas = document.querySelector('canvas')
    const ctx = canvas.getContext('2d')
    let index = 0
    function render(){
      ctx.clearRect(0,0,600,400)
      index++
      if(index>40)index = 0
      ctx.moveTo(100,100)
      ctx.lineTo(400,100)

      // 设置虚线
      ctx.setLineDash([20,5])
      ctx.lineDashOffset = index
      ctx.stroke()
      requestAnimationFrame(render)
    }
    render()
  </script>
</body>
</html>
线条样式api整理
| 属性/方法名称 | 使用说明 | 属性类型 | 备注 |
|---|---|---|---|
| lineWidth | 设置或返回线条的粗细 | Number | |
| lineCap | 设置线段两端的点的样式. butt平齐,round半圆, square正方形 | String | |
| lineJoin | 设置两个线段连接点的样式 (mitter默认,round带有一点圆润效果, bevel把尖角弄平) | String | |
| setLineDash([虚线的长度,空格部分的宽度]) | 设置虚线 | Function | |
| lineDashOffset | 设置或返回线段的偏移 | Number |
11.阴影设置
<html lang="en">
<body>
  <canvas width="600" height="400"></canvas>
  <script>
    const canvas = document.querySelector('canvas')
    const ctx = canvas.getContext('2d')
    ctx.shadowOffsetX = 10 // 设置阴影的x方向偏移
    ctx.shadowOffsetY = 10 // 设置阴影y方向的偏移
    ctx.shadowColor = 'red' // 设置阴影y方向的偏移
    ctx.shadowBlur = 5 // 设置阴影的模糊程度
    ctx.strokeRect(300,200,200,200)
   </script>
</body>
</html>
阴影绘制api整理
| 属性/方法名称 | 使用说明 | 属性类型 | 备注 |
|---|---|---|---|
| shadowOffsetX | 设置阴影的x方向偏移 | Number | |
| shadowOffsetY | 设置阴影y方向的偏移 | Number | |
| shadowColor | 设置阴影y方向的偏移 | String | |
| shadowBlur | 设置阴影的模糊程度 | Number |
12.绘制图像及视频
绘制图像
<html lang="en">
  <body>
    <canvas width="600" height="800"></canvas>
    <script>
      const canvas = document.querySelector('canvas')
      const ctx = canvas.getContext('2d')
      const img = new Image()
      img.src = '../img/1.png'
      img.onload = function(){
        // 第一种绘制图片的方式
        // ctx.drawImage(imgDom,x,y)
        // ctx.drawImage(img,0,0)
        // 第二种方式
         // ctx.drawImage(imgDom,x,y,width,height)
        ctx.drawImage(img,0,0,600,800)
        // 第三种方式 裁剪
        // ctx.drawImage(img,裁剪的x,裁剪的y,要裁剪的宽,要裁剪的高,绘制x,绘制y,绘制width,绘制的height)
        // ctx.drawImage(img,500,600,1000,1500,0,0,700,500)
      }
    </script>
  </body>
</html>
绘制视频
<html lang="en">
</html>
  <body>
    <canvas width="600" height="400"></canvas>
    <video id="video" width="500" height="500" controls hidden src="../img/4.mp4"></video>
    <button id="btn">播放</button>
    <script>
      const canvas = document.querySelector('canvas')
      const ctx = canvas.getContext('2d')
      const video = document.getElementById('video')
      const img = new Image()
      img.src = '../img/2.jpg'
      btn.onclick = function(){
        if(video.paused){
          video.play()
          render()
        }else{
          video.pause()
        }
      }
      function render(){
        ctx.drawImage(video,0,0,600,400)
        ctx.drawImage(img,0,0,50,50) // 同时绘制一个icon图标
        requestAnimationFrame(render)
      }
    </script>
  </body>
</html>
图像视频绘制api整理
| 属性/方法名称 | 使用说明 | 属性类型 | 备注 |
|---|---|---|---|
| drawImage(imgDom,x,y) | 绘制图像 | Function | 方案一,同时可以渲染canvas |
| drawImage(imgDom,x,y,width,height) | 绘制图像 | Function | 方案二 |
| drawImage(img,裁剪的x,裁剪的y,要裁剪的宽,要裁剪的高,绘制x,绘制y,绘制width,绘制的height) | 绘制图像 | Function | 方案三 |
| drawImage(video,x,y,width,height) | 绘制视频 | ||
| toDataURL(‘image/jpeg’, 0.5) | 将canvas导出为可访问路径 | Function | 返回base64地址 |
| toBlob(file=>) | 将canvas导出为文件对象 | Function | e为文件对象 |
13.绘制文字
<html lang="en">
</html>
  <body>
    <canvas width="600" height="600"></canvas>
    <script>
      const canvas = document.querySelector('canvas')
      const ctx = canvas.getContext('2d')
      ctx.strokeStyle = 'red'
      // 设置文字样式 同css
      ctx.font = '50px 微软雅黑'
      // 设置文字水平对齐方式 (基于对峙中心点),同css
      ctx.textAlign = 'center'
      // 设置垂直对齐方式 支持top,button,middle
      ctx.textBaseline = 'middle'
      // 文本方向
      ctx.direction = 'rtl'
      // 返回一个文本的预设参数,包括文字的占比宽度等等信息
      const textInfo = ctx.measureText('你好')
      // ctx.fillText(要绘制的文字,x,x,绘制文字的最大宽度)
      // 填充文字
      // ctx.fillText('小明大门',100,100)
      // 绘制文字 轮廓
      ctx.strokeText('小明大门!',200,200)
      ctx.arc(200,200,5,0,Math.PI*2)
      ctx.fill()
    </script>
  </body>
</html>
文字绘制api整理
| 属性/方法名称 | 使用说明 | 属性类型 | 备注 |
|---|---|---|---|
| font | 设置或返回文字样式,同css | String | |
| textAlign | 设置文件对其方式,基于绘制起点 | String | |
| textBaseline | 设置垂直对齐方式 支持top,button,middle | String | |
| direction | 文本方向,支持 rtl (基本没啥用) | String | |
| measureText(‘text’) | 返回一个文本的预设参数,包括文字的占比宽度等等信息 | Function | |
| fillText(要绘制的文字,x,y,绘制文字的最大宽度) | 填充文字 | Function | |
| strokeText(‘文字!’,x,y) | 绘制文字 轮廓 | Function |
14.2D转换
位移
<html lang="en">
  <body>
    <canvas width="600" height="600"></canvas>
    <script>
      const canvas = document.querySelector('canvas')
      const ctx = canvas.getContext('2d')
      // 位移 移动的是坐标,也就是绘制起点
      ctx.translate(100,100)
      ctx.fillRect(0,0,100,100)
      // 从上一个坐标系开始位移
      ctx.translate(100,100)
      ctx.fillRect(0,0,100,100)
    </script>
  </body>
</html>
缩放
<html lang="en">
</html>
  <body>
    <canvas width="600" height="600"></canvas>
    <script>
      const canvas = document.querySelector('canvas')
      const ctx = canvas.getContext('2d')
      // 缩放 拉伸坐标系
      ctx.scale(2,2)
      ctx.fillRect(100,100,100,100)
    </script>
  </body>
</html>
旋转
<html lang="en">
  <body>
    <canvas width="600" height="600"></canvas>
    <script>
      const canvas = document.querySelector('canvas')
      const ctx = canvas.getContext('2d')
      // 旋转。旋转坐标系x,y
      ctx.arc(200,200,10,0,Math.PI*2)
      ctx.fill()
      ctx.rotate(Math.PI/6)
      ctx.fillRect(200,200,100,100)
    </script>
  </body>
</html>
使用transform
<html lang="en">
  <body>
    <canvas width="600" height="600"></canvas>
    <script>
      const canvas = document.querySelector('canvas')
      const ctx = canvas.getContext('2d')
      // 位移
      ctx.transform(1,0,0,1,100,100)
      ctx.fillRect(0,0,100,100)
    </script>
  </body>
</html>
一起使用
<html lang="en">
  <body>
    <canvas width="600" height="600"></canvas>
    <script>
      const canvas = document.querySelector('canvas')
      const ctx = canvas.getContext('2d')
      ctx.translate(300,300)
      ctx.rotate(Math.PI/4)
      ctx.scale(2,1)
      ctx.fillRect(-250,-25,500,50)
    </script>
  </body>
</html>
转换api整理
| 属性/方法名称 | 使用说明 | 属性类型 | 备注 |
|---|---|---|---|
| translate(x,y) | 位移,移动的起始点 | Function | |
| scale(x,y) | 缩放 拉伸坐标系x,y | Function | |
| rotate(Math.pi) | 旋转。旋转坐标系x,y | Function | |
| transform() | 复合使用 |
15.合成图层
- 更多参数参考地址:https://developer.mozilla.org/zh-CN/docs/Web/API/CanvasRenderingContext2D/globalCompositeOperation
合成图层的设置
<html lang="en">
  <body>
    <canvas width="600" height="600"></canvas>
    <script>
      const canvas = document.querySelector('canvas')
      const ctx = canvas.getContext('2d')
      ctx.fillStyle = 'red'
      ctx.fillRect(100,100,100,100)
      // 设置图层相交时的显示样式
      // 更多参数 https://developer.mozilla.org/zh-CN/docs/Web/API/CanvasRenderingContext2D/globalCompositeOperation
      ctx.globalCompositeOperation ="source-in"
      ctx.fillStyle = 'pink'
      ctx.fillRect(150,150,100,100)
    </script>
  </body>
</html>
刮刮卡案例实现
<!DOCTYPE html>
<html lang="en">
  <head>
    <meta charset="UTF-8" />
    <meta http-equiv="X-UA-Compatible" content="IE=edge" />
    <meta name="viewport" content="width=device-width, initial-scale=1.0" />
    <title>Document</title>
    <style>
      *{
        margin: 0;
        padding: 0;
      }
      div{
        width: 500px;
        height: 200px;
        text-align: center;
        line-height: 200px;
      }
      canvas{
        position: absolute;
        top: 0;
        left: 0;
        z-index: 10;
      }
    </style>
  </head>
  <body>
    <div>谢谢惠顾</div>
    <canvas width="500" height="200"></canvas>
    <script>
      const canvas = document.querySelector('canvas')
      const ctx = canvas.getContext('2d')
      // 设置图层相交时的显示样式
      // 更多参数 https://developer.mozilla.org/zh-CN/docs/Web/API/CanvasRenderingContext2D/globalCompositeOperation
      // ctx.globalCompositeOperation ="source-in"

      const img = new Image()
      img.src = '../img/5.jpg'
      img.onload = function(){
        ctx.drawImage(img,0,0,500,200)
      }
      // 是否可以刮
      let isgua = false
      // 监听canvas的鼠标事件
      canvas.onmousedown = function(){
        isgua=true
      }
      canvas.onmouseup = function(){
        isgua =false
      }
      canvas.onmousemove = function(e){
        if(!isgua)return
        ctx.globalCompositeOperation = 'destination-out'
        const x = e.pageX
        const y = e.pageY
        ctx.closePath()
        ctx.beginPath()
        ctx.arc(x,y,20,0,Math.PI*2)
        ctx.fill()
      }
    </script>
  </body>
</html>
合成图层api整理
| 属性/方法名称 | 使用说明 | 属性类型 | 备注 |
|---|---|---|---|
| globalCompositeOperation | 设置/返回合成图层的方式 | String |
16.裁剪
- 什么是裁剪?
在一个画布上有多个图层时,只是显示有裁剪路径的部分
案例
<html lang="en">
<body>
  <canvas width="600" height="600"></canvas>
  <script>
    const canvas = document.querySelector('canvas')
    const ctx = canvas.getContext('2d')
     // 用于存储绘制路径
    const path2d = new Path2D()
    path2d.moveTo(300,300)
    path2d.bezierCurveTo(400,200,600,400,300,600)
    path2d.moveTo(300,300)
    path2d.bezierCurveTo(200,200,0,400,300,600)
    ctx.strokeStyle = 'red'
    //  当canvas上有其它的图层时只绘制裁剪出来的部分内容
    // ctx.clip(裁剪路径  如果不传绘制路径的话默认会以开始路径和结束路径作为裁剪路径)
    ctx.clip(path2d)
    const img = new Image()
      img.src = '../img/1.png'
      img.onload = function(){
        ctx.drawImage(img,0,0,600,600)
        ctx.lineWidth = 10
        ctx.stroke(path2d)
      }
  </script>
</body>
</html>
裁剪api整理
| 属性/方法名称 | 使用说明 | 属性类型 | 备注 |
|---|---|---|---|
| clip(裁剪路径 如果不传绘制路径的话默认会以开始路径和结束路径作为裁剪路径) | 裁剪路径 | Function |
17.状态的保存与恢复
- 什么是状态缓存和恢复
状态保存 可以保存多个,就像一个数组,每次保存就往数组中添加一项,恢复时取出数组中最前面的一个
案例
<body>
  <canvas width="600" height="600"></canvas>
  <script>
    const canvas = document.querySelector('canvas')
    const ctx = canvas.getContext('2d')

    // 状态保存 可以保存多个,就像一个数组,每次保存就往数组中添加一项,恢复时取出数组中最前面的一个
    ctx.fillStyle='red'
    ctx.fillRect(0,0,100,100)
    // 保存当前的状态   会保存颜色,位移等等参数
    ctx.save()
    ctx.fillStyle = 'blue'
    ctx.fillRect(100,100,100,100)
    ctx.save()
    ctx.fillStyle = 'pink'
    ctx.fillRect(200,200,100,100)

    // 如果继续画那么默认会以pink为颜色
    // 那么现在恢复一个状态,取出数组中的最前面一项就是blue的颜色
    ctx.restore()
    ctx.fillRect(300,300,100,100)
    // 在恢复一下,取出红色
    ctx.restore()
    ctx.fillRect(400,400,100,100)
  </script>
</body>
| 属性/方法名称 | 使用说明 | 属性类型 | 备注 |
|---|---|---|---|
| save() | 保存状态 | Function | |
| restore() | 恢复上一次保存的状态 | Function |
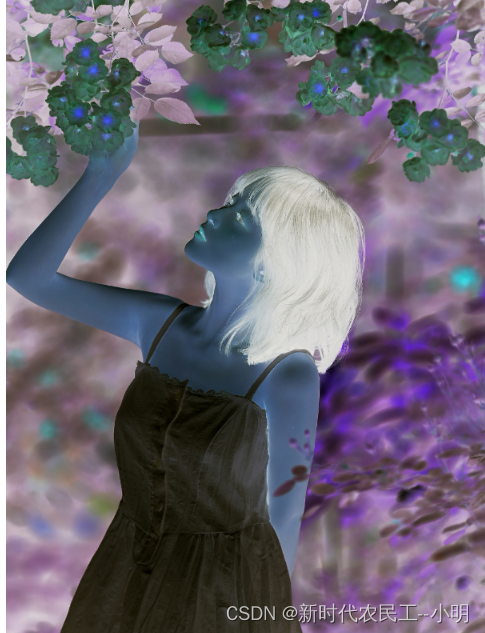
18.像素的操作
对每个像素进行操作后在绘制回去
用案例说话
<html lang="en">
  <body>
    <canvas width="600" height="800"></canvas>
    <script>
      const canvas = document.querySelector('canvas')
      const ctx = canvas.getContext('2d')
      const img = new Image()
      img.src = '../img/1.png'
      img.onload = function(){
        ctx.drawImage(img,0,0,600,800)
        // 获取固定区域的所有像素信息
        const imageData = ctx.getImageData(0,0,300,300)
        console.log(imageData);
        // 对每个像素进行操作后在绘制回去、

        // 置灰操作
        // for(var i =0; i<imageData.data.length;i+=4){
        //   // 每个像素由rgba组成,所以数组中的每4个值为一组 ,所以在循环时i必须+=4
        //   const amv = (imageData.data[i]+imageData.data[i+1]+imageData.data[i+2])/3
        //   imageData.data[i] = amv
        //   imageData.data[i+1] = amv
        //   imageData.data[i+2] = amv
        //   imageData.data[i+3] = 255
        // }
        // 反向取色
        for(var i =0; i<imageData.data.length;i+=4){
          // 每个像素由rgba组成,所以数组中的每4个值为一组 ,所以在循环时i必须+=4
          // imageData.data[i] = 255-imageData.data[i]
          // imageData.data[i+1] = 255-imageData.data[i+1]
          // imageData.data[i+2] = 255-imageData.data[i+2]
          if(i%30==0){
            imageData.data[i+3] = 150
          }else{
            imageData.data[i+3] = 255
          }

        }
        // 把处理完的像素信息在绘制回去
        ctx.putImageData(imageData,0,0)
      }
    </script>
  </body>
</html>

像素操作api整理
| 属性/方法名称 | 使用说明 | 属性类型 | 备注 |
|---|---|---|---|
| getImageData(x,y,width,height) | 返回指定位置和高宽的像素信息 | Function | |
| putImageData(橡树对象,x,y) | 绘制像素信息 | Function | |
| isPointInPath(绘制路径对象,x,y) | 判断某个点是否在需要绘制的路径上 |
19.封装绘制物体
<!DOCTYPE html>
<html lang="en">
<head>
  <meta charset="UTF-8">
  <meta http-equiv="X-UA-Compatible" content="IE=edge">
  <meta name="viewport" content="width=device-width, initial-scale=1.0">
  <title>Document</title>
  <style>
    canvas{
      border: 1px solid red;
      margin: 100px;
    }
  </style>
</head>
<body>
  <canvas width="800" height="800"></canvas>
  <script>
    const canvas = document.querySelector('canvas')
    const ctx = canvas.getContext('2d')
     // 用于存储绘制路径
    // const path2d = new Path2D()
    // path2d.moveTo(300,300)
    // path2d.bezierCurveTo(400,200,600,400,300,600)
    // path2d.moveTo(300,300)
    // path2d.bezierCurveTo(200,200,0,400,300,600)
    // ctx.fillStyle = 'red'
    // ctx.fill(path2d)

    class Love {
      path2d = {}
      constructor(x,y){
        this.x = x
        this.y = y
        canvas.onmousemove = (e)=>{
          // 判断某个点是否在需要绘制的路径上
          const isIn = ctx.isPointInPath(this.path2d,e.offsetX,e.offsetY)
          console.log(isIn);
        }
      }
      setMoveTo(x,y){
        this.x = x
        this.y = y
        return this
      }
      deaw(){
        const path2d = new Path2D()
        path2d.moveTo(this.x,this.y)
        path2d.bezierCurveTo(this.x+100,this.y-100,this.x+300,this.y+100,this.x,this.y+300)
        path2d.moveTo(this.x,this.y)
        path2d.bezierCurveTo(this.x-100,this.y-100,this.x-300,this.y+100,this.x,this.y+300)
        ctx.fillStyle = 'red'
        ctx.save()
        ctx.fill(path2d)
        this.path2d = path2d
        ctx.restore()
      }
    }
    requestAnimationFrame(()=>{
      console.log(11);
    })
    const love = new Love(400,300)
    love.deaw()
  </script>
</body>
</html>
20.制作画笔,手绘签名
<!DOCTYPE html>
<html lang="en">
<head>
  <meta charset="UTF-8">
  <meta http-equiv="X-UA-Compatible" content="IE=edge">
  <meta name="viewport" content="width=device-width, initial-scale=1.0">
  <title>Document</title>
  <style>
    canvas{
      border: 1px solid red;
    }
    .option{
      width: 800px;
      margin-top: 10px;
      text-align: center;
    }
  </style>
</head>
<body>
  <canvas width="800" height="400"></canvas>
  <br />
  <div class="option">
    <button class="wide">粗线条</button>
    <button class="thin">细线条</button>
    <button class="preserve">保存签名</button>
    <input type="color" />
    <button class="xpc">橡皮差</button>
    <button class="clonsRect">清空画布</button>
  </div>
  <script>
    const canvas = document.querySelector('canvas')
    const {width,height} = canvas
    const ctx = canvas.getContext('2d')
    // 线段连接处样式
    ctx.lineJoin ="round"
    // 线段两端样式
    ctx.lineCap ="round"
    const wide= document.querySelector('.wide')
    const thin= document.querySelector('.thin')
    const color = document.querySelector('[type=color]')
    const xpc= document.querySelector('.xpc')
    const clonsRect= document.querySelector('.clonsRect')
    const preserve = document.querySelector('.preserve')
    wide.onclick = function(){
      ctx.globalCompositeOperation ="source-over"
      ctx.lineWidth = 10
    }
    thin.onclick = function(){
      ctx.globalCompositeOperation ="source-over"
      ctx.lineWidth = 1
    }
    clonsRect.onclick = function(){
      ctx.clearRect(0,0,width,height)
    }
    // 橡皮擦
    xpc.onclick = function(){
      // 原理:在选中橡皮擦时,把合成图层改为的相交的变透明
      ctx.globalCompositeOperation ="destination-out"
      ctx.lineWidth = 20
    }
    color.onchange = function(e){
      ctx.strokeStyle = e.target.value
      console.log(e);
    }
    preserve.onclick = function(){
      // 得到一个base64
      const imgUrl = canvas.toDataURL()
      // const img = new Image()
      // img.src = imgUrl
      // document.body.append(img)
      const a = document.createElement('a')
      a.download = '签名'
      a.href = imgUrl
      a.click()
    }
    // 判断是否开始画,当鼠标按下并移动时
    let isin = false

    // 当鼠标按下时移动画笔到指定位置,并开发可以绘制变量
    canvas.onmousedown = function(e){
      isin=true
      ctx.beginPath()
      var x = e.offsetX
      var y = e.offsetY
      ctx.moveTo(x,y)
    }
    // 当鼠标放开时。停止绘制,
    canvas.onmouseup = function(e){
      isin = false
    }
    // 当鼠标移出canvas区域时也停止绘制
    canvas.onmouseleave = function (e){
      isin = false
    }
    // 当鼠标在canvas上移动时,并且鼠标处于按下状态并开始绘制
    canvas.onmousemove = function(e){
      if(!isin)return
      var x = e.offsetX
      var y = e.offsetY
      ctx.lineTo(x,y)
      ctx.stroke()
    }
  </script>
</body>
</html>
21.制作时钟
<!DOCTYPE html>
<html lang="en">
  <head>
    <meta charset="UTF-8" />
    <meta http-equiv="X-UA-Compatible" content="IE=edge" />
    <meta name="viewport" content="width=device-width, initial-scale=1.0" />
    <title>Document</title>
  </head>
  <body>
    <canvas width="800" height="600"></canvas>
    <script>
      const canvas = document.querySelector('canvas')
      const ctx = canvas.getContext('2d')
      function render() {
        ctx.clearRect(0,0,800,600)
        ctx.save()
        // 移动坐标点
        ctx.translate(400, 300)
        // 旋转坐标系
        ctx.rotate(-Math.PI / 2)
        // 缓存上面位移及旋转操作
        ctx.save()
        // 绘制小时刻度
        for (var i = 0; i < 12; i++) {
          ctx.beginPath()
          ctx.moveTo(170, 0)e
          ctx.lineTo(190, 0)
          ctx.lineWidth = 6
          ctx.strokeStyle = 'gray'
          ctx.stroke()
          ctx.closePath()
          // 每一次旋转都是基于上一次的位置尔旋转
          ctx.rotate((2 * Math.PI) / 12)
        }
        // 小时刻度绘制完成后恢复之前的操作,不在保留,以就是说不在保留之前绘制小时刻度的rotate旋转
        ctx.restore()

        // 同理可得绘制分钟刻度的方法

        ctx.save()
        for (var i = 0; i < 60; i++) {
          ctx.beginPath()
          ctx.moveTo(180, 0)
          ctx.lineTo(190, 0)
          ctx.lineWidth = 2
          ctx.strokeStyle = 'gray'
          ctx.stroke()
          ctx.closePath()
          // 每一次旋转都是基于上一次的位置尔旋转
          ctx.rotate((2 * Math.PI) / 60)
        }
        ctx.restore()

        // 获取时间
        const date = new Date()
        let h = date.getHours()
        const m = date.getMinutes()
        const s = date.getSeconds()
        // 小时是24小时的,表盘只有12小时,需要处理一下
        h = h >= 12 ? h - 12 : h

        ctx.save()
        // 先绘制秒帧
        // 先按现在的秒数进行旋转
        ctx.rotate(((2 * Math.PI) / 60) * s)
        ctx.beginPath()
        ctx.moveTo(-30, 0)
        ctx.lineTo(190, 0)
        ctx.lineWidth = 2
        ctx.strokeStyle = 'red'
        ctx.stroke()
        ctx.closePath()
        ctx.restore()
        // 同上道理 绘制分针和时针
        // 先按现在的秒数进行旋转
        ctx.save()
        ctx.rotate(((2 * Math.PI) / 60) * m + ((2 * Math.PI) / 60 / 60) * s)
        ctx.beginPath()
        ctx.moveTo(-20, 0)
        ctx.lineTo(150, 0)
        ctx.lineWidth = 4
        ctx.strokeStyle = 'blue'
        ctx.stroke()
        ctx.closePath()
        ctx.restore()

        // 绘制时针
        ctx.save()
        ctx.rotate(((2 * Math.PI) / 12) * h + ((2 * Math.PI) / 12 / 60) * m)
        ctx.beginPath()
        ctx.moveTo(-10, 0)
        ctx.lineTo(130, 0)
        ctx.lineWidth = 6
        ctx.strokeStyle = '#000'
        ctx.stroke()
        ctx.closePath()
        ctx.restore()
        // 一定要多恢复一次,把所有的缓存都清除调
        ctx.restore()
        requestAnimationFrame(render)
      }
      render()
    </script>
  </body>
</html>


 744
744


 被折叠的 条评论
为什么被折叠?
被折叠的 条评论
为什么被折叠?
 到【灌水乐园】发言


