


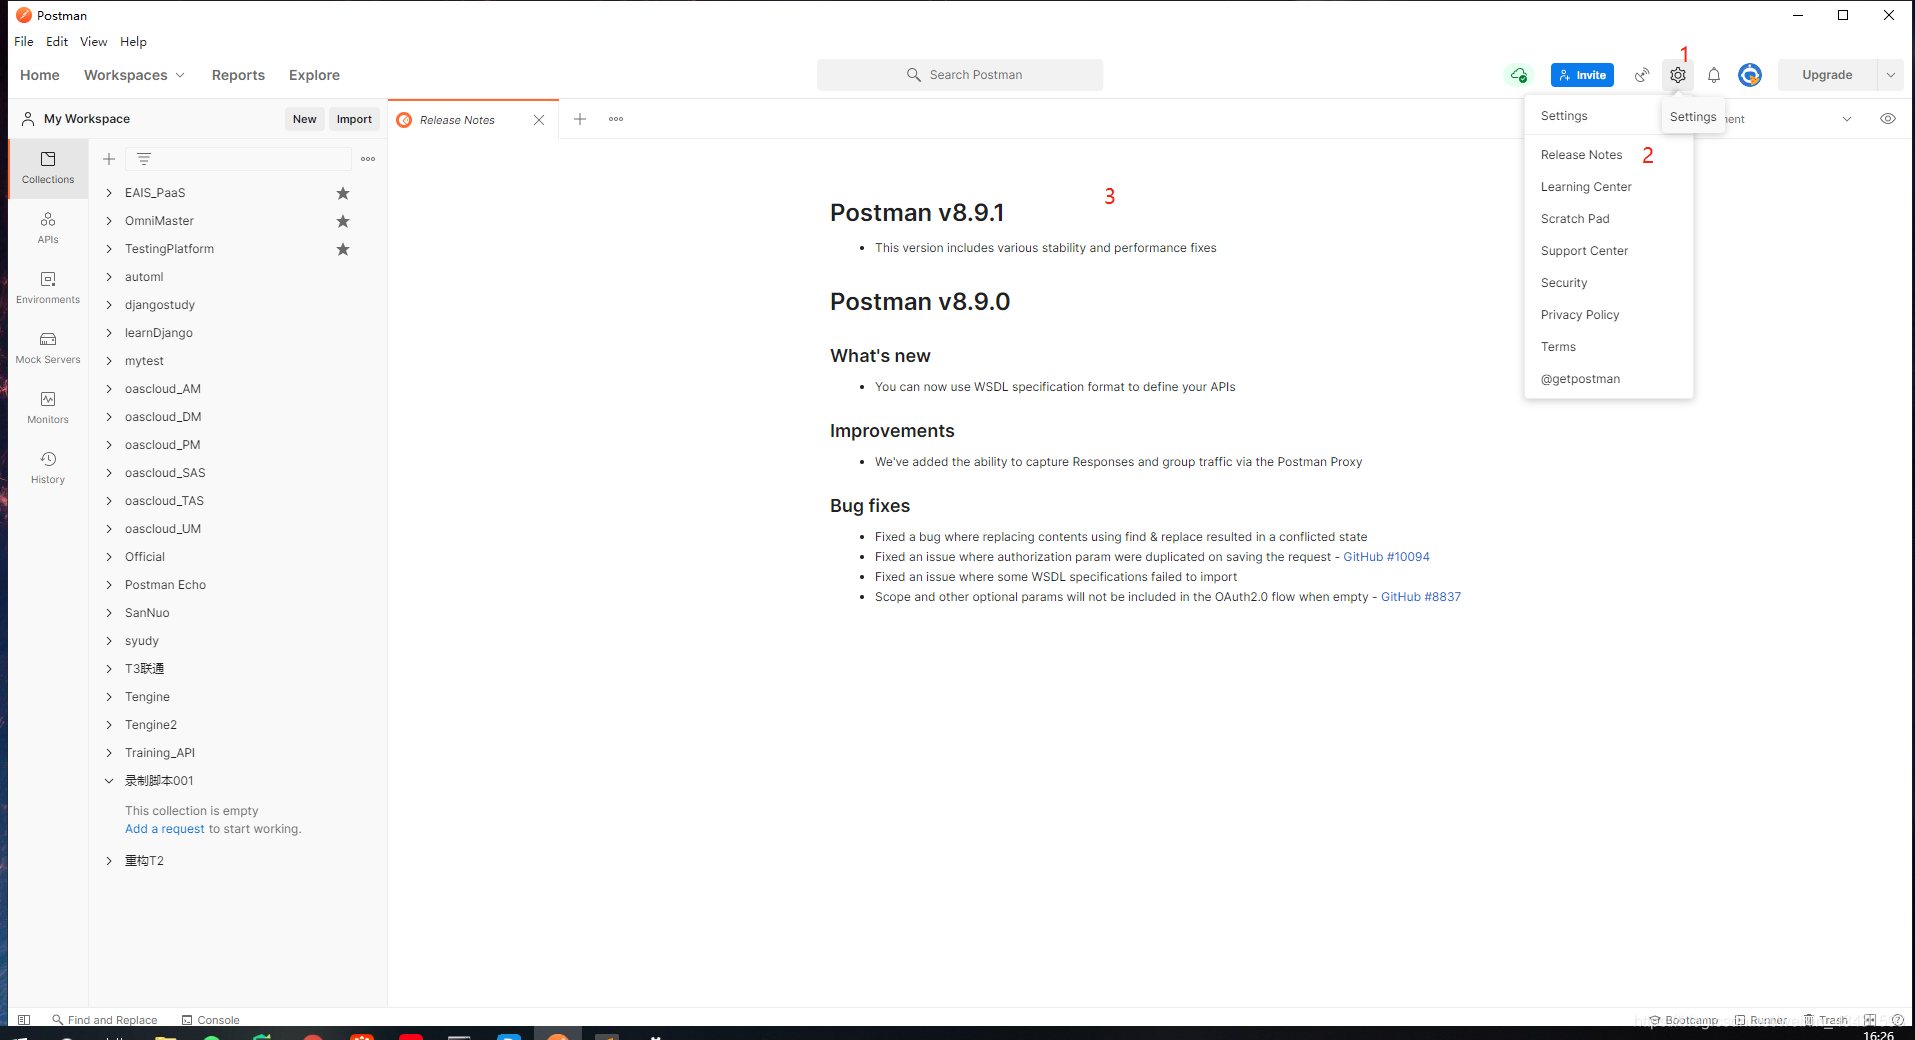
查看Postman版本
如图操作,查看版本:Postman v8.9.1
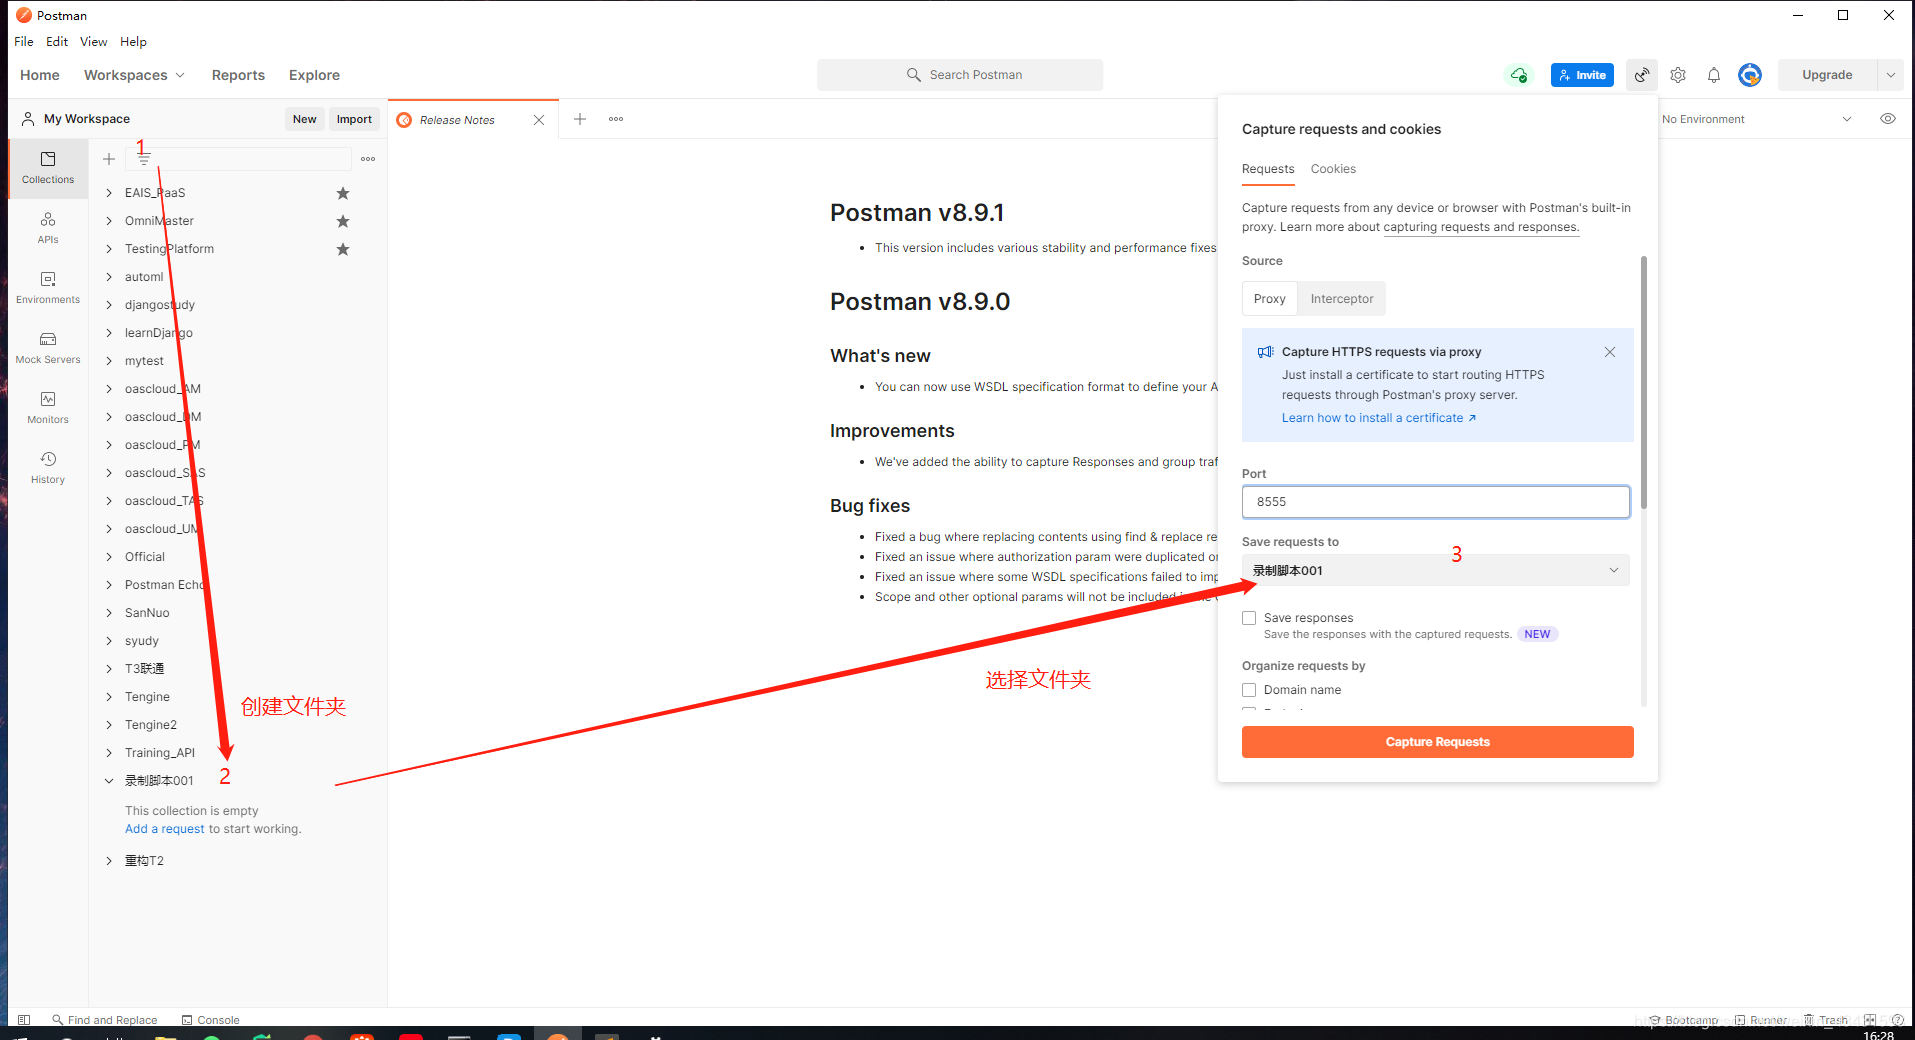
设置抓包选项
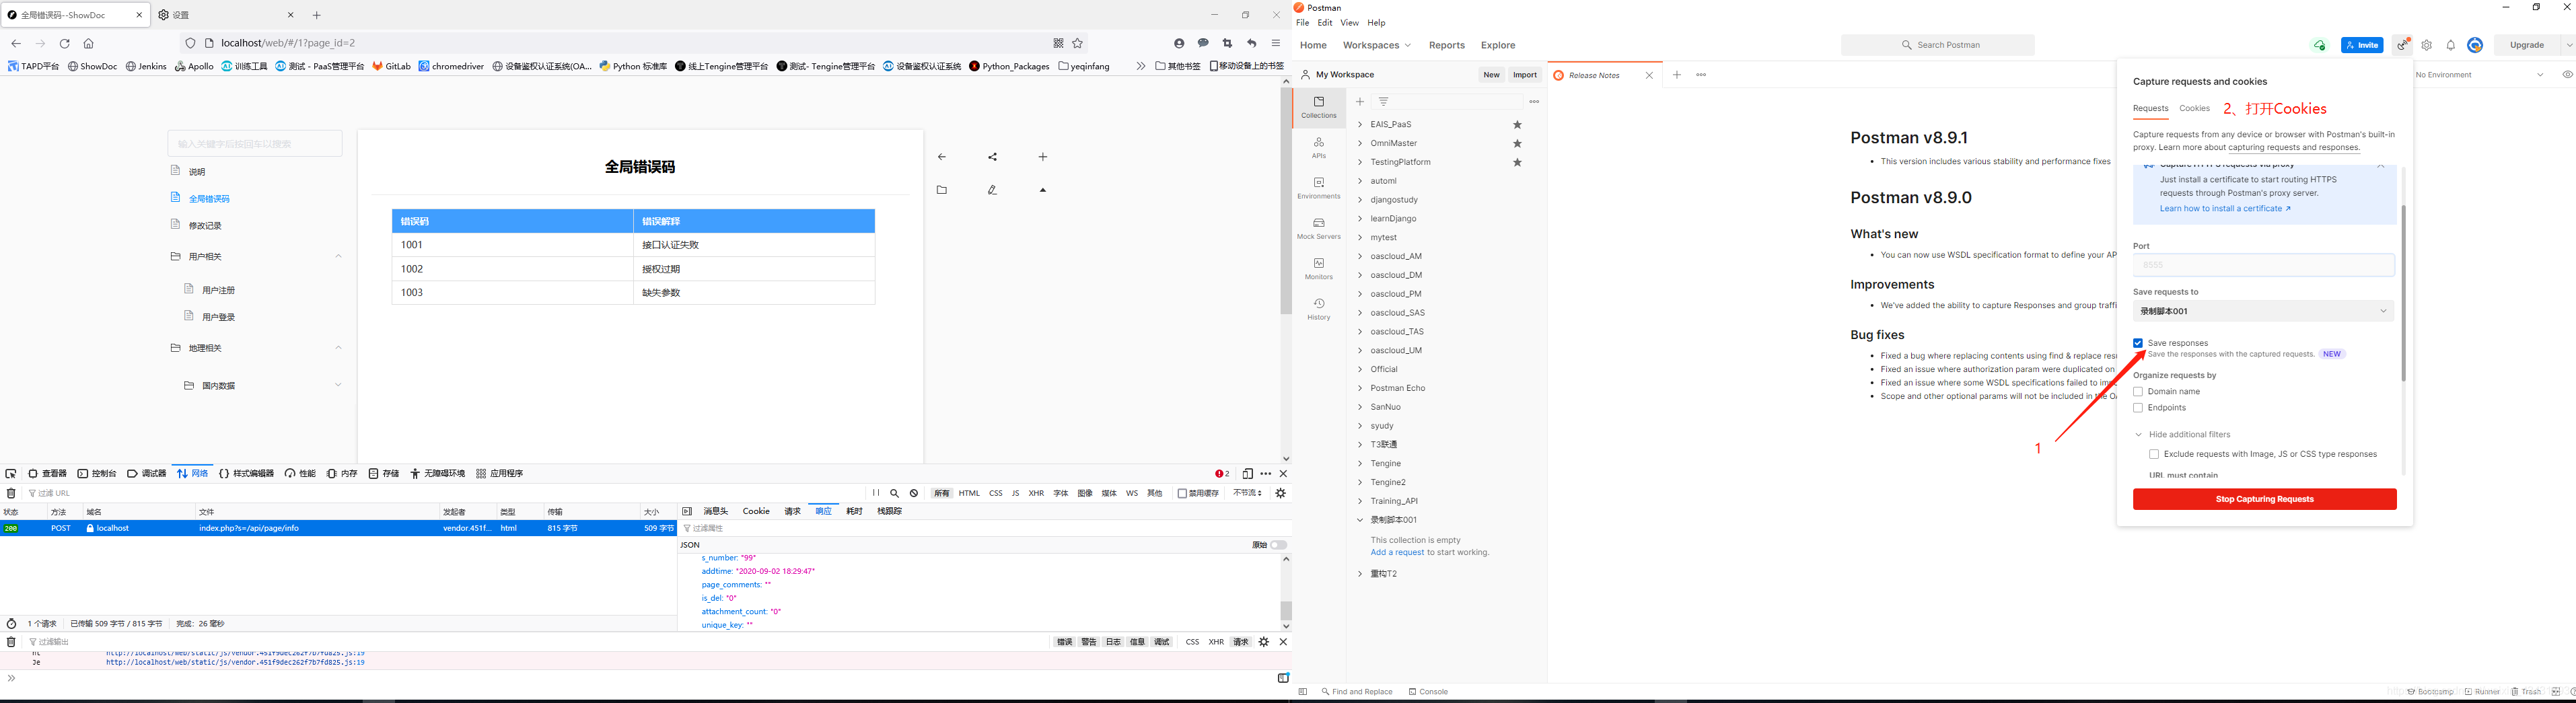
1、如图操作,简单设置了抓包的端口“8555”和存放文件夹“录制脚本001”,点击“Capyure Requests”开始脚本录制。
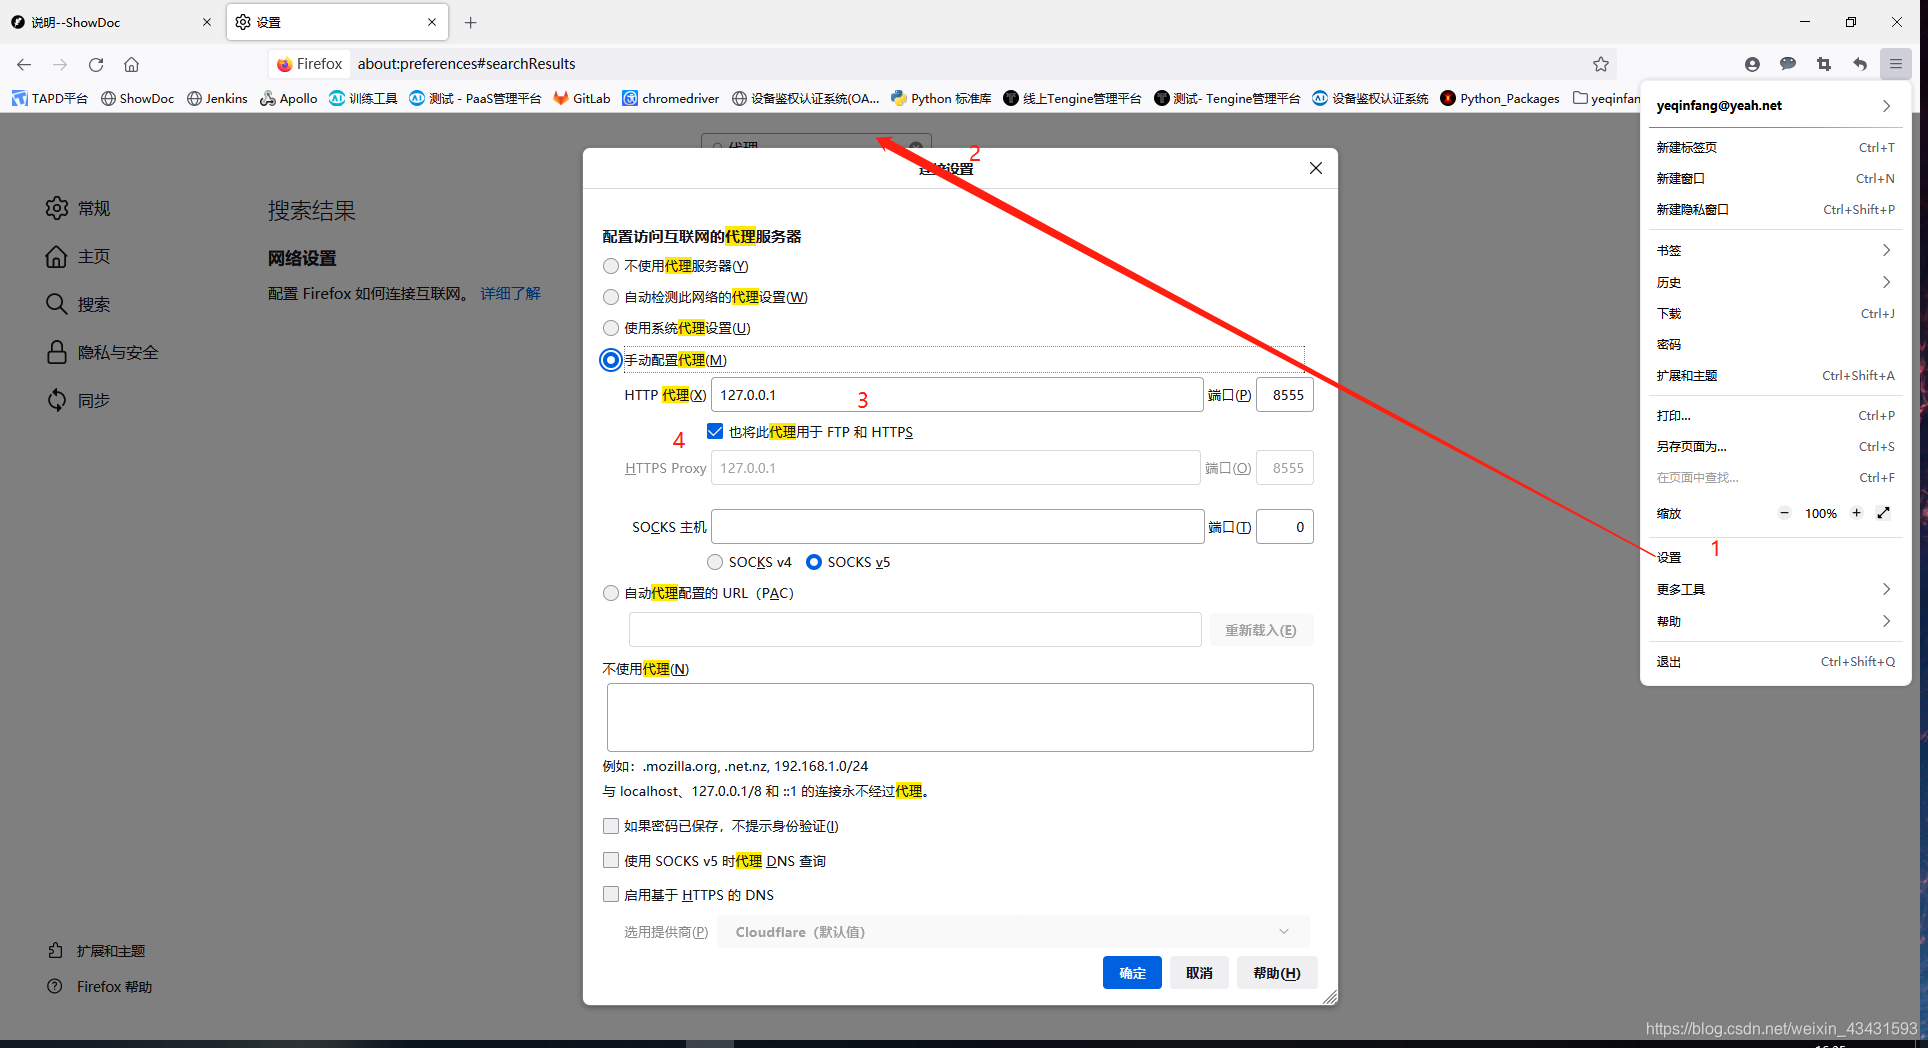
2、设置浏览器并抓包
如图,是对火狐浏览器代理的设置操作,并根据postman的设置,进行代理设置
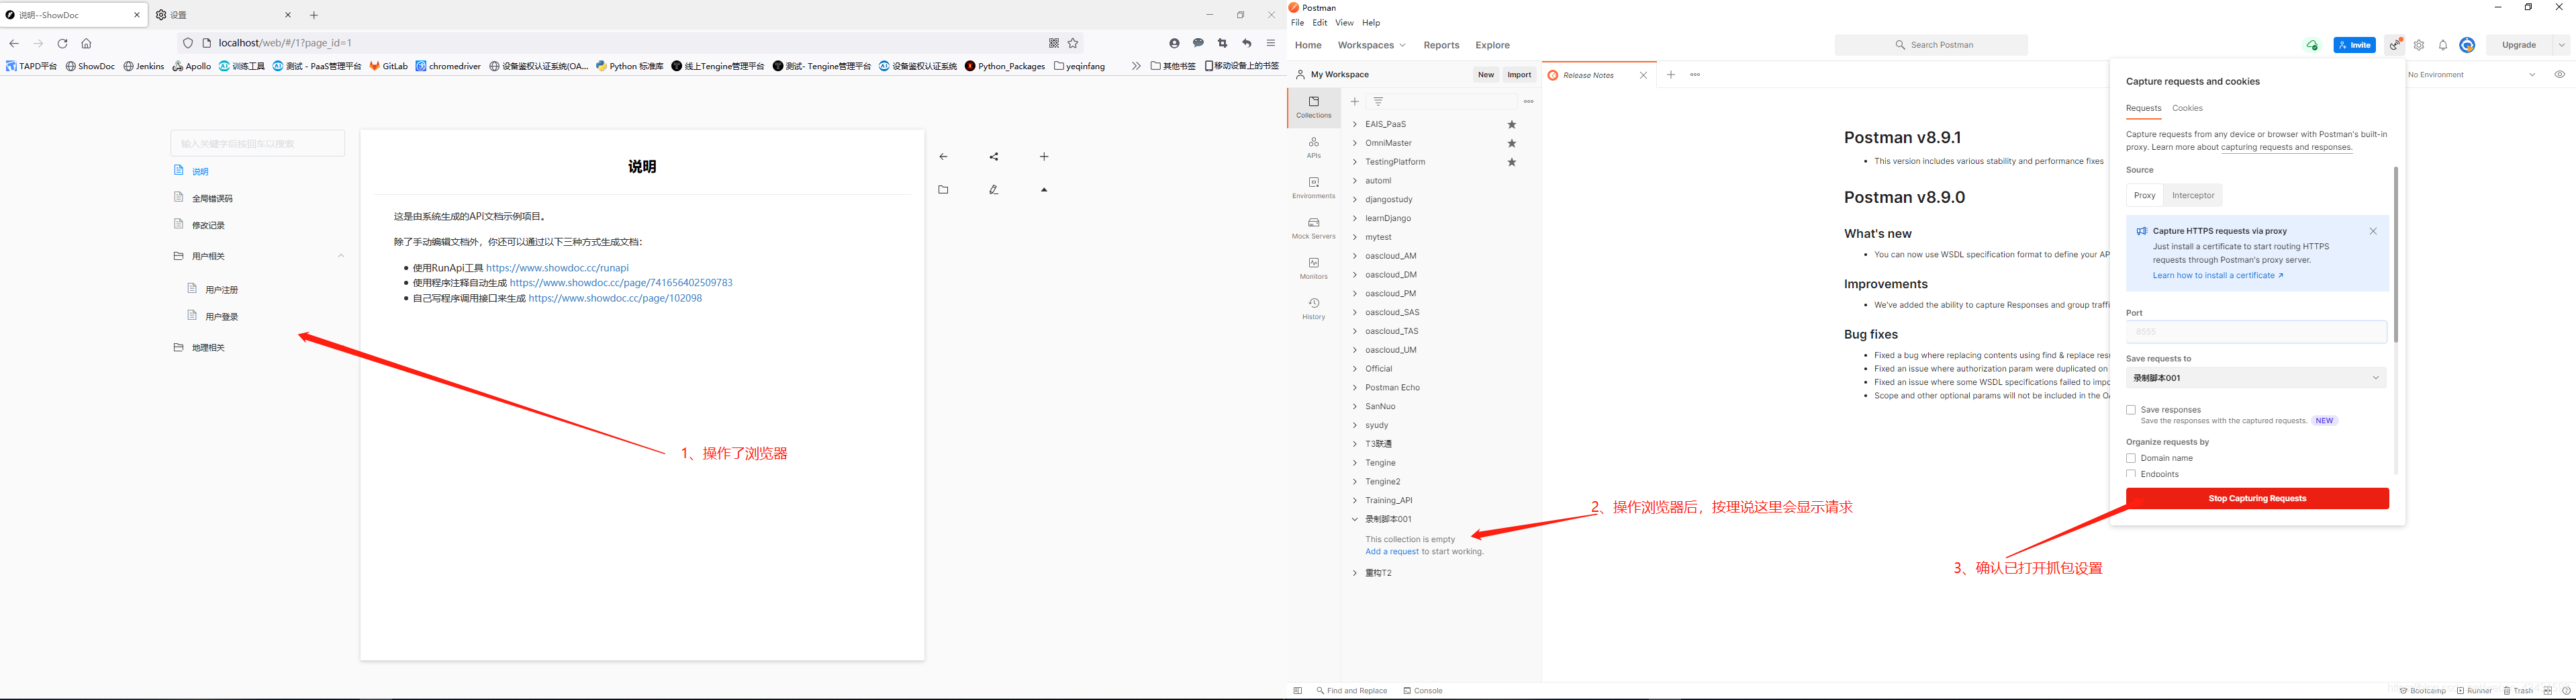
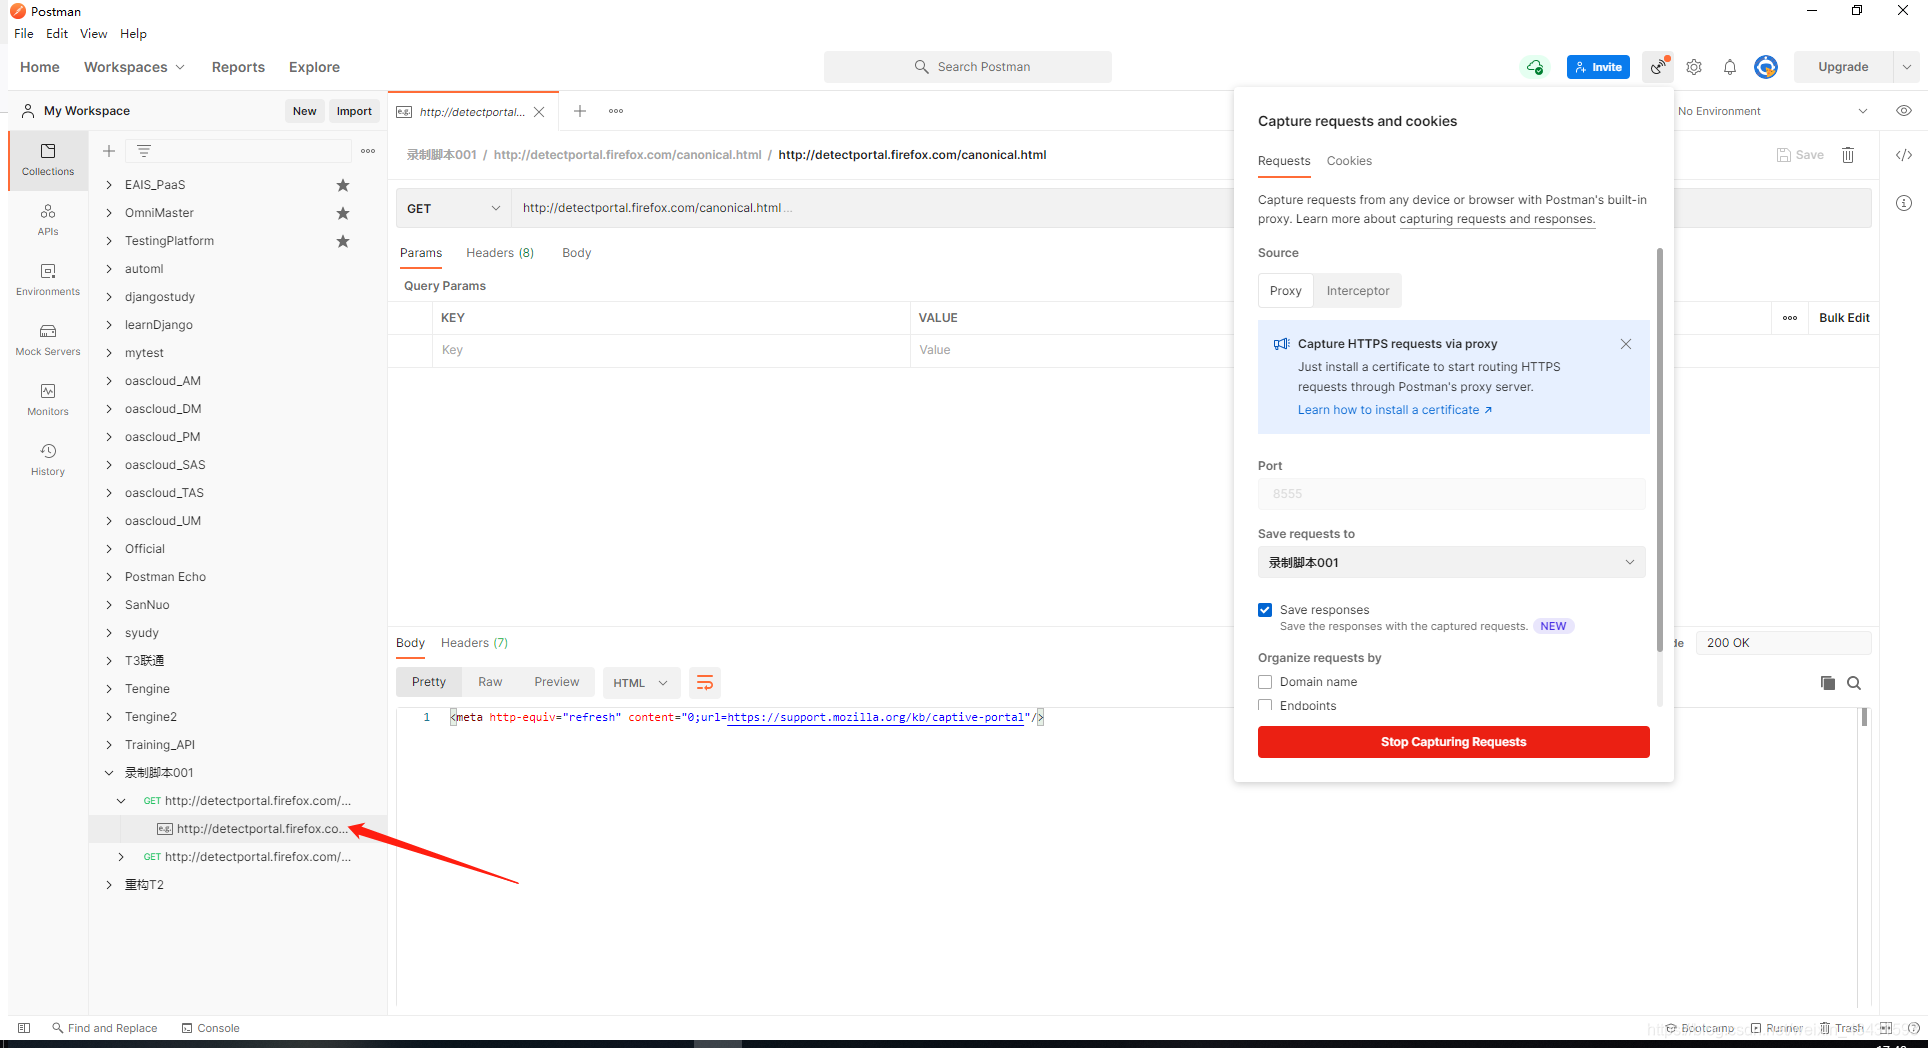
3、操作浏览器进行抓包
如图操作,没有抓到浏览器包,这是为什么呢?
4、问题排查
首先查看抓包描述:Capture requests from any device or browser with Postman’s built-in proxy. Learn more about
capturing requests and responses.
按理说只要设置了代理,就能够捕获到相关请求才对。我们根据提示查阅资料看看(链接:https://learning.postman.com/docs/sending-requests/capturing-request-data/capturing-http-requests/)
(1)根据官网描述,提供两种抓包方式,目前,我们采取的是代理方式 “Built-in proxy”
Capturing HTTP requests
If you are using APIs to build client-side applications - mobile apps, websites, or desktop applications - you may want to see the actual HTTP and HTTPS request traffic that’s being sent and received in the application. Sometimes you might discover APIs that aren’t even documented. Postman gives you tools to see and capture this network traffic.
When using the Postman app, you can capture the HTTP traffic in one of two ways:
•Built-in proxy
•Interceptor
(2)根据官方描述,使用postman的代理后,会将请求转发给服务器,并将响应存一份储到代理服务器上,类似于google的postman扩展
Built-in proxy
The Postman app has a built-in proxy that can capture HTTP traffic:
1.The Postman app listens for any calls made by the client app or device.
2.The Postman proxy captures the request and forwards it to the server.
3.The server returns a response to the Postman proxy, where it can also be saved.
4.The response is returned back to the client.
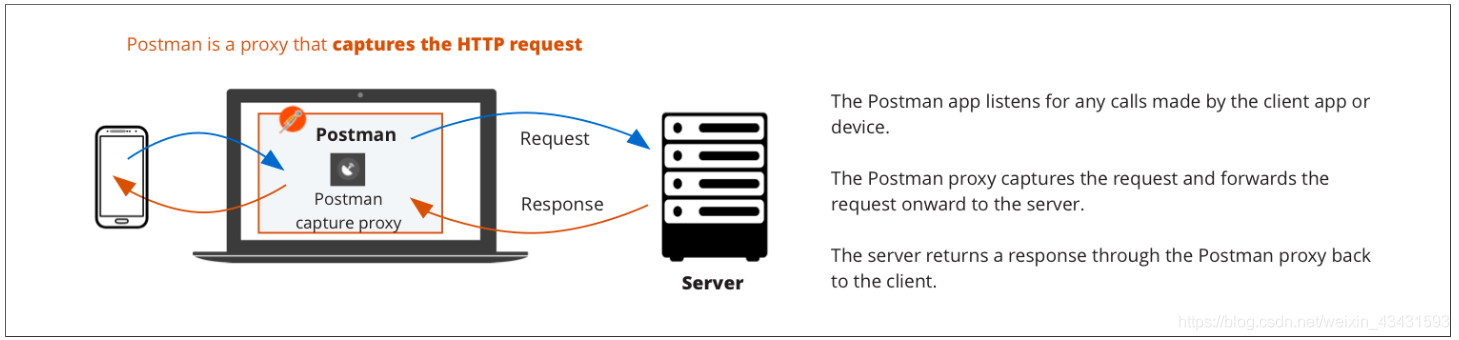
Similar to the Interceptor Chrome extension, the Postman app proxy also intercepts and captures your requests. Additionally, it can capture responses. You can log all network requests and responses under the History tab in the sidebar, or in a collection.
(3)根据官方步骤,检查自己的操作步骤,发现没有打开cookies和保存response
Using Postman’s proxy example
In this tutorial, you will use Postman’s proxy feature to inspect HTTP communication going to and from your phone. To get started, make sure your computer and phone are connected to the same local wireless network.
Step 1: Set up the proxy in Postman
1.Open the Capture requests and cookies modal in the Postman app by clicking the icon in the header toolbar.

Capture requests and cookies icon
2.In the Requests tab, set Source to Proxy.
3.Make note of the port mentioned in the proxy settings. In this example, it’s set for the default port 5555.
4.Set Save requests to to History to store requests in the History sidebar panel. You can also select a collection from the list and save the requests there. proxy settings modal
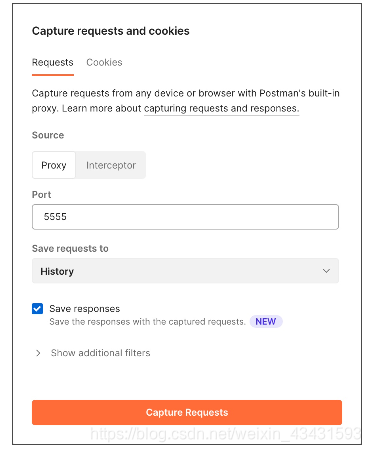
5.Select Save responses to also save each request’s responses. They will be saved alongside the requests in the same collection or history.
In responses with a content-type containing images, audio, or video, content is intercepted but not captured. The only information captured is response headers, time taken, and the status code.
6.There are additional filters you can use to limit the requests and responses captured. You can do the following:
◦Exclude requests with image, JS, or CSS responses.
◦Only capture URLs containing a string or a regular expression.
◦Not capture URLs containing a string or a regular expression.
◦Only capture the methods specified in a comma-separated list
Grouping requests and responses
By default, requests and responses will be saved chronologically. If you save them to a collection, you can also store them grouped by domain name, endpoints, or both.
1.In Save requests to, specify a collection to store requests and responses.
2.Under Organize requests by, select Domain name, Endpoints, or both. Your requests and responses will be organized in folders in the selected collection.
(3)尝试打开cookies和保存response,依旧没能抓到包
(4)奇怪的问题
为什么会出现这样的问题呢?太奇怪了!先试试万能的重启:
1、重启Postman
2、选中存储请求的文件夹,并开启“capture request”
3、开启“capture cookies”
4、重启火狐浏览器
如图,发现会捕捉到一些请求,但是操作火狐浏览器,还是没有捕捉到任何请求。
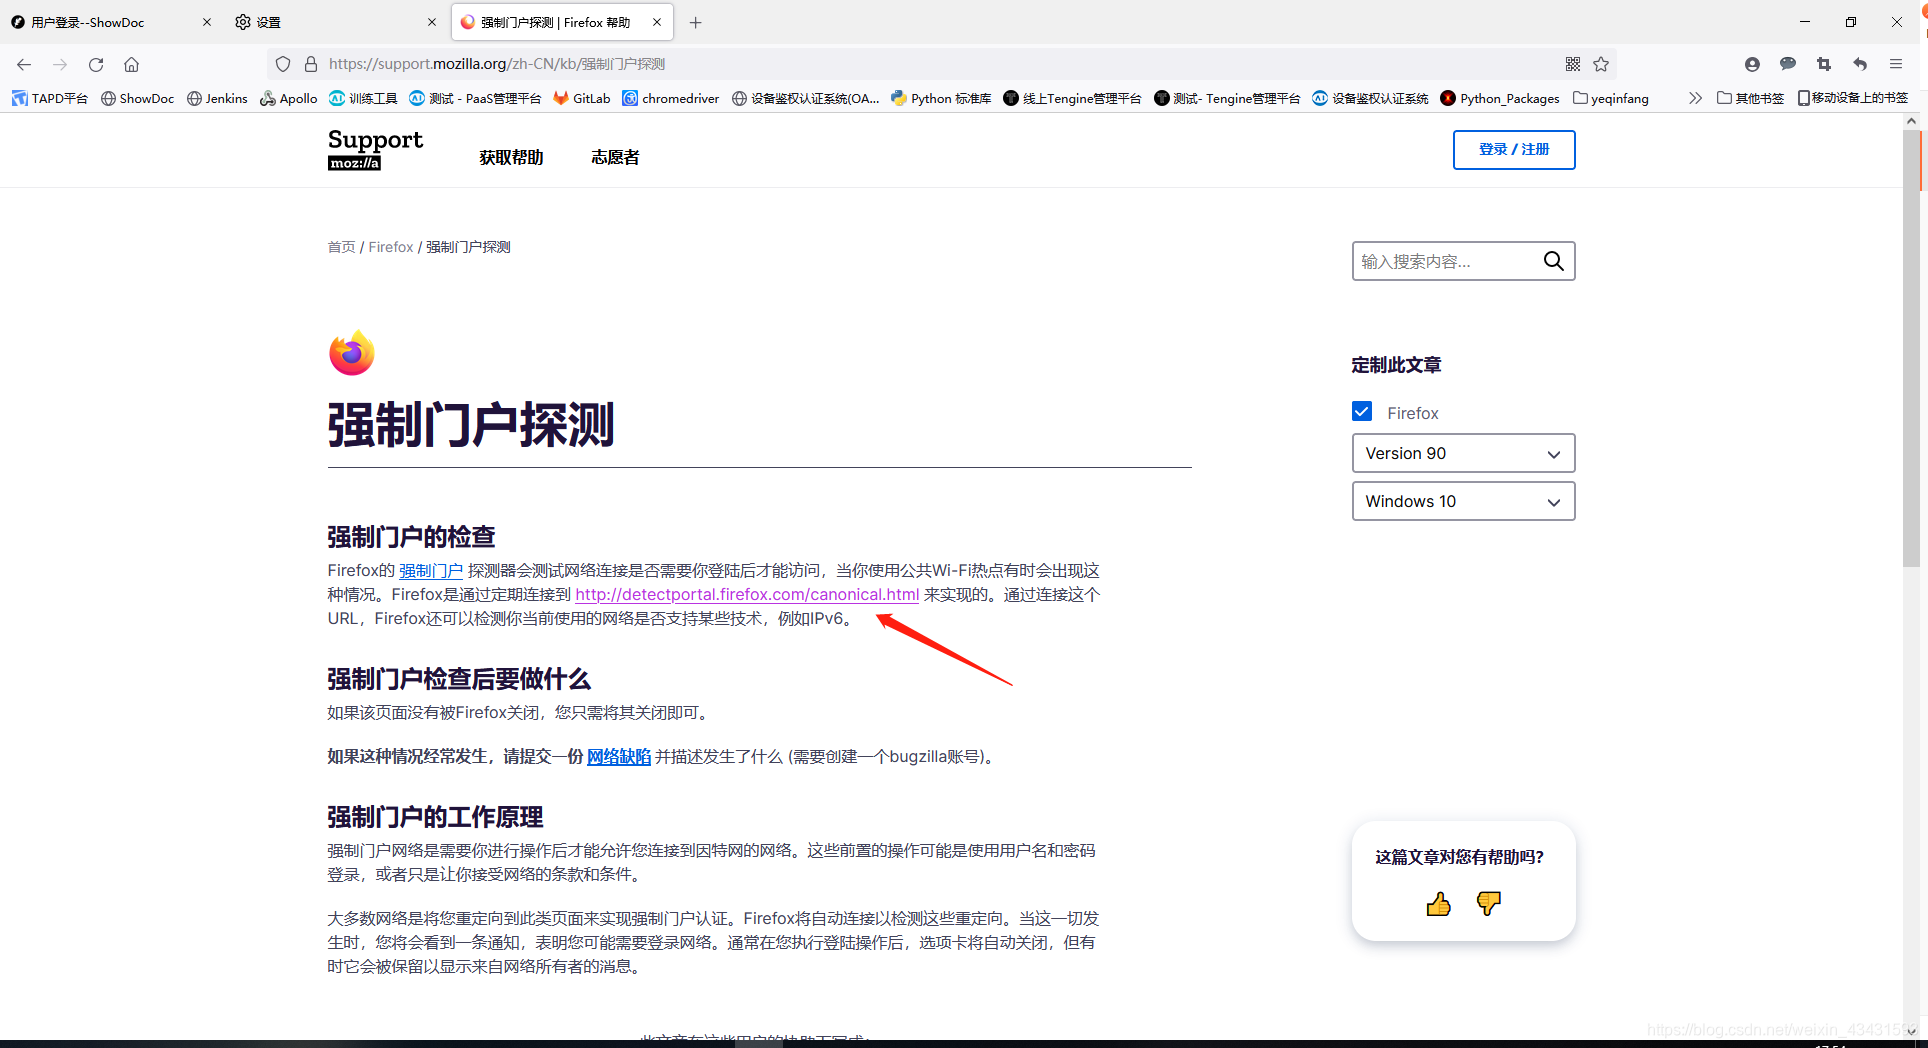
(5)网页打开捕捉到的请求
强制门户探测?我就一个简单的代理,怎么遇到这么多问题啊?
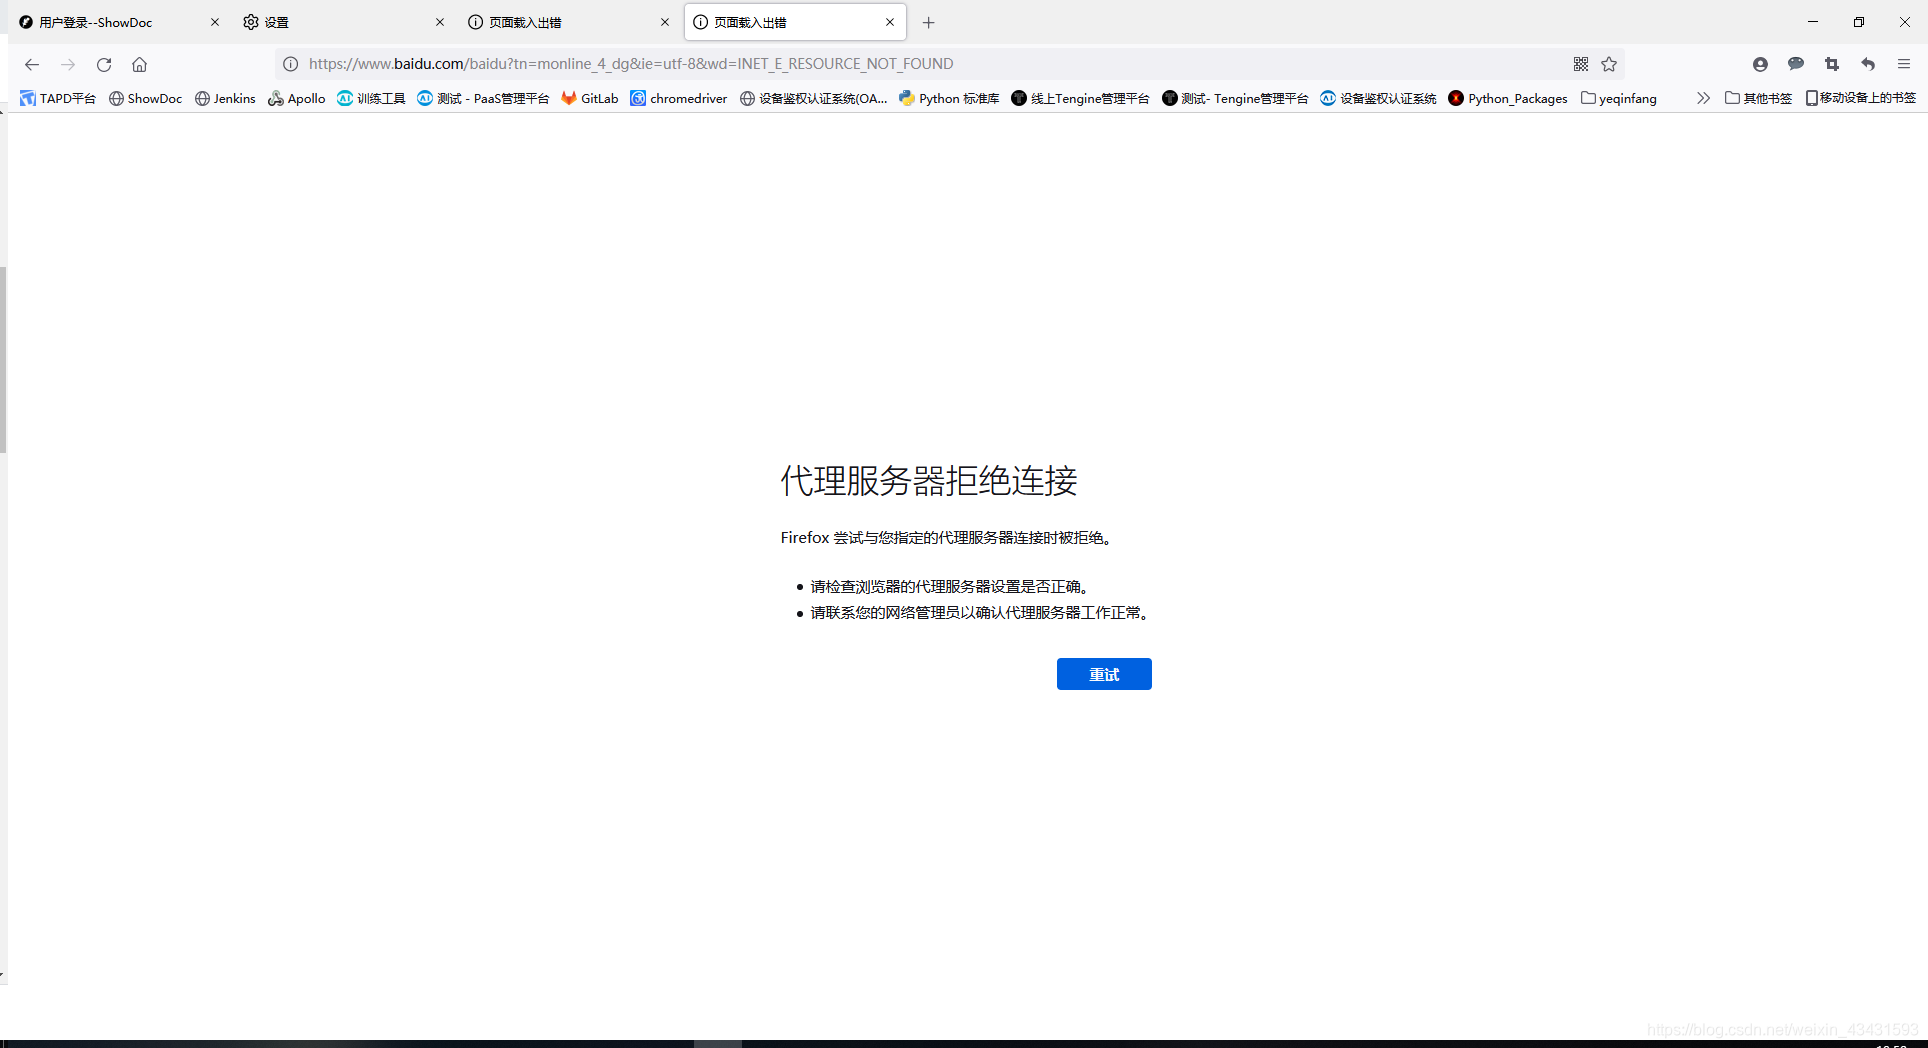
(6)查看网页报错
如图,随便打开一个网址,发现代理服务器拒绝了连接。因为请求的是https,因此被拒绝了。
(7)按照官方文档,安装https证书
Windows
You need to Install the OpenSSL module to generate the certificate.(安装方式:https://learning.postman.com/docs/sending-requests/capturing-request-data/capturing-http-requests/#requirements-to-use-the-openssl-module)
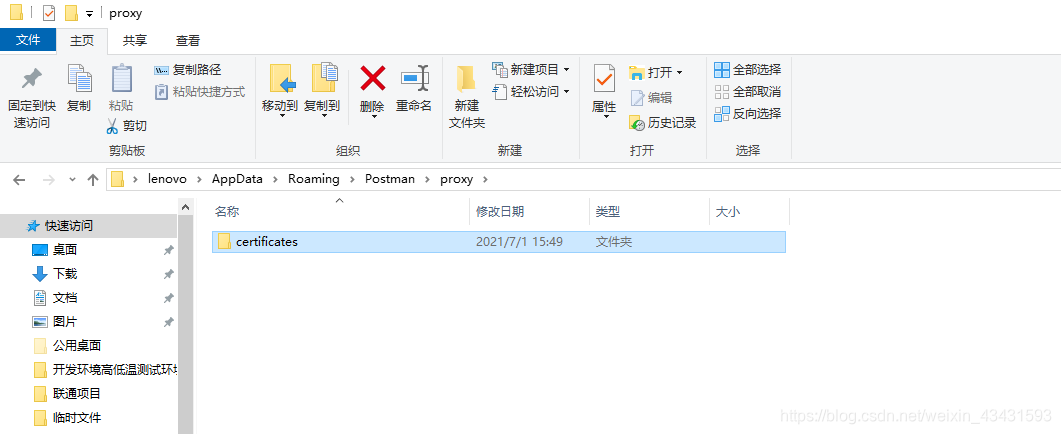
1.From Windows File Explorer, navigate to %APPDATA%\Postman\proxy. Typically, it will be located at: C:\Users\AppData\Roaming\Postman\proxy Navigate to crt file
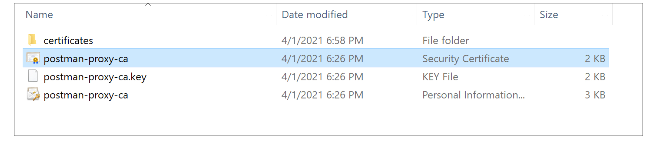
然而,执行到上面一步时,我发现我的路径少了3个文件,因此没办法再继续(也许需要通过OpenSSL去生成证书,然而官方文档【安装方式】没有该步骤):
没想到吧,一个小问题竟然有这么多惊喜!!!先这样吧,改日再战!


 8054
8054

 被折叠的 条评论
为什么被折叠?
被折叠的 条评论
为什么被折叠?
 到【灌水乐园】发言


