


Android动画学习之逐帧动画
逐帧动画
使用图像序列来实现逐帧动画的过程。
☆☆☆同定义补帧动画类似,我们通过XML文件的方式定义逐帧动画。
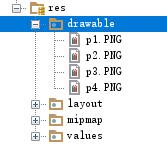
1.在res文件夹中的drawable文件夹中,放入动画帧。
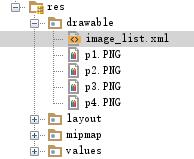
2.在drawable文件夹下建立逐帧动画的XML文件,来定义动画帧。
3.将建立的动画XML文件,作为图像加载到控件中。
4.使用AnimationDrawable创建对象来获取动画资源。
☆☆☆使用Android Studio实现逐帧动画。
1.打开Android Studio,新建工程后,在res文件夹中drawable文件夹,放入图片,我放入4张图片。

2.在res文件夹中drawable文件夹建立XML文件,编写代码来设置动画。
<?xml version="1.0" encoding="utf-8"?>
<animation-list xmlns:android="http://schemas.android.com/apk/res/android">
    <item android:drawable="@drawable/p1" android:duration="500"/>
    <item android:drawable="@drawable/p2" android:duration="500"/>
    <item android:drawable="@drawable/p3" android:duration="500"/>
    <item android:drawable="@drawable/p4" android:duration="500"/>
</animation-list>
3.在activity_main.xml中,建立1个Button,1个ImageView,将建立的动画XML文件,作为图像加载到ImageView控件中。

<?xml version="1.0" encoding="utf-8"?>
<RelativeLayout xmlns:android="http://schemas.android.com/apk/res/android"
    xmlns:app="http://schemas.android.com/apk/res-auto"
    xmlns:tools="http://schemas.android.com/tools"
    android:id="@+id/activity_main"
    android:layout_width="match_parent"
    android:layout_height="match_parent"
    android:paddingBottom="@dimen/activity_vertical_margin"
    android:paddingLeft="@dimen/activity_horizontal_margin"
    android:paddingRight="@dimen/activity_horizontal_margin"
    android:paddingTop="@dimen/activity_vertical_margin"
    tools:context="lession.example.com.androidlession4_10.MainActivity">

    <Button
        android:layout_width="match_parent"
        android:layout_height="wrap_content"
        android:layout_alignParentTop="true"
        android:id="@+id/button"
        android:layout_alignParentStart="true"
        android:text="逐帧动画演示"
        android:textSize="20sp"
        android:textColor="@android:color/holo_red_dark" />

    <ImageView
        android:layout_width="match_parent"
        android:layout_height="wrap_content"
        android:background="@drawable/image_list"
        android:id="@+id/imageView"
        android:layout_below="@+id/button"
        android:layout_alignParentEnd="true"
        android:layout_marginTop="28dp" />
</RelativeLayout>
4.在MainActivity.java中,编写相关代码。
package lession.example.com.androidlession4_10;

import android.graphics.drawable.AnimationDrawable;
import android.support.v7.app.AppCompatActivity;
import android.os.Bundle;
import android.view.View;
import android.widget.Button;
import android.widget.ImageView;

public class MainActivity extends AppCompatActivity {
    @Override
    protected void onCreate(Bundle savedInstanceState) {
        super.onCreate(savedInstanceState);
        setContentView(R.layout.activity_main);
        Button bt = (Button) findViewById(R.id.button);
        final ImageView iv = (ImageView) findViewById(R.id.imageView);
        final AnimationDrawable mAd = (AnimationDrawable) iv.getBackground();
        bt.setOnClickListener(new View.OnClickListener() {
            @Override
            public void onClick(View v) {
                mAd.start();
            }
        });
    }
}
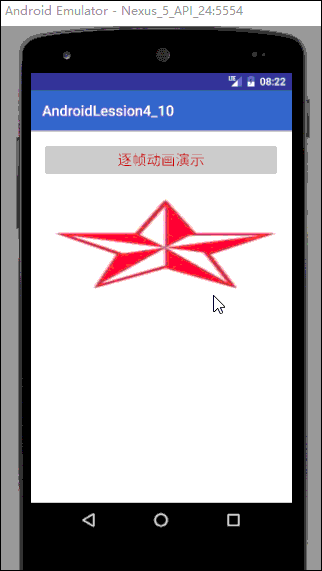
运行结果:
这就是逐帧动画的使用,如果转载以及CV操作,请务必注明出处,谢谢!


 952
952


 被折叠的 条评论
为什么被折叠?
被折叠的 条评论
为什么被折叠?
 到【灌水乐园】发言


