


 本文详细介绍了如何在SpringBoot应用中管理Actuator端点的安全性,包括全开/部分开放端点、端点映射、使用SpringSecurity进行端口保护和配置登录验证的步骤。
目录
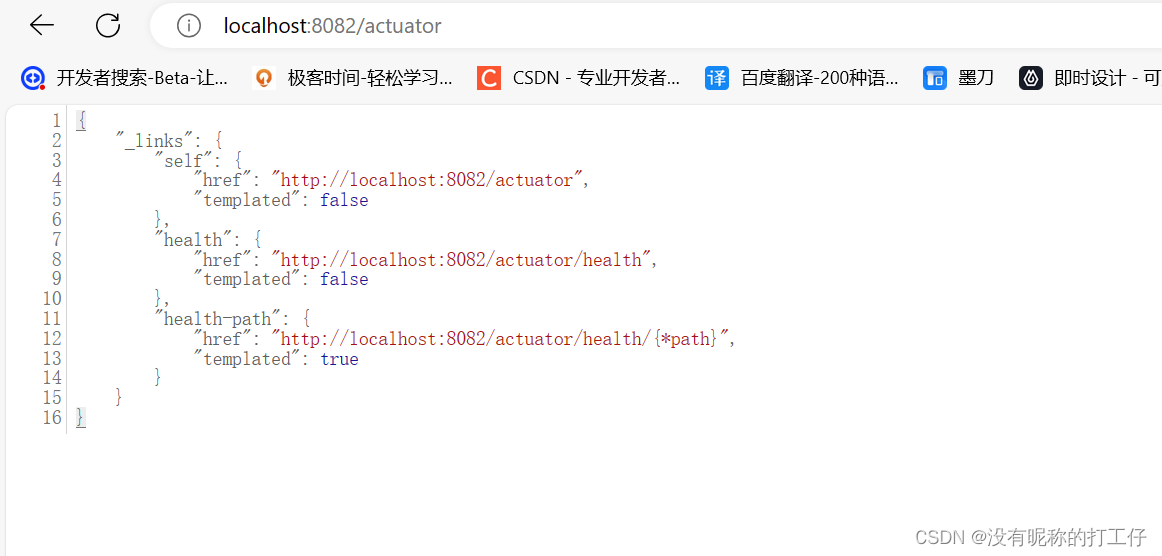
目前springboot默认暴露“/actuator、/health”端点。通过访问“/actuator”端点即可看到:
开放全部端点(不安全):
如果想要打开全部端点,可以在配置文件application.yml中添加以下配置
management:
  endpoints:
    web:
      exposure:
        include: "*"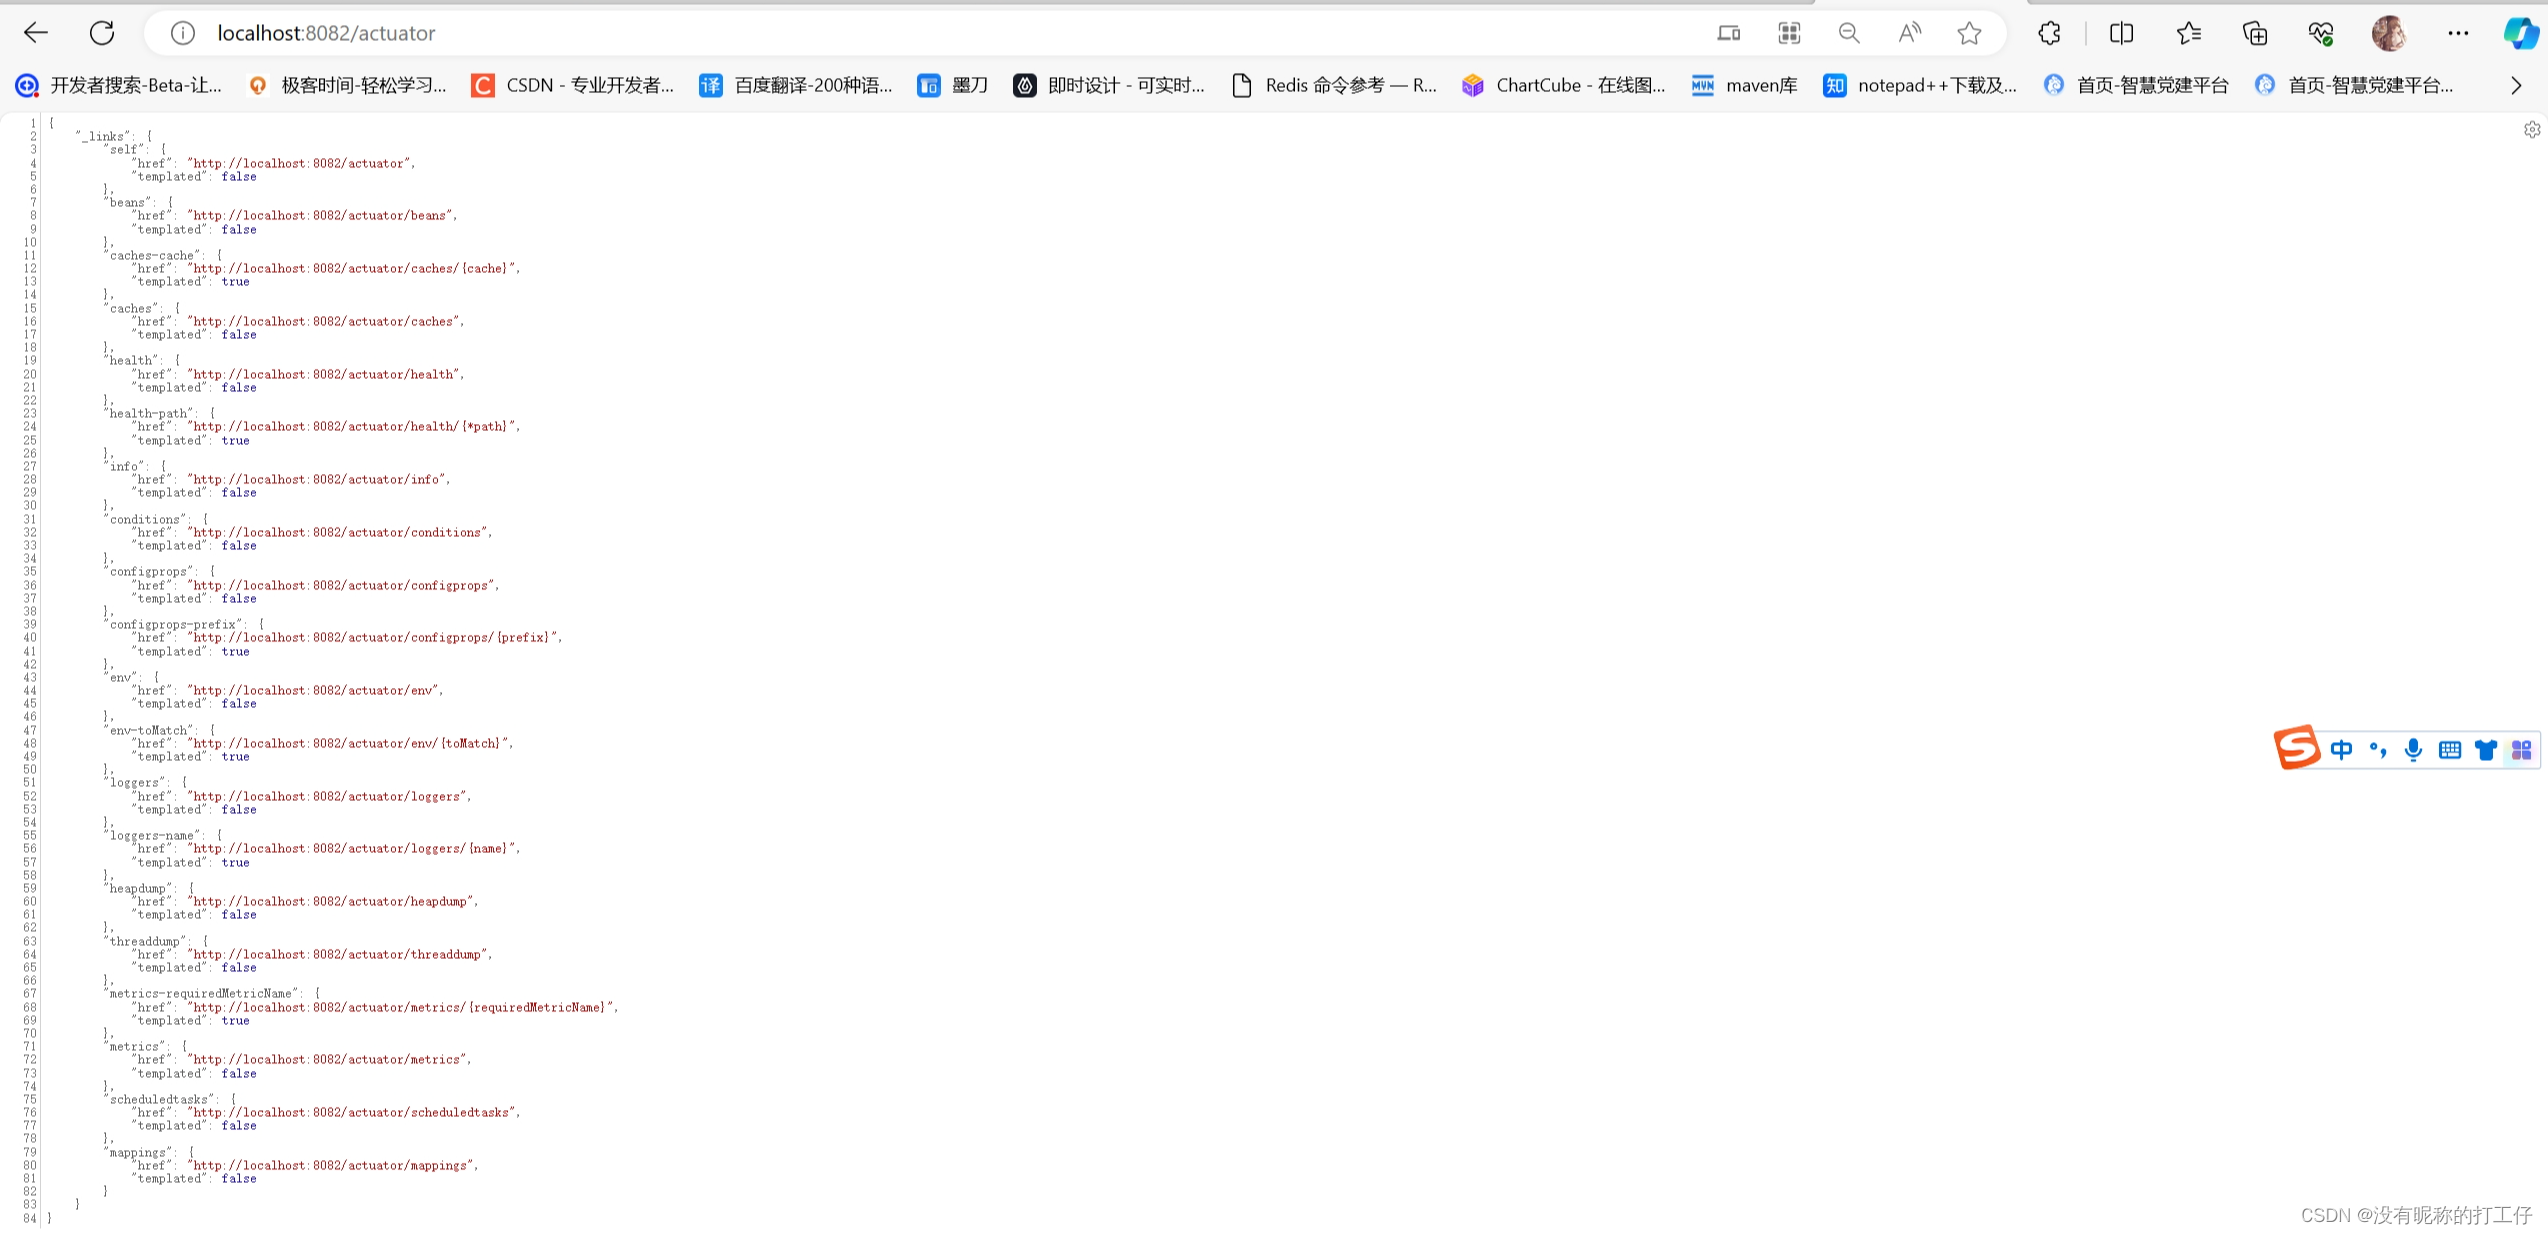
开放部分端点
现在,所有Actuator端点将对外开放,并且可以通过相应的URL进行访问。比如,可以通过 /actuator/health 访问健康检查端点。但是,打开所有Actuator端点可能会带来一些安全风险,因此请在生产环境中慎重考虑。建议您仅仅开放必需的端点,并根据实际需求限制端点的访问权限。如下:
management:
  endpoints:
    web:
      exposure:
        include: health,info,metrics,beans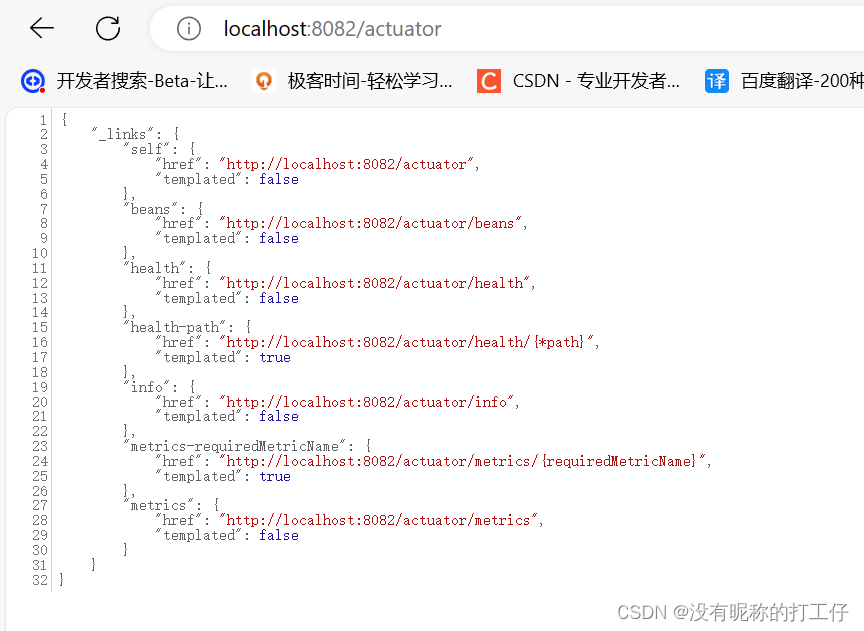
端点映射
springboot actuator的默认的端点 URL 前缀和端点 id, 所有人都知道,不是很安全,可以通过配置更改端点映射,如以下修改:
management:
  endpoints:
    web:
      base-path: /high
      path-mapping:
         health: heal
修改后即可通过“/high/heal”访问health端口。
端点映射也可以修改地址与端口号:
management:
  server:
    address: 127.0.0.1
    port: 8888
端口保护
springboot actuator的登录保护验证是通过Spring Security来实现的,接下来我们通过一个简单的示例实现一下。
1、 添加Spring Security依赖:
首先,您需要添加Spring Security依赖到项目中。可以在项目的pom.xml文件中添加以下依赖:
<dependency>
	<groupId>org.springframework.boot</groupId>
	<artifactId>spring-boot-starter-security</artifactId>
</dependency>2、Spring Security简单配置类:
package com.example.highactuator.config;

import org.springframework.context.annotation.Configuration;
import org.springframework.http.HttpMethod;
import org.springframework.security.config.annotation.web.builders.HttpSecurity;
import org.springframework.security.config.annotation.web.configuration.EnableWebSecurity;
import org.springframework.security.config.annotation.web.configuration.WebSecurityConfigurerAdapter;

@Configuration
@EnableWebSecurity
public class SecurityConfig extends WebSecurityConfigurerAdapter {

    @Override
    protected void configure(HttpSecurity http) throws Exception {

        http.formLogin() // 自定义自己编写的登录页面
                .loginPage("/test/login") // 登录页面设置
                .loginProcessingUrl("/test/login") // 登录访问路径
                .defaultSuccessUrl("/test/index").permitAll() // 登录成功后的跳转路径
                .and().authorizeRequests()
                .antMatchers("/high","/high/**").hasRole("ADMIN")
                .antMatchers("/", "/test/hello", "/login.html").permitAll() // 设置哪些路径可以直接访问,不需要认证
                .anyRequest().authenticated()
                .and().csrf().disable(); // 关闭csrf防护
    }
}
3、application.yml配置规则
配置设置了一个具有用户名 admin 和密码 password 的管理员用户,并且仅当用户提供正确的用户名和密码后,才会显示详细的健康信息。以及health的映射。
spring:
  security:
    user:
      name: admin
      password: admin
      roles: ADMIN

management:
  endpoint:
    health:
      show-components: when_authorized
  endpoints:
    web:
      base-path: /high
      path-mapping:
         health: heal
4、写一个简单的controller
package com.example.highactuator.controller;
import org.springframework.stereotype.Controller;
import org.springframework.web.bind.annotation.RequestMapping;
import org.springframework.web.bind.annotation.ResponseBody;
@Controller
@RequestMapping("/test")
public class TestController {
@RequestMapping("/index")
@ResponseBody
public String index(){
return "hello index";
}
@RequestMapping("/hello")
@ResponseBody
public String hello(){
return "new hello";
}
@RequestMapping("/login")
public String login(){
return "login";
}
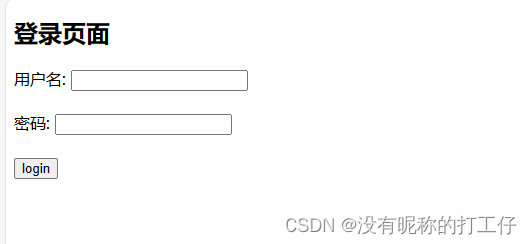
}5、简单登录页面
<!DOCTYPE html>
<html>
<body>
<h2>登录页面</h2>
<form action="/test/login" method="post">
    <label for="username">用户名:</label>
    <input type="text" id="username" name="username" required><br><br>
    <label for="password">密码:</label>
    <input type="password" id="password" name="password" required><br><br>
    <input type="submit" value="login">
</form>
</body>
</html>
最后浏览器验证一下,通过访问“/high”或者“/high/heal”(我做了端点映射了,没有做映射访问“/actuator、/actuator/health端点”)可以跳转到以下页面:
输入用户名密码并成功登录后,将显示健康信息。


 4172
4172

 被折叠的 条评论
为什么被折叠?
被折叠的 条评论
为什么被折叠?
 到【灌水乐园】发言


