


 本文详细介绍了如何在Windows环境下使用getopt及getopt_long函数,并通过一个实际案例展示了规范的命令行参数处理方法。
参考资料:
https://www.cnblogs.com/chenliyang/p/6633739.html
https://www.cnblogs.com/qingergege/p/5914218.html
https://blog.csdn.net/huangxiaohu_coder/article/details/7475156
三则参考资料已经将getopt、getopt_long和getopt_long_only的用法写的非常详尽,有珠玉在前,我也不打算再多讲用法了。这篇文章主要讲解一下如何在windows上使用getopt,以及分析一个比较实用的使用案例。
我们知道getopt和getopt_long主要还是用在Linux操作系统中,在windows上如果你使用#include <getopt.h>是会报错的,所以有人已经将源码迁移修改好供我们使用:https://github.com/Chunde/getopt-for-windows,只要在项目中手动加入源文件即可!
下面是案例部分,主要探讨一个程序的规范性写法(人性化!),希望对读者有所启发:
1. 首先,我们定义一个函数,用来打印程序的使用方法:
void usage(const char* progname) {
    printf("Usage: %s [options] scenename\n", progname);
    printf("Valid scenenames are: rgb, rgby, rand10k, rand100k, biglittle, littlebig, pattern,\n"
        "                      bouncingballs, fireworks, hypnosis, snow, snowsingle\n");
    printf("Program Options:\n");
    printf("  -r  --renderer <cpuref/cuda>  Select renderer: ref or cuda (default=cuda)\n");
    printf("  -s  --size  <INT>             Rendered image size: <INT>x<INT> pixels (default=%d)\n", DEFAULT_IMAGE_SIZE);
    printf("  -b  --bench <START:END>       Run for frames [START,END) (default=[0,1))\n");
    printf("  -c  --check                   Check correctness of CUDA output against CPU reference\n");
    printf("  -i  --interactive             Render output to interactive display\n");
    printf("  -f  --file  <FILENAME>        Output file name (FILENAME_xxxx.ppm) (default=output)\n");
    printf("  -?  --help                    This message\n");
}
注意这个函数的参数是progname,联想到argv[0]不就正是程序的全名吗?用的时候传递argv[0]即可。
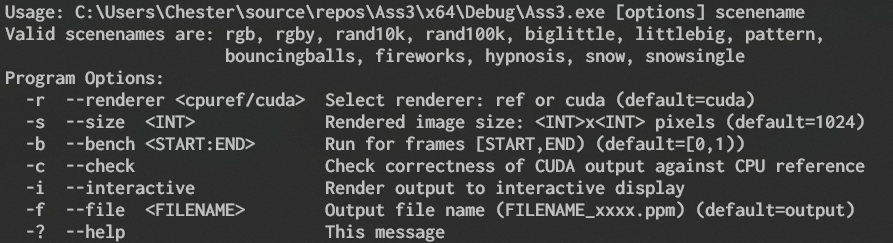
再来看这个usage的写法,它打印了短选项和等价的长选项的用法!最后输出的结果如下:
2. 然后我们定义一个结构体,在后面这个结构体会被getopt_long()解析(注意常用的是getopt_long,因为它同时支持长短选项)。
    int opt;
    static struct option long_options[] = {
        {"help",        0, 0,  '?'},
        {"check",       0, 0,  'c'},
        {"bench",       1, 0,  'b'},
        {"interactive", 0, 0,  'i'},
        {"file",        1, 0,  'f'},
        {"renderer",    1, 0,  'r'},
        {"size",        1, 0,  's'},
        {0 ,0, 0, 0}
    };
为什么这个结构长这个样子?其中一则参考资料给出了解释,记录如下:
struct option {
const char  *name;       /* 参数名称 */
int          has_arg;    /* 指明是否带有参数 */
int          *flag;      /* flag=NULL时,返回value;不为空时,*flag=val,返回0 */
int          val;        /* 用于指定函数找到选项的返回值或flag非空时指定*flag的值 */
};
has_arg  指明是否带参数值,其数值可选:
no_argument         表明长选项不带参数,如:--name, --help
required_argument  表明长选项必须带参数,如:--prefix /root或 --prefix=/root
optional_argument  表明长选项的参数是可选的,如:--help或 –prefix=/root,其它都是错误
所以最终这个结构体可能会长这个样子(与usage对应):
    static struct option long_options[] = {
        {"help",        0, 0,  '?'},
        {"check",       0, 0,  'c'},
        {"bench",       1, 0,  'b'},
        {"interactive", 0, 0,  'i'},
        {"file",        1, 0,  'f'},
        {"renderer",    1, 0,  'r'},
        {"size",        1, 0,  's'},
        {0 ,0, 0, 0}
    };
或者这个样子(用到了预定义的参数):
    static struct option long_options[] =
    {
        {"reqarg", required_argument,NULL, 'r'},
        {"optarg", optional_argument,NULL, 'o'},
        {"noarg",  no_argument,         NULL,'n'},
        {NULL,     0,                      NULL, 0},
    };
3. 万事俱备了,直接进入重头戏吧,即调用getopt_long
    while ((opt = getopt_long(argc, argv, "b:f:r:s:ci?", long_options, NULL)) != EOF) {

        switch (opt) {
        case 'b':
            if (sscanf(optarg, "%d:%d", &benchmarkFrameStart, &benchmarkFrameEnd) != 2) {
                fprintf(stderr, "Invalid argument to -b option\n");
                usage(argv[0]);
                exit(1);
            }
            break;
        case 'i':
            interactiveMode = true;
            break;
        case 'c':
            checkCorrectness = true;
            break;
        case 'f':
            frameFilename = optarg;
            break;
        case 'r':
            if (std::string(optarg).compare("cuda") == 0) {
                useRefRenderer = false;
            }
            else if (std::string(optarg).compare("cpuref") == 0) {
                useRefRenderer = true;
            }
            else {
                fprintf(stderr, "ERROR: Unknown renderer type: %s\n", optarg);
                usage(argv[0]);
                return 1;
            }
            break;
        case 's':
            imageSize = atoi(optarg);
            break;
        case '?':
        default:
            usage(argv[0]);
            return 1;
        }
    }
从循环中的switch我们看出,这个函数的奥秘就在于:“使用字符串和结构体定义规则,使用规则进行分叉”!具体的用法参看参考资料,这里只介绍这种好的写法。相信这个例子胜过一大段解释!


 378
378

 被折叠的 条评论
为什么被折叠?
被折叠的 条评论
为什么被折叠?
 到【灌水乐园】发言


