


什么是策略模式
策略模式是对算法的包装,是把使用算法的责任和算法本身分割开来,委派给不同的对象管理,最终可以实现解决多重if判断问题。
- 环境(Context)角色:持有一个Strategy的引用。
- 抽象策略(Strategy)角色:这是一个抽象角色,通常由一个接口或抽象类实现。此角色给出所有的具体策略类所需的接口。
- 具体策略(ConcreteStrategy)角色:包装了相关的算法或行为。
优点:策略模式最终帮助我们解决在实际开发中多重if判断问题、提高扩展性、维护性增强、提高代码可读性。
缺点:后期维护不同策略类是非常多、定义类比较多、代码量增大。
优点大于缺点。
策略模式应用场景
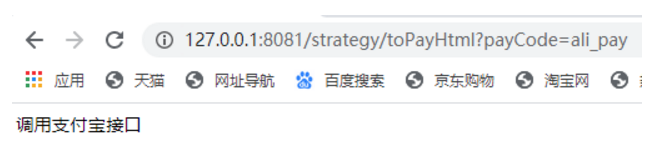
比如搭建聚合支付平台的时候,这时候需要对接很多第三方支付接口,比如支付宝、微信支付、小米支付等。
通过传统if代码判断的,后期的维护性非常差!
public  String toPayHtml2(String payCode){
    if(payCode.equals("ali_pay")){
        return  "调用支付宝接口...";
    }
    if(payCode.equals("xiaomi_pay")){
        return  "调用小米支付接口";
    }
    if(payCode.equals("yinlian_pay")){
        return  "调用银联支付接口...";
    }
    return  "未找到该接口...";
}
这时候可以通过策略模式解决多重if判断问题。
策略模式架构图
调用第三方支付接口逻辑不同,但是都是最终封装为html表单参数支付接口。

Maven依赖信息
<parent>
    <groupId>org.springframework.boot</groupId>
    <artifactId>spring-boot-starter-parent</artifactId>
    <version>2.1.11.RELEASE</version>
    <relativePath/> <!-- lookup parent from repository -->
</parent>

<properties>
    <maven.compiler.source>8</maven.compiler.source>
    <maven.compiler.target>8</maven.compiler.target>
    <boot-version>2.1.11.RELEASE</boot-version>
    <mybatis.starter.version>2.0.0</mybatis.starter.version>
    <mapper.starter.version>2.1.5</mapper.starter.version>
</properties>

<dependencies>

    <!-- springboot 整合web组件 -->
    <dependency>
        <groupId>org.springframework.boot</groupId>
        <artifactId>spring-boot-starter-web</artifactId>
    </dependency>

    <!-- 集成 lombok插件 -->
    <dependency>
        <groupId>org.projectlombok</groupId>
        <artifactId>lombok</artifactId>
        <optional>true</optional>
    </dependency>

    <!-- 集成 swagger 在线生成文档 -->
    <dependency>
        <groupId>com.spring4all</groupId>
        <artifactId>swagger-spring-boot-starter</artifactId>
        <version>1.7.0.RELEASE</version>
    </dependency>

    <!-- springboot-log4j -->
    <dependency>
        <groupId>org.springframework.boot</groupId>
        <artifactId>spring-boot-starter-log4j</artifactId>
        <version>1.3.8.RELEASE</version>
    </dependency>

    <!-- 引入数据库依赖 -->
    <dependency>
        <groupId>mysql</groupId>
        <artifactId>mysql-connector-java</artifactId>
        <scope>runtime</scope>
    </dependency>

    <!-- 引入mybatis-plus依赖 -->
    <dependency>
        <groupId>com.baomidou</groupId>
        <artifactId>mybatis-plus-boot-starter</artifactId>
        <version>3.4.1</version>
    </dependency>
</dependencies>

<dependencyManagement>
    <dependencies>
        <!-- springCloud 版本管理 -->
        <dependency>
            <groupId>org.springframework.cloud</groupId>
            <artifactId>spring-cloud-dependencies</artifactId>
            <version>Greenwich.RELEASE</version>
            <type>pom</type>
            <scope>import</scope>
        </dependency>

        <!-- springBoot 版本管理 -->
        <dependency>
            <groupId>org.springframework.boot</groupId>
            <artifactId>spring-boot-dependencies</artifactId>
            <version>${boot-version}</version>
            <type>pom</type>
            <scope>import</scope>
        </dependency>

        <!-- ailibaba 版本管理 -->
        <dependency>
            <groupId>com.alibaba.cloud</groupId>
            <artifactId>spring-cloud-alibaba-dependencies</artifactId>
            <version>2.1.1.RELEASE</version>
            <type>pom</type>
            <scope>import</scope>
        </dependency>
    </dependencies>
</dependencyManagement>
数据库访问层
相关SQL语句
DROP TABLE IF EXISTS `payment_channel`;
CREATE TABLE `payment_channel` (
  `id` int(11) NOT NULL AUTO_INCREMENT COMMENT 'ID',
  `channel_name` varchar(32) NOT NULL COMMENT '渠道名称',
  `channel_id` varchar(32) NOT NULL COMMENT '渠道ID',
  `strategy_bean_id` varchar(255) DEFAULT NULL COMMENT '策略执行beanid',
  PRIMARY KEY (`id`,`channel_id`)
) ENGINE=InnoDB AUTO_INCREMENT=6 DEFAULT CHARSET=utf8 COMMENT='支付渠道 ';

-- ----------------------------
-- Records of payment_channel
-- ----------------------------
INSERT INTO `payment_channel` VALUES ('1', '支付宝渠道', 'ali_pay', 'aliPayStrategy');
INSERT INTO `payment_channel` VALUES ('2', '小米支付渠道', 'xiaomi_pay', 'xiaoMiPayStrategy');
数据库访问层
@Data
public class PaymentChannelEntity {

    /**
     * ID
     **/
    private Integer id;

    /**
     * 渠道名称
     **/
    private String channelName;

    /**
     * 渠道ID
     **/
    private String channelId;

    /**
     * 策略执行beanId
     **/
    private String strategyBeanId;

    /**
     * 是否启用
     **/
    private Integer enable;
}
@Repository
public interface PaymentChannelMapper {

    @Select("SELECT  id as id ,channel_name ,channel_id,strategy_bean_id from payment_channel where channel_id=#{payCode}")
    PaymentChannelEntity getPaymentChannel(@Param("payCode") String payCode);
}
工具类
@Component
public class SpringUtils implements ApplicationContextAware {

    private static ApplicationContext applicationContext;

    @Override
    public void setApplicationContext(ApplicationContext applicationContext) throws BeansException {
        this.applicationContext = applicationContext;
    }

    /**
     * @Title: getApplicationContext
     * @Description: 获取applicationContext
     * @Date: 2021/3/25 9:44
     * @Return org.springframework.context.ApplicationContext
     **/
    public static ApplicationContext getApplicationContext() {
        return applicationContext;
    }

    /**
     * @Title: getBean
     * @Description: 通过name获取 Bean
     * @param: name bean的名称
     * @Date: 2021/3/25 9:50
     * @Return java.lang.Object
     **/
    public static Object getBean(String name){
        return getApplicationContext().getBean(name);
    }

    /**
     * @Title: getBean
     * @Description: 通过class获取Bean
     * @param: clazz bean的class
     * @Date: 2021/3/25 9:55
     * @Return T
     **/
    public static <T> T getBean(Class<T> clazz){
        return getApplicationContext().getBean(clazz);
    }

    /**
     * @Title: getBean
     * @Description: 通过name,以及Clazz返回指定的Bean
     * @param: name bean的名称
     * @param: clazz bean的class
     * @Date: 2021/3/25 9:59
     * @Return T
     **/
    public static <T> T getBean(String name,Class<T> clazz){
        return getApplicationContext().getBean(name, clazz);
    }
}
PayStrategy(抽象角色)
public interface PayStrategy {

    /**
     * @Title: toPayHtml
     * @Description: 定义共同算法实现骨架
     * @Date: 2021/3/24 19:39
     * @Return java.lang.String
     **/
    String toPayHtml();
}
ConcreteStrategy (具体实现角色)
@Component
public class AliPayStrategy implements PayStrategy {
    @Override
    public String toPayHtml() {
        return "调用支付宝接口";
    }
}
@Component
public class XiaoMiPayStrategy implements PayStrategy {
    @Override
    public String toPayHtml() {
        return "调用小米支付接口";
    }
}
@Component
public class YinlianPayStrategy implements PayStrategy {
    @Override
    public String toPayHtml() {
        return "调用银联支付接口";
    }
}
PayContextService (上下文)
@RequestMapping("/strategy")
public interface PayService {

    @GetMapping("/toPayHtml")
    String toPayHtml(String payCode);
}
@RestController
public class PayServiceImpl implements PayService {

    @Autowired
    private PaymentChannelMapper paymentChannelMapper;
    @Autowired
    private SpringUtils springUtils;

    @Override
    public String toPayHtml(String payCode) {

        //1.验证参数
        if(StringUtils.isEmpty(payCode)){
            return "payCode不能为空!";
        }

        //2.使用payCode查询数据库
        PaymentChannelEntity paymentChannel = paymentChannelMapper.getPaymentChannel(payCode);
        if(paymentChannel == null){
            return "该渠道为空!";
        }

        //3.获取策略执行的beanId
        String strategyBeanId = paymentChannel.getStrategyBeanId();

        //4.使用strategyBeanId获取对应spring容器bean信息
        PayStrategy payStrategy  = springUtils.getBean(strategyBeanId, PayStrategy.class);

        //5.执行具体策略算法
        return payStrategy.toPayHtml();
    }
}
启动类
@SpringBootApplication
@MapperScan("com.jql.*.mapper")
public class App {
    public static void main(String[] args) {
        SpringApplication.run(App.class);
    }
}

更多学习资源移步到:http://www.mayikt.com/


 411
411


 被折叠的 条评论
为什么被折叠?
被折叠的 条评论
为什么被折叠?
 到【灌水乐园】发言


