


本篇主要使用GitHub Page部署博客,使用GitHub Action实现自动化部署
1.建立GitHub远程仓库
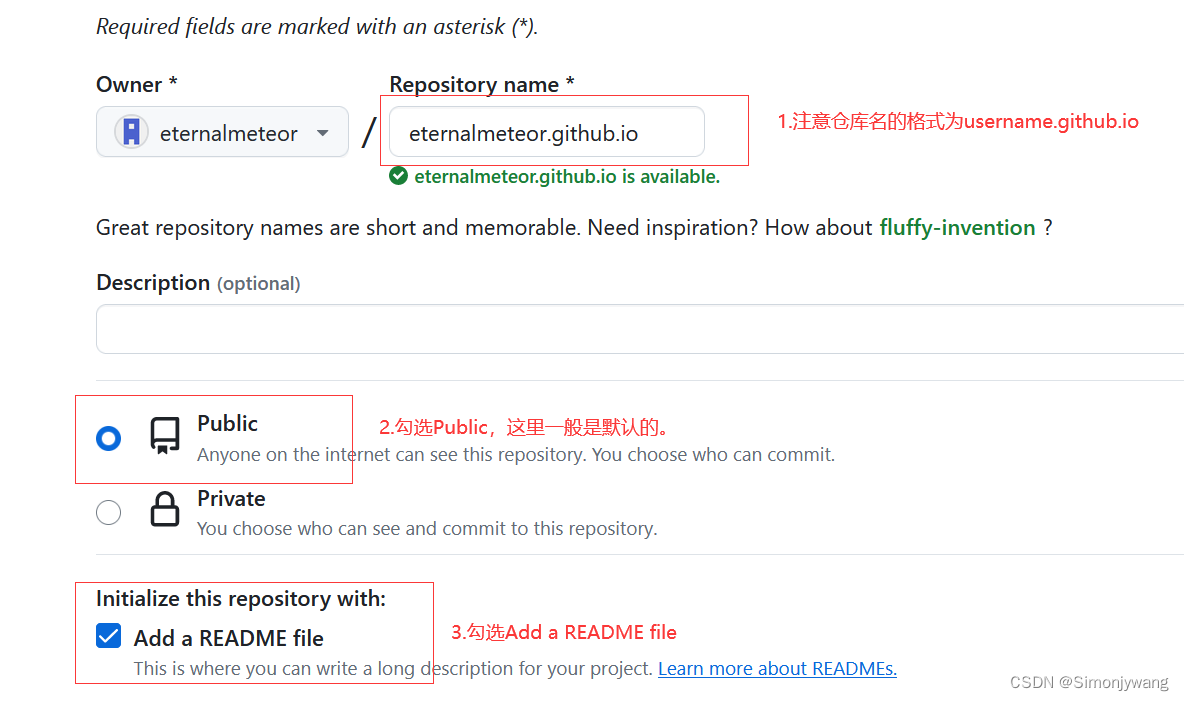
- 登录至自己的GitHub账号,建立GitHub Page仓库。
注意:这里的GitHub page的命名格式必须为username.github.io,其中username为GitHub的用户名,即就是Repository name前面的Owner名。
- 勾选public,将仓库设置为公开仓库。
- 勾选
Add a README file,设置main分支为仓库的默认主分支。
2.将本地仓库和远程仓库相关联
-
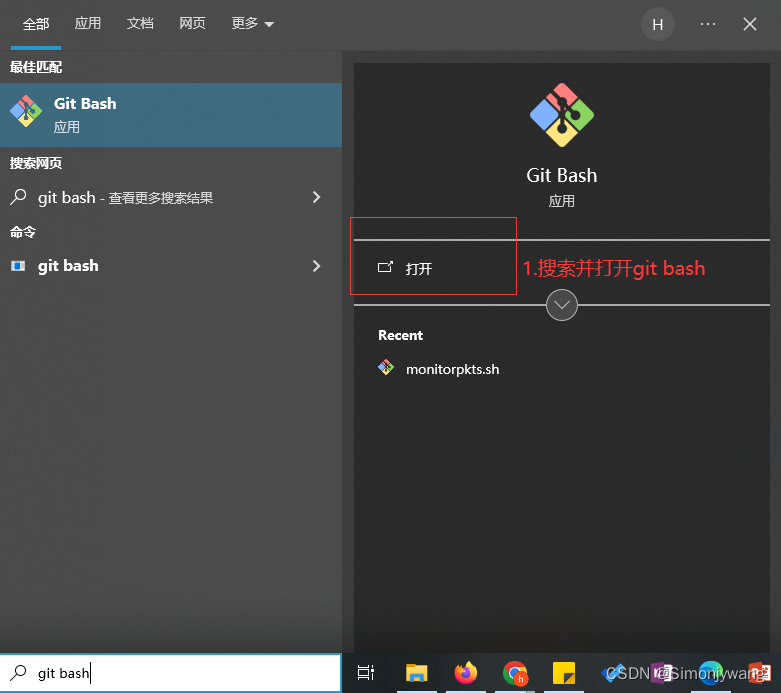
在菜单栏中搜索
git bash并打开。
-
进入至本地仓库目录下,例如我的本地仓库目录为:
d:/quickstart

- 在quickStart目录下运行
git init命令,初始化本地仓库为git仓库
git init
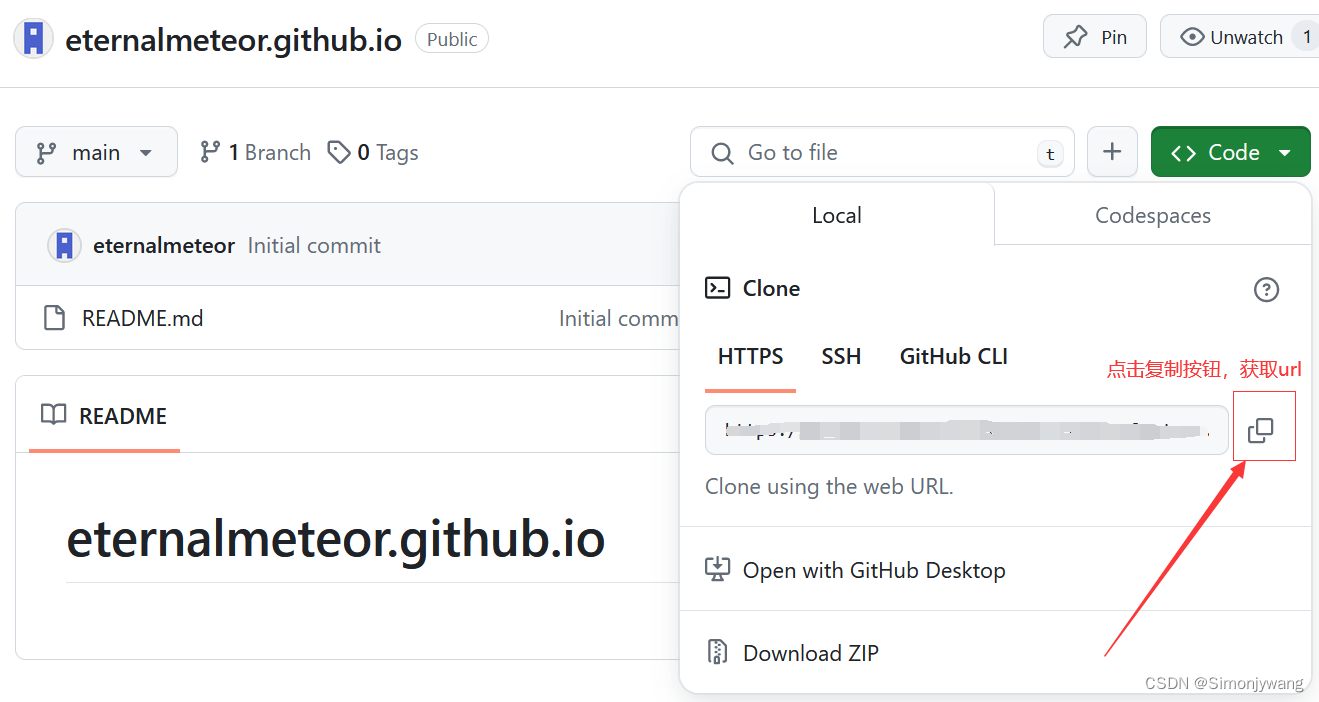
- 将本地仓库和远程仓库(自己创建的.github.io仓库)相关联。
git remote add origin url (url代表远程仓库的url)
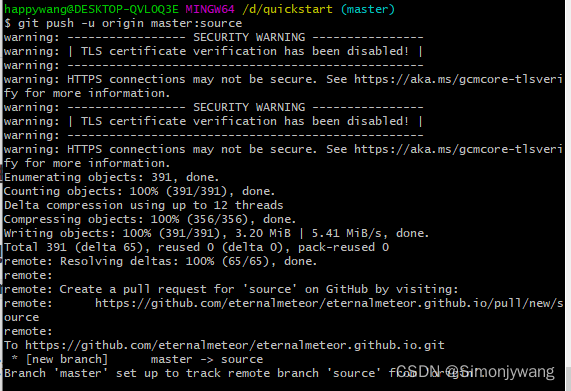
- 将本地仓库中的内容推送至远程仓库。
注意1:本文档采用同一个远程仓库的两个分支进行hugo仓库的自动部署。设置远程仓库中的source分支为本地仓库的内容,main分支代表要发布的静态网页。
注意2:git add .之后在Windows平台会出现warning: LF will be replaced by CRLF in .gitmodules. The file will have its original line endings in your working directory,查阅资料之后发现是不同平台下空格表示方式不同,可以不用管。
注意3:git push时需要本地分支名,本地分支名会显示在git bash界面中当前目录的后面,注意看自己的分支名。

git add . #将本地修改添加至暂存区
git commit -m '注释' #将本地修改从暂存区移动到本地分支
git push -u origin master:source #-u选项代表将所推送的远程分支设置本地分支的上游,后续可以无须指定,相当于缓存了一簇推送设置,master代表本地分支名,source代表远程分支名。
3.使用Github Action实现自动部署
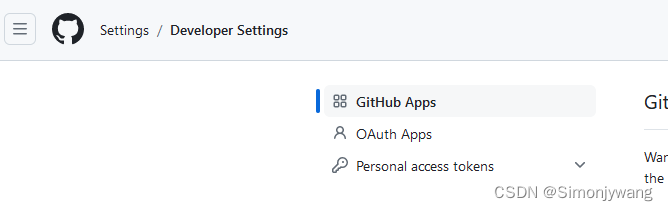
- 点击Settings–>Developer Settings,进入到Developer Settings页面。
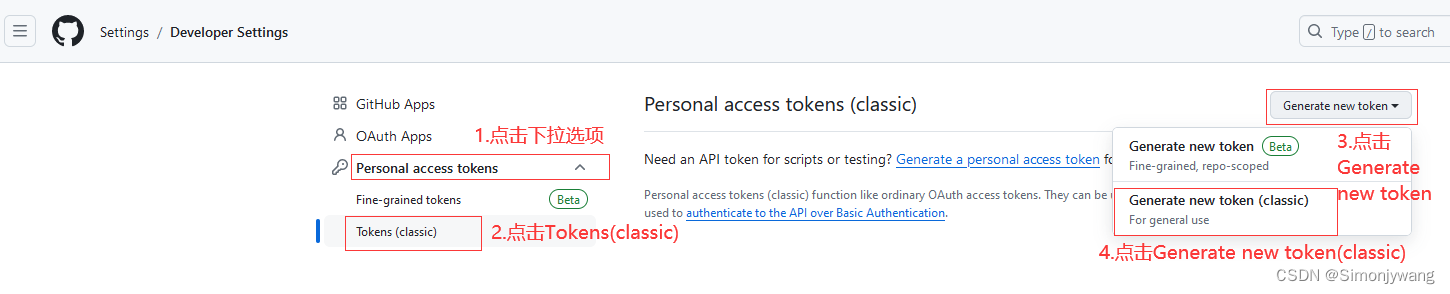
- 点击Personal access tokens --> Token(classic) --> Generate new token --> Generate new token(classic),进入New personal access token(classic) 页面。
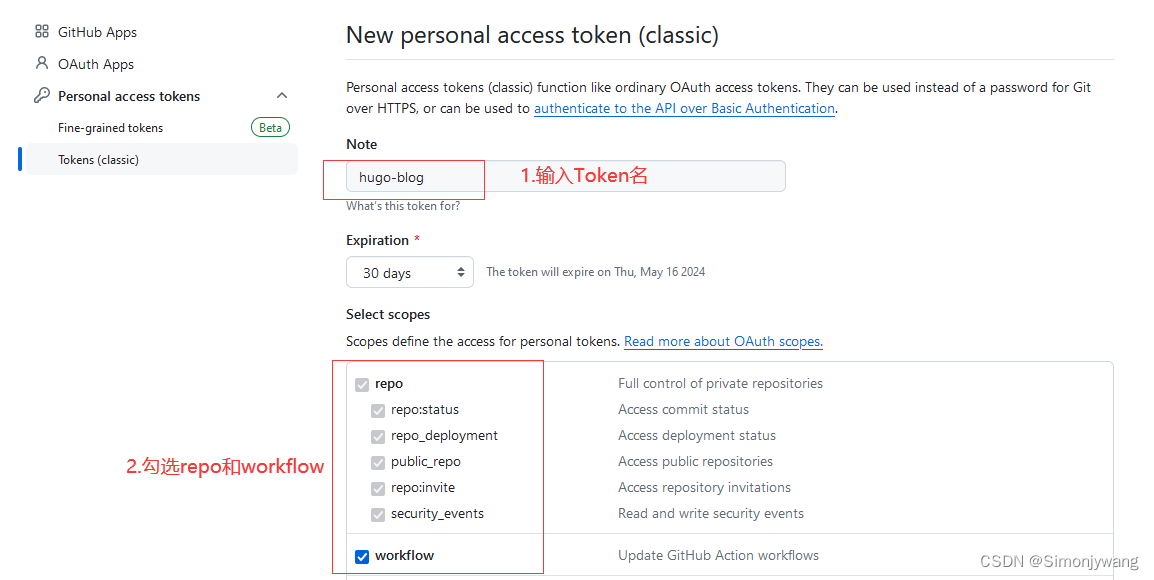
- 在Note中输入Token名(自己可以随便起,例如hugo-blog),勾选repo和workflow.
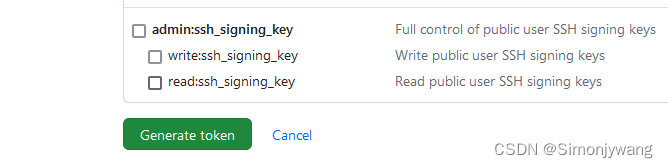
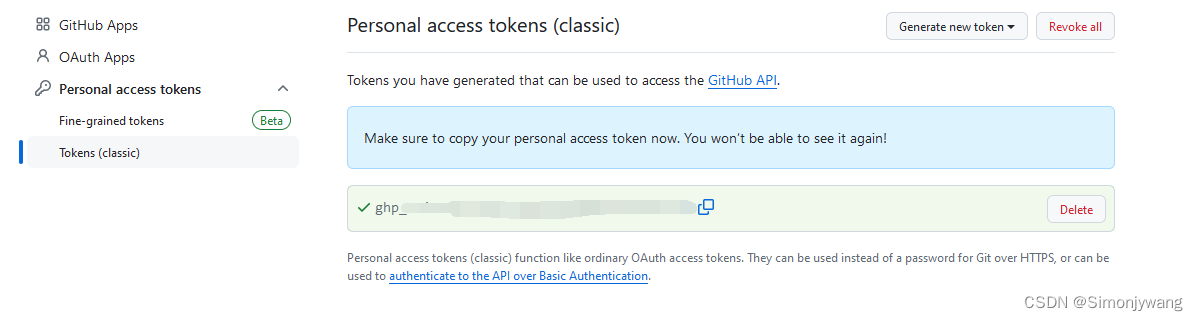
- 点击页面底部的Generate token产生Token,敲重点:记录以ghp开头的一串代码,后续步骤需要使用。
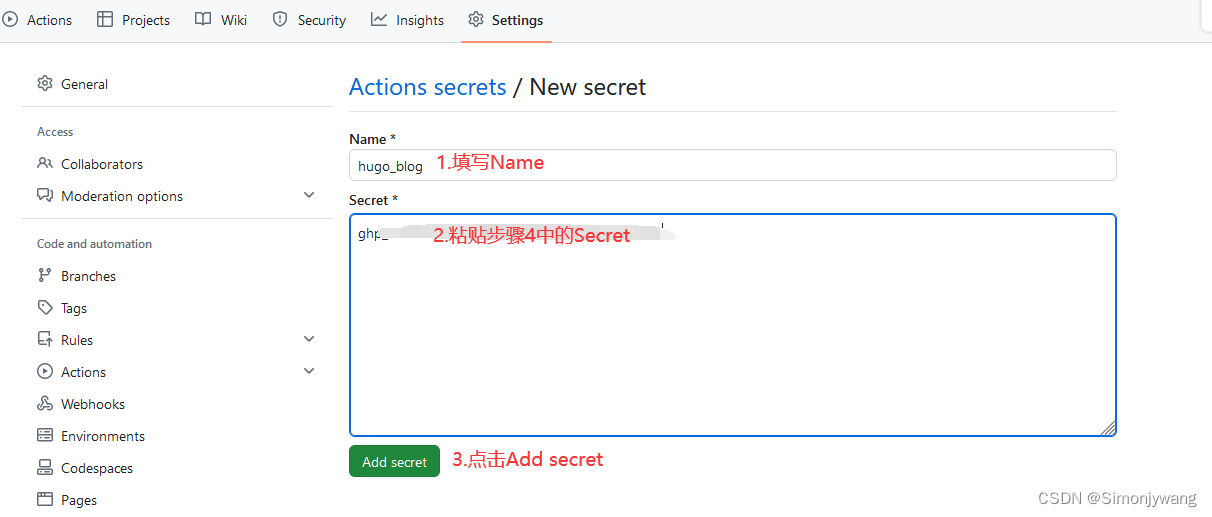
- 打开远程仓库中的Setting页面,点击Sercrets and variables–>Actions–>New reposiroty secert.

- 在New repository secret页面中添加步骤4中的Token, 并设置相应的Name(后续需要使用), 点击Add secret.
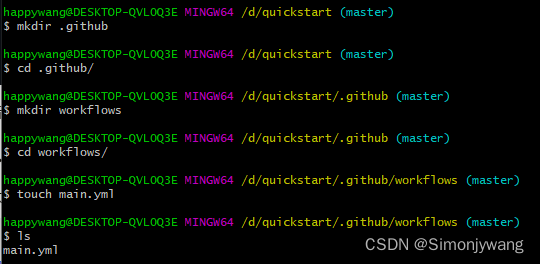
- 在本地仓库quickstart目录下新建.github/workflows/main.yml文件(.github和workflows均为目录)。
- 按照个人信息修改如下所示的main.yml文件(主要修改branches和personal_token),并填充至自己新建的main.yml文件中。
name: Hugo Deploy GitHub Pages

on:
  push:
    branches:
      - source  # 设置为自己远程仓库的分支名

jobs:
  build-deploy:
    runs-on: ubuntu-latest
    concurrency:
      group: ${{ github.workflow }}-${{ github.ref }}
    steps:
      - name: Checkout
        uses: actions/checkout@v2
        with:
          submodules: true
          fetch-depth: 0

      - name: Setup Hugo
        uses: peaceiris/actions-hugo@v2
        with:
          hugo-version: '0.124.1'  # 使用你的Hugo版本号
          extended: true # 如果你使用的不是extended版本的hugo,将true改为false

      - name: Build
        run: hugo --minify

      - name: Deploy
        uses: peaceiris/actions-gh-pages@v3
        with:
          personal_token: ${{ secrets.HUGO_BLOG }}  # 使用你步骤6设置的Name(大写)
          publish_dir: ./public
          publish_branch: main  # 添加这一行, 可以将推送分支改为main
          user_name: 'github-actions[bot]'
          user_email: 'github-actions[bot]@users.noreply.github.com'
          commit_message: ${{ github.event.head_commit.message }}
          # cname: yourdomain.com  # 如果你有自定义域名, 替换为你的域名
- 退回至quickstart目录下,使用如下命令推送至远程仓库进行测试。
git add .
git commit -m "test auto deploy"
git push origin master:source
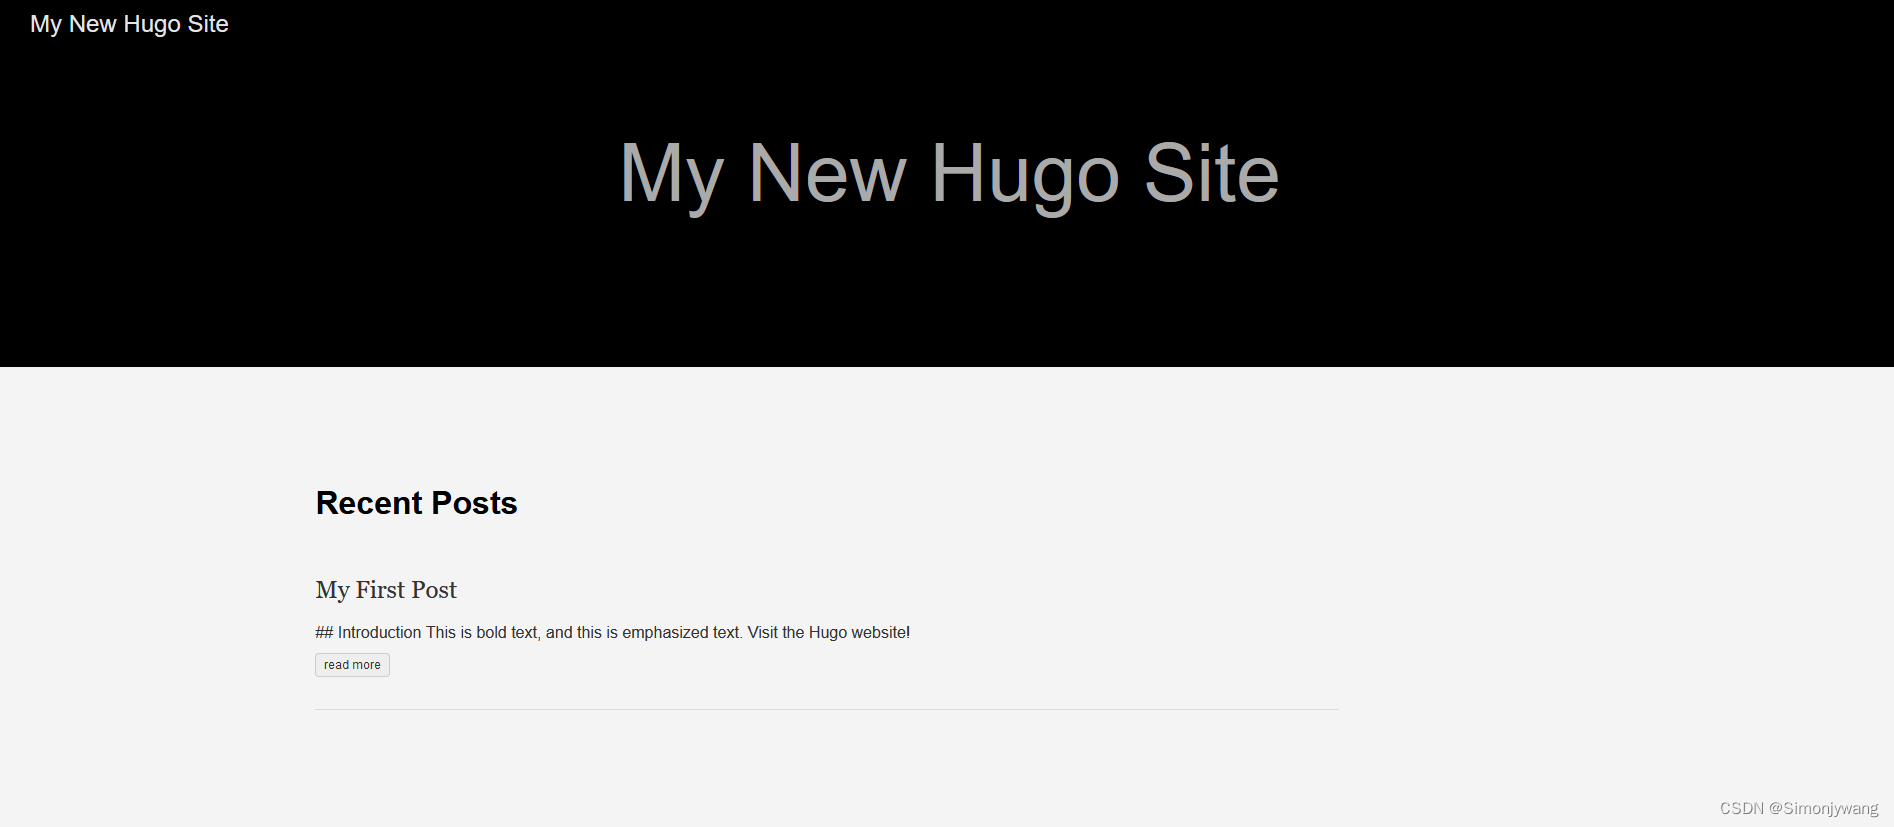
- 打开域名
https://username.github.io(username更换为自己的username) 进行查看。


 1875
1875


 被折叠的 条评论
为什么被折叠?
被折叠的 条评论
为什么被折叠?
 到【灌水乐园】发言


