


文章目录
安装
下载安装包和依赖
浏览器中输入http://downloads.sourceforge.net/project/pcre/pcre/8.37/pcre-8.37.tar.gz即可下载
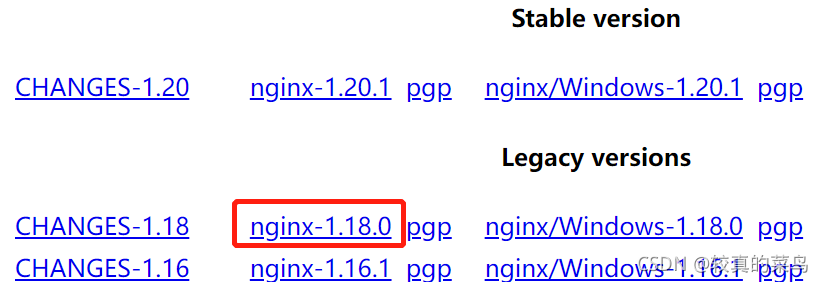
下载nginx的安装包
http://nginx.org/en/download.html
安装
tar –xvf pcre-8.37.tar.gz解压压缩文件- 进入pcre-8.37目录执行
./configure命令 - 安装 openssl 、zlib 、 gcc 依赖
yum -y install make zlib zlib-devel gcc-c++ libtool openssl openssl-devel
- 安装 nginx
使用命令解压nginx安装包并进入nginx安装包目录 - 执行
./configure命令后,执行make && make install命令 - 进入
/usr/local/nginx/sbin目录启动nginx,使用./nginx命令 - 通过
http://ip/访问,可访问到说明可以启动成功
- 关闭nginx使用
./nginx -s stop命令 - 重新加载nginx使用
./nginx -s reload命令 - 可以通过./nginx -V 查看安装了哪些插件
nginx的配置文件
cd /usr/local/nginx/conf/ 路径下的nginx.conf文件
配置文件中的内容
包含三部分内容
- 全局块:配置服务器整体运行的配置指令
比如 worker_processes 1;处理并发数的配置 - events 块:影响 Nginx 服务器与用户的网络连接
比如 worker_connections 1024; 支持的最大连接数为 1024 - http 块
还包含两部分:
http 全局块
server 块
反向代理配置
参数拼接:是将代理的路径后的参数拼接到被代理的路径的后面
- 监听端口,如果监听到就转向另外的端口
监听80端口,转向8080端口
访问http://192.168.64.123:80将请求转发到http://192.168.64.123:8080/,配置中的proxy_pass为代理地址,被代理的地址要以/结尾,否则地址不是到要代理的ip和端口上
server {
    listen       80; # 监听端口
    server_name  localhost;   #监听ip

    #charset koi8-r;

    #access_log  logs/host.access.log  main;

    location / {
        root   html;
        proxy_pass http://192.168.64.123:8080/;  #代理地址
        index  index.html index.htm;
    }

    #error_page  404              /404.html;

    # redirect server error pages to the static page /50x.html
    #
    error_page   500 502 503 504  /50x.html;
    location = /50x.html {
        root   html;
    }

    # proxy the PHP scripts to Apache listening on 127.0.0.1:80
    #
    #location ~ \.php$ {
    #    proxy_pass   http://127.0.0.1;
    #}

    # pass the PHP scripts to FastCGI server listening on 127.0.0.1:9000
    #
    #location ~ \.php$ {
    #    root           html;
    #    fastcgi_pass   127.0.0.1:9000;
    #    fastcgi_index  index.php;
    #    fastcgi_param  SCRIPT_FILENAME  /scripts$fastcgi_script_name;
    #    include        fastcgi_params;
    #}

    # deny access to .htaccess files, if Apache's document root
    # concurs with nginx's one
    #
    #location ~ /\.ht {
    #    deny  all;
    #}
}
- 根据访问的路径跳转到不同端口的服务中
nginx 监听端口为 9001,
访问http://192.168.64.123:9001/edu/直接跳转到http://192.168.64.123:8081/edu/
访问http://192.168.64.123:9001/vod/直接跳转到http://192.168.64.123:8080/vod/
配置
server {
    listen       9001;
    #listen       somename:8080;
    server_name  192.168.64.123;

    location ~ /edu/ {
        proxy_pass http://192.168.64.123:8081;
    }
    location ~ /vod/ {
        proxy_pass http://192.168.64.123:8080;
    }
}
配置中的location ~ /vod/正则表达式说明
- = :用于不含正则表达式的 uri 前,要求请求字符串与 uri 严格匹配,如果匹配
成功,就停止继续向下搜索并立即处理该请求。 - ~:用于表示 uri 包含正则表达式,并且区分大小写。
- ~*:用于表示 uri 包含正则表达式,并且不区分大小写。
- ^~:用于不含正则表达式的 uri 前,要求 Nginx 服务器找到标识 uri 和请求字
符串匹配度最高的 location 后,立即使用此 location 处理请求,而不再使用 location块中的正则 uri 和请求字符串做匹配。
nginx 配置实例-负载均衡
修改配置文件
events {
    worker_connections  1024;
}


http {
    include       mime.types;
    default_type  application/octet-stream;
    sendfile        on;
    #tcp_nopush     on;

    #keepalive_timeout  0;
    keepalive_timeout  65;

    #gzip  on;
    upstream myserver{
        server 192.168.64.123:8080;
        server 192.168.64.123:8081;
    }
    server {
        listen       80;
        server_name  localhost;

        #charset koi8-r;

        #access_log  logs/host.access.log  main;

        location / {
            root   html;
            proxy_pass http://myserver;
            index  index.html index.htm;
        }
        error_page   500 502 503 504  /50x.html;
        location = /50x.html {
            root   html;
        }
    server {
        listen       9001;
        #listen       somename:8080;
        server_name  192.168.64.123;

        location ~ /edu/ {
            proxy_pass http://192.168.64.123:8081;
        }
        location ~ /vod/ {
            proxy_pass http://192.168.64.123:8080;
        }
    }
}
在原有基础上添加了,注意每行server的最后都要加上; ,否则会报错
upstream myserver{
    server 192.168.64.123:8080;
    server 192.168.64.123:8081;
}
proxy_pass http://myserver; http后面的路径为upstream 后面的参数
Nginx 提供了几种分配方式(策略):
- 轮询(默认)
每个请求按时间顺序逐一分配到不同的后端服务器,如果后端服务器 down 掉,能自动剔除 - weight
weight 代表权,重默认为 1,权重越高被分配的客户端越多
指定轮询几率,weight 和访问比率成正比,用于后端服务器性能不均的情况 ,如
upstream server_pool{
	server 192.168.5.21 weight=10;
	server 192.168.5.22 weight=10;
}
- ip_hash
每个请求按访问 ip 的 hash 结果分配,这样每个访客固定访问一个后端服务器,可以解决 session 的问题。 例如:
upstream server_pool{
	ip_hash;
	server 192.168.5.21:80;
	server 192.168.5.22:80;
}
- 、fair(第三方)
按后端服务器的响应时间来分配请求,响应时间短的优先分配。比如
upstream server_pool{
	server 192.168.5.21:80;
	server 192.168.5.22:80;
	fair;
}
nginx 配置实例-动静分离
配置文件案例
events {
    worker_connections  1024;
}


http {
    include       mime.types;
    default_type  application/octet-stream;

    sendfile        on;
    #tcp_nopush     on;

    #keepalive_timeout  0;
    keepalive_timeout  65;

    #gzip  on;
    upstream myserver{
        server 192.168.64.123:8080;
        server 192.168.64.123:8081;
    }
    server {
        listen       80;
        server_name  localhost;


        location / {
            root   html;
            proxy_pass http://myserver;
            index  index.html index.htm;
        }
        location /img/ {
            root /soft/;
            autoindex on;
        }
        error_page   500 502 503 504  /50x.html;
        location = /50x.html {
            root   html;
        }
    }


    # another virtual host using mix of IP-, name-, and port-based configuration
    #
    server {
        listen       9001;
        #listen       somename:8080;
        server_name  192.168.64.123;

        location ~ /edu/ {
            proxy_pass http://192.168.64.123:8081;
        }
        location ~ /vod/ {
            proxy_pass http://192.168.64.123:8080;
        }
    }
}
新增的配置为
location /img/ {
    root /soft/;
    autoindex on;  # 可访问文件目录
}
访问http://192.168.64.123/img/1.jpg可以访问到服务器的/soft/img路径下的图片
也可以用alias别名代理,配置为
location /img/ {
    alias /soft/img/;
    autoindex on;  # 可访问文件目录
}
反向代理和静态服务器的配置规律
可以把配置中的location后面的匹配路径作为分隔符,匹配到了后将请求路径中分隔符前面的部分替换为root 或者proxy_pass后面的配置参数生成一个新的路径即为代理路径或者静态页面的路径
如果用alias,则匹配到了后是将匹配路径作为分隔符,将请求路径的分隔符及前面的路径全部替换了alias后面的参数,与root和proxy_pass的区别是拼成的新路径带不带匹配路径
注意:如果配置了proxy_pass不管用,考虑下被代理地址是否多写了斜杠/
配置代理缓存
nginx缓存是把内容或者文件保存到本地硬盘,把保存的目录和key做个索引,方便查询
proxy_cache_path /soft/nginx_cache/ levels=1:2 keys_zone=cache_image:200m inactive=1d max_size=6g; # 缓存配置

server {
    listen       80;
    server_name  localhost;

    #charset koi8-r;

    #access_log  logs/host.access.log  main;

    # location / {
    #     root   html;
	#     proxy_pass http://myserver;
	    #     index  index.html index.htm;
	    # }

	location / {
	 root   html;
	 # autoindex on;
	 proxy_pass http://192.168.1.123:8080;  # 代理地址,必须为http的,不能是本地路径/dev/tmp这种
	  proxy_cache_valid 200 304 1h; # 有效时间
	proxy_cache cache_image; # 值为上面的配置的
	# proxy_cache_methods GET POST;
	add_header Nginx-Cache "$upstream_cache_status"; # 响应头部信息,如果使用的缓存则值为HIT,否则为MISS

	}
    #error_page  404              /404.html;

    # redirect server error pages to the static page /50x.html
    #
    error_page   500 502 503 504  /50x.html;
    location = /50x.html {
        root   html;
    }

    # proxy the PHP scripts to Apache listening on 127.0.0.1:80
    #
    #location ~ \.php$ {
    #    proxy_pass   http://127.0.0.1;
    #}

    # pass the PHP scripts to FastCGI server listening on 127.0.0.1:9000
    #
    #location ~ \.php$ {
    #    root           html;
    #    fastcgi_pass   127.0.0.1:9000;
    #    fastcgi_index  index.php;
    #    fastcgi_param  SCRIPT_FILENAME  /scripts$fastcgi_script_name;
    #    include        fastcgi_params;
    #}

    # deny access to .htaccess files, if Apache's document root
    # concurs with nginx's one
    #
    #location ~ /\.ht {
    #    deny  all;
    #}
}
参数解释
- proxy_cache_path:缓存在硬盘中的目录
- levels:缓存在硬盘中目录的层级,即目录中还会套几层目录,比如有一个URL是http://netexr.blog.51cto.com/1.png,那么这个图片如果被缓存那他的路径就是
/soft/nginx_cache/9/ad/e0bd86606797639426a92306b1b98ad9
计算方法:
1) nginx先把请求地址/1.png用md5进行哈希,得到e0bd86606797639426a92306b1b98ad9
2) level=1:2就是把最后一位数9拿出来建一个目录,然后再把9前面的2位建一个目录,最后把刚才得到的这个缓存文件放到9/ad目录中。
3) 同样的方法推理,如果配置level=1:1,那么缓存文件的路径就是/soft/nginx_cache/9/d/e0bd86606797639426a92306b1b98ad9
上面的例子只是最简单的URL,如果带参数呢?
比如http://netexr.blog.51cto.com/1.png?v=1,那么缓存路径还是一样吗?
先对比下这个两个配置:
proxy_cache_key $uri;
proxy_cache_key $uri$is_args$args
第一个配置只根据不带参的$uri进行哈希,所以这时候加了参数和没加参数是一样的结果;
第二个配置就是把域名之后所有的内容(也就是$request_uri)都进行哈希。
- keys_zone:缓存的名称,是下面的proxy_cache值,后面的大小为缓存在硬盘中的目录索引
- inactive:缓存的有效时间
- max_size:缓存的最大值
配置清除缓存插件purge
插件git地址:https://github.com/FRiCKLE/ngx_cache_purge/releases/tag/2.3
- 上传下载下来的ngx_cache_purge-2.3.tar.gz并解压
- 安装,通过
./configure --prefix=/usr/local/nginx --with-stream --add-module=/soft/ngx_cache_purge-2.3,prefix为nginx的安装路径,--with-stream为之前安装过的插件,--add-module=/soft/ngx_cache_purge-2.3为安装purge插件,如果之前安装过别的插件,要一起安装,否则会被覆盖掉 - make命令编译
- cp objs/nginx /usr/local/nginx/sbin/将nginx文件复制到nginx的执行路径
- 通过/usr/local/nginx/sbin/nginx -V查看是否安装成功,
缓存配置在server里修改为
location / {
    # root   html;
    autoindex on;
    proxy_pass http://192.168.1.123:8080;
    # alias /soft/img;
     proxy_cache_valid 200 304 1h;
	 proxy_cache cache_image;
	 # proxy_cache_methods GET POST;
	 add_header Nginx-Cache "$upstream_cache_status";
    proxy_cache_key    $uri$is_args$args;	 # $is_args$args是缓存key带参数
}
location ~ /purge(/.*) {
   	    proxy_cache_purge  cache_image $1$is_args$args; # $1为uri,cache_image 为配置缓存的proxy_cache 的值
}
删除
purge命令清除静态缓存
http://域名+purge+静态资源相对路径 来清除静态资源缓存
TCP转发
nginx从1.9版本开始支持TCP、UDP转发,但是需要编译时带上--with stream
安装好nginx后安装stream流程
- 在nginx-1.18.0目录下执行
./configure --with-stream - 执行
make && make install
完成上面两个即可配置TCP转发,我因为用的安装都是nginx默认的,所以执行以上两个命令即可
配置转发rabbitmq请求为例
# stream模块和http模块平级,即是最外层
stream{
    server{
        listen 10002;
        proxy_pass 192.168.1.123:5672;
	}
}
使用Nginx增加认证
生成密钥
yum install -y httpd-tools
htpasswd -cb /etc/nginx/htpasswd skywalking password123
-cd后面是生成账号密码的文件,需要提前创建好,skywalking为账号,password123为密码
配置nginx
server {
    listen 8081;
    #auth_basic "Please enter the user name and password"; #这里是验证时的提示信息
    #auth_basic_user_file /data/skywalking/nginx/htpasswd;
    index  index.html;
    location /skywalking {
        root   html;
                    index  index.html index.htm;
        #auth_basic on;
        auth_basic "Please enter the user name and password"; #这里是验证时的提示信息
        auth_basic_user_file /etc/nginx/htpasswd;
        proxy_pass http://127.0.0.1:8090/;
        # WebSocket 穿透
        #proxy_set_header Origin "";
        #proxy_set_header Upgrade $http_upgrade;
        #proxy_set_header Connection "upgrade";
    }
}
配置https
- 配置证书需要用的信息配置文件
req.cnf,省份、邮件、城市、组织等,如果不配置需要生成证书时一步一步填写
[req]
default_bits = 2048
prompt = no
default_md = sha256
req_extensions = v3_req
distinguished_name = dn

[dn]
C=CN
ST=SomeState
L=SomeCity
O=SomeOrganization
OU=SomeOrganizationalUnit
CN=example.com
emailAddress=test@example.com

[v3_req]
subjectKeyIdentifier = hash
authorityKeyIdentifier = keyid:always,issuer
basicConstraints = CA:FALSE
keyUsage = nonRepudiation, digitalSignature, keyEncipherment
- 使用Linux命令生成密钥和证书:
openssl req -new -x509 -newkey rsa:4096 -sha256 -nodes -keyout private.key -out certificate.pem -days 365 -config req.cnf,最后的req.cnf就是第一步的文件 - 将生成的证书和配置文件配置到nginx的配置文件里
server {
    listen       443 ssl;
    server_name  localhost;

	# SSL证书和私钥路径
	ssl_certificate /path/your_certificate.pem;
	ssl_certificate_key /path/your_private_key.key;

	# 可选的SSL配置
	ssl_protocols TLSv1.2 TLSv1.3; # 推荐使用的协议版本
	ssl_ciphers HIGH:!aNULL:!MD5; # 推荐的密码套件
	ssl_prefer_server_ciphers on; # 优先使用服务器端的密码套件
	ssl_session_cache shared:SSL:1m; # 会话缓存
	ssl_session_timeout 10m; # 会话超时时间

    location / {
        root   html;
        index  index.html index.htm;
    }
    error_page   500 502 503 504  /50x.html;
    location = /50x.html {
        root   html;
    }
}
重启启动nginx即可,用https访问即可
常用命令
- nginx -V:查看配置文件地址、启动命令、安装路径、日志文件路径、插件等信息
- nginx -t:测试配置的配置文件是否正确


 261
261


 被折叠的 条评论
为什么被折叠?
被折叠的 条评论
为什么被折叠?
 到【灌水乐园】发言


