


提示:文章写完后,目录可以自动生成,如何生成可参考右边的帮助文档
文章目录
前言
基于Detectron2的BlendMask训练
训练的数据为:2014COCO数据集
配置环境为:ubuntu18.4 cuda10.1 单张显卡2018ti
提示:以下是本篇文章正文内容,下面案例可供参考
一、下载Detectron2
要训练BlendMask,首先上github搜索BlendMask,出现的界面为
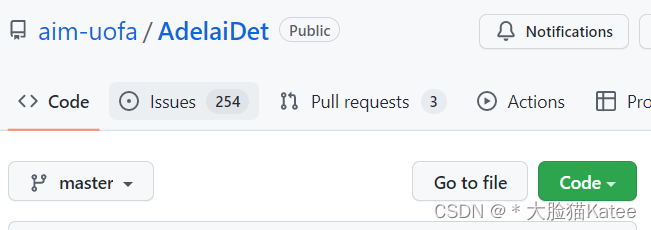
AdelaiDet是基于Detectron2之上,可以包含多个实例级识别任务的开源工具箱,所以它也可以看作是Detectron2的一个拓展插件。BlendMask也是属于AdelaiDet其中一个任务。
二、使用步骤
1.基础环境配置
在终端中输入
conda create -n detectron2 python=3.8   #conda创建虚拟环境
conda activate detectron2               #激活环境

nvcc --version                          #查看cuda版本
根据你的cuda配置去pytorch官网下载对应的pytroch
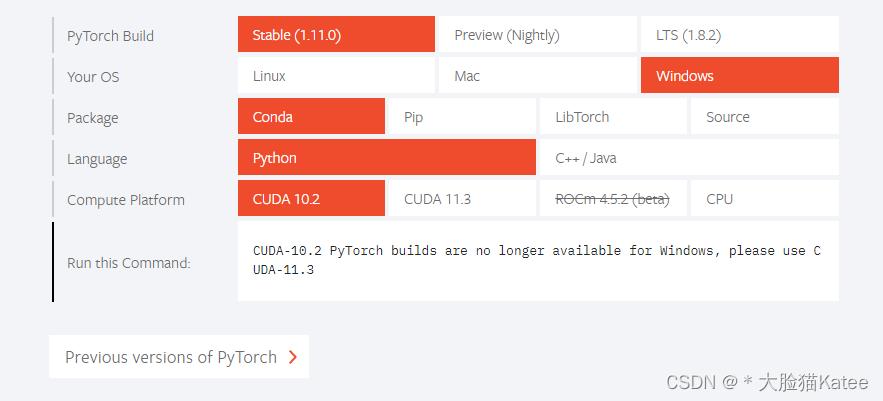
如果这个页面没看到,就点击Previous version of PyTorch,一定要找到对应的cuda和python版本。
例如我的版本是cuda10.1

使用以下命令安装
pip install torch1.8.1+cu101 torchvision0.9.1+cu101 torchaudio==0.8.1 -f https://download.pytorch.org/whl/torch_stable.html
检查一下
python                                 #在终端中进入python环境
>>> import torch
>>> import torchvision
>>> print(torch.cuda.is_available())    #查看cuda是否可用
>>>torch.__version__                    #查看torch版本
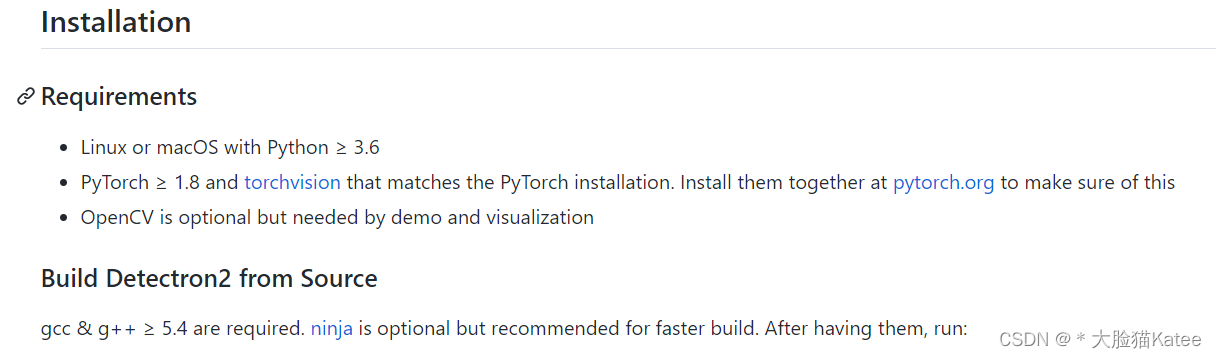
2.安装Detectron2
基本要求如下
下载代码
git clone https://github.com/facebookresearch/detectron2.git   #用git下载代码
python -m pip install -e detectron2                            #安装detectron2
3.安装AdelaiDet
git clone https://github.com/aim-uofa/AdelaiDet.git
cd AdelaiDet
python setup.py build develop                      #进行编译
4.用官方权重调通demo
1.文件依赖的requirements要记得安装,一般都在requirements.txt里面
2.选择一个官方已经训练好的模型权重,如blendmask_r101_dcni3_5x.pth
2.将blendmask_r101_dcni3_5x.pth放于AdelaiDet目录下
3.在终端运行
python demo/demo.py \
    --config-file configs/BlendMask/R_101_dcni3_5x.yaml \
    --input input1.jpg \
    --confidence-threshold 0.35 \
    --opts MODEL.WEIGHTS blendmask_r101_dcni3_5x.pth
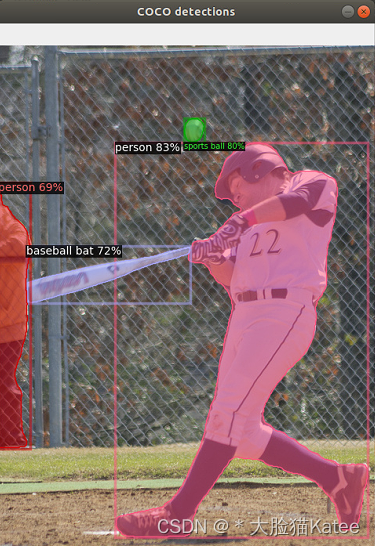
input1.jpg是自己选择的图片放在datasets下面的
若出现实例分割图片则为成功
5.使用COCO数据集2014
1.首先在COCO数据集官网下载2014的COCO数据集
目录结构为:
datasets/coco/annotations
/train2014 #训练数据集
/test2014 #测试数据集
/val2014 #验证数据集

2.cd AdelaiDet/datasets,修改文件prepare_thing_sem_from_instance.py,将文件中的train2017改为train2014
if __name__ == "__main__":
    args = get_parser().parse_args()
    dataset_dir = os.path.join(os.path.dirname(__file__), args.dataset_name)
    if args.dataset_name == "coco":
        thing_id_to_contiguous_id = _get_coco_instances_meta()["thing_dataset_id_to_contiguous_id"]
        #split_name = 'train2017'
        split_name = 'train2014'
        annotation_name = "annotations/instances_{}.json"
    else:
        thing_id_to_contiguous_id = {1: 0}
        split_name = 'train'
        annotation_name = "annotations/{}_person.json"
    #for s in ["train2017"]:                                       注释部分为修改部分,将2017修改为2014
    for s in ["train2014"]:
        create_coco_semantic_from_instance(
            os.path.join(dataset_dir, "annotations/instances_{}.json".format(s)),
            os.path.join(dataset_dir, "thing_{}".format(s)),
            thing_id_to_contiguous_id
        )
3.运行
python datasets/prepare_thing_sem_from_instance.py #从实例标注中提取语义信息
会生成一个thing_train2014的文件夹,里面的文件为npz结尾。
6.修改配置文件
1.cd AdelaiDet/configs/BlendMask/Base-BlendMask.yaml
DATASETS:
  #TRAIN: ("coco_2017_train",)
  #TEST: ("coco_2017_val",)
  TRAIN: ("coco_2014_train",)                                  #修改训练数据集
  TEST: ("coco_2014_val",)
SOLVER:
  IMS_PER_BATCH: 2                                            #根据你的GPU修改batch size
  BASE_LR: 0.01  # Note that RetinaNet uses a different default learning rate
  STEPS: (60000, 80000)
  MAX_ITER: 90000                                                #根据需求修改迭代次数
2.cd AdelaiDet/adet/config/defaults.py ,将文档中SynBN改为BN,因为我是单GPU训练,Syn表示需要同时训练,有多GPU的不用改这一步
#_C.MODEL.BASIS_MODULE.NORM = "SyncBN"
_C.MODEL.BASIS_MODULE.NORM = "BN"

#_C.MODEL.FCPOSE.BASIS_MODULE.BN_TYPE = "SyncBN"
_C.MODEL.FCPOSE.BASIS_MODULE.BN_TYPE = "BN"
7.进行训练
1.cd AdelaiDet
OMP_NUM_THREADS=1 python tools/train_net.py \
    --config-file configs/BlendMask/R_50_1x.yaml \         #配置文档的路径
    --num-gpus 1 \                                         #设置的GPU为1
    OUTPUT_DIR training_dir/blendmask_R_50_1x              #训练完输出的路径
如果能显示这个页面,说明已经成功运行!

常见问题
1.可以上github该项目,点击Issue里面搜索,里面大多数问题都有人回答。

2.我遇到的问题
(1) No module named ‘detectron2.utils’ 
解决方法:重新安装detectron2
(2) No such file or directory: ‘…/datasets/train2014/00000000_56456687.npz’
解决办法:将生成的thing_train2014里面的npz文件全部放在train2014中
(3)RuntimeError:Default process group has not been initialized,

解决办法:这是因为原配置文件设置的多GPU,但是我运行的是单CPU,所以初始化不成功,需要去cd AdelaiDet/adet/config/defaults.py ,将文档中SynBN改为BN,


 2330
2330


 被折叠的 条评论
为什么被折叠?
被折叠的 条评论
为什么被折叠?
 到【灌水乐园】发言


