


第七课:springboot实现不同环境配置加载方式二
简介
基于上一篇文章内容;
第六课:springboot实现不同环境配置加载方式一
能实现简单的项目通过maven 打包去加载不同文件下面的properties文件内容;
但是如果项目系统比较复杂;依赖的pproperties配置项内容都放到一个文件;一方面管理不太好管理;另外可读性或者扩展性比较差(遇到需要指定properties文件名的)
那就需要我们把这些不同的配置文件给分成多个properties文件;然后放到同一个文件夹;通过不maven打包制定不同环境的命令去加载不同环境对应的文件夹下的所有的文件内容
项目demo下载
项目的结构
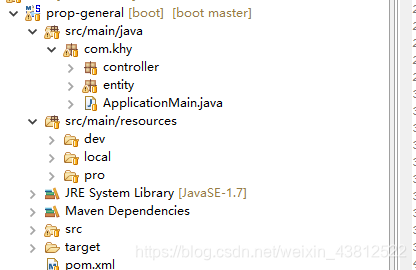
如上图 springboot 默认使用的application.properties文件;
然后根据不同的环境创建了 不同的.properties文件内容;
dev–> 指向的是dev 的环境properties文件
local --> 指向的是local 的环境properties文件
pro --> 指向的是pro 的环境properties文件
代码内容
1.pom.xml
<properties>
		<project.build.sourceEncoding>UTF-8</project.build.sourceEncoding>
		<project.reporting.outputEncoding>UTF-8</project.reporting.outputEncoding>
		<java.version>1.7</java.version>
		<!--含有多个main 需要指定某一个启动class类 -->
		<start-class>com.khy.ApplicationMain</start-class>
	</properties>

	<dependencies>
		<!-- Spring Boot Web 依赖 -->
		<dependency>
			<groupId>org.springframework.boot</groupId>
			<artifactId>spring-boot-starter-web</artifactId>
		</dependency>
	</dependencies>

	<build>
		<resources>
			<resource>
				<directory>src/main/resources</directory>
				<excludes>
					<exclude>local/*	</exclude><!--不包含这些文件  -->
					<exclude>dev/*	</exclude>
					<exclude>pro/*	</exclude>
				</excludes>
				<filtering>true</filtering>
			</resource>
			<resource>
				<directory>src/main/resources/${profiles.active}</directory>	<!--替换的配置文件的内容  -->
			</resource>
		</resources>
		<plugins>
			<plugin>
				<groupId>org.springframework.boot</groupId>
				<artifactId>spring-boot-maven-plugin</artifactId>
			</plugin>
		</plugins>
	</build>
	<profiles>
        <profile>
            <id>local</id>
            <properties>
                <profiles.active>local</profiles.active>
            </properties>
            <activation>
                <!--默认生效的配置组 使用maven 打包不指定 -P xxx  默认的是local-->
                <activeByDefault>true</activeByDefault>
            </activation>
        </profile>
        <profile>
            <id>dev</id>
            <properties>
                <profiles.active>dev</profiles.active>
            </properties>
        </profile>
        <profile>
            <id>pro</id>
            <properties>
                 <profiles.active>pro</profiles.active>
            </properties>
        </profile>
    </profiles>
一上是maven的配置内容;通过maven 打包指定-P 命令选择不同的环境则项目加载不同环境的配置文件内容;
2. ConstantsTest
@Component
@ConfigurationProperties(prefix = "constants")
@PropertySource("classpath:constants.properties")
public class ConstantsTest {

    private String password;
    private String userName;


	//get/set...
}
主要通过演示加载不同环境的properties文件,将properties文件中的内容赋值到当前对象中去;
@PropertySource(“classpath:constants.properties”)// 标识加载的properties文件名称,
@ConfigurationProperties(prefix = “constants”) //标识对应key 的前缀
3.UserEntity
@Component
public class UserEntity {

    @Value("${zidingyi.name}")
    private String name;

    @Value("${zidingyi.password}")
    private String password;

  // get/set....
}
这个是通过@Value注解来实现properties配置的value 和对象属性绑定的操作;
实现原理
通过maven 打包的实现选择某个环境内容
我们用 pro这个环境做测试内容;
测试
mvn clean install -Dmaven.test.skip=true -P
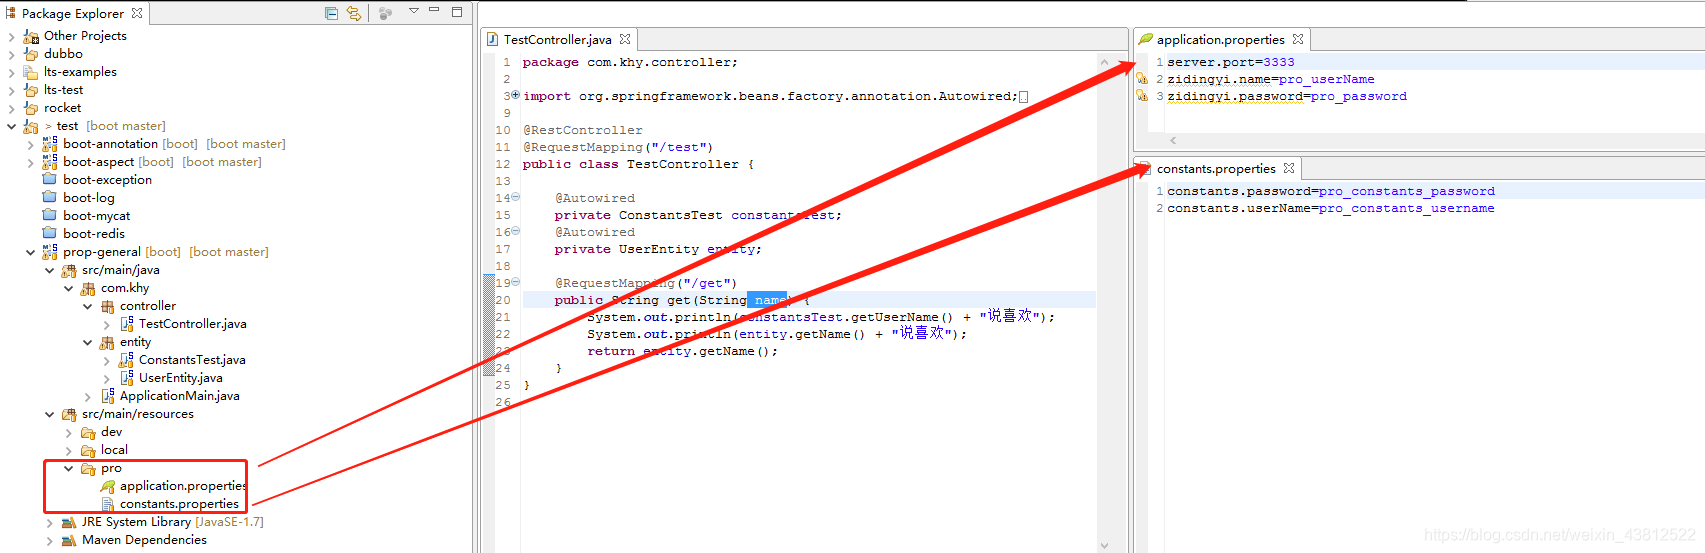
打完的包下面的class文件中可以看到
application.properties
constants.properties
两个文件的内容
已经变成指定环境中的配置;
项目启动之后的端口 3333
然后调用接口
http://localhost:3333/test/get
控制台打印的属性信息内容


 1910
1910


 被折叠的 条评论
为什么被折叠?
被折叠的 条评论
为什么被折叠?
 到【灌水乐园】发言


