


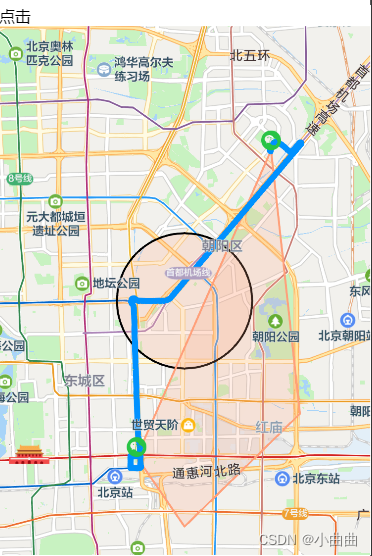
- 点、线、面、圆形的显示
- 获取周边、天气等
<view class="map_box">
  <view bindtap="change">点击</view>
  <map class="w100 min100" id="navi_map" longitude="116.451028" latitude="39.949643" scale="12" markers="{{markers}}" polyline="{{polyline}}" circles="{{circles}}" polygons="{{polygons}}" ></map>
</view>
// miniprogram/pages/gao_de/gao_de.js
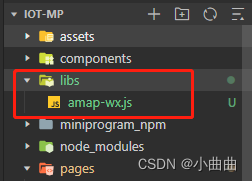
var amapFile = require('../../libs/amap-wx.js');//如:../../libs/amap-wx.js
Page({
/**
* 页面的初始数据
*/
data: {
markers: [{ //点
iconPath: "../../assets/imgs/wx.png",
latitude: 39.989643,
longitude: 116.481028,
width: 20,
height: 20
},{
iconPath: "../../assets/imgs/wx.png",
latitude: 39.90816,
longitude: 116.434446,
width: 20,
height: 20
}],
polyline: [], // 线
circles: [{ // 圆(圆心和半径)
latitude: 39.949643,
longitude: 116.451028,
fillColor: "#FFA07A33", // 圆形填充颜色
strokeColor: "#FFA07A",
strokeWidth: 2,
radius: 2000
}],
polygons:[{ // 区域(拐点坐标集合)
points: [
{ latitude: 39.989643, longitude: 116.481028 },
{ latitude: 39.90816, longitude: 116.434446},
{ latitude: 39.889643, longitude: 116.451028 },
{ latitude: 39.919643, longitude: 116.491028 },
],
fillColor: '#FFA07A33',
strokeColor: '#FFA07A',
strokeWidth: 2
}]
},
/**
* 生命周期函数--监听页面加载
*/
onLoad: function (options) {
var that = this;
var myAmapFun = new amapFile.AMapWX({key:'a0ee84c178d16e6045790c612eb51ab9'});
// 获取周边
myAmapFun.getPoiAround({
success: function(data){
console.log(data)
//成功回调
},
fail: function(info){
//失败回调
console.log(info)
}
})
//获取自己所在地址的定位
myAmapFun.getRegeo({
success: function(data){
//成功回调
console.log(data)
},
fail: function(info){
//失败回调
console.log(info)
}
})
//获取定位地点天气内容
myAmapFun.getWeather({
success: function(data){
console.log(data,'123')
//成功回调
},
fail: function(info){
//失败回调
console.log(info)
}
})
//获取两点之间行车路线
myAmapFun.getDrivingRoute({
origin: '116.481028,39.989643',
destination: '116.434446,39.90816',
success: function(data){
var points = [];
if(data.paths && data.paths[0] && data.paths[0].steps){
var steps = data.paths[0].steps;
for(var i = 0; i < steps.length; i++){
var poLen = steps[i].polyline.split(';');
for(var j = 0;j < poLen.length; j++){
points.push({
longitude: parseFloat(poLen[j].split(',')[0]),
latitude: parseFloat(poLen[j].split(',')[1])
})
}
}
}
that.setData({
polyline: [{
points: points,
color: "#0091ff",
width: 6
}]
});
if(data.paths[0] && data.paths[0].distance){
that.setData({
distance: data.paths[0].distance + '米'
});
}
if(data.taxi_cost){
that.setData({
cost: '打车约' + parseInt(data.taxi_cost) + '元'
});
}
},
fail: function(info){
}
})
},
change(){
let o = this.data.polygons[0]
o.points = [ { latitude: 39.989643, longitude: 116.481028 },
{ latitude: 39.90816, longitude: 116.434446},
{ latitude: 39.889643, longitude: 116.451028 },]
this.setData({
['polygons[0]']: o,
})
}
})


 1万+
1万+

 被折叠的 条评论
为什么被折叠?
被折叠的 条评论
为什么被折叠?
 到【灌水乐园】发言


