


 文章介绍了如何使用HyperShift在RHACM管理下创建、管理和扩展OpenShift的托管集群,强调了成本、部署和管理的优势,包括在AWS环境中的具体操作示例。
《OpenShift / RHEL / DevSecOps / Ansible 汇总目录》
说明:本文已经在 OpenShift 4.14 + ACM 2.9 + AWS 环境中验证
文章目录
用 HyperShift 实现 OpenShift 托管集群
什么是 HyperShift 托管集群以及架构
红帽 HyperShift 是实现以托管的方式运行 OpenShift 集群 Control Plane 控制平面的开源项目,使用 HyperShift 可以在一个 RHACM 管理集群中统一运行多个托管 OpenShift 集群的 Control Plane,而这些托管集群的 Worker 还是运行在各自集群中。
基于 HyperShift 的 OpenShift 托管集群和标准的 OpenShift 集群最显著不同点是集群的 Control Plane 运行差异。
- 一个标准 OpenShift 集群的 Control Plane 和 Worker 同时运行在一个 OpenShift 集群中。Control Plane 对应的 Pod 是通过 Operator 管理生命周期的,相关 Pod 直接运行在 Control Plane 节点的 CoreOS 中,且运行 Control Plane 的相关资源分布在该集群的多个 Namespace 中。
- 一个托管 OpenShift 集群的 Control Plane 和 Worker 分别运行在管理集群中和被管集群中。Control Plane 对应的 Pod 是通过 Deployment 或 StatefulSet 管理生命周期的,相关 Pod 集中运行在管理集群中与托管集群对应的 Namespace 中。

一个 HostedCluster 其实是一个逻辑上的集群,因为 HostedCluster 的 Control Plane 和 Worker 实际上是分开运行的。其中 Control Plane 运行在 “管理集群” 中的对应的命名空间内,而 Worker 是运行在指定的 “NodePool” 中。这就是说 HostedCluster 封装了 control plane 和 data plane 配置。HostedCluster 的 control plane 运行在管理集群对应的命名空间中,而不是像标准集群那样运行在 VM 或裸机上。而 HostedCluster 的 data plane 是用 NodePool 实现的,NodePool 资源是一组可扩展的 worker 节点。
正是因为 HostedCluster 的 Control Plane 被托管在 “管理集群” 中运行,因此一部分针对 HostedCluster 的 Control Plane 管理操作(例如扩展集群节点、升级集群、配置 MachineConfig 等)都只能在 “管理集群” 中进行,而不能在 HostedCluster 控制台中进行。
HyperShift 托管集群的价值
成本优势
为了保证可靠性标准 OpenShift 集群需要 3 个节点运行 Control Plane,因此当集群数量比较多的时候 Control Plane 消耗的硬件资源会比较多。而通过红帽的 HyperShift 实现的托管集群部署模式可以将 OpenShift 集群的 Control Plane 和 Worker 解耦运行部署,这样就可以在一个管理集群上集中运行多云环境中被托管集群的 Control Plane。另外托管集群的 Control Plane 是通过 Deployment 部署运行的,Deployment 自身的自愈性使得 Control Plane 即便是在单 Pod 运行的时候也具备一定的可靠性。这些都使得在大规模运行托管集群的时候具备节省 IaaS 资源的优势。
托管控制平面比标准控制平面相比,其基础设施成本平均降低 3-5 倍。在不使用集群时,客户还可以更快、更轻松地启动和关闭集群,从而节省更多成本。
部署优势
由于 HyperShift 托管集群的 Control Plane 不需要在独立节点部署,因此安装部署托管集群的效率得到提高。以前需要 30-40 分钟的配置时间,现在平均只需 10-15 分钟,使企业能够更快地开始、构建和部署应用程序。
由于一个 HyperShift 托管集群的 Control Plane 和 Worker 是分开运行的,因此这个逻辑上的集群可以分别运行在不同的硬件架构或网络环境上。例如 Control Plane 运行在 X86 架构的硬件上,而 Worker 可以运行在 ARM 架构的硬件上;或者 Control Plane 运行在私有云中,而 Worker 可以运行在不同公有云中。
管理优势
“管理集群” 的管理员可以集中管理所有托管集群的 Control Plane 配置,例如扩展集群节点、升级集群、配置 MachineConfig 等,这些配置无需 “托管集群” 的使用用户负责。这种集中的 Control Plane 管理模式可以让大量集群的管理操作具有更好的统一性、一致性和可控性。
在 RHACM 上管理 OpenShift 托管集群生命周期
虽然 HyperShift 是一个独立运行的开源项目,但在 OpenShift 多云环境中是结合 RHACM 使用的,这样通过 HyperShift 创建的 “托管集群” 会自动被 RHACM 纳管。因此以下操作是在运行 RHACM 的 “管理集群” 中进行的。
注意:以下操作需要在 demo.redhat.com 中申请 Red Hat Advanced Cluster Management with HyperShift 运行环境。
创建托管集群
- 下载 hcp 客户端。
$ curl -Lk $(oc get consoleclidownload hcp-cli-download -o json | jq -r '.spec.links[] | select(.text=="Download hcp CLI for Linux for x86_64").href') | tar xvz ./
- 在 “管理集群” 中执行以下 命令,创建一个名为 production 的托管集群。其中在 aws-credentials 里是访问 AWS 的各种凭证,另外 worker 节点分布在指定的 AWS Region 和 Zone 中,且每个 Zone 的 NodePool 中有一个实例副本。
$ hcp create cluster aws \
  --name production \
  --infra-id production \
  --region us-west-2 \
  --zones us-west-2b,us-west-2c \
  --instance-type m6a.large \
  --root-volume-type gp3 \
  --root-volume-size 100 \
  --etcd-storage-class gp3-csi \
  --control-plane-availability-policy SingleReplica \
  --infra-availability-policy SingleReplica \
  --network-type OVNKubernetes \
  --release-image quay.io/openshift-release-dev/ocp-release:4.14.2-x86_64 \
  --node-pool-replicas 1 \
  --namespace local-cluster \
  --secret-creds aws-credentials \
  --auto-repair \
  --generate-ssh
执行成功后应有以下日志:
2023-07-19T06:08:06Z    INFO    Retreiving credentials secret   {"namespace": "local-cluster", "name": "aws-credentials"}
Using baseDomain from the secret-creds baseDomain m6nbn.sandbox1223.opentlc.com
2023-07-19T06:08:08Z    INFO    Creating infrastructure {"id": "production"}
2023-07-19T06:08:09Z    INFO    Created VPC     {"id": "vpc-0dbb455dea3da0022"}
2023-07-19T06:08:09Z    INFO    Enabled DNS support on VPC      {"id": "vpc-0dbb455dea3da0022"}
2023-07-19T06:08:09Z    INFO    Enabled DNS hostnames on VPC    {"id": "vpc-0dbb455dea3da0022"}
2023-07-19T06:08:09Z    INFO    Created DHCP options    {"id": "dopt-06e9180ecce2798e5"}
2023-07-19T06:08:10Z    INFO    Associated DHCP options with VPC        {"vpc": "vpc-0dbb455dea3da0022", "dhcp options": "dopt-06e9180ecce2798e5"}
2023-07-19T06:08:10Z    INFO    Created internet gateway        {"id": "igw-0f379192743dfb8d6"}
2023-07-19T06:08:10Z    INFO    Attached internet gateway to VPC        {"internet gateway": "igw-0f379192743dfb8d6", "vpc": "vpc-0dbb455dea3da0022"}
2023-07-19T06:08:11Z    INFO    Created security group  {"name": "production-worker-sg", "id": "sg-0a0c67424dc142f20"}
2023-07-19T06:08:11Z    INFO    Authorized ingress rules on security group      {"id": "sg-0a0c67424dc142f20"}
2023-07-19T06:08:11Z    INFO    Created subnet  {"name": "production-private-us-west-2b", "id": "subnet-0fddca2cd2c3673e6"}
2023-07-19T06:08:12Z    INFO    Created subnet  {"name": "production-public-us-west-2b", "id": "subnet-0c1b771e914dec9b5"}
2023-07-19T06:08:12Z    INFO    Created elastic IP for NAT gateway      {"id": "eipalloc-02d9c770ef0a9b34e"}
2023-07-19T06:08:12Z    INFO    Created NAT gateway     {"id": "nat-02ef8b7b049647d46"}
2023-07-19T06:08:13Z    INFO    Created route table     {"name": "production-private-us-west-2b", "id": "rtb-0387350f60fa0fa7f"}
2023-07-19T06:08:27Z    INFO    Created route to NAT gateway    {"route table": "rtb-0387350f60fa0fa7f", "nat gateway": "nat-02ef8b7b049647d46"}
2023-07-19T06:08:27Z    INFO    Associated subnet with route table      {"route table": "rtb-0387350f60fa0fa7f", "subnet": "subnet-0fddca2cd2c3673e6"}
2023-07-19T06:08:28Z    INFO    Created subnet  {"name": "production-private-us-west-2c", "id": "subnet-07eb7d2e8b596f5f0"}
2023-07-19T06:08:28Z    INFO    Created subnet  {"name": "production-public-us-west-2c", "id": "subnet-0648995b90f5157b7"}
2023-07-19T06:08:29Z    INFO    Created elastic IP for NAT gateway      {"id": "eipalloc-005636f452805336f"}
2023-07-19T06:08:29Z    INFO    Created NAT gateway     {"id": "nat-084482616a67bbba9"}
2023-07-19T06:08:29Z    INFO    Created route table     {"name": "production-private-us-west-2c", "id": "rtb-0d7cb65e5c7c684ae"}
2023-07-19T06:08:44Z    INFO    Created route to NAT gateway    {"route table": "rtb-0d7cb65e5c7c684ae", "nat gateway": "nat-084482616a67bbba9"}
2023-07-19T06:08:44Z    INFO    Associated subnet with route table      {"route table": "rtb-0d7cb65e5c7c684ae", "subnet": "subnet-07eb7d2e8b596f5f0"}
2023-07-19T06:08:44Z    INFO    Created route table     {"name": "production-public", "id": "rtb-0abc9178955d575e1"}
2023-07-19T06:08:45Z    INFO    Set main VPC route table        {"route table": "rtb-0abc9178955d575e1", "vpc": "vpc-0dbb455dea3da0022"}
2023-07-19T06:08:45Z    INFO    Created route to internet gateway       {"route table": "rtb-0abc9178955d575e1", "internet gateway": "igw-0f379192743dfb8d6"}
2023-07-19T06:08:45Z    INFO    Associated route table with subnet      {"route table": "rtb-0abc9178955d575e1", "subnet": "subnet-0c1b771e914dec9b5"}
2023-07-19T06:08:45Z    INFO    Associated route table with subnet      {"route table": "rtb-0abc9178955d575e1", "subnet": "subnet-0648995b90f5157b7"}
2023-07-19T06:08:46Z    INFO    Created s3 VPC endpoint {"id": "vpce-084aac0cfeaedf873"}
2023-07-19T06:08:46Z    INFO    Found existing public zone      {"name": "m6nbn.sandbox1223.opentlc.com", "id": "Z050931826W0V1W05E9GL"}
2023-07-19T06:08:47Z    INFO    Created private zone    {"name": "production.m6nbn.sandbox1223.opentlc.com", "id": "Z08873212FDMHDTBNBXSM"}
2023-07-19T06:08:48Z    INFO    Created private zone    {"name": "production.hypershift.local", "id": "Z07589673T48L5DOSIPEG"}
2023-07-19T06:08:48Z    INFO    Detected Issuer URL     {"issuer": "https://oidc-storage-m6nbn.s3.us-east-2.amazonaws.com/production"}
2023-07-19T06:08:48Z    INFO    Created OIDC provider   {"provider": "arn:aws:iam::723204534903:oidc-provider/oidc-storage-m6nbn.s3.us-east-2.amazonaws.com/production"}
2023-07-19T06:08:49Z    INFO    Created role    {"name": "production-openshift-ingress"}
2023-07-19T06:08:49Z    INFO    Created role policy     {"name": "production-openshift-ingress"}
2023-07-19T06:08:49Z    INFO    Created role    {"name": "production-openshift-image-registry"}
2023-07-19T06:08:49Z    INFO    Created role policy     {"name": "production-openshift-image-registry"}
2023-07-19T06:08:49Z    INFO    Created role    {"name": "production-aws-ebs-csi-driver-controller"}
2023-07-19T06:08:49Z    INFO    Created role policy     {"name": "production-aws-ebs-csi-driver-controller"}
2023-07-19T06:08:49Z    INFO    Created role    {"name": "production-cloud-controller"}
2023-07-19T06:08:49Z    INFO    Created role policy     {"name": "production-cloud-controller"}
2023-07-19T06:08:49Z    INFO    Created role    {"name": "production-node-pool"}
2023-07-19T06:08:49Z    INFO    Created role policy     {"name": "production-node-pool"}
2023-07-19T06:08:49Z    INFO    Created role    {"name": "production-control-plane-operator"}
2023-07-19T06:08:49Z    INFO    Created role policy     {"name": "production-control-plane-operator"}
2023-07-19T06:08:49Z    INFO    Created role    {"name": "production-cloud-network-config-controller"}
2023-07-19T06:08:50Z    INFO    Created role policy     {"name": "production-cloud-network-config-controller"}
2023-07-19T06:08:50Z    INFO    Created role    {"name": "production-worker-role"}
2023-07-19T06:08:50Z    INFO    Created instance profile        {"name": "production-worker"}
2023-07-19T06:08:50Z    INFO    Added role to instance profile  {"role": "production-worker-role", "profile": "production-worker"}
2023-07-19T06:08:50Z    INFO    Created role policy     {"name": "production-worker-policy"}
2023-07-19T06:08:50Z    INFO    Created IAM profile     {"name": "production-worker", "region": "us-west-2"}
2023-07-19T06:08:50Z    INFO    Applied Kube resource   {"kind": "Namespace", "namespace": "", "name": "local-cluster"}
2023-07-19T06:08:50Z    INFO    Applied Kube resource   {"kind": "Secret", "namespace": "local-cluster", "name": "production-pull-secret"}
2023-07-19T06:08:50Z    INFO    Applied Kube resource   {"kind": "", "namespace": "local-cluster", "name": "production"}
2023-07-19T06:08:50Z    INFO    Applied Kube resource   {"kind": "Secret", "namespace": "local-cluster", "name": "production-etcd-encryption-key"}
2023-07-19T06:08:50Z    INFO    Applied Kube resource   {"kind": "Secret", "namespace": "local-cluster", "name": "production-ssh-key"}
2023-07-19T06:08:50Z    INFO    Applied Kube resource   {"kind": "NodePool", "namespace": "local-cluster", "name": "production-us-west-2b"}
2023-07-19T06:08:50Z    INFO    Applied Kube resource   {"kind": "NodePool", "namespace": "local-cluster", "name": "production-us-west-2c"}
- 执行命令查看 hostedcluster 的状态,当 hostedcluster 状态如下时可以继续以下步骤。
$ oc get hostedcluster production -n local-cluster
NAME         VERSION   KUBECONFIG                    PROGRESS    AVAILABLE   PROGRESSING   MESSAGE
production   4.13.2    production-admin-kubeconfig   Completed   True        False         The hosted control plane is available
- 执行命令查看托管集群使用的 nodepool。
$ oc get nodepool -n local-cluster
NAME                    CLUSTER      DESIRED NODES   CURRENT NODES   AUTOSCALING   AUTOREPAIR   VERSION   UPDATINGVERSION   UPDATINGCONFIG   MESSAGE
production-us-west-1b   production   1               1               False         True         4.13.2
production-us-west-1c   production   1               1               False         True         4.13.2
- 执行命令查看运行 production 托管集群 Control Plane 资源,以及相关 Deployment,它们都运行在对应的 local-cluster-production 命名空间中。
$ oc get hostedcontrolplane production -n local-cluster-production
NAME         AGE
production   10m

$ oc get deployment -n local-cluster-production
NAME                                 READY   UP-TO-DATE   AVAILABLE   AGE
aws-ebs-csi-driver-controller        1/1     1            1           8m27s
aws-ebs-csi-driver-operator          1/1     1            1           8m29s
capi-provider                        1/1     1            1           10m
catalog-operator                     1/1     1            1           9m3s
certified-operators-catalog          1/1     1            1           9m3s
cloud-network-config-controller      1/1     1            1           8m22s
cluster-api                          1/1     1            1           10m
cluster-autoscaler                   1/1     1            1           10m
cluster-image-registry-operator      1/1     1            1           9m3s
cluster-network-operator             1/1     1            1           9m4s
cluster-node-tuning-operator         1/1     1            1           9m4s
cluster-policy-controller            1/1     1            1           9m4s
cluster-storage-operator             1/1     1            1           9m3s
cluster-version-operator             1/1     1            1           9m4s
community-operators-catalog          1/1     1            1           9m3s
control-plane-operator               1/1     1            1           10m
csi-snapshot-controller              1/1     1            1           8m45s
csi-snapshot-controller-operator     1/1     1            1           9m3s
csi-snapshot-webhook                 1/1     1            1           8m45s
dns-operator                         1/1     1            1           9m4s
hosted-cluster-config-operator       1/1     1            1           9m4s
ignition-server                      1/1     1            1           10m
ingress-operator                     1/1     1            1           9m4s
konnectivity-agent                   1/1     1            1           10m
konnectivity-server                  1/1     1            1           10m
kube-apiserver                       1/1     1            1           10m
kube-controller-manager              1/1     1            1           9m11s
kube-scheduler                       1/1     1            1           9m11s
machine-approver                     1/1     1            1           10m
multus-admission-controller          1/1     1            1           8m17s
oauth-openshift                      1/1     1            1           9m5s
olm-operator                         1/1     1            1           9m3s
openshift-apiserver                  1/1     1            1           9m11s
openshift-controller-manager         1/1     1            1           9m5s
openshift-oauth-apiserver            1/1     1            1           9m5s
openshift-route-controller-manager   1/1     1            1           9m4s
packageserver                        1/1     1            1           9m3s
redhat-marketplace-catalog           1/1     1            1           9m3s
redhat-operators-catalog             1/1     1            1           9m3s
- 确认会为 nodepool 和 etcd 分配对应的 PVC。
$ oc get pvc -n local-cluster-my-production
NAME                              			 STATUS   VOLUME                                     CAPACITY   ACCESS MODES   STORAGECLASS                   AGE
data-etcd-0                       			 Bound    pvc-275c9722-0354-4aed-ae31-7ef25704d2cf   199Gi      RWO            crc-csi-hostpath-provisioner   4m21s
production-us-west-1b-9dbebc81-7brhx-rhcos   Bound    pvc-940d1bb3-de81-4ed8-a47c-10461f698337   199Gi      RWO            crc-csi-hostpath-provisioner   2m13s
production-us-west-1c-0g4gol2-4ccu91-rhcos   Bound    pvc-234h8031-tm02-4id3-r5ek-758943027584   199Gi      RWO            crc-csi-hostpath-provisioner   2m22s
- 执行命令,在获得新建的托管集群的 kubeconfig 和 kubeadmin 用户的登录密码后可登录访问托管集群。
$ oc get secret production-kubeadmin-password -n local-cluster --template='{{ .data.password }}' | base64 -d > $HOME/.kube/production.kubeadmin-password
$ oc get secret production-admin-kubeconfig -n local-cluster --template='{{ .data.kubeconfig }}' | base64 -d > $HOME/.kube/production-kubeconfig
$ KUBECONFIG=$HOME/.kube/production-kubeconfig
$ oc whoami --show-console
https://console-openshift-console.apps.cluster-ptl68.sandbox1543.opentlc.com
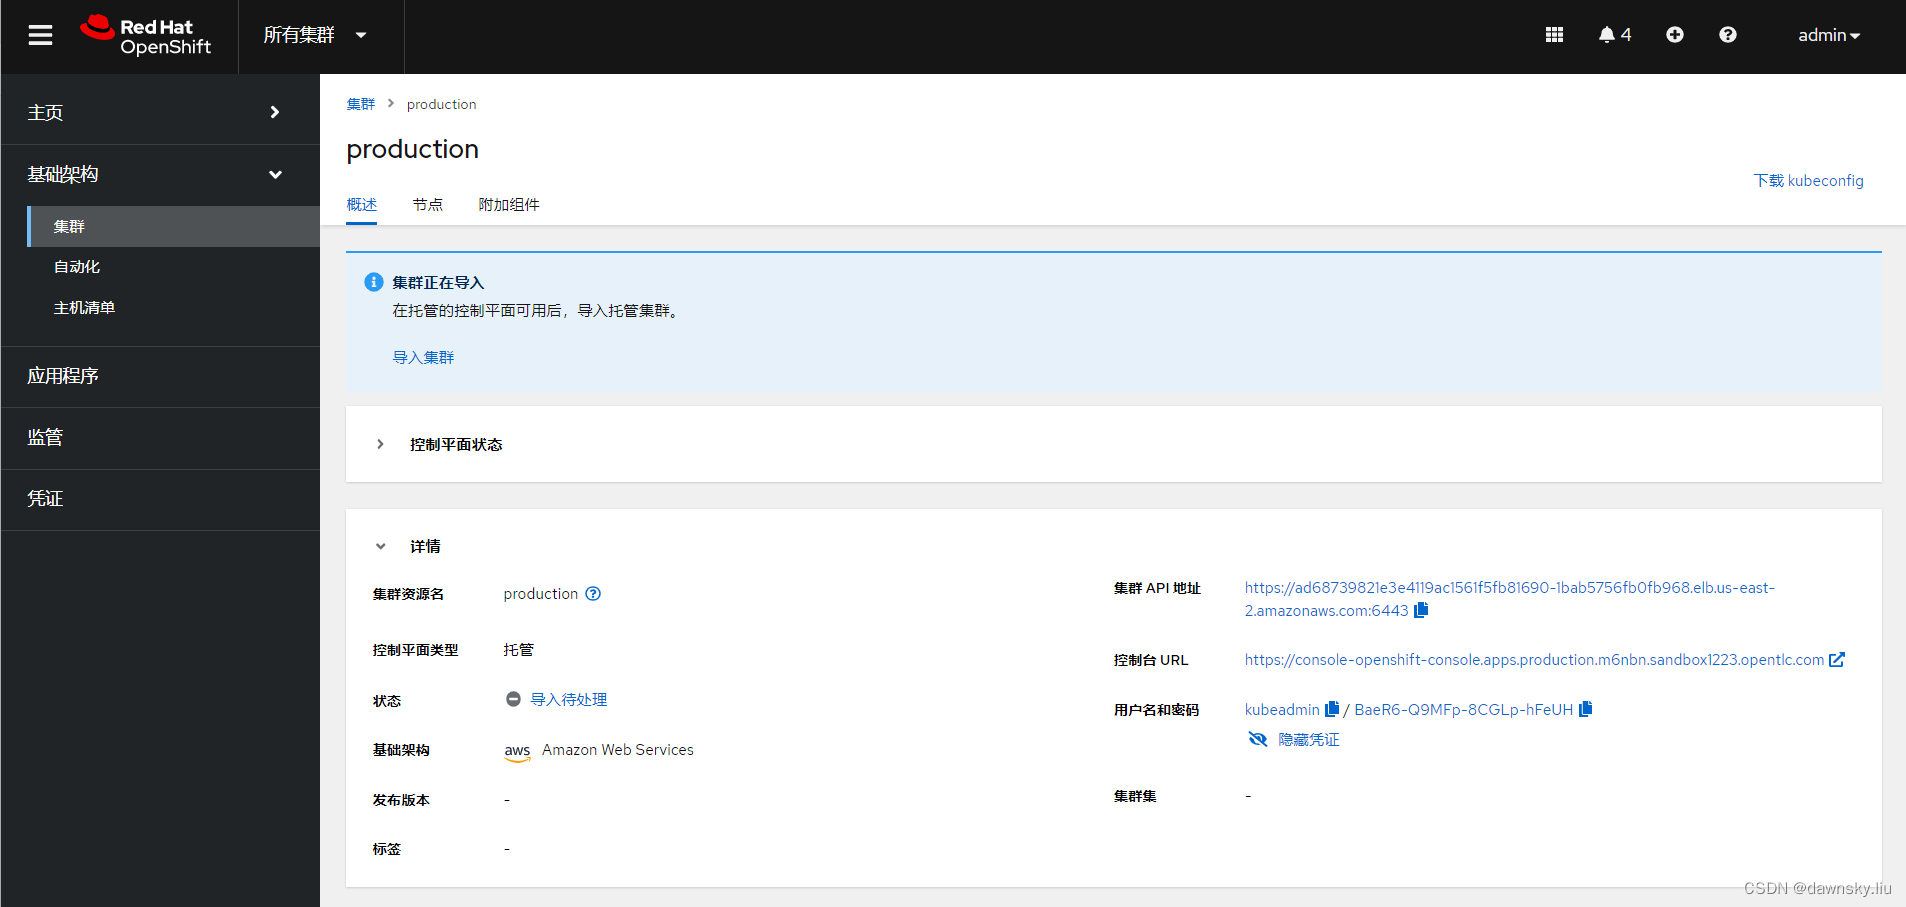
也可打开下图的 production 托管集群的控制台 URL 进入 production 托管集群,并用托管集群的登录用户名/密码登录。
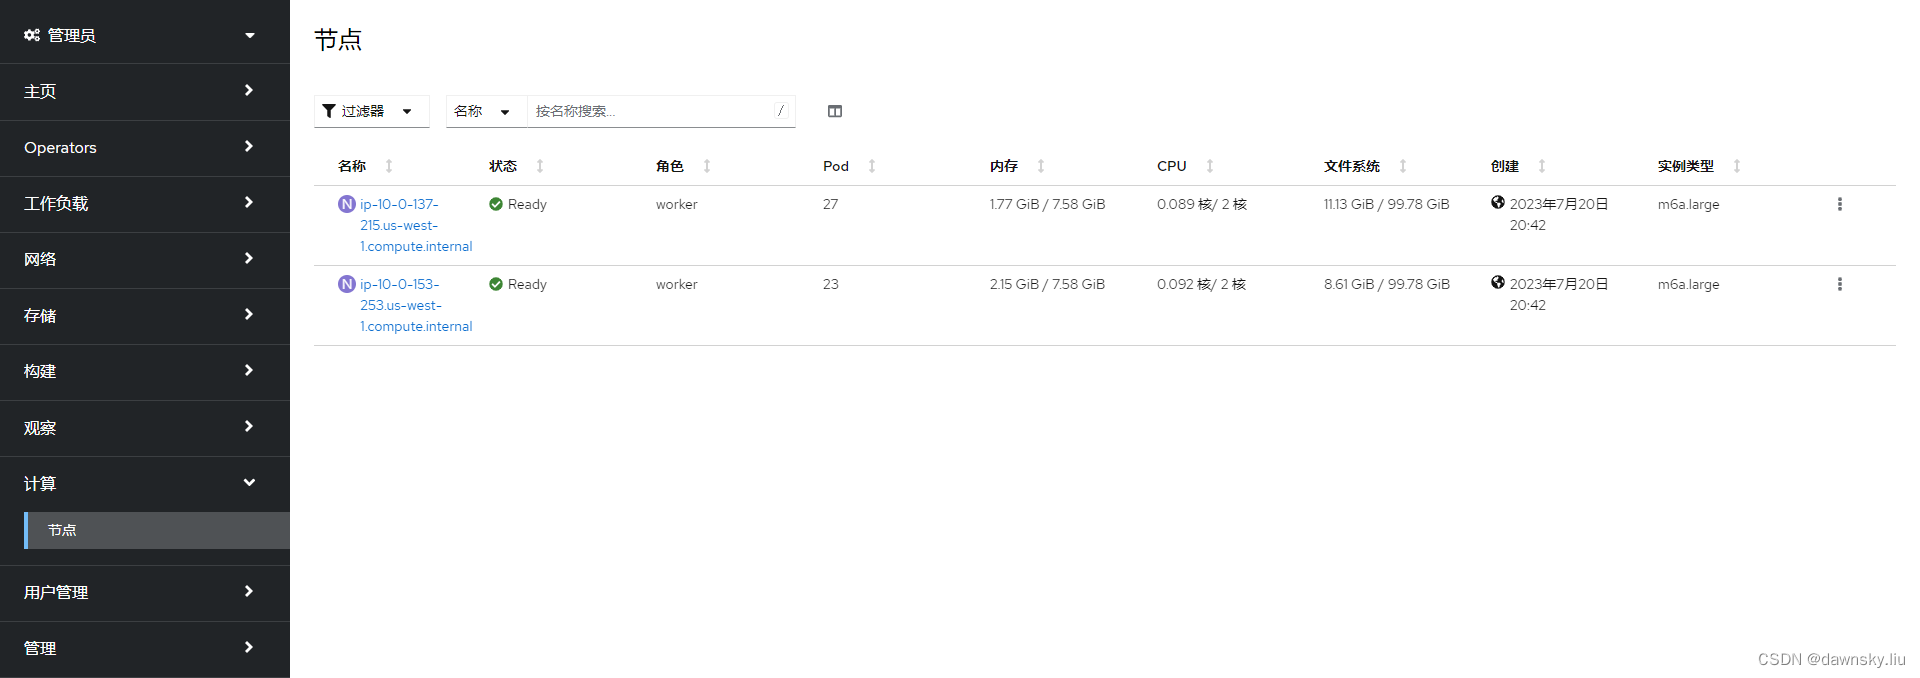
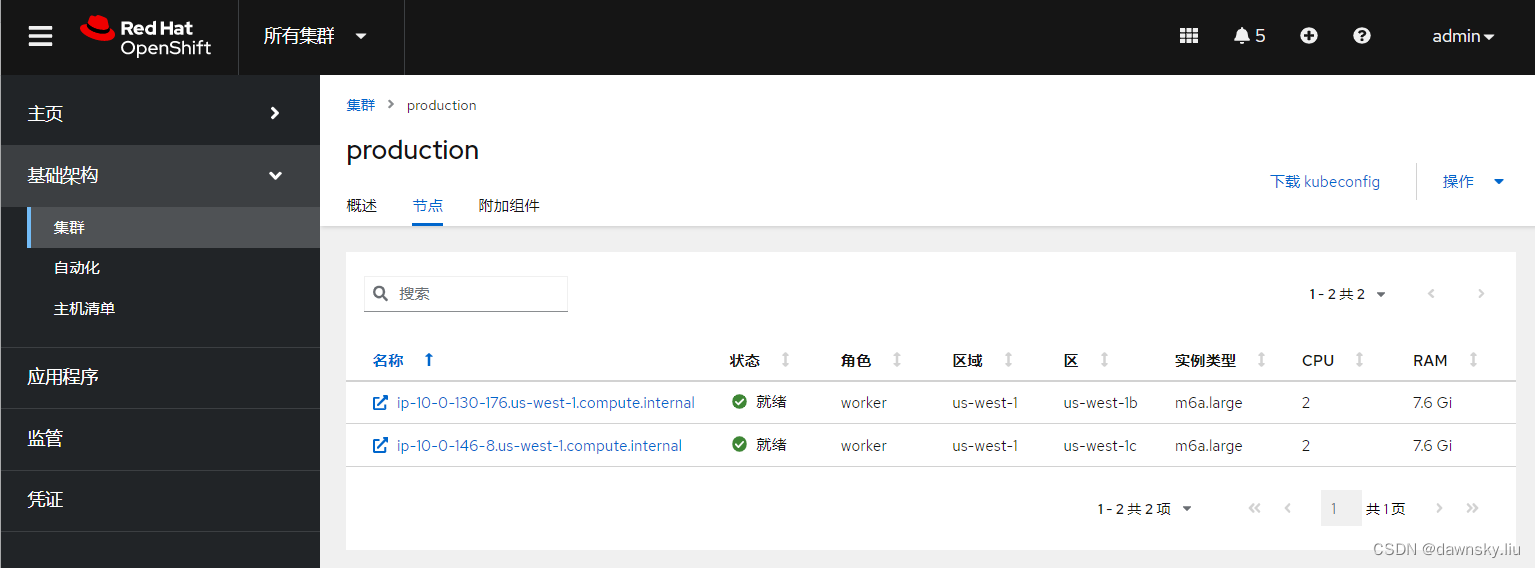
- 打开托管集群的“计算”菜单,确认只能看到“节点”菜单项。这是因为托管集群的 IaaS 资源主要是由“管理集群”负责的。而且集群只有 2 个 worker 节点,这是因为托管集群的 Control Plane 是运行在 “管理集群” 上。
- 执行命令,查看在托管集群中的 Operator 对象。注意:其中没有标准集群的 authentication,etcd,cluster-autoscaler,machine-api 等 Opeartor。
$ oc get co
NAME                                       VERSION   AVAILABLE   PROGRESSING   DEGRADED   SINCE   MESSAGE
console                                    4.13.2    True        False         False      3m35s
csi-snapshot-controller                    4.13.2    True        False         False      13m
dns                                        4.13.2    True        False         False      6m31s
image-registry                             4.13.2    True        False         False      6m21s
ingress                                    4.13.2    True        False         False      6m1s
insights                                   4.13.2    True        False         False      7m2s
kube-apiserver                             4.13.2    True        False         False      13m
kube-controller-manager                    4.13.2    True        False         False      13m
kube-scheduler                             4.13.2    True        False         False      13m
kube-storage-version-migrator              4.13.2    True        False         False      6m31s
monitoring                                 4.13.2    True        False         False      5m35s
network                                    4.13.2    True        False         False      12m
node-tuning                                4.13.2    True        False         False      9m6s
openshift-apiserver                        4.13.2    True        False         False      13m
openshift-controller-manager               4.13.2    True        False         False      13m
openshift-samples                          4.13.2    True        False         False      6m2s
operator-lifecycle-manager                 4.13.2    True        False         False      12m
operator-lifecycle-manager-catalog         4.13.2    True        False         False      12m
operator-lifecycle-manager-packageserver   4.13.2    True        False         False      13m
service-ca                                 4.13.2    True        False         False      7m
storage                                    4.13.2    True        False         False      8m55s
- 退出托管集群,重回到“管理集群”,确认当前只有一个项目。
$ unset KUBECONFIG
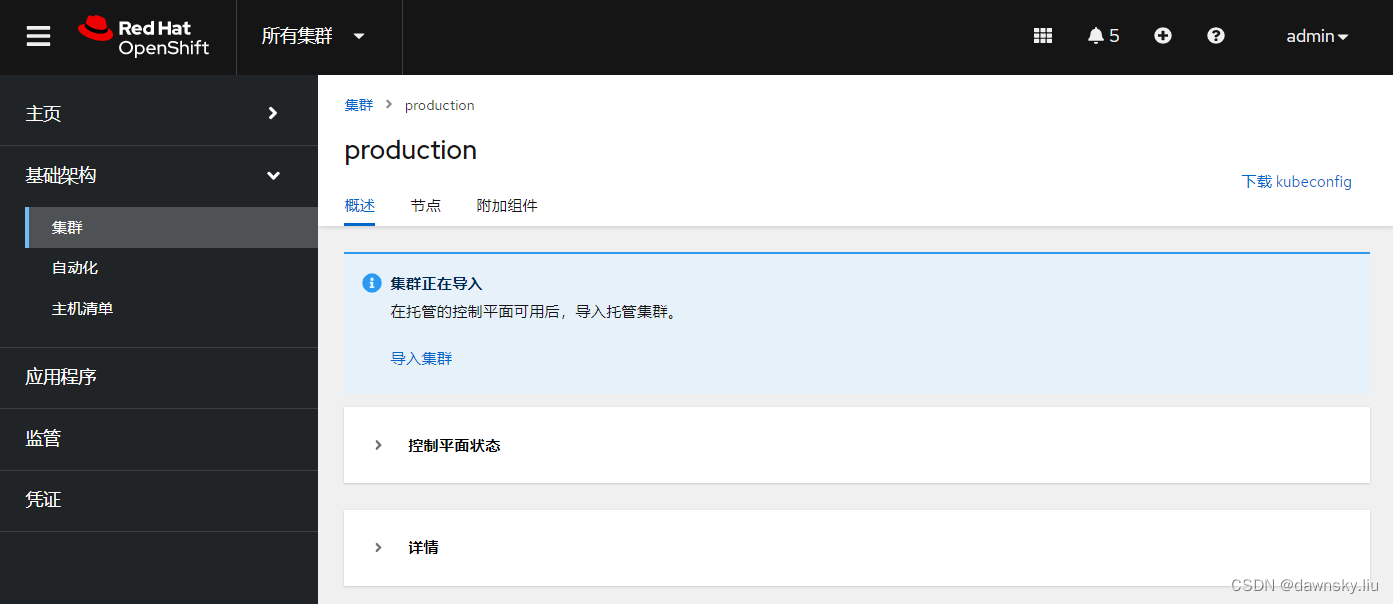
- 在管理集群的控制台中进入 production 托管集群,然后点击下图的 “导入集群” 链接。说明:OpenShisft 4.15 会自动将新创建的托管集群导入为被管集群。
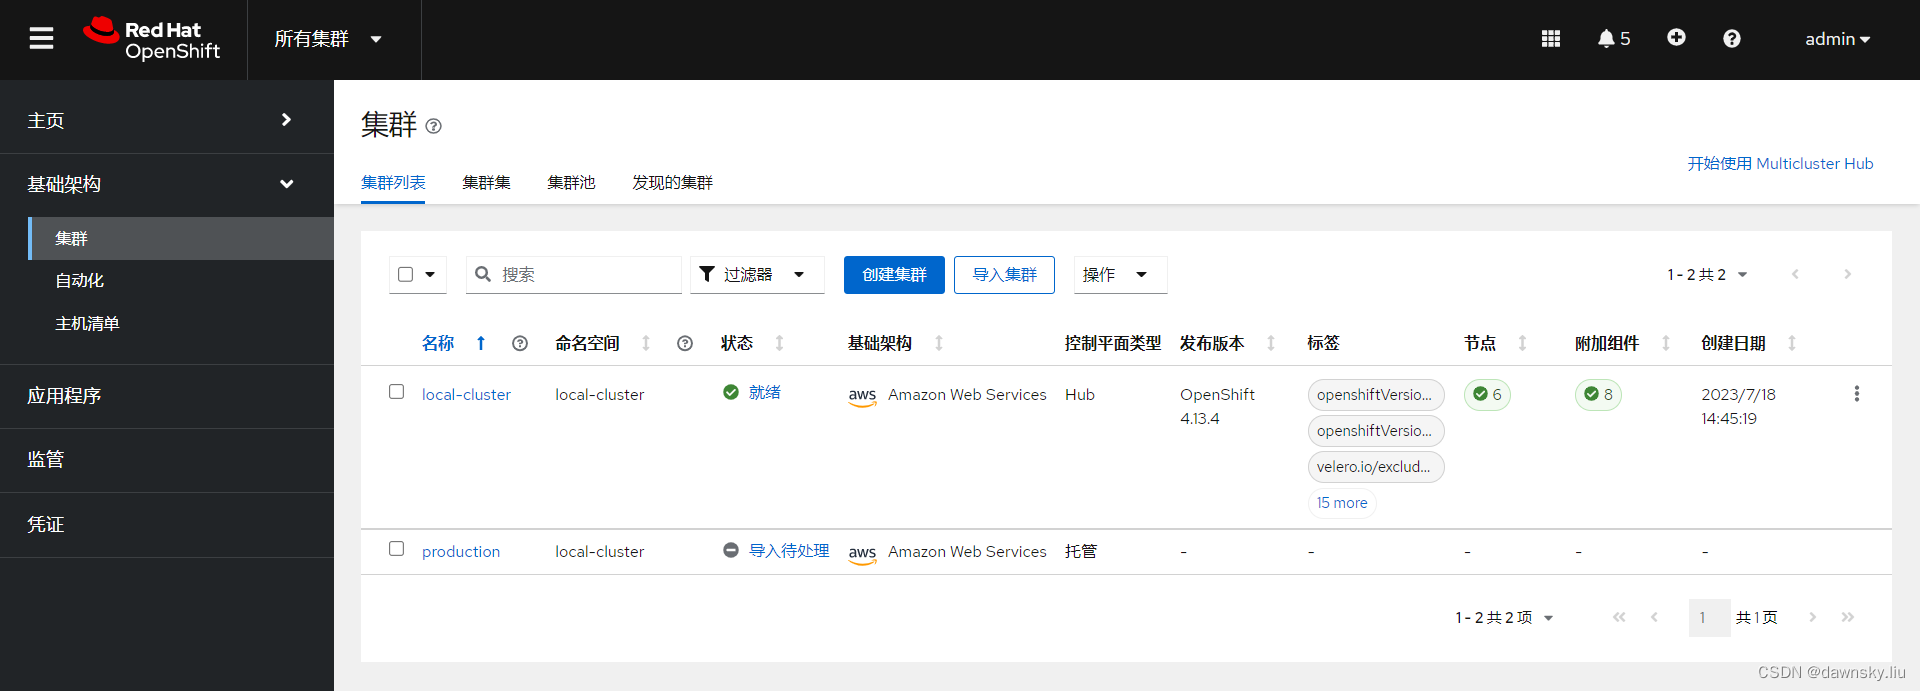
- 向管理集群导入托管集群后,如下图,production 的状态显示“就绪”。

此时可运行以下命令查看被 RHACM 纳管的 managedcluster。
$ oc get managedcluster production
NAME            HUB ACCEPTED   MANAGED CLUSTER URLS                                                                         JOINED   AVAILABLE   AGE
production      true           https://aa6480104c9ab4a9386d6cef729d7313-7716ef5a7b0dd7ef.elb.us-east-2.amazonaws.com:6443   True     True        15m
- 此时在查找包含 production 的项目,可以看到如下 3 个项目。
$ oc get project | grep production
klusterlet-production                                             Active
local-cluster-production                                          Active
production                                                        Active
升级托管集群
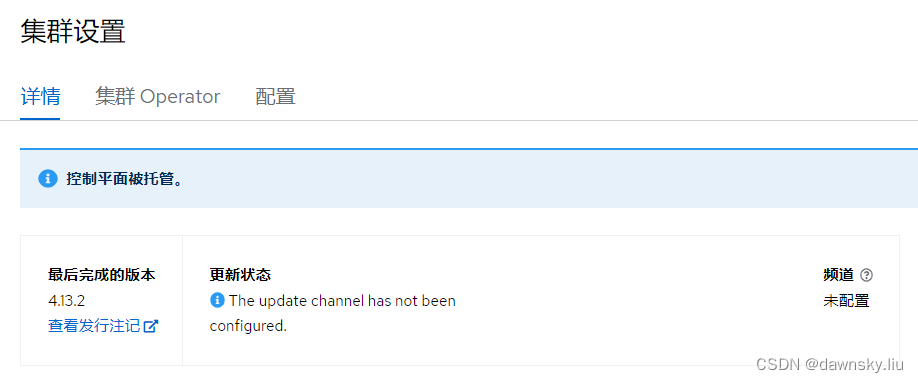
- 在 production “托管集群” 的控制台的 “集群设置” 页面中确认有 “控制平面被托管” 的提示,并且无法从控制台对该集群进行升级操作。
- 在 “管理集群” 的控制台中找到名为 production 的托管集群,然后点击“有可用的升级”链接。
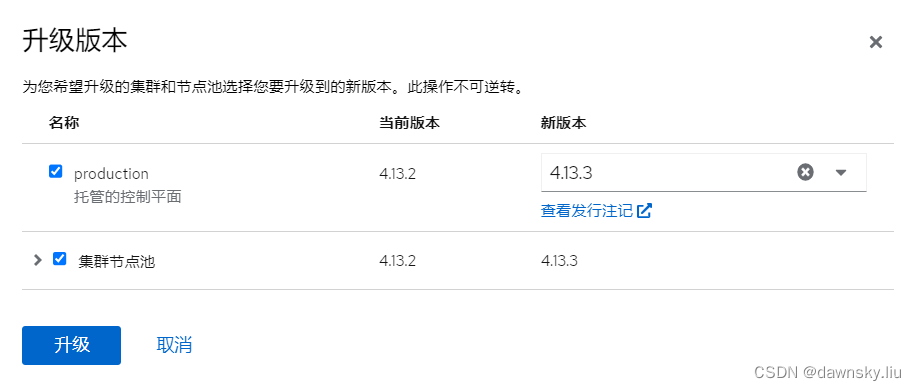
- 在“升级版本”弹出对话框中选择新版本,然后点击“升级”。
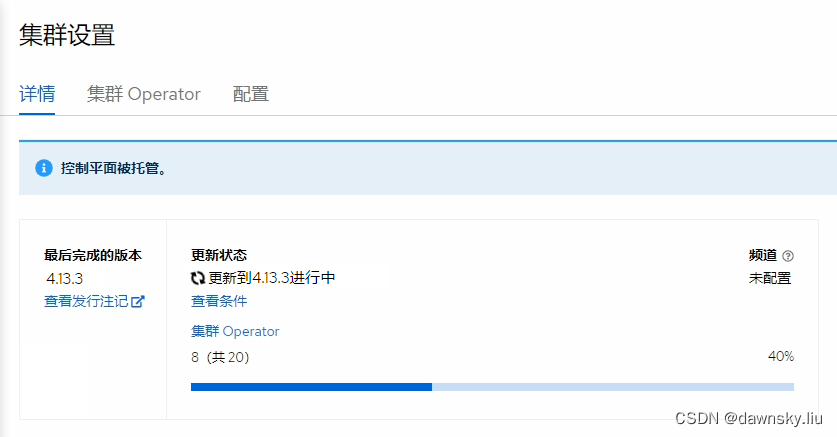
- 在 production “托管集群” 控制台的 “集群设置” 页面中确认升级过程已经开始,直到托管集群完成升级即可。
扩展托管集群
添加删除 NodePool
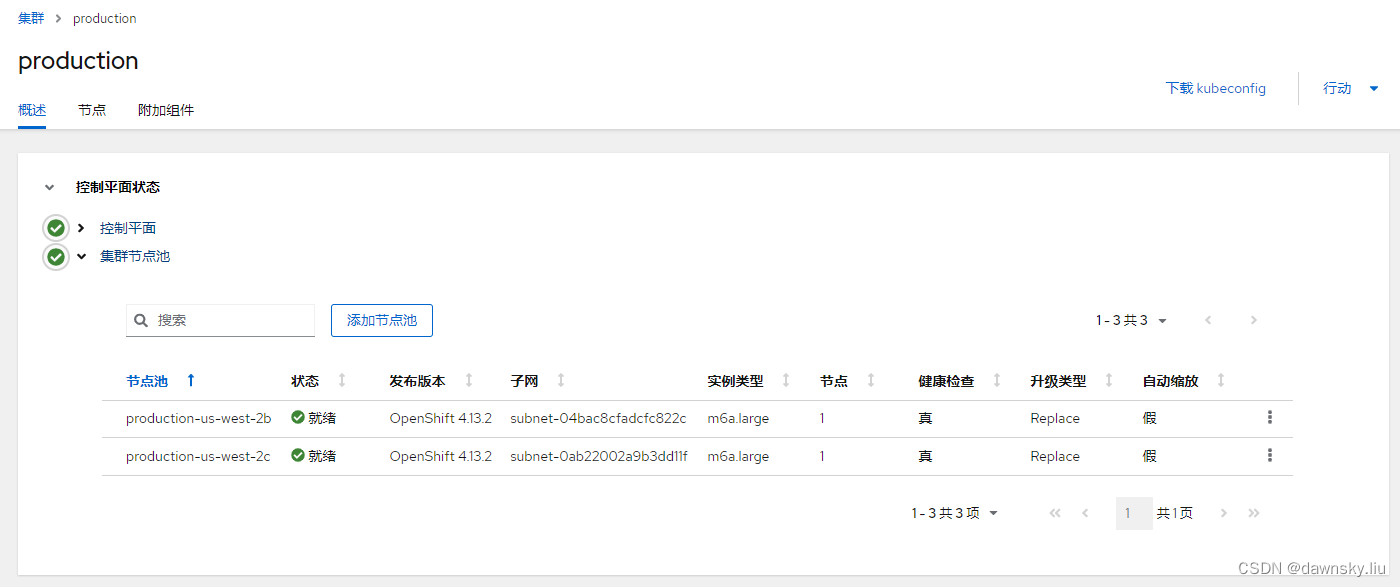
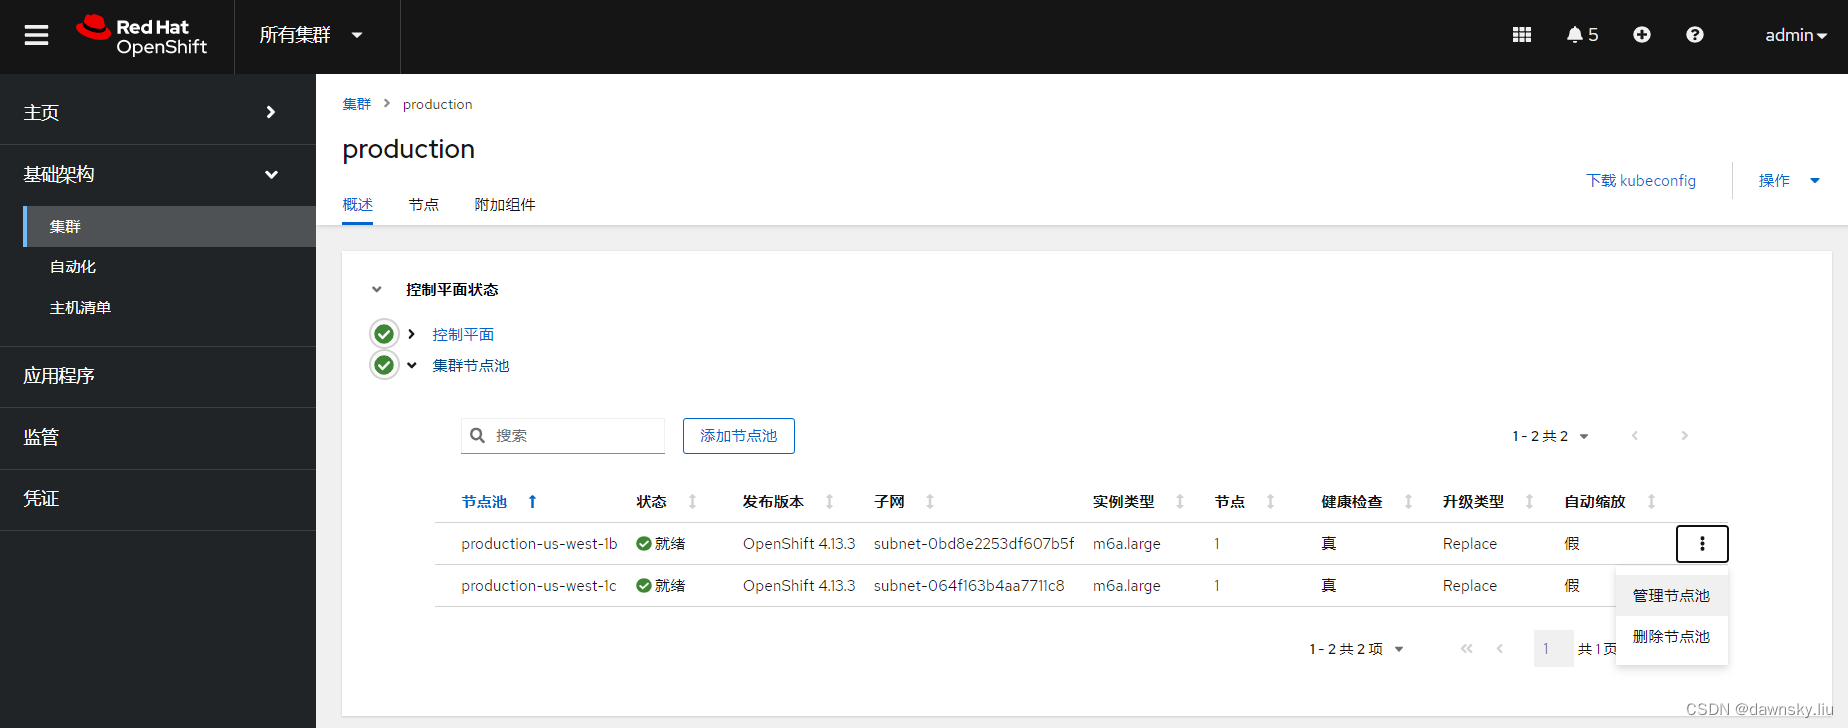
- 查看 production 托管集群当前有 2 个节点池,每个里有 1 个节点。
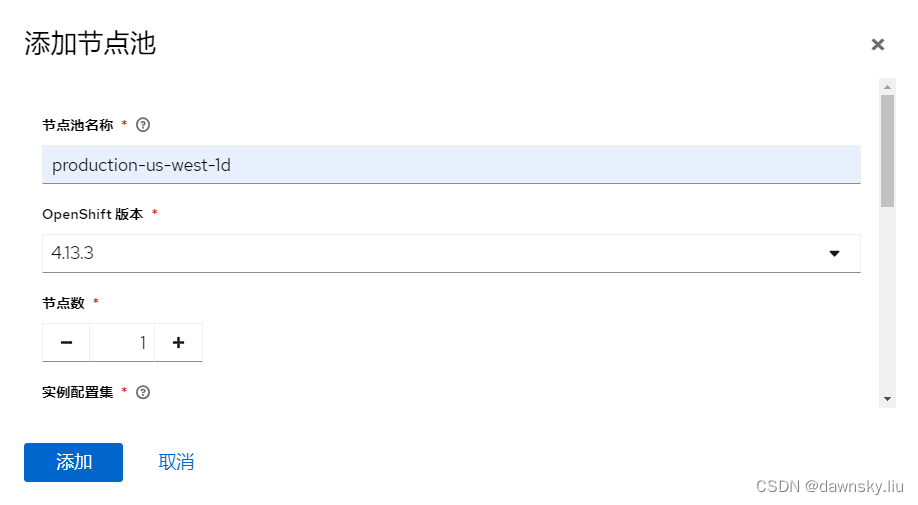
- 执行以下命令向 production 托管集群添加一个新的节点池,节点池中包含 1 个节点。
$ hcp create nodepool aws \
  --cluster-name production \
  --name production-us-west-1d \
  --node-count 1 \
  --namespace local-cluster \
  --instance-type m6a.large \
  --root-volume-type gp3 \
  --root-volume-size 100
或在管理集群中进入 production 托管集群,在“控制平面状态” 区域中点击 “添加节点池” 按钮,然后在对话框中添加节点池。
- 查看新添加的 nodepool 的状态。
$ oc get nodepool -n local-cluster
NAME                    CLUSTER      DESIRED NODES   CURRENT NODES   AUTOSCALING   AUTOREPAIR   VERSION   UPDATINGVERSION   UPDATINGCONFIG   MESSAGE
production-us-west-1b   production   1               1               False         True         4.13.3
production-us-west-1c   production   1               1               False         True         4.13.3
production-us-west-1d   production   1               1               False         False        4.13.3
- 查看托管集群的 Worker 节点数量,可以看到已经扩展到 3 个节点。
$ oc get node --kubeconfig $HOME/.kube/production-kubeconfig
NAME                                         STATUS   ROLES    AGE   VERSION
ip-10-0-131-250.us-west-2.compute.internal   Ready    worker   46m   v1.26.5+0001a21
ip-10-0-132-119.us-west-2.compute.internal   Ready    worker   11m   v1.26.5+0001a21
ip-10-0-154-142.us-west-2.compute.internal   Ready    worker   46m   v1.26.5+0001a21
- 删除节点池中的 production-us-west-1d 节点池即删除托管集群的对应的 Worker 节点。
手动扩展 Worker 节点
- 在 RHACM 控制台查看名为 production 的 “托管集群”,此时有 2 个节点。
- 执行命令,扩展名为 production-us-west-1b 的 nodepool 的节点数量。
$ oc scale nodepool production-us-west-1b --replicas 2 -n local-cluster
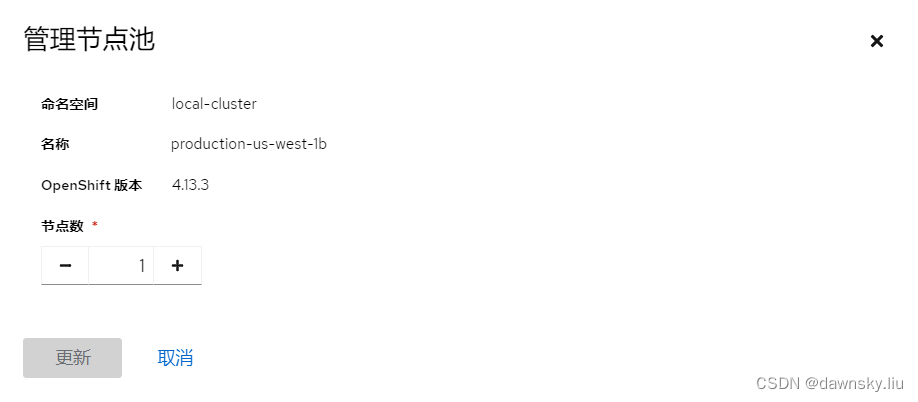
或在管理集群中进入 production 托管集群,在“控制平面状态” 区域中点击 “production-us-west-1b” 后方的下拉菜单,进入“管理节点池”。
- 在“管理节点池” 窗口中增加“节点数”,然后点击“更新”。
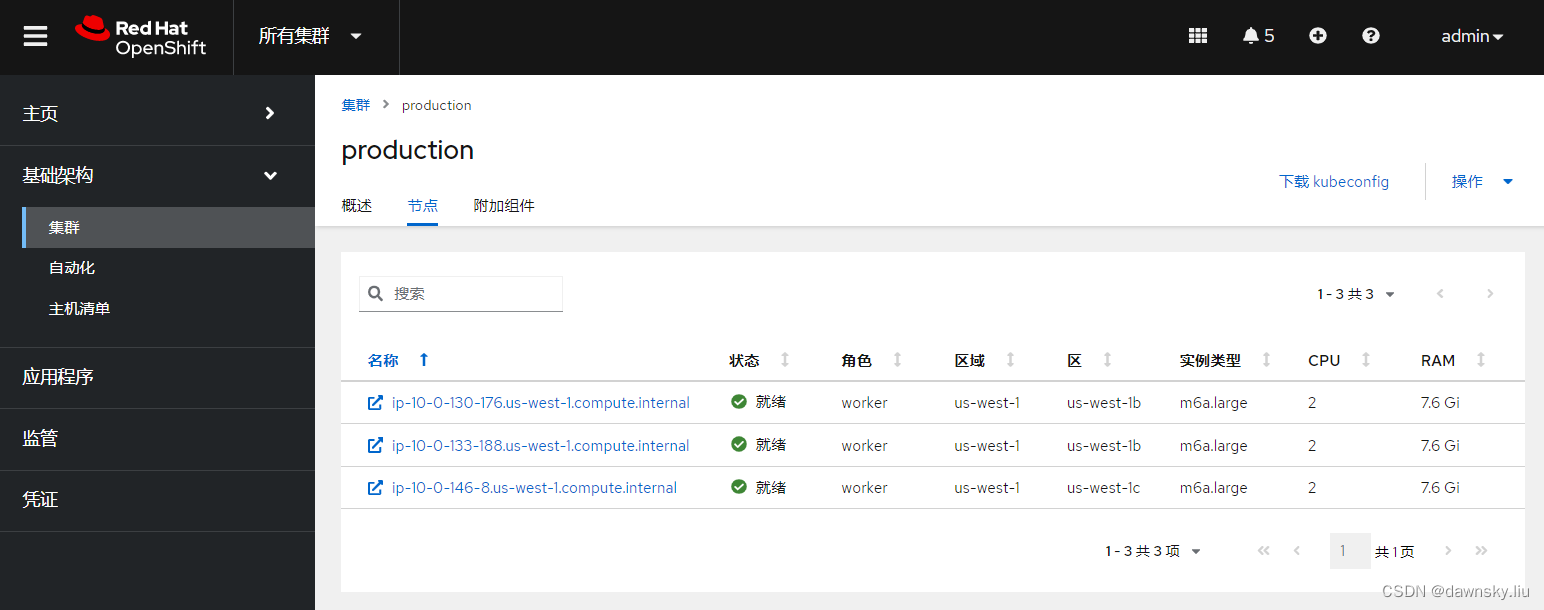
- 经过一定时间再次在 RHACM 控制台查看名为 production 的 “托管集群”,确认在 us-west-2b 的 Zone 中已运行有 2 个节点了。
自动扩展 Worker 节
- 执行命令,修改名为 production-us-west-1b 的 nodepool,将其设为 autoScaling,并设最大和最小数量。
$ oc -n local-cluster patch nodepool production-us-west-1b --type=json -p '[{"op": "remove", "path": "/spec/replicas"},{"op":"add", "path": "/spec/autoScaling", "value": { "max": 5, "min": 1 }}]'
- 查看 nodepool,确认 production-us-west-1b 的 AUTOSCALING 已是 True。
$ oc get nodepool -n local-cluster
NAME                    CLUSTER      DESIRED NODES   CURRENT NODES   AUTOSCALING   AUTOREPAIR   VERSION   UPDATINGVERSION   UPDATINGCONFIG   MESSAGE
production-us-west-1b   production                   1               True          True         4.13.3
production-us-west-1c   production   1               1               False         True         4.13.3
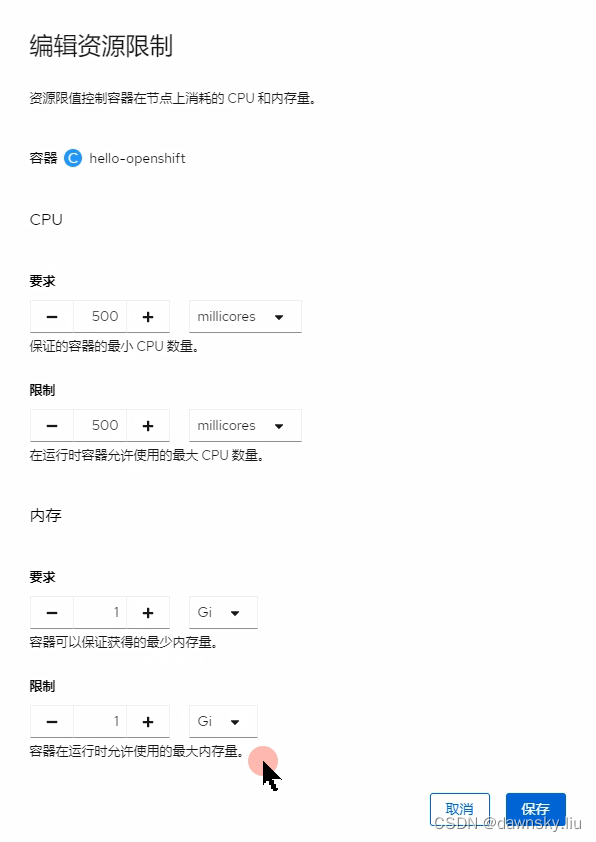
- 在 production “托管集群” 中使用 Deployment 运行 openshift/hello-openshift 容器,并为该 Deployment 中的容器设置以下资源限制。
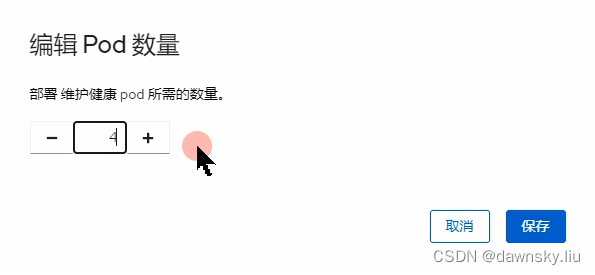
- 根据情况增加运行 hello-openshift 的 Pod 数量。
- 经过一定时间在 RHACM 控制台查看名为 production 的 “托管集群”,确认在 us-west-2b 的 Zone 中运行的节点数量增加了,最多运行在 us-west-2b 中的节点可增加到 5 个。
- 还可减少运行 hello-openshift 的 Pod 数量到 1。经过一定时间在 RHACM 控制台查看名为 production 的 “托管集群”,确认在 us-west-2b 的 Zone 中运行的节点数量减少到 2 个。
限制使用 OpenShift 的版本
以下 ConfigMap 用来限制使用 OpenShift 的版本。
apiVersion: v1
data:
  supported-versions: '{"versions":["4.13","4.14","4.15"]}'
kind: ConfigMap
metadata:
  labels:
    hypershift.openshift.io/supported-versions: "true"
  name: supported-versions
  namespace: hypershift
删除托管集群
- 执行命令,删除 production 托管集群。
$ oc delete managedcluster production
$ hcp destroy cluster aws --name production --namespace local-cluster --secret-creds aws-credentials
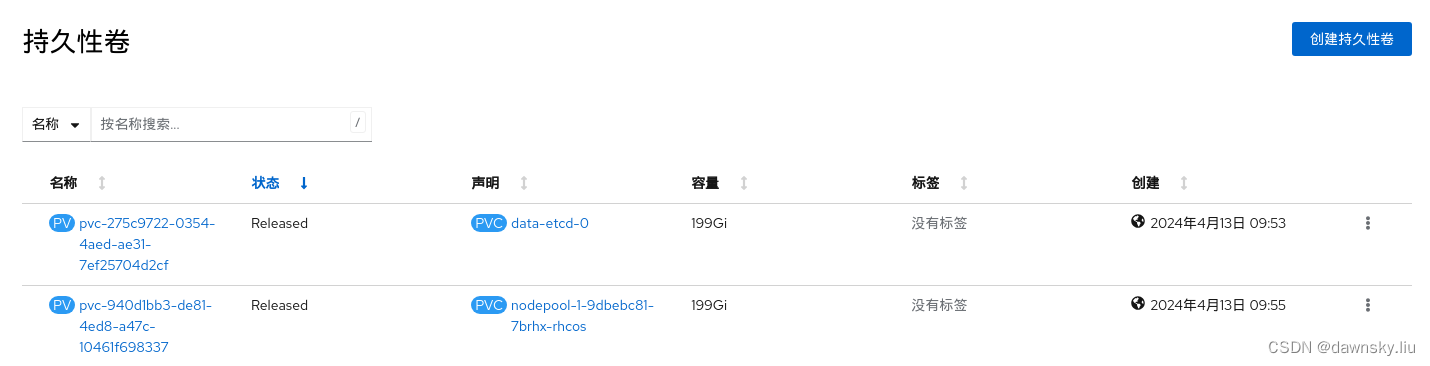
- 确认在删除托管集群后,其对应的 PV 还会继续保存,如果需要也可手动删除。
演示视频
参考
https://github.com/redhat-cop/openshift-lab-origin/blob/master/HyperShift/Introduction.adoc
https://hypershift-docs.netlify.app/reference/api/
https://access.redhat.com/documentation/zn-cn/red_hat_advanced_cluster_management_for_kubernetes/2.9/html-single/clusters/index#enable-node-auto-scaling-hosted-cluster
https://hypershift-docs.netlify.app/how-to/cluster-configuration/


 877
877

 被折叠的 条评论
为什么被折叠?
被折叠的 条评论
为什么被折叠?
 到【灌水乐园】发言


