


库函数总结
- Python Build-in
- OS库
- np库
- torch
- torch.LongTensor()
- CLASS torch.utils.data.Dataset()
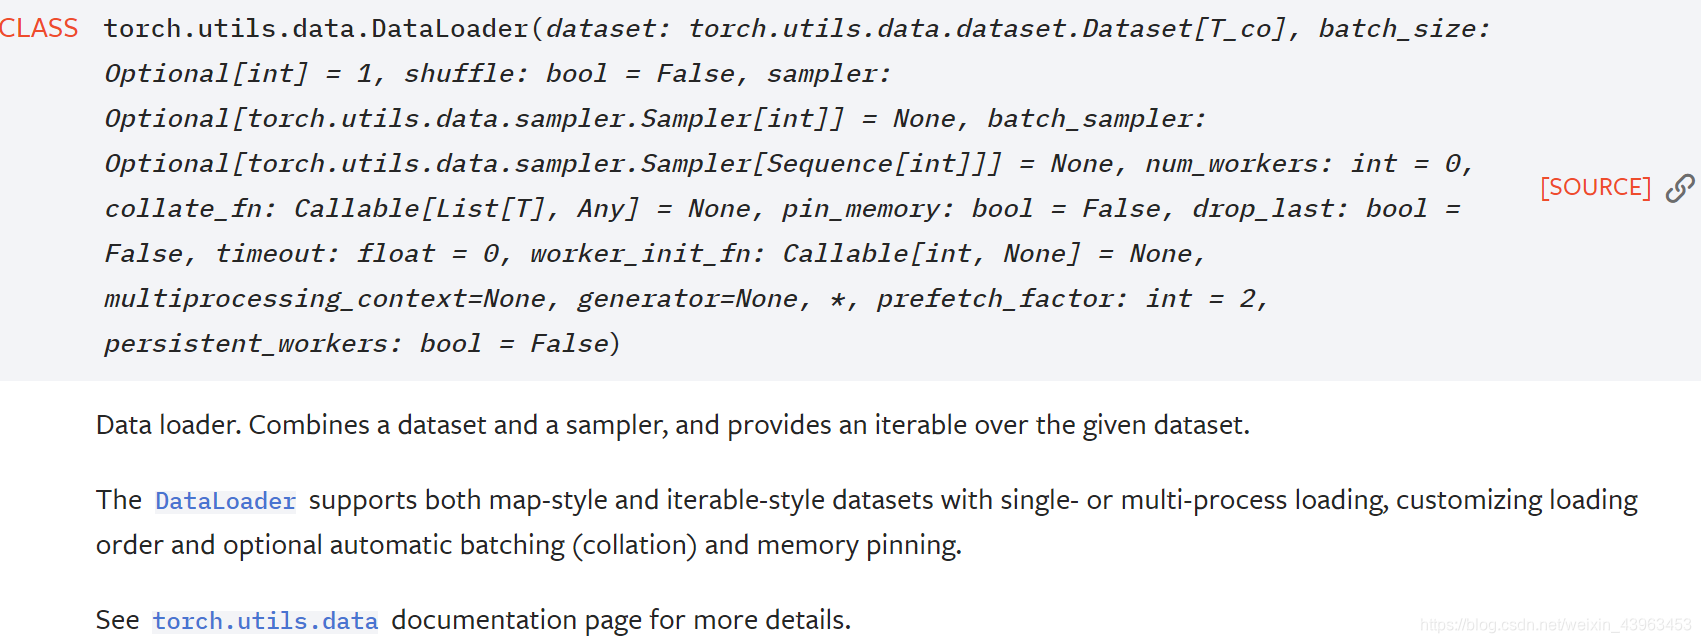
- CLASS torch.utils.data.DataLoader()
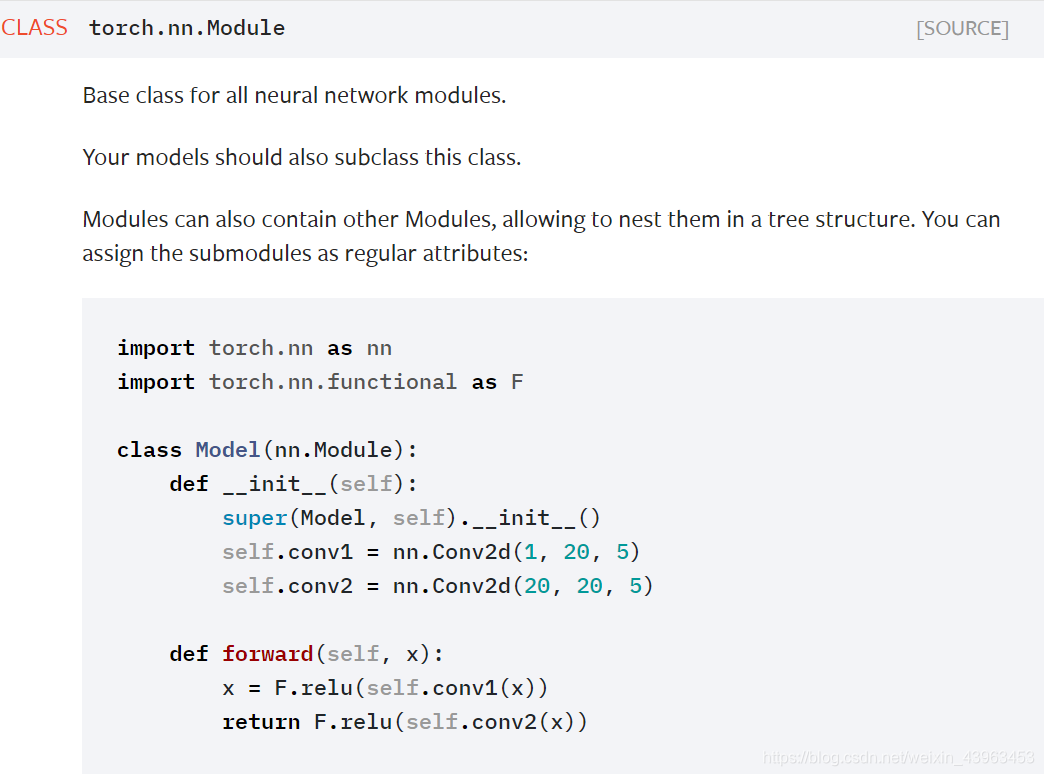
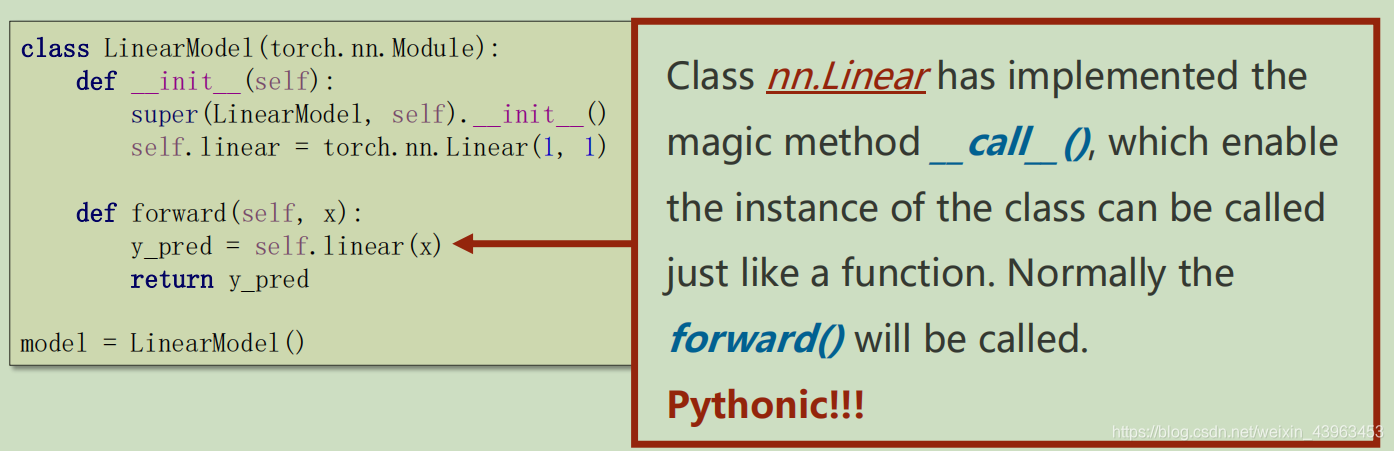
- CLASS torch.nn.Module
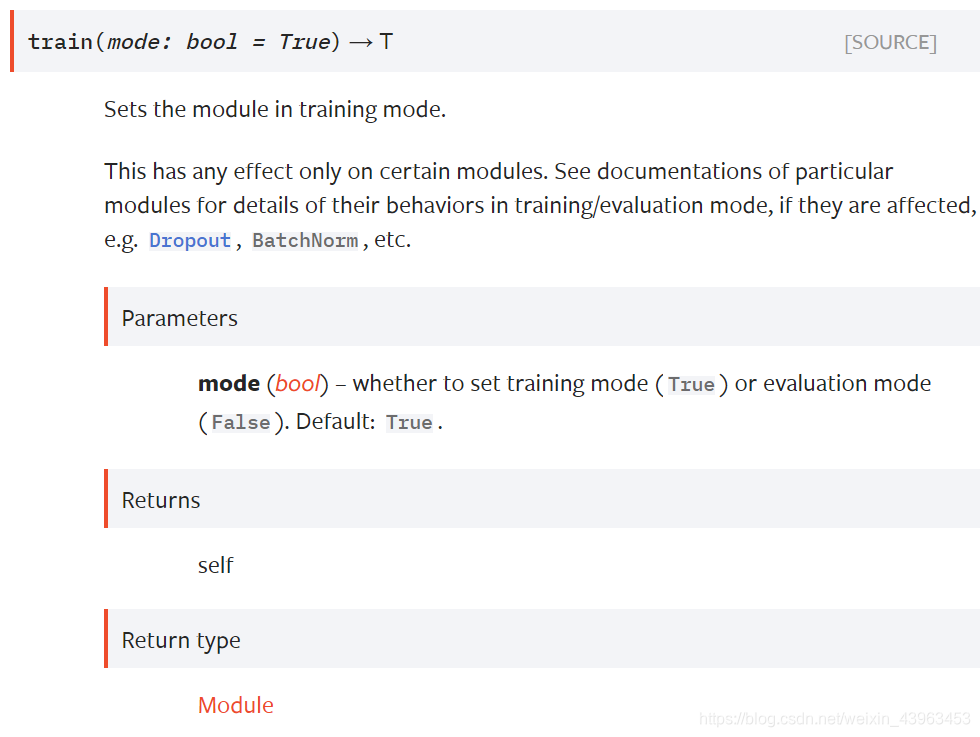
- Module.train(mode: bool = True) → T
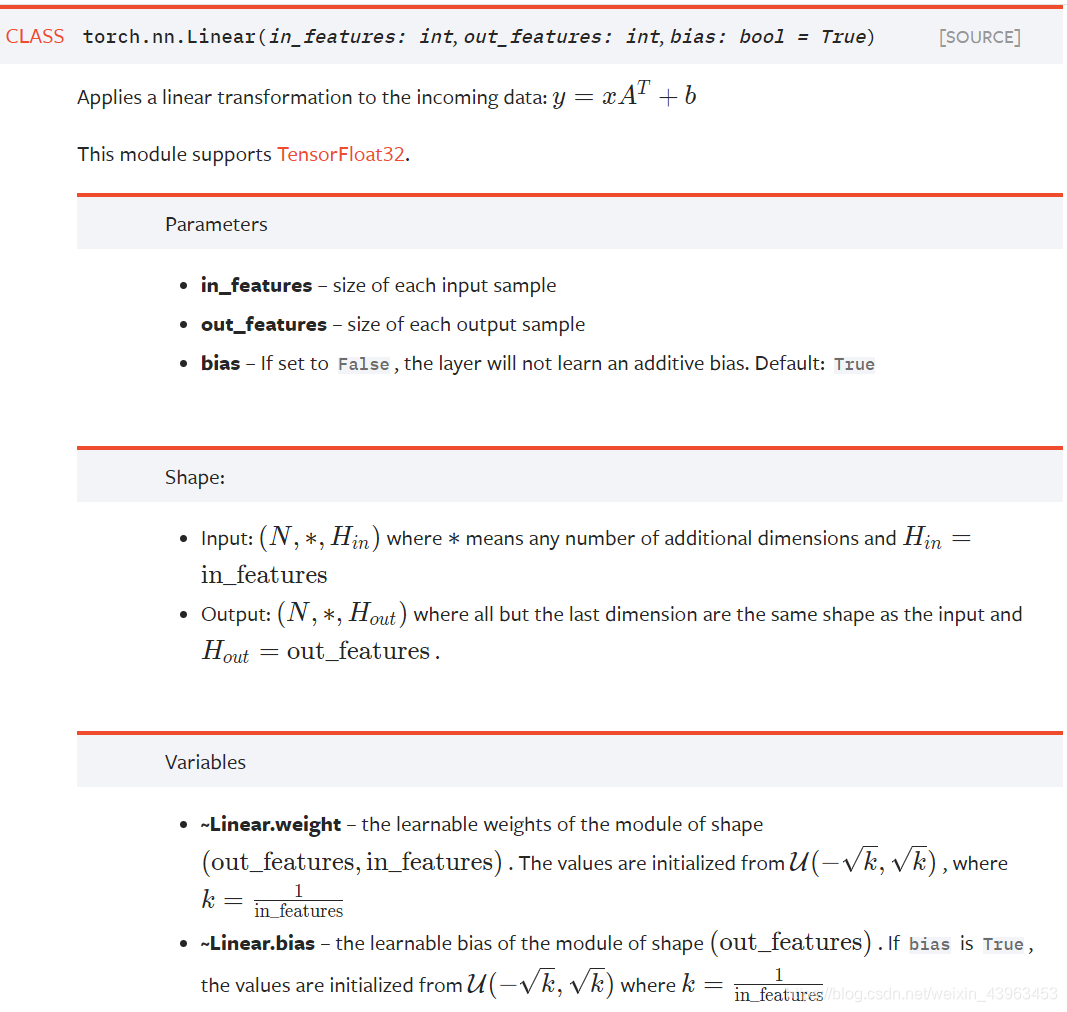
- CLASS torch.nn.Linear
- CLASS torch.nn.ReLU(inplace: bool = False)
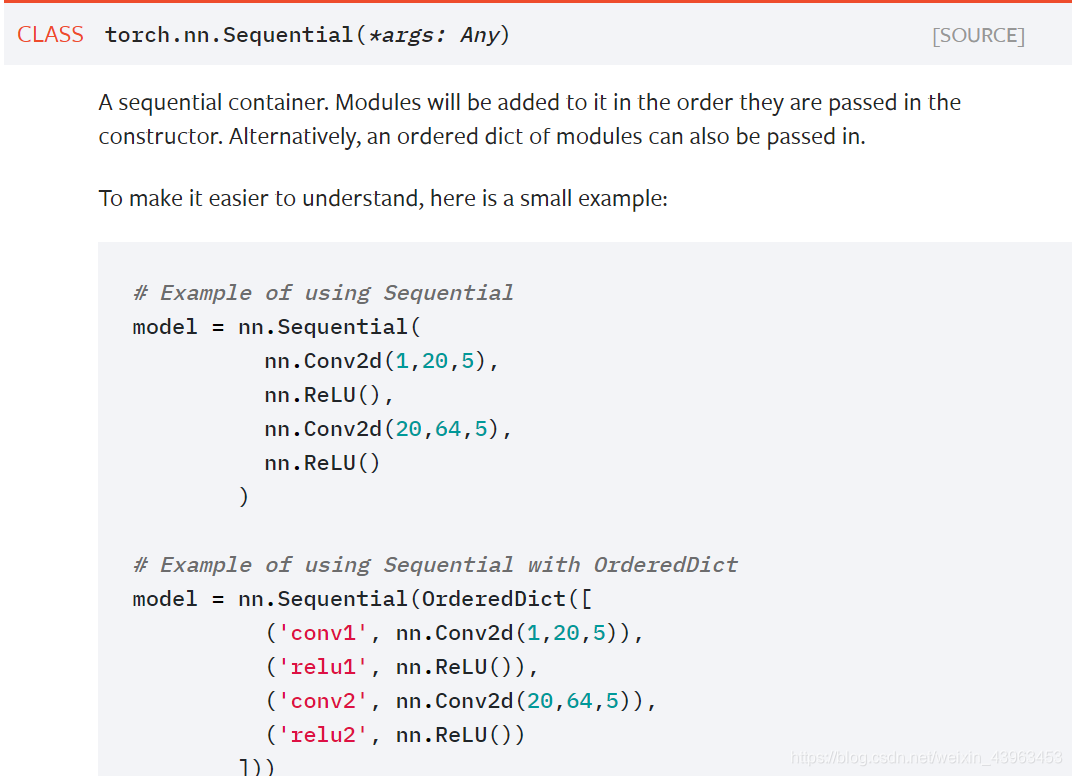
- CLASStorch.nn.Sequential(*args: Any)
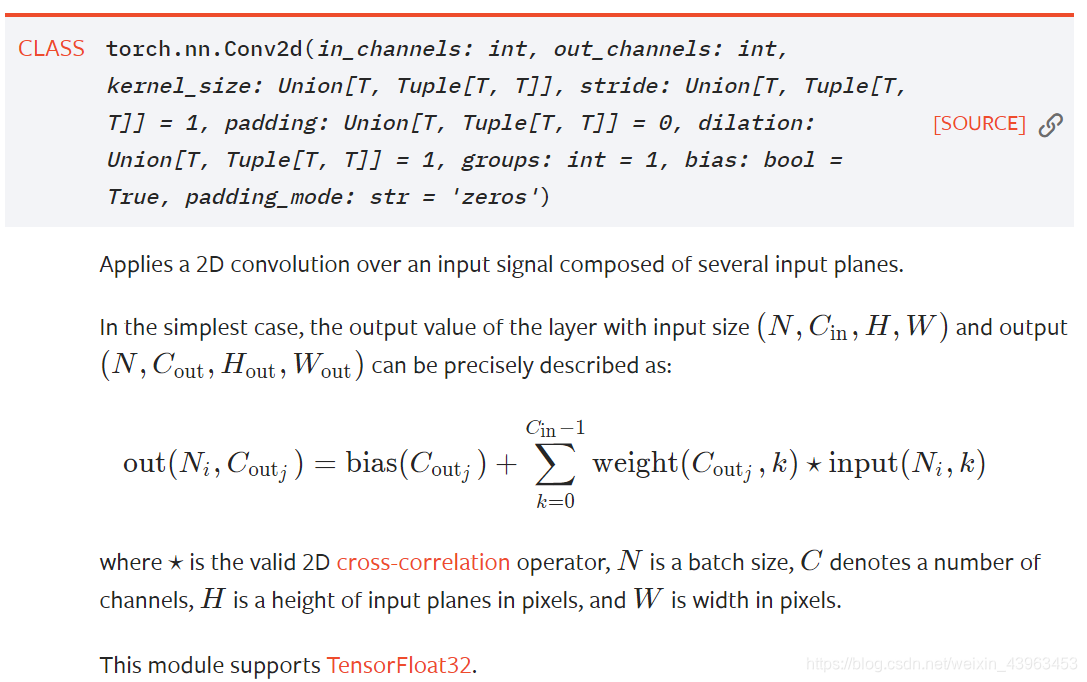
- CLASS torch.nn.Conv2d()
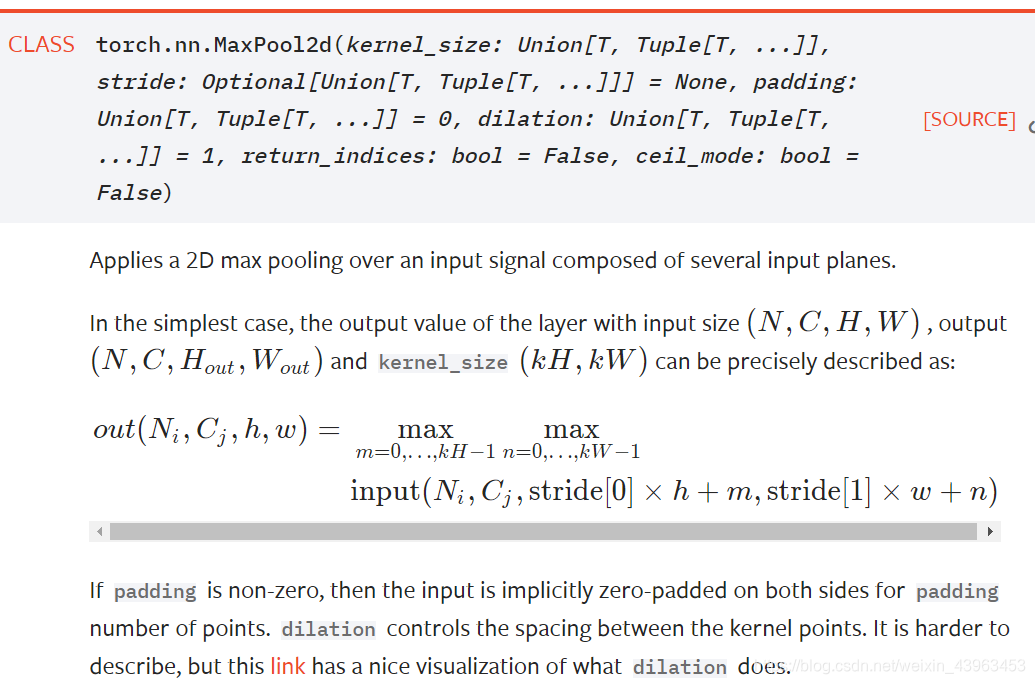
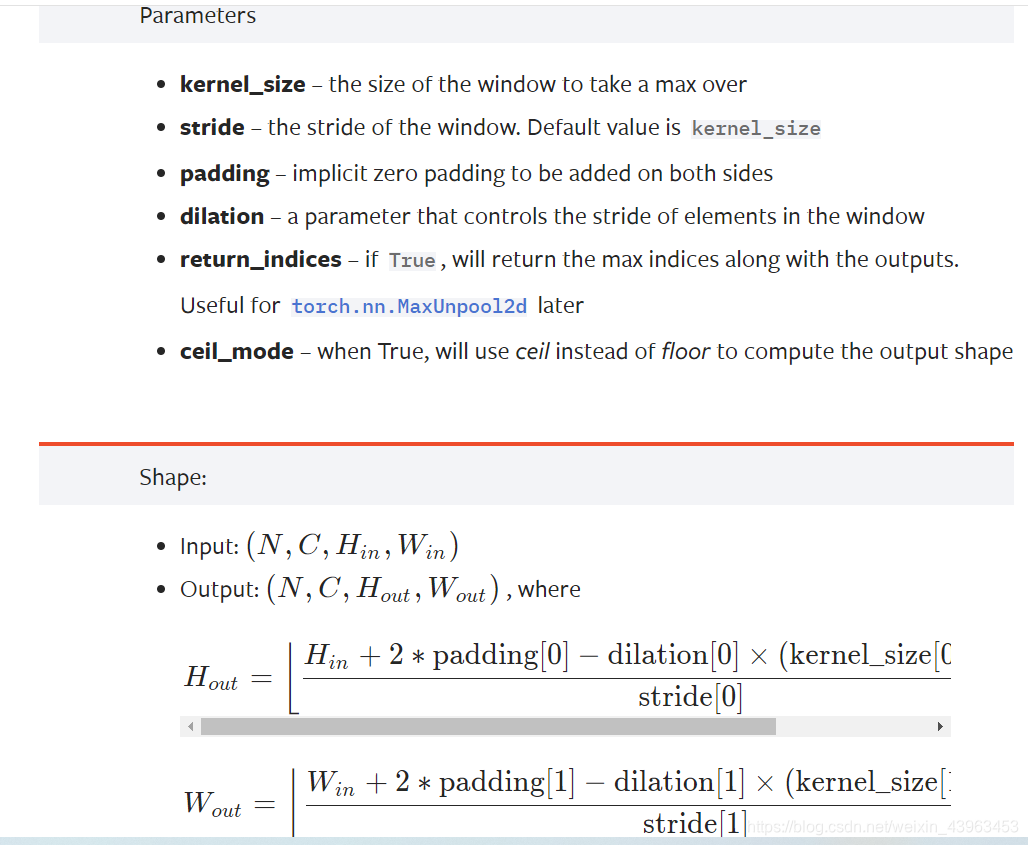
- CLASS torch.nn.MaxPool2d()
- CLASS torch.nn.CrossEntropyLoss()
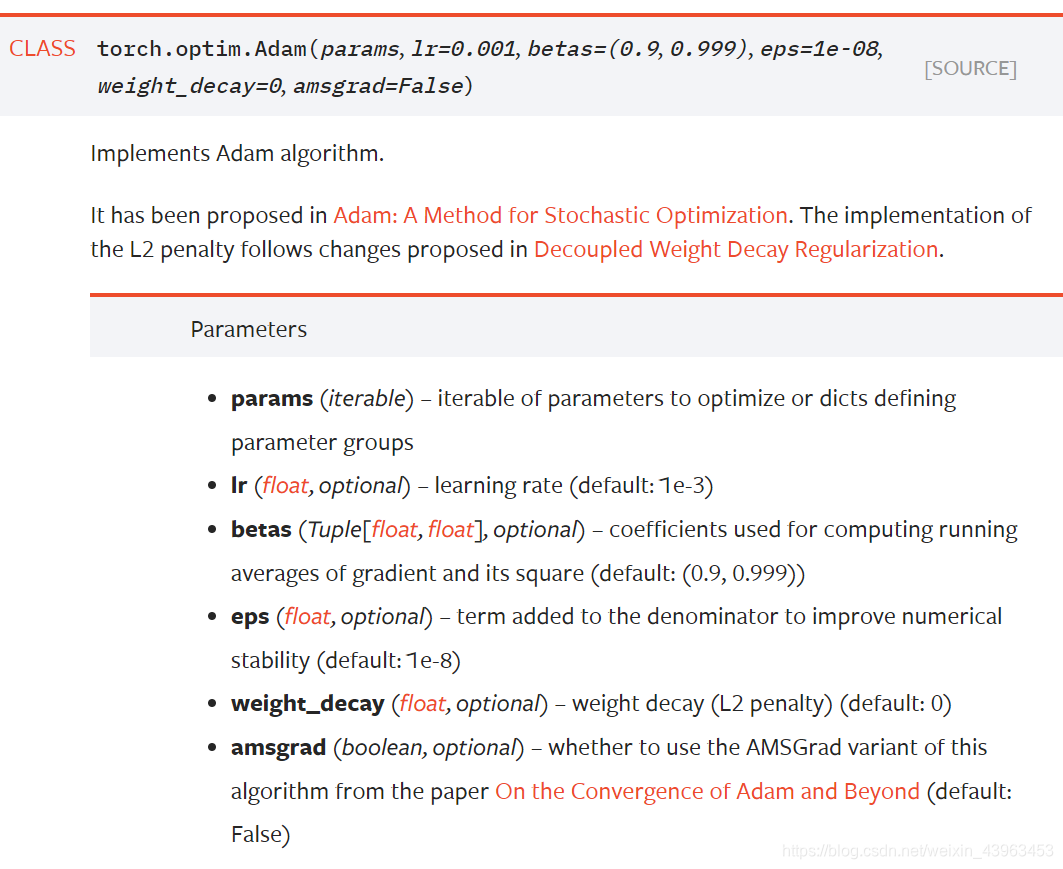
- CLASS torch.optim.Adam()
- torch.Tensor
- CLASS torch.no_grad()
- torchvision
- time
Python Build-in
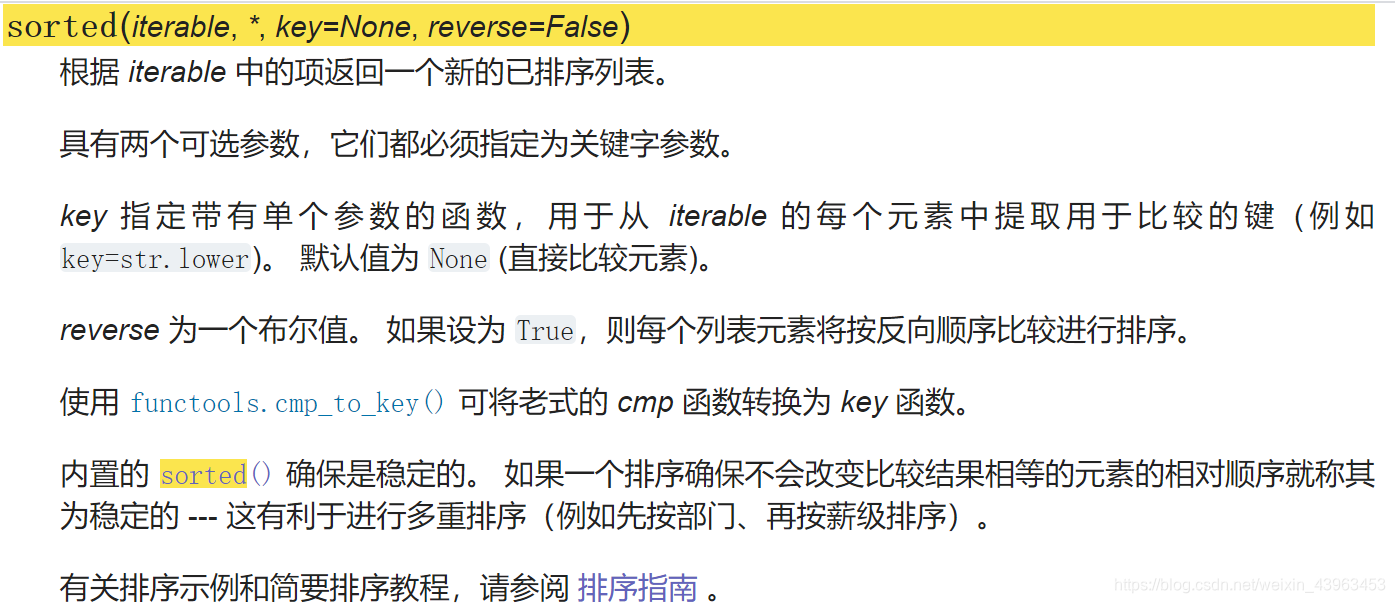
sorted()
image_dir = sorted(os.listdir(path))
函数返回:
enumerate()
用于将一个可遍历的数据对象(如列表、元组或字符串)组合为一个索引序列,同时列出数据和数据下标,一般用在 for 循环当中。

for i, file in enumerate(image_dir):
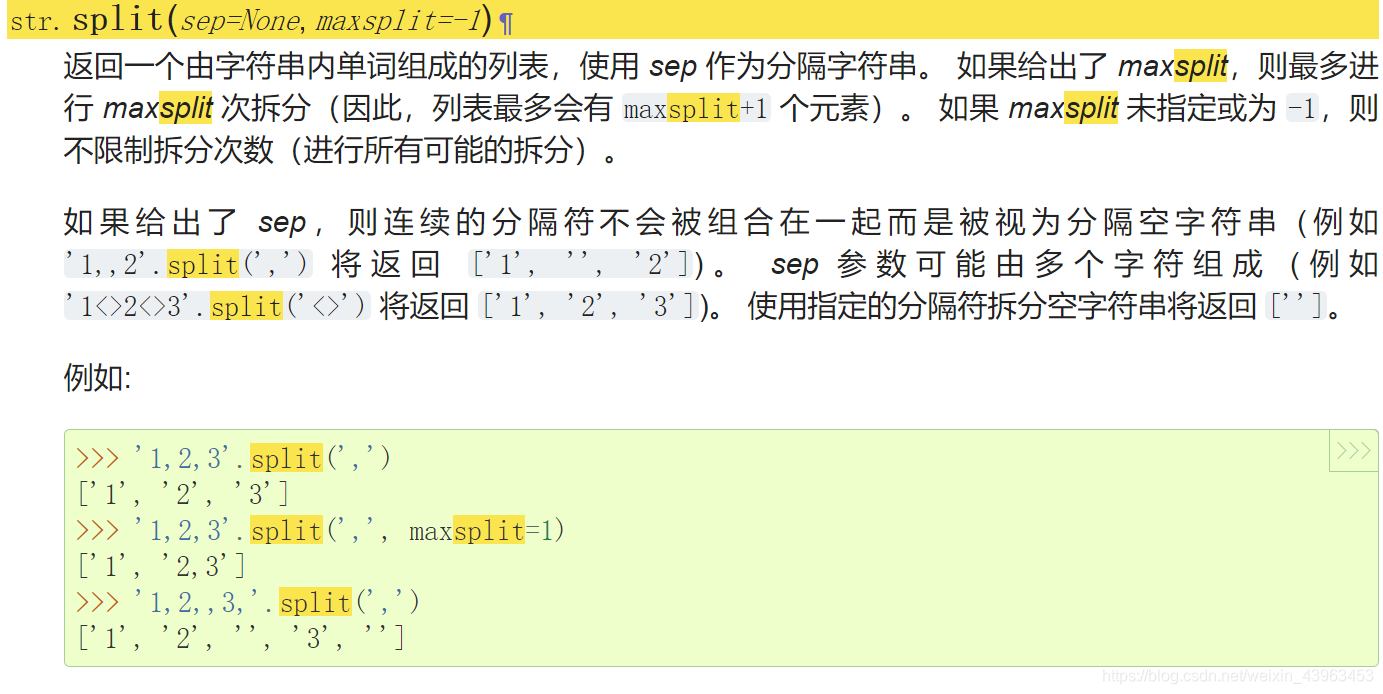
str.split()
y[i] = int(file.split("_")[0])
str.format()
这个函数没彻底明白,暂且将遇到的总结一下:(因为格式太多了)
print("Size of training data = {}".format(len(train_x)))
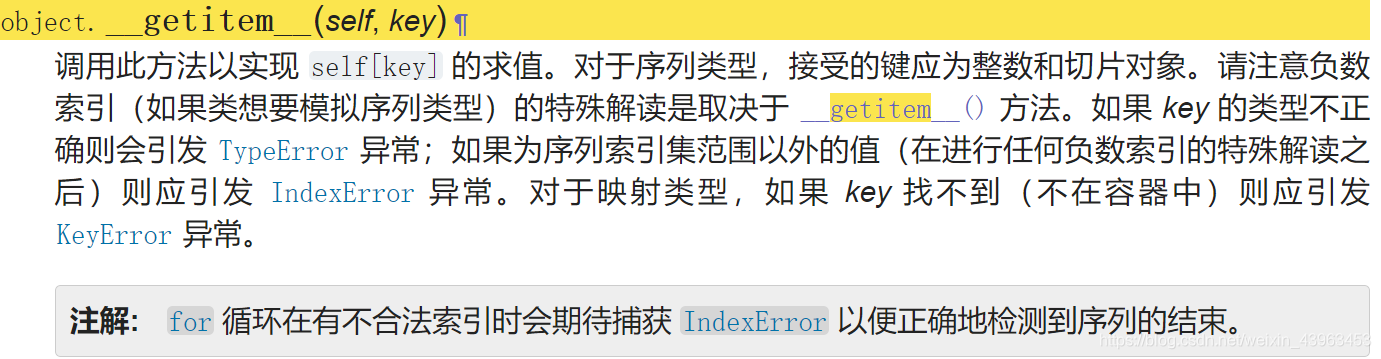
object.getitem(self, key)
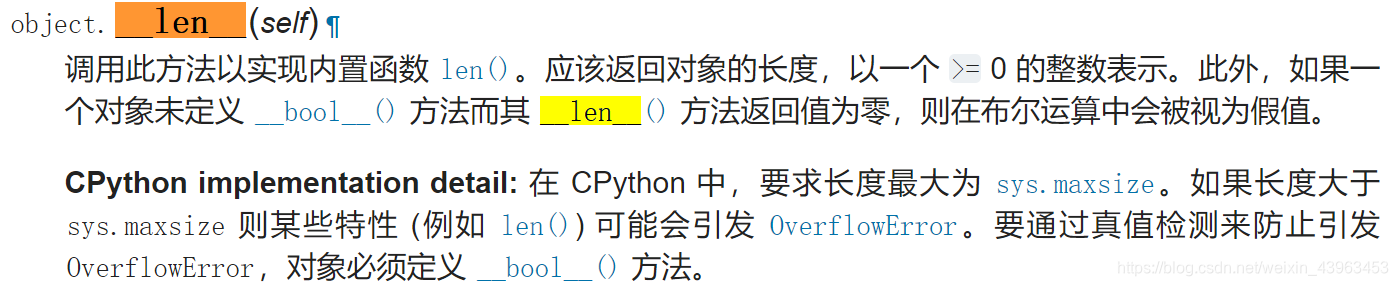
object.len(self)
object.call(self[, args…])

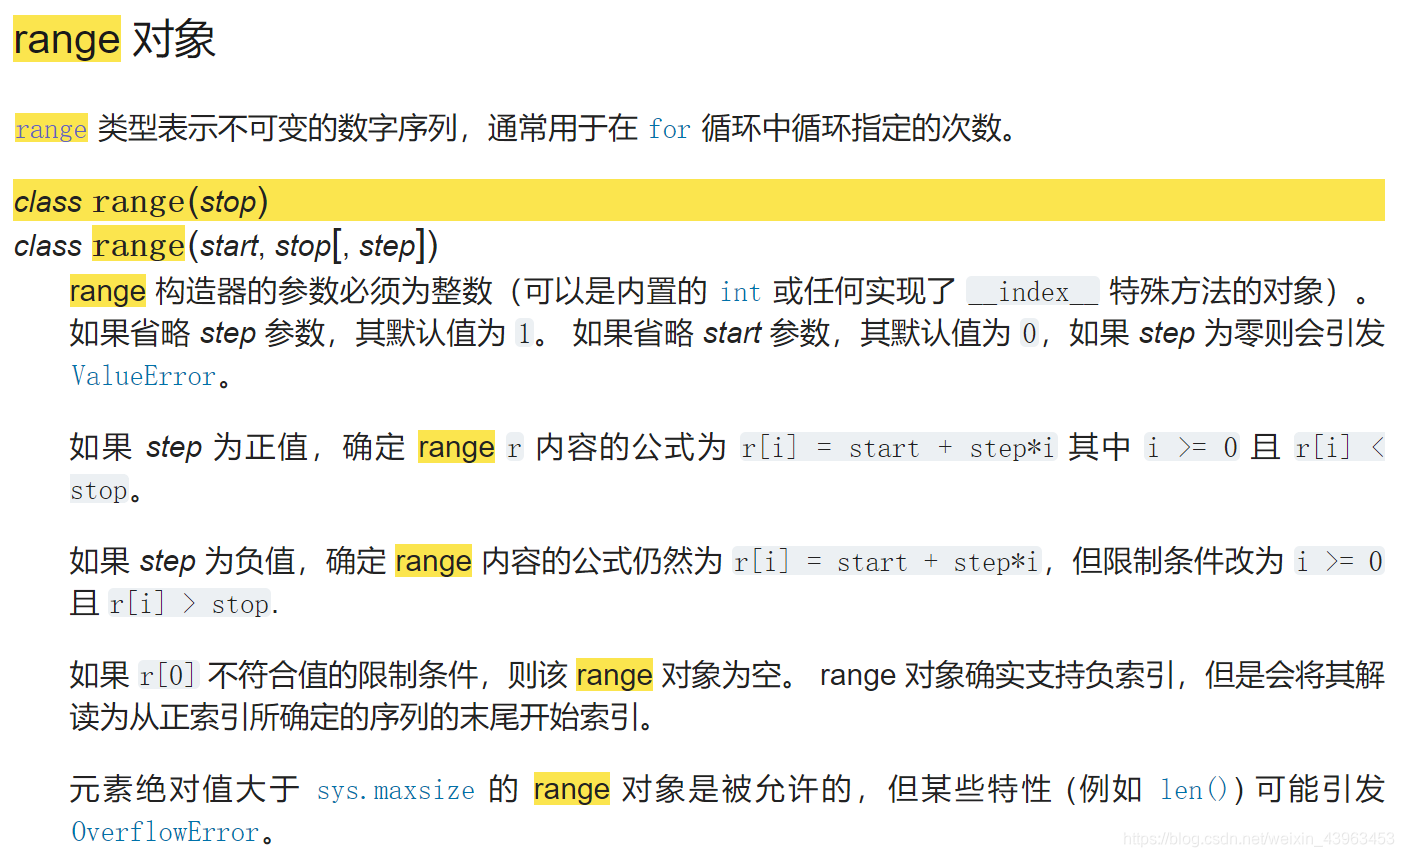
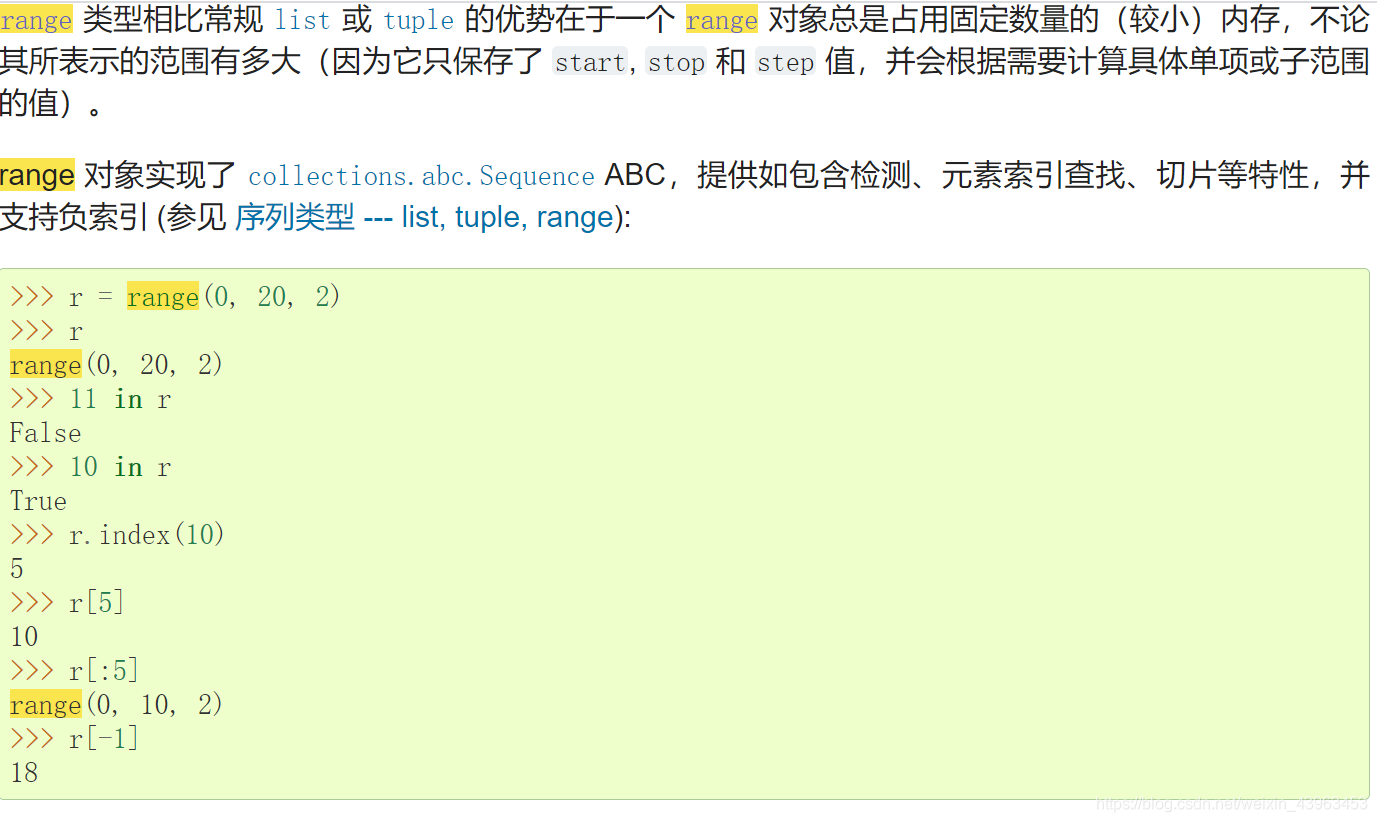
range 对象
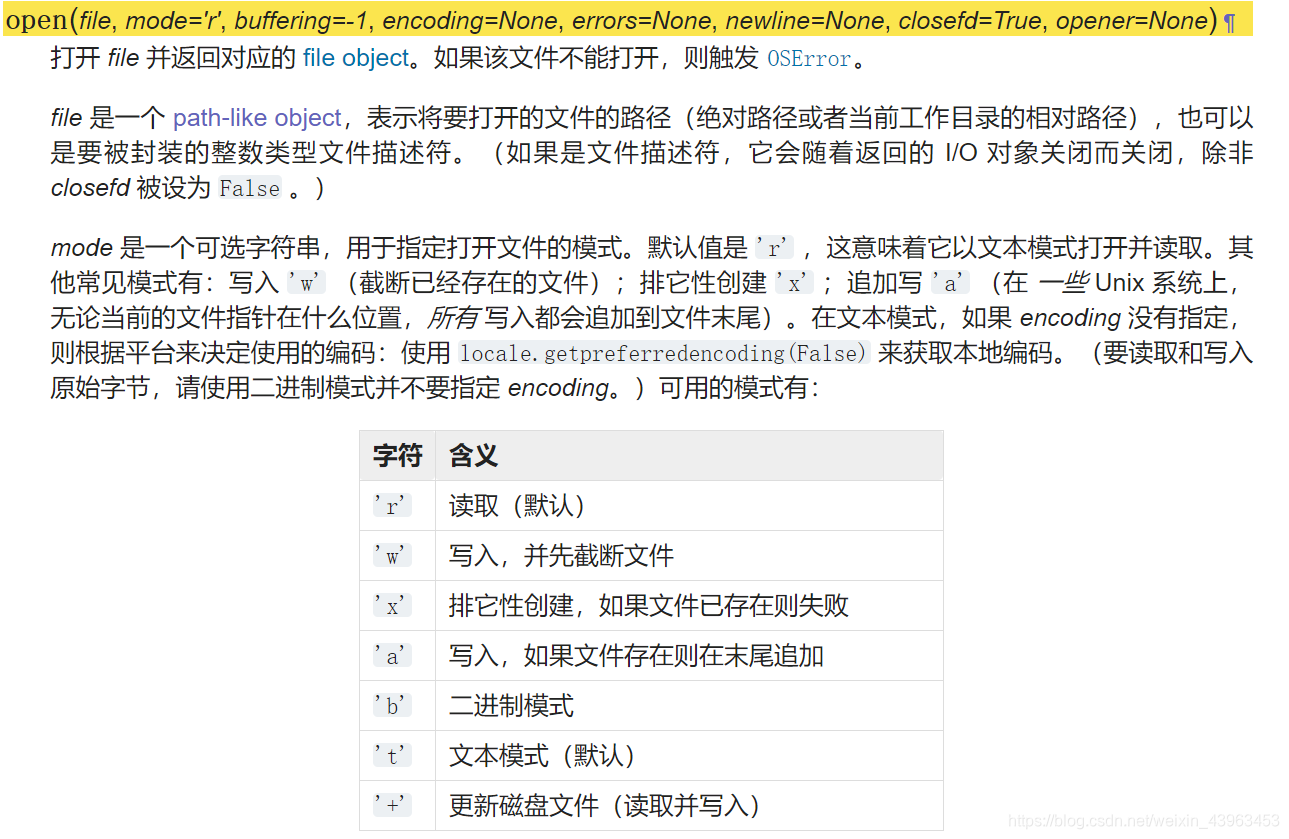
open
OS库
os.listdir()
image_dir = sorted(os.listdir(path))

os.path.join()
img = cv2.imread(os.path.join(path, file))

np库
np.zeros()

 x = np.zeros((len(image_dir), 128, 128, 3), dtype=np.uint8)
    y = np.zeros((len(image_dir)), dtype=np.uint8)
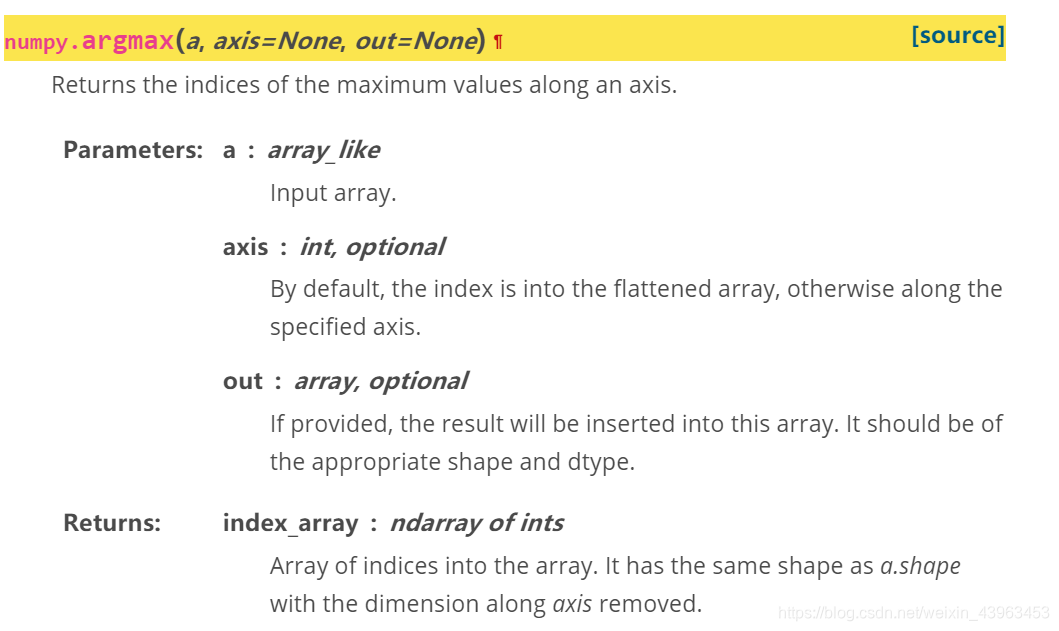
np.argmax()
即:每行出一个还是每列
np. concatenate
def concatenate(arrays, axis=None, out=None):
    """
    concatenate((a1, a2, ...), axis=0, out=None)

    Join a sequence of arrays along an existing axis.

    Parameters
    ----------
    a1, a2, ... : sequence of array_like
        The arrays must have the same shape, except in the dimension
        corresponding to `axis` (the first, by default).
    axis : int, optional
        The axis along which the arrays will be joined.  If axis is None,
        arrays are flattened before use.  Default is 0.
    out : ndarray, optional
        If provided, the destination to place the result. The shape must be
        correct, matching that of what concatenate would have returned if no
        out argument were specified.

    Returns
    -------
    res : ndarray
        The concatenated array.

    See Also
    --------
    ma.concatenate : Concatenate function that preserves input masks.
    array_split : Split an array into multiple sub-arrays of equal or
                  near-equal size.
    split : Split array into a list of multiple sub-arrays of equal size.
    hsplit : Split array into multiple sub-arrays horizontally (column wise)
    vsplit : Split array into multiple sub-arrays vertically (row wise)
    dsplit : Split array into multiple sub-arrays along the 3rd axis (depth).
    stack : Stack a sequence of arrays along a new axis.
    hstack : Stack arrays in sequence horizontally (column wise)
    vstack : Stack arrays in sequence vertically (row wise)
    dstack : Stack arrays in sequence depth wise (along third dimension)
    block : Assemble arrays from blocks.

    Notes
    -----
    When one or more of the arrays to be concatenated is a MaskedArray,
    this function will return a MaskedArray object instead of an ndarray,
    but the input masks are *not* preserved. In cases where a MaskedArray
    is expected as input, use the ma.concatenate function from the masked
    array module instead.

    Examples
    --------
    >>> a = np.array([[1, 2], [3, 4]])
    >>> b = np.array([[5, 6]])
    >>> np.concatenate((a, b), axis=0)
    array([[1, 2],
           [3, 4],
           [5, 6]])
    >>> np.concatenate((a, b.T), axis=1)
    array([[1, 2, 5],
           [3, 4, 6]])
    >>> np.concatenate((a, b), axis=None)
    array([1, 2, 3, 4, 5, 6])

    This function will not preserve masking of MaskedArray inputs.

    >>> a = np.ma.arange(3)
    >>> a[1] = np.ma.masked
    >>> b = np.arange(2, 5)
    >>> a
    masked_array(data=[0, --, 2],
                 mask=[False,  True, False],
           fill_value=999999)
    >>> b
    array([2, 3, 4])
    >>> np.concatenate([a, b])
    masked_array(data=[0, 1, 2, 2, 3, 4],
                 mask=False,
           fill_value=999999)
    >>> np.ma.concatenate([a, b])
    masked_array(data=[0, --, 2, 2, 3, 4],
                 mask=[False,  True, False, False, False, False],
           fill_value=999999)

    """
torch
torch.LongTensor()
CLASS torch.utils.data.Dataset()

CLASS torch.utils.data.DataLoader()

CLASS torch.nn.Module
Module.train(mode: bool = True) → T
CLASS torch.nn.Linear
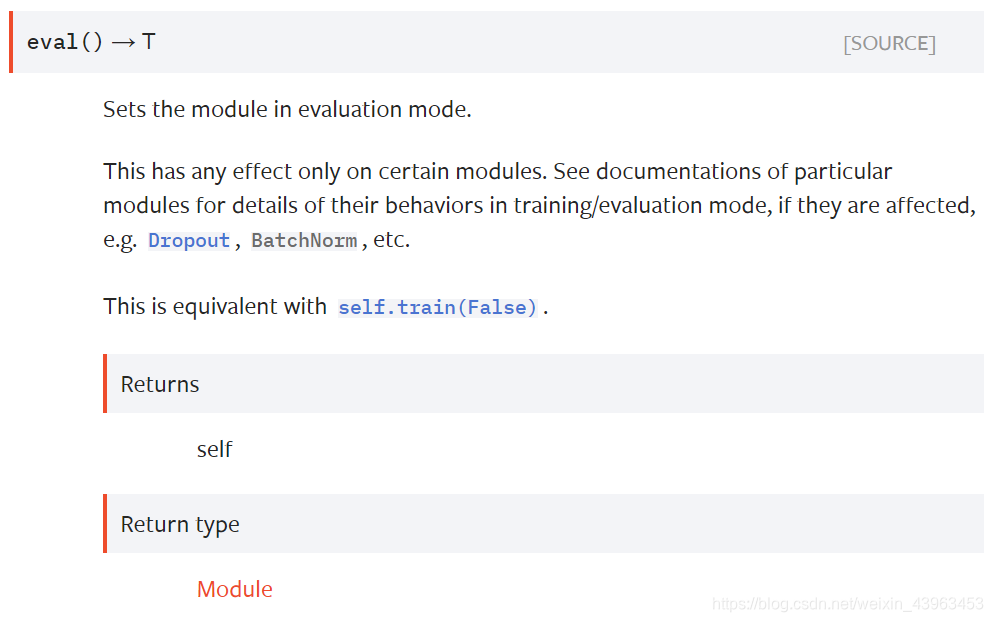
eval() → T
CLASS torch.nn.ReLU(inplace: bool = False)

CLASStorch.nn.Sequential(*args: Any)
CLASS torch.nn.Conv2d()

CLASS torch.nn.MaxPool2d()
CLASS torch.nn.CrossEntropyLoss()

CLASS torch.optim.Adam()
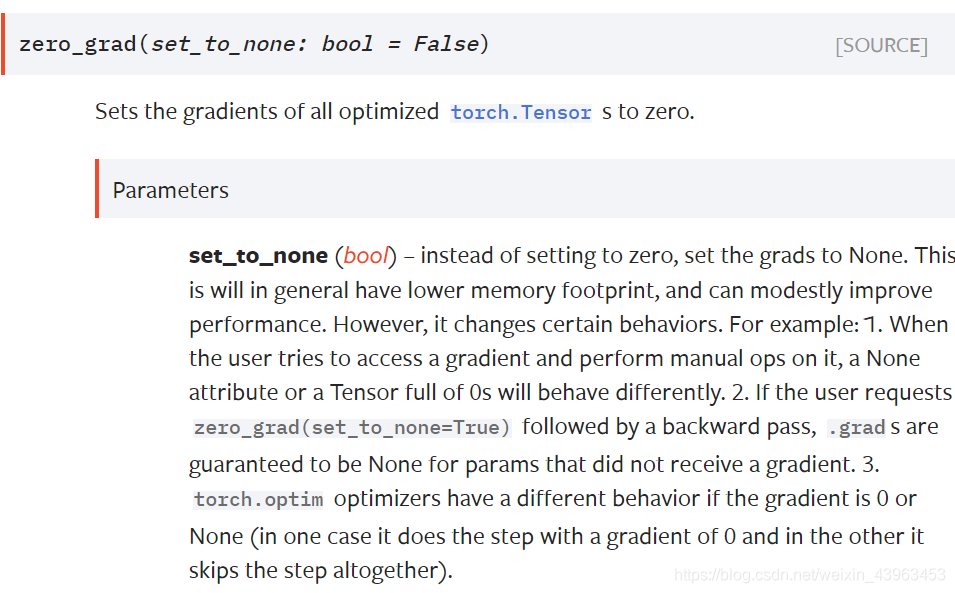
Adam.zero_grad()
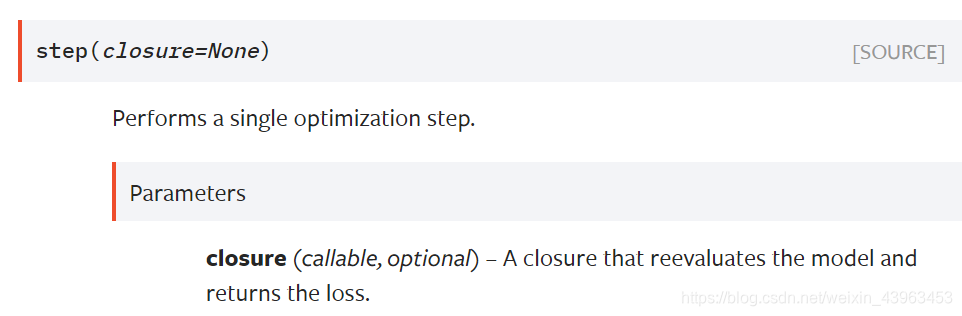
Adam.step()
torch.Tensor
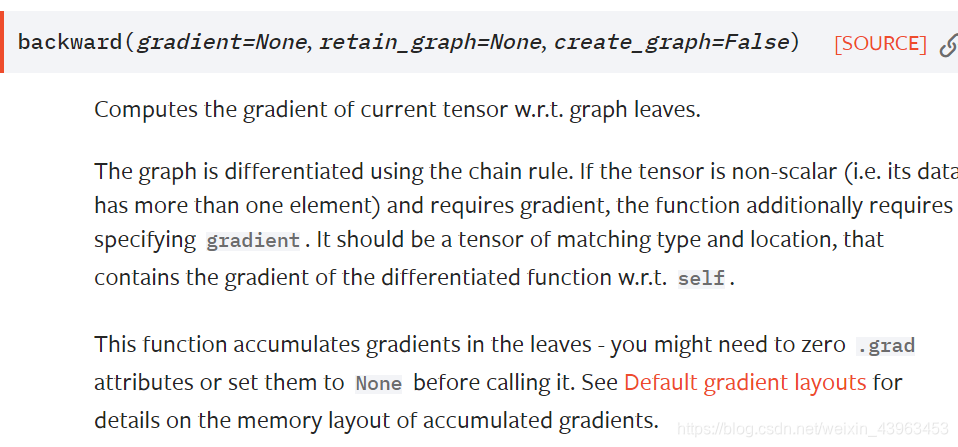
Tensor.backward()
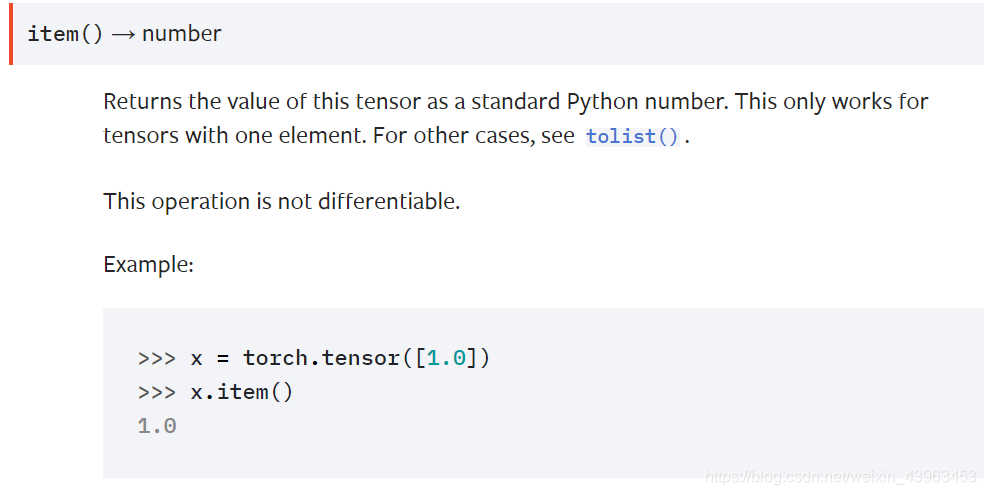
item() → number
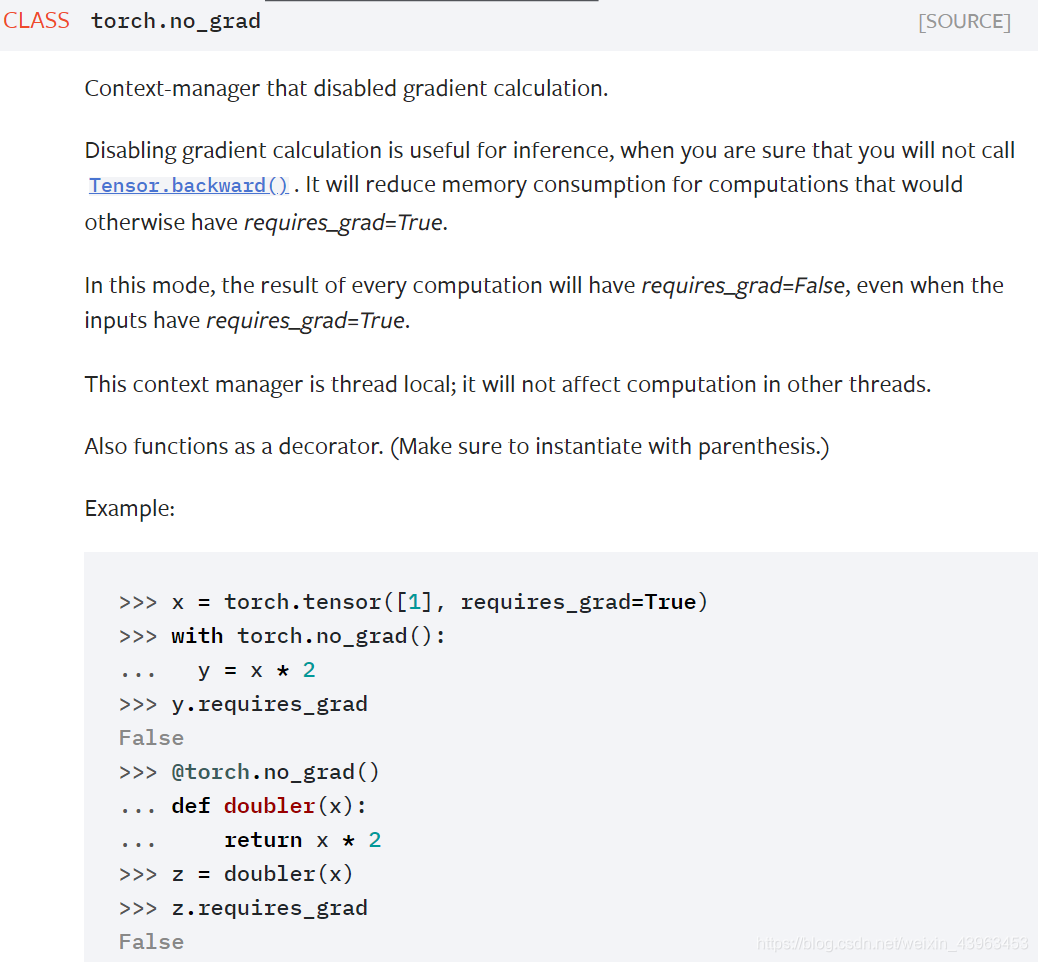
CLASS torch.no_grad()
torchvision
torchvision.transforms
train_transform = transforms.Compose([
    transforms.ToPILImage(),
    transforms.RandomHorizontalFlip(), # 隨機將圖片水平翻轉
    transforms.RandomRotation(15), # 隨機旋轉圖片
    transforms.ToTensor(), # 將圖片轉成 Tensor,並把數值 normalize 到 [0,1] (data normalization)
])
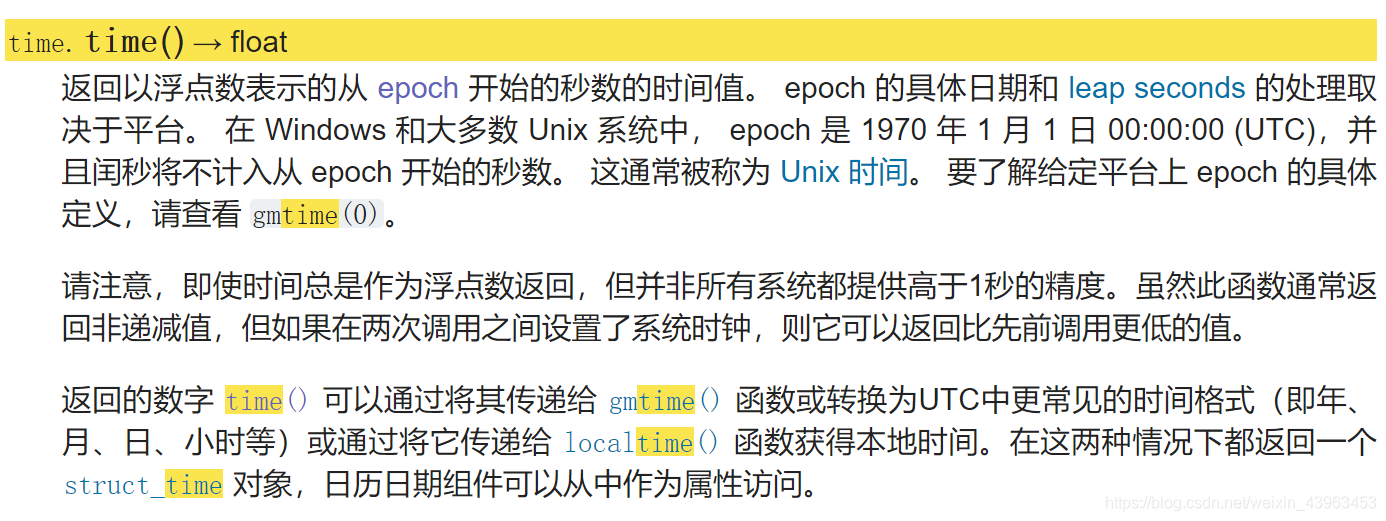
time
time.time()


 544
544


 被折叠的 条评论
为什么被折叠?
被折叠的 条评论
为什么被折叠?
 到【灌水乐园】发言


