


引言
在Unity开发过程中,我们常常会遇到这样一个需求:将一张简单的图片通过平铺效果进行展示,以此来减少图片的大小。这个操作非常简单,只需将Image的Type设置为Tiled,然后调整RectTransform的尺寸即可。但有时候,产品经理会提出更高的要求:让这个图片动起来。这听起来有点麻烦,对吧?当然,我们可以通过写shader来实现这个功能,但现在,我要给大家介绍一个更简单的办法,只需用代码控制即可实现。
实现流动效果
我们先来看一下最终的效果。箭头流动效果展示 这个流动的效果,其实是通过控制RawImage的UV坐标来实现的。
实现步骤关键点
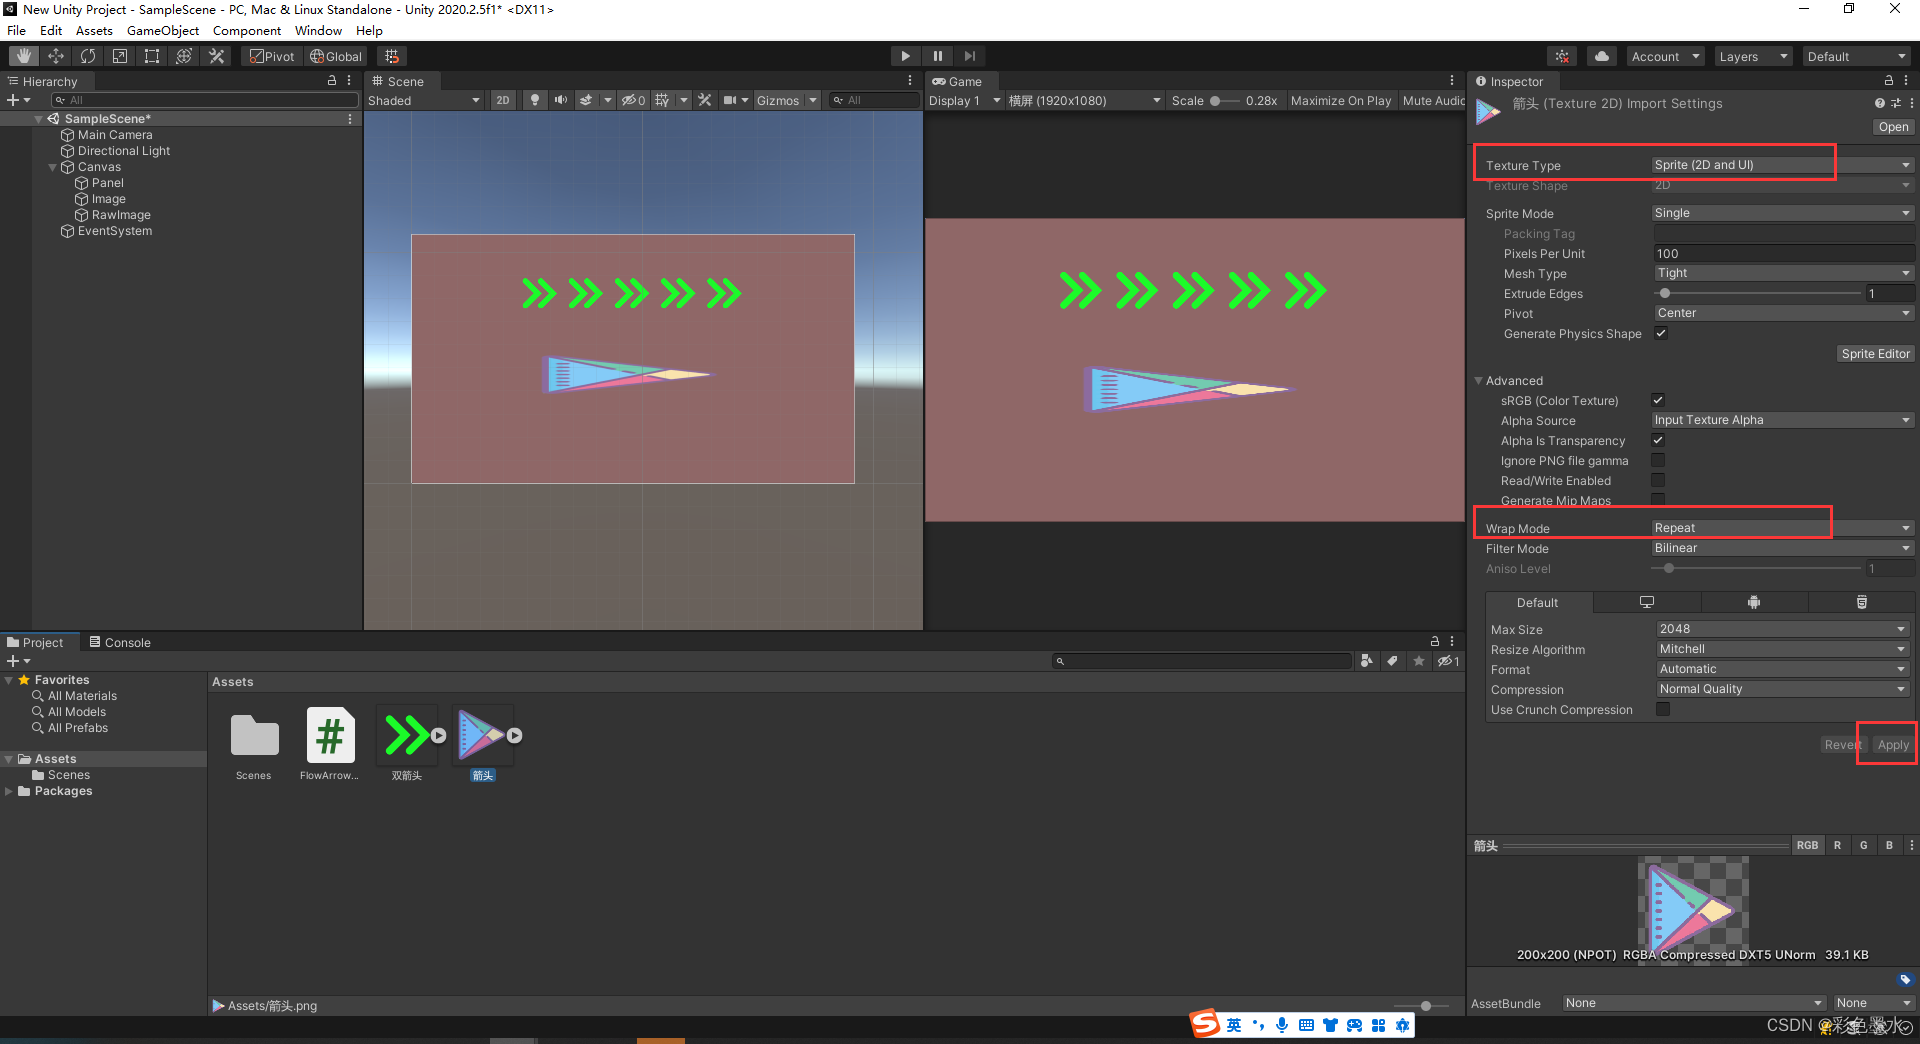
-
将原图片的格式设置为Repeat
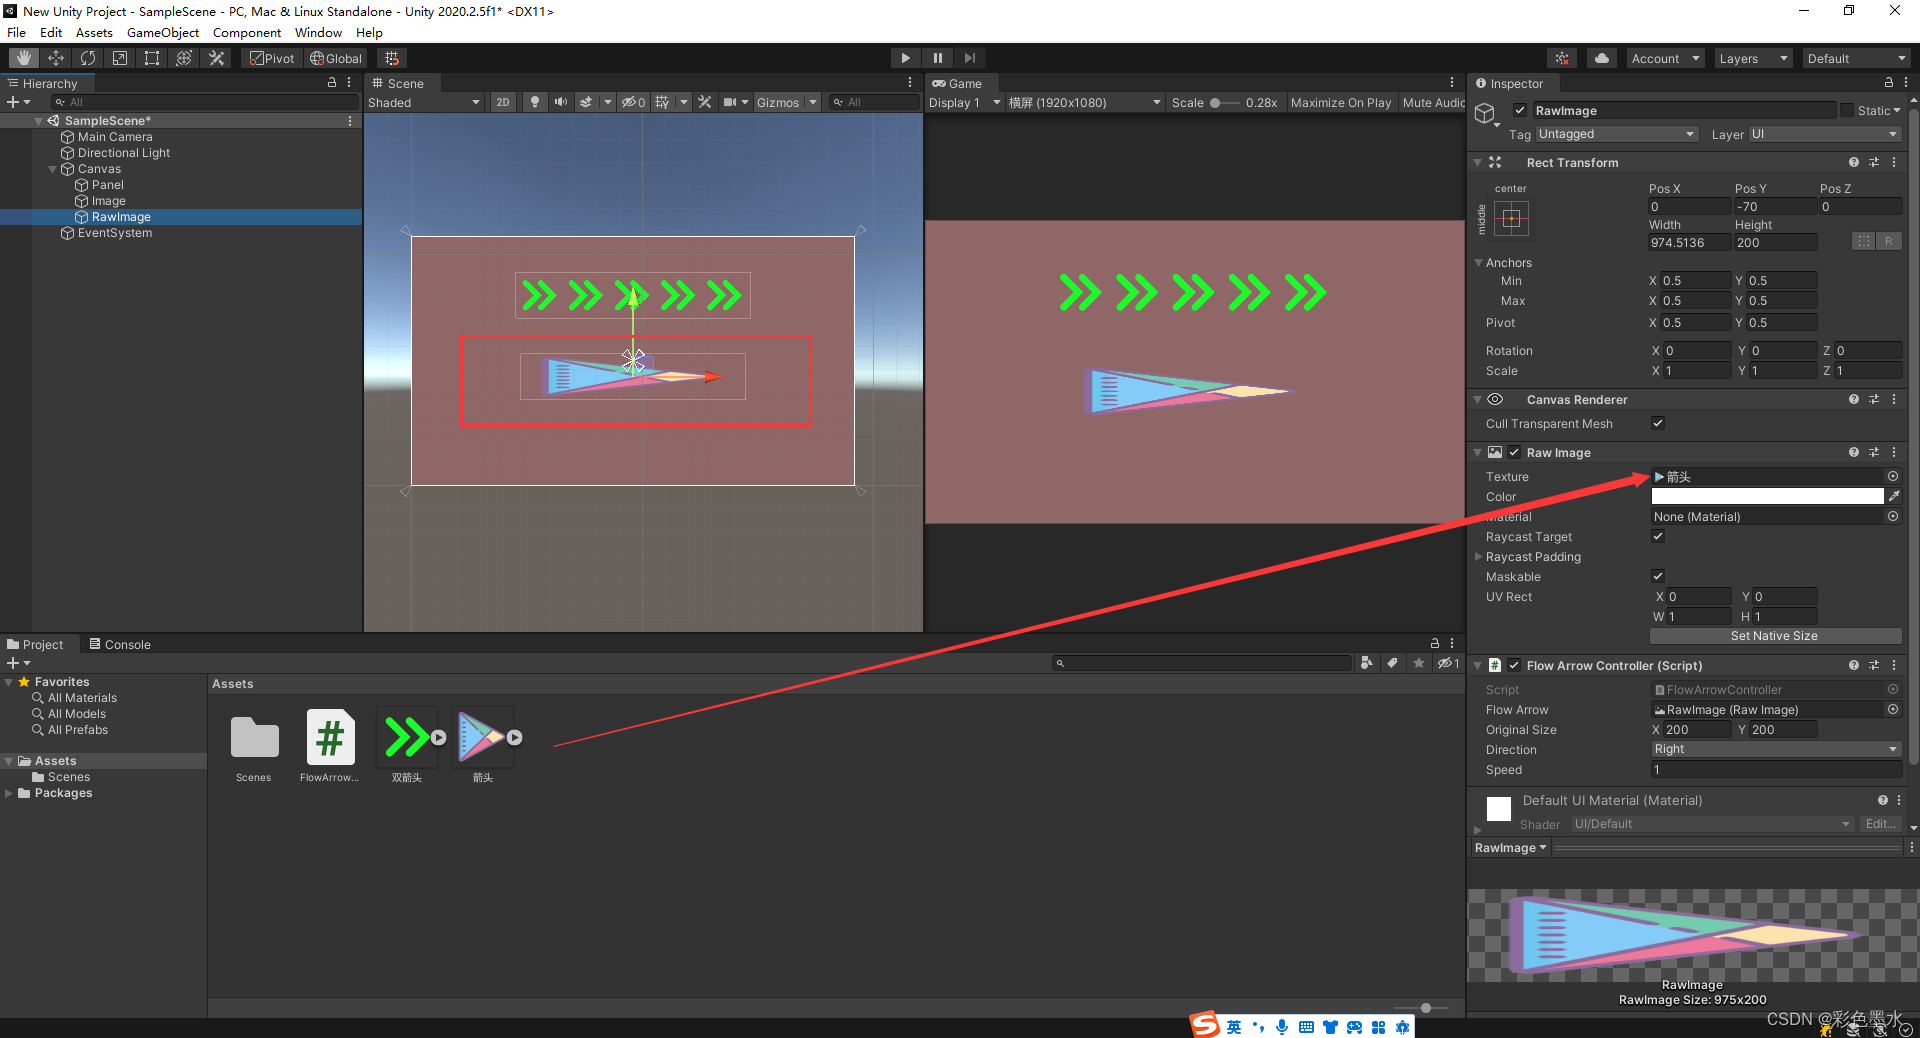
-
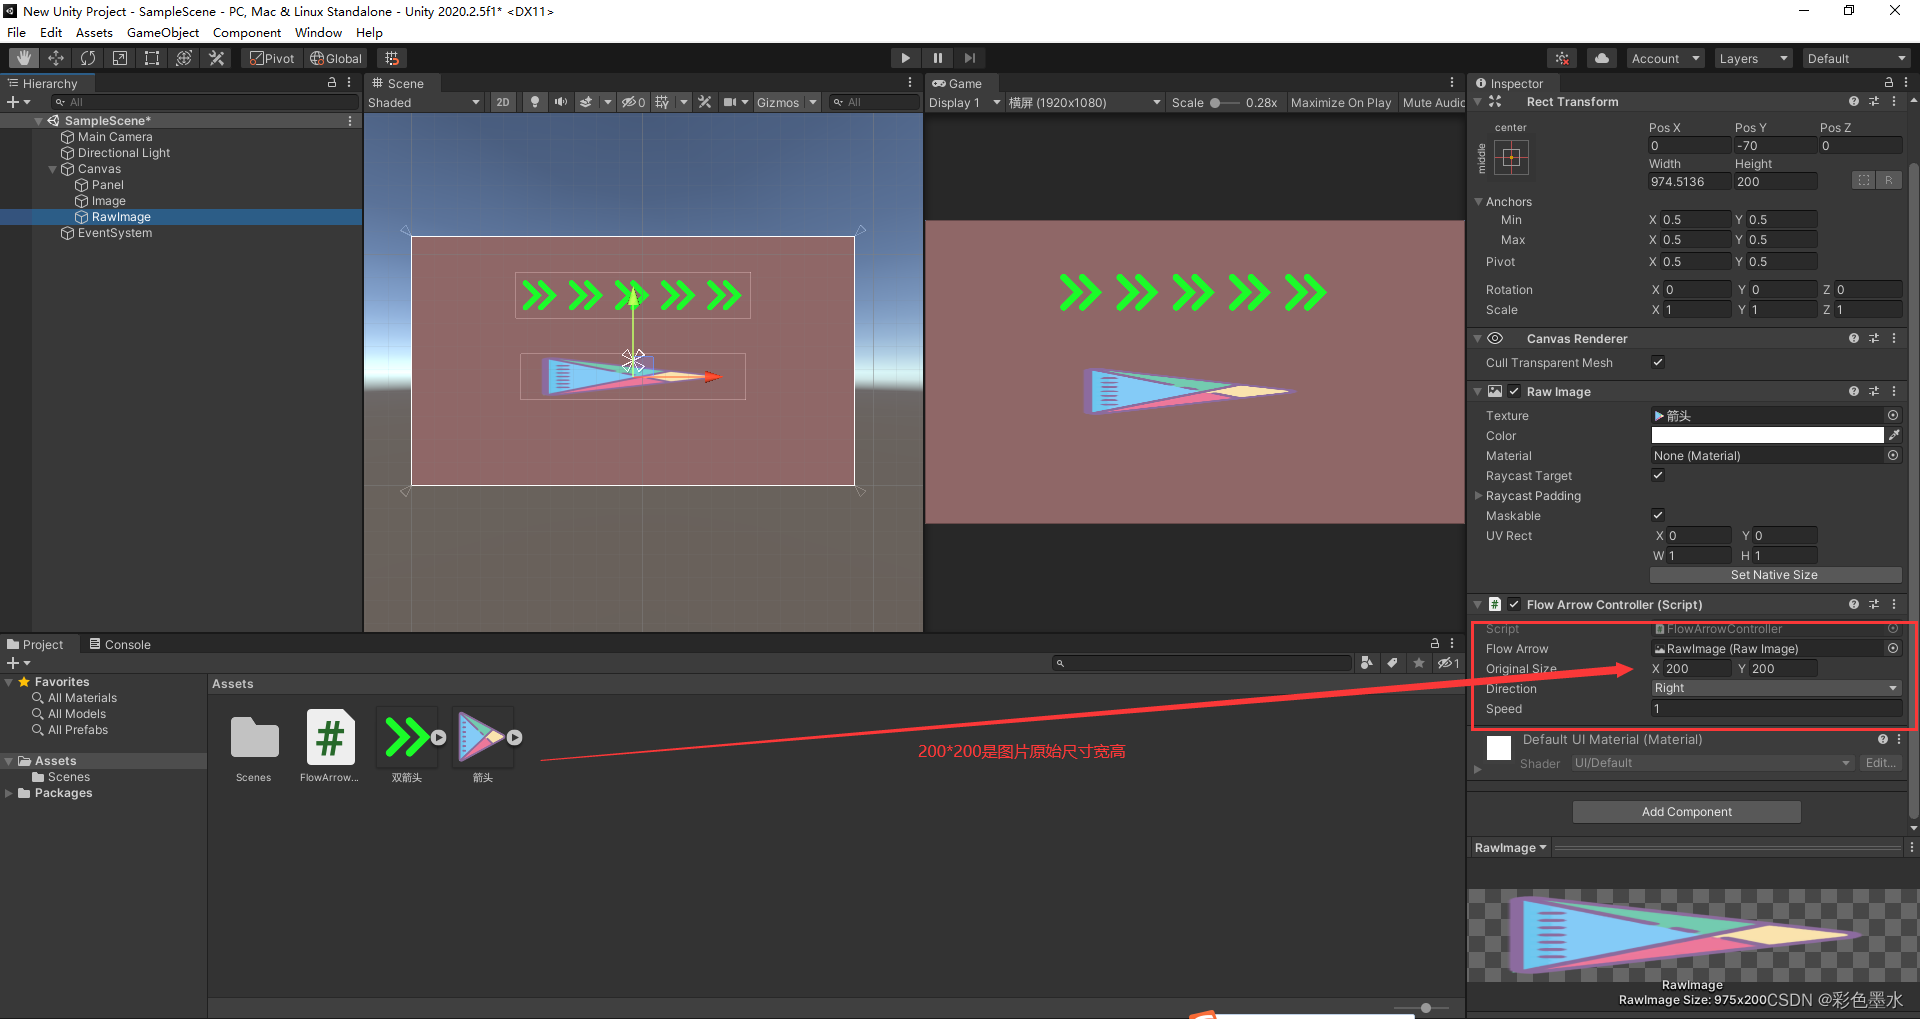
创建RawImage,将箭头图片拖入,设置合适的大小和位置
-
创建脚本,编写代码。
-
将脚本挂载到RawImage上,设置参数,运行。
代码
using UnityEngine;
using UnityEngine.UI;
public class FlowArrowController : MonoBehaviour
{
public RawImage flowArrow;
public Vector2 originalSize;
public FlowDirection direction = FlowDirection.Up;
public float speed = 1f;
private void Update()
{
FlowArrows(flowArrow, originalSize, direction, speed, Time.deltaTime);
}
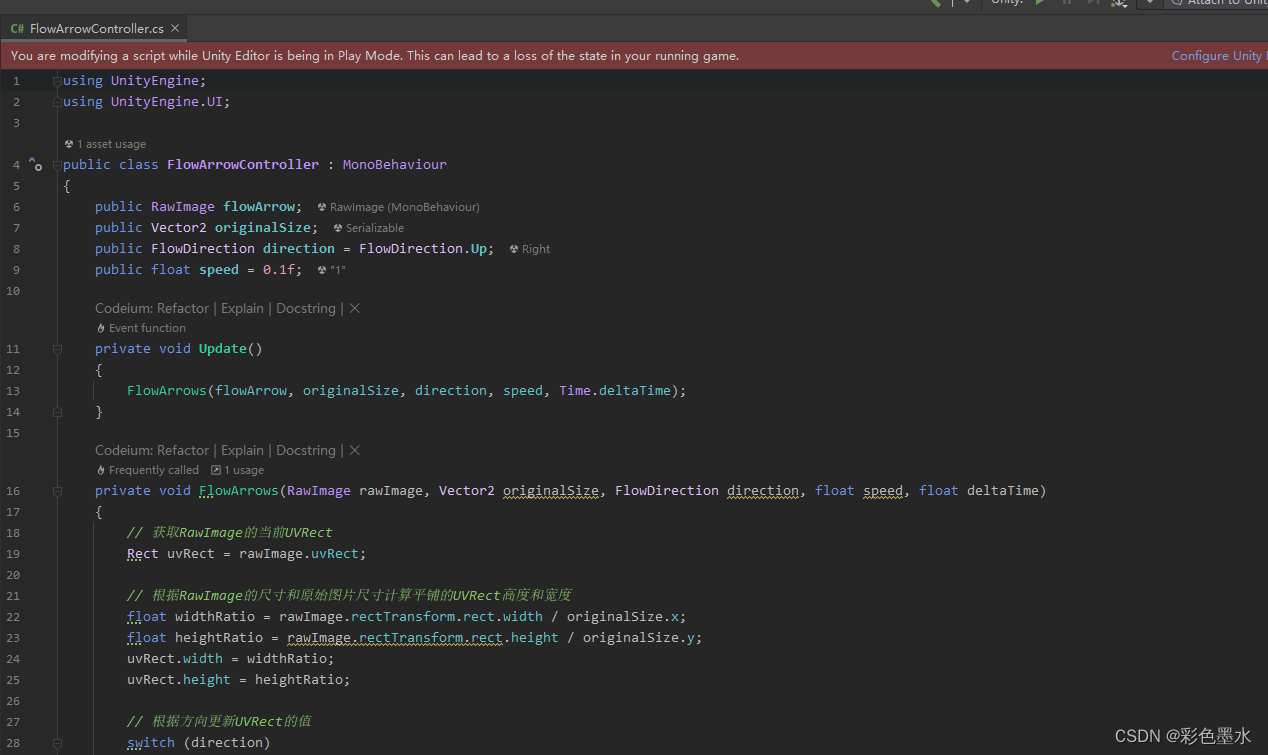
private void FlowArrows(RawImage rawImage, Vector2 originalSize, FlowDirection direction, float speed, float deltaTime)
{
// 获取RawImage的当前UVRect
Rect uvRect = rawImage.uvRect;
// 根据RawImage的尺寸和原始图片尺寸计算平铺的UVRect高度和宽度
float widthRatio = rawImage.rectTransform.rect.width / originalSize.x;
float heightRatio = rawImage.rectTransform.rect.height / originalSize.y;
uvRect.width = widthRatio;
uvRect.height = heightRatio;
// 根据方向更新UVRect的值
switch (direction)
{
case FlowDirection.Up:
uvRect.y = Mathf.Repeat(uvRect.y - (speed * deltaTime), 1);
break;
case FlowDirection.Down:
uvRect.y = Mathf.Repeat(uvRect.y + (speed * deltaTime), 1);
break;
case FlowDirection.Left:
uvRect.x = Mathf.Repeat(uvRect.x + (speed * deltaTime), 1);
break;
case FlowDirection.Right:
uvRect.x = Mathf.Repeat(uvRect.x - (speed * deltaTime), 1);
break;
}
// 更新RawImage的UVRect
rawImage.uvRect = uvRect;
}
}
public enum FlowDirection
{
Up,
Down,
Left,
Right
}
结论
通过上述的步骤和代码,我们就可以实现一个简单的流动效果。怎么样,是不是很简单呢?下次遇到类似的需求,就可以用这个方法来解决了。不过,如果产品经理的要求更高,比如要实现更复杂的流动效果,那可能还是需要用到shader。不过,那就不是这篇文章的内容了,我们下次再聊。


 156
156

 被折叠的 条评论
为什么被折叠?
被折叠的 条评论
为什么被折叠?
 到【灌水乐园】发言


