


Centos7.9 部署分子动力学相关软件
一. Centos7.9 基础工具安装及一些环境配置
1.1 Centos DNS配置
-
在 配置文件 /etc/resolv.conf 中添加
nameserver 8.8.8.8 nameserver 114.114.114.114 -
验证,ping一下百度和阿里的域名
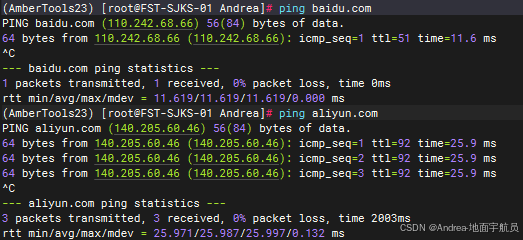
-
可以ping通,配置完成
1.2 yum 换源
-
编写脚本 auto_aliyun.sh
#!/bin/bash # 备份官方的原yum源的配置 mv /etc/yum.repos.d/CentOS-Base.repo /etc/yum.repos.d/CentOS-Base.repo.backup # 下载Centos-7.repo文件,或者curl -o /etc/yum.repos.d/CentOS-Base.repo http://mirrors.aliyun.com/repo/Centos-7.repo,取决于你是否有wget的命令 wget -O /etc/yum.repos.d/CentOS-Base.repo http://mirrors.aliyun.com/repo/Centos-7.repo # 清除yum缓存 yum clean all # 缓存本地yum源 yum makecache -
给执行权限并运行
chmod 777 auto_aliyun.sh & ./ auto_aliyun.sh
1.3 Centos7 yum只下载不安装, 离线安装
-
下载命令
yumdownloader xxx -
安装命令
rpm -ivh xxx.rpm
1.4 Centos7 安装 cmake3
-
执行命令
yum install -y epel-release yum install -y cmake3 -
验证
[root@FST-SJKS-01 build]# cmake3 --version
cmake3 version 3.17.5

CMake suite maintained and supported by Kitware (kitware.com/cmake).
1.5 其它基本工具安装
-
执行命令, 两个命令,执行就完了
sudo yum install flex tcsh zlib-devel \
     bzip2-devel libXt-devel libXext-devel libXdmcp-devel \
     tkinter openmpi openmpi-devel perl perl-ExtUtils-MakeMaker \
     patch bison boost-devel

sudo yum install python-devel tkinter python-pmw glew-devel \
  freeglut-devel libpng-devel freetype-devel libxml2-devel glm-devel
二. Centos7.9 使用scl+devtoolse-11 升级gcc
-
安装scl (先解决yum源的问题)
yum install centos-release-scl centos-release-scl-rh -
安装完成后 会默认在 /etc/yum.repos.d 下生成 2 个 repo 源文件 ,如果没有生成,自己写
#CentOS-SCLo-rh.repo
#
# Please see http://wiki.centos.org/SpecialInterestGroup/SCLo for more
# information

[centos-sclo-rh]
name=CentOS-7 - SCLo rh
baseurl=https://mirrors.aliyun.com/centos/7/sclo/x86_64/rh/ # 注意:这里推荐改成国内的源
# mirrorlist=http://mirrorlist.centos.org?arch=$basearch&release=7&repo=sclo-rh
gpgcheck=0
enabled=1
gpgkey=file:///etc/pki/rpm-gpg/RPM-GPG-KEY-CentOS-SIG-SCLo


[centos-sclo-rh-testing]
name=CentOS-7 - SCLo rh Testing
baseurl=http://buildlogs.centos.org/centos/7/sclo/$basearch/rh/
gpgcheck=0
enabled=0
gpgkey=file:///etc/pki/rpm-gpg/RPM-GPG-KEY-CentOS-SIG-SCLo

[centos-sclo-rh-source]
name=CentOS-7 - SCLo rh Sources
baseurl=http://vault.centos.org/centos/7/sclo/Source/rh/
gpgcheck=1
enabled=0
gpgkey=file:///etc/pki/rpm-gpg/RPM-GPG-KEY-CentOS-SIG-SCLo

[centos-sclo-rh-debuginfo]
name=CentOS-7 - SCLo rh Debuginfo
baseurl=http://debuginfo.centos.org/centos/7/sclo/$basearch/
gpgcheck=1
enabled=0
gpgkey=file:///etc/pki/rpm-gpg/RPM-GPG-KEY-CentOS-SIG-SCLo
#CenntOS-SCLo-sclo.repo # # Please see http://wiki.centos.org/SpecialInterestGroup/SCLo for more # information [centos-sclo-sclo] name=CentOS-7 - SCLo sclo baseurl=https://mirrors.aliyun.com/centos/7/sclo/x86_64/sclo/ # 注意:这里推荐改成国内的源 # mirrorlist=http://mirrorlist.centos.org?arch=$basearch&release=7&repo=sclo-sclo gpgcheck=0 enabled=1 gpgkey=file:///etc/pki/rpm-gpg/RPM-GPG-KEY-CentOS-SIG-SCLo [centos-sclo-sclo-testing] name=CentOS-7 - SCLo sclo Testing baseurl=http://buildlogs.centos.org/centos/7/sclo/$basearch/sclo/ gpgcheck=0 enabled=0 gpgkey=file:///etc/pki/rpm-gpg/RPM-GPG-KEY-CentOS-SIG-SCLo [centos-sclo-sclo-source] name=CentOS-7 - SCLo sclo Sources baseurl=http://vault.centos.org/centos/7/sclo/Source/sclo/ gpgcheck=1 enabled=0 gpgkey=file:///etc/pki/rpm-gpg/RPM-GPG-KEY-CentOS-SIG-SCLo [centos-sclo-sclo-debuginfo] name=CentOS-7 - SCLo sclo Debuginfo baseurl=http://debuginfo.centos.org/centos/7/sclo/$basearch/ gpgcheck=1 enabled=0 gpgkey=file:///etc/pki/rpm-gpg/RPM-GPG-KEY-CentOS-SIG-SCLo -
更新 yum 源的缓存
yum clean all yum makecache -
安装 Devtoolset
查看 支持的版本
yum search devtoolset --enablerepo='centos-sclo-rh'因为笔者需要的是gcc 11 ,所以可以
yum search devtoolset --enablerepo='centos-sclo-rh' | grep devtoolset-11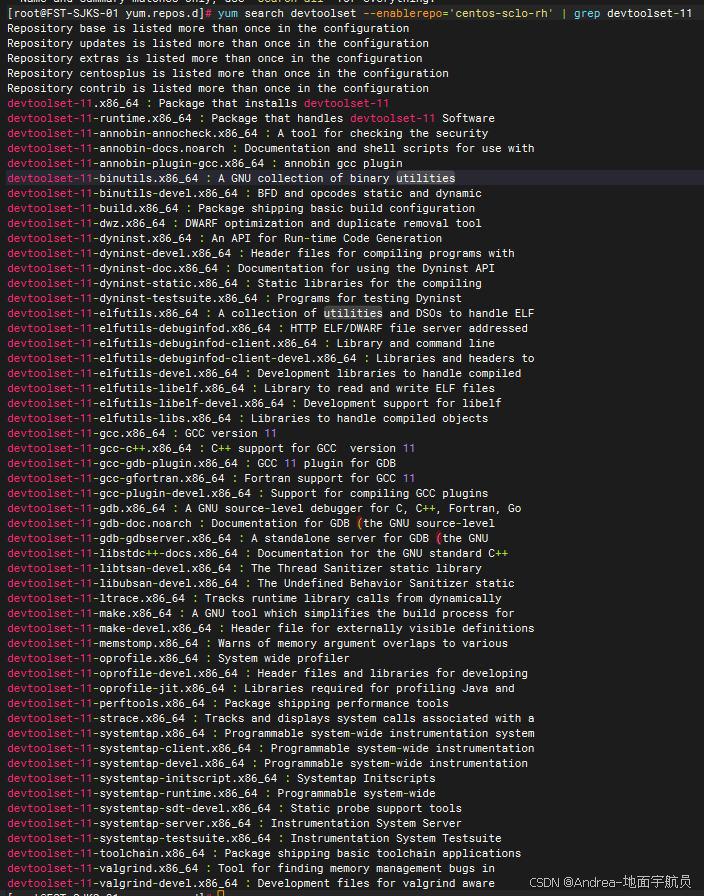
-
安装
yum install devtoolset-11-gcc.x86_64 devtoolset-11-gcc-c++.x86_64 devtoolset-11-gcc-gfortran.x86_64 devtoolset-11-gcc-plugin-devel.x86_64 -
scl 基本使用
# 查看通过 scl 安装了哪些软件
scl -l
scl --list
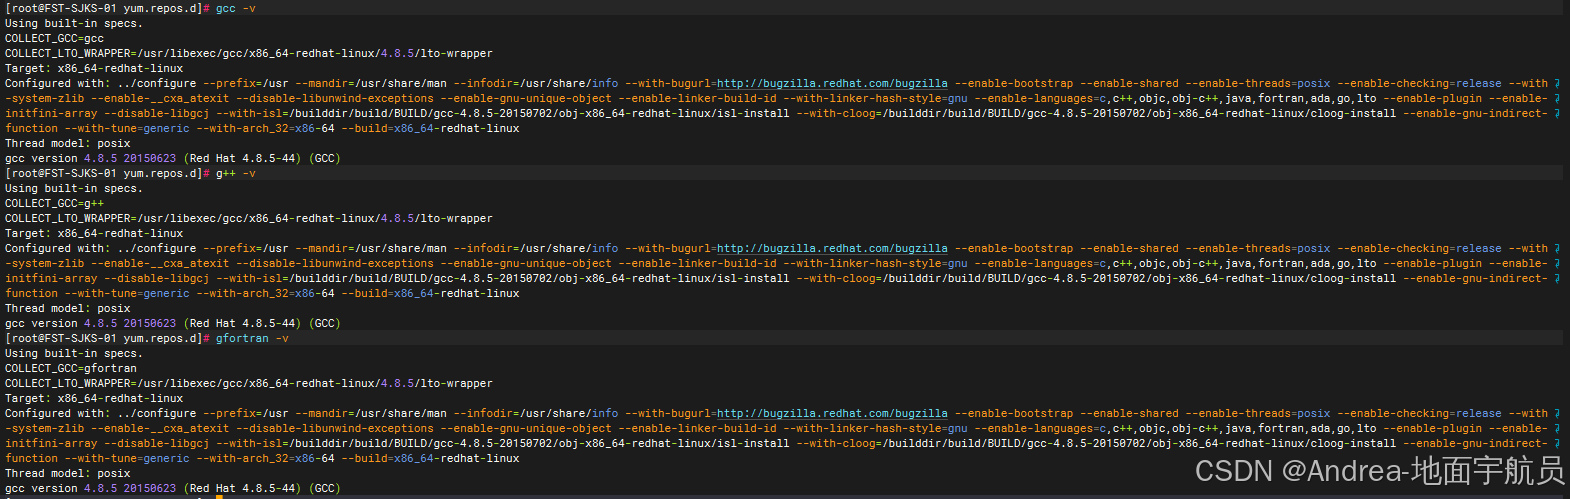
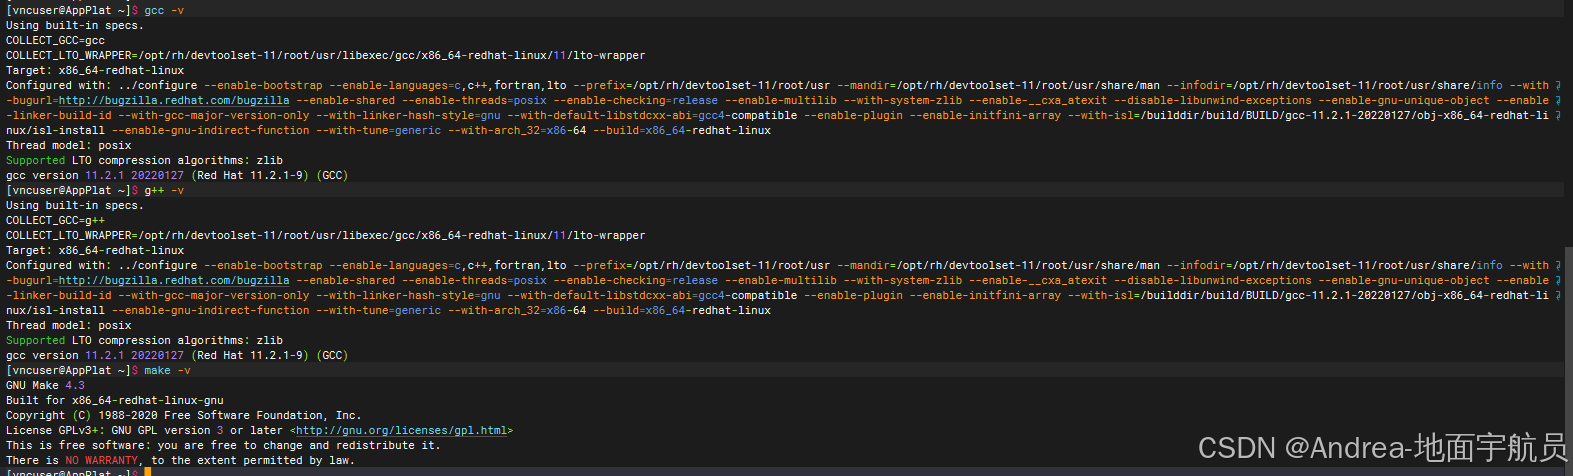
使用scl之前 gcc g++ gforchan 的版本都是 4.8.5
当前命令行使能哪个scl的软件
 scl enable devtoolset-11 bash
 # 或者使用
 source /opt/rh/devtoolset-11/enable  # 如果之后每个终端都要使用这个版本的软件可以将这行加到 ~/.bashrc 中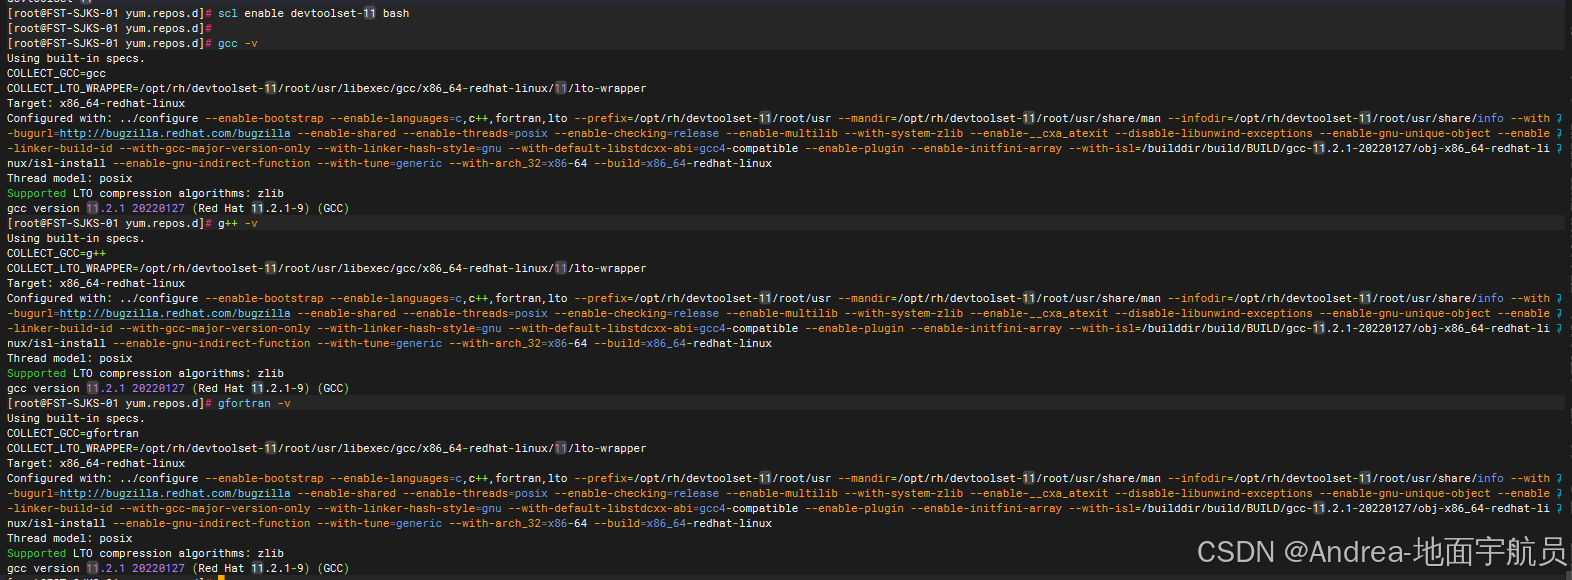
可以看到执行完 scl enable devtoolset-11 bash 命令后, gcc g++ gforchan的版本变成了 11.2.1
三. 安装fftw-3.3.8 (gromacs-2018.8的依赖)
-
下载 http://www.fftw.org/fftw-3.3.8.tar.gz ,解压后进入目录 执行
./configure --prefix=/sob/fftw338 --enable-sse2 --enable-avx --enable-float --enable-shared -
然后进一步运行
make -j install -
最后的效果

四. 安装gromacs
4.1 gromacs-2018.8
-
下载 http://ftp.gromacs.org/pub/gromacs/gromacs-2018.8.tar.gz ,解压后进入目录
-
依次执行
mkdir build cd build export CMAKE_PREFIX_PATH=/sob/fftw338 cmake3 .. -DCMAKE_INSTALL_PREFIX=/sob/gmx2018.8 -
编译安装
make install -j -
报错
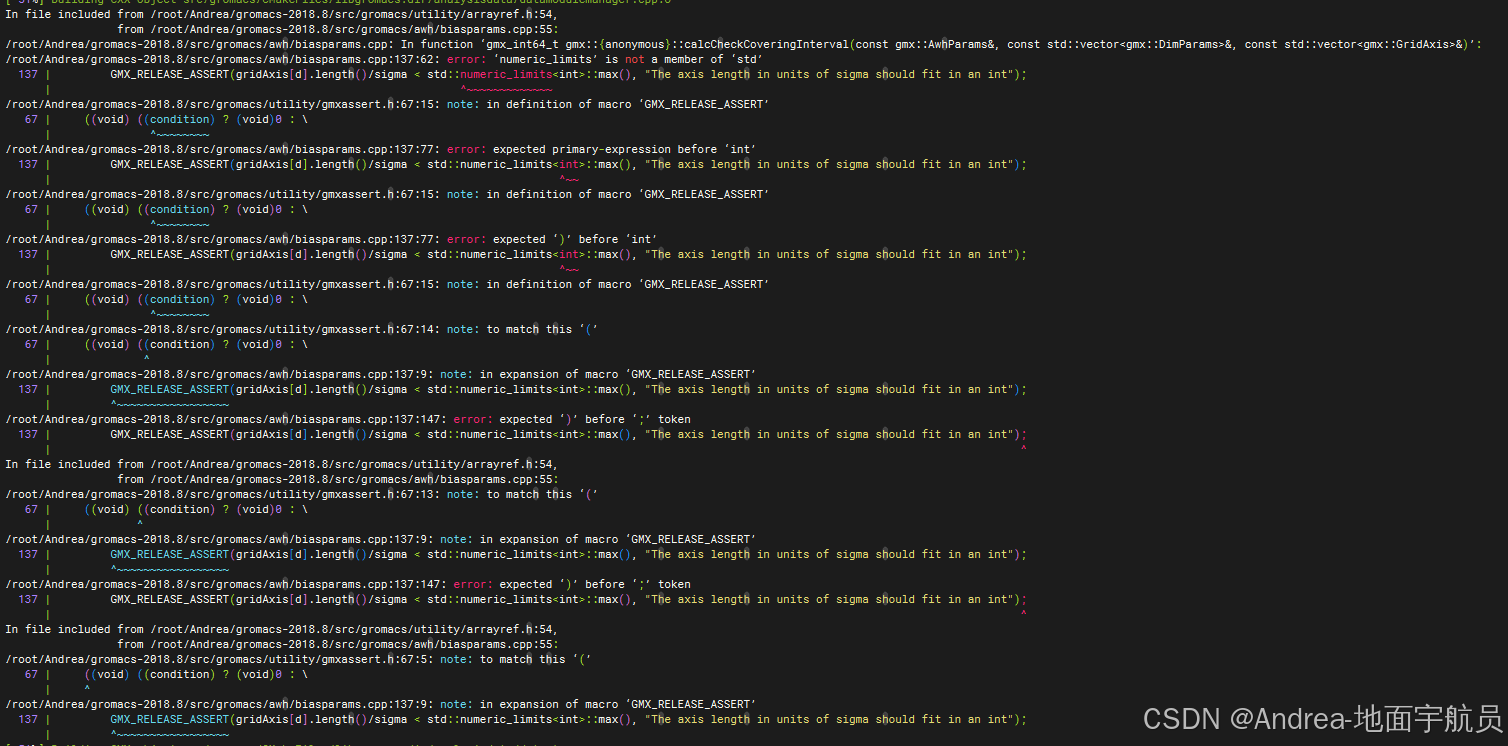
In file included from /root/Andrea/gromacs-2018.8/src/gromacs/utility/arrayref.h:54, from /root/Andrea/gromacs-2018.8/src/gromacs/awh/biasparams.cpp:55: /root/Andrea/gromacs-2018.8/src/gromacs/awh/biasparams.cpp: In function ‘gmx_int64_t gmx::{anonymous}::calcCheckCoveringInterval(const gmx::AwhParams&, const std::vector<gmx::DimParams>&, const std::vector<gmx::GridAxis>&)’: /root/Andrea/gromacs-2018.8/src/gromacs/awh/biasparams.cpp:137:62: error: ‘numeric_limits’ is not a member of ‘std’ 137 | GMX_RELEASE_ASSERT(gridAxis[d].length()/sigma < std::numeric_limits<int>::max(), "The axis length in units of sigma should fit in an int"); | ^~~~~~~~~~~~~~ /root/Andrea/gromacs-2018.8/src/gromacs/utility/gmxassert.h:67:15: note: in definition of macro ‘GMX_RELEASE_ASSERT’ 67 | ((void) ((condition) ? (void)0 : \ | ^~~~~~~~~ /root/Andrea/gromacs-2018.8/src/gromacs/awh/biasparams.cpp:137:77: error: expected primary-expression before ‘int’ 137 | GMX_RELEASE_ASSERT(gridAxis[d].length()/sigma < std::numeric_limits<int>::max(), "The axis length in units of sigma should fit in an int"); | ^~~ /root/Andrea/gromacs-2018.8/src/gromacs/utility/gmxassert.h:67:15: note: in definition of macro ‘GMX_RELEASE_ASSERT’ 67 | ((void) ((condition) ? (void)0 : \ | ^~~~~~~~~ /root/Andrea/gromacs-2018.8/src/gromacs/awh/biasparams.cpp:137:77: error: expected ‘)’ before ‘int’ 137 | GMX_RELEASE_ASSERT(gridAxis[d].length()/sigma < std::numeric_limits<int>::max(), "The axis length in units of sigma should fit in an int"); | ^~~ /root/Andrea/gromacs-2018.8/src/gromacs/utility/gmxassert.h:67:15: note: in definition of macro ‘GMX_RELEASE_ASSERT’ 67 | ((void) ((condition) ? (void)0 : \ | ^~~~~~~~~ /root/Andrea/gromacs-2018.8/src/gromacs/utility/gmxassert.h:67:14: note: to match this ‘(’ 67 | ((void) ((condition) ? (void)0 : \ | ^ /root/Andrea/gromacs-2018.8/src/gromacs/awh/biasparams.cpp:137:9: note: in expansion of macro ‘GMX_RELEASE_ASSERT’ 137 | GMX_RELEASE_ASSERT(gridAxis[d].length()/sigma < std::numeric_limits<int>::max(), "The axis length in units of sigma should fit in an int"); | ^~~~~~~~~~~~~~~~~~ /root/Andrea/gromacs-2018.8/src/gromacs/awh/biasparams.cpp:137:147: error: expected ‘)’ before ‘;’ token 137 | GMX_RELEASE_ASSERT(gridAxis[d].length()/sigma < std::numeric_limits<int>::max(), "The axis length in units of sigma should fit in an int"); | ^ In file included from /root/Andrea/gromacs-2018.8/src/gromacs/utility/arrayref.h:54, from /root/Andrea/gromacs-2018.8/src/gromacs/awh/biasparams.cpp:55: /root/Andrea/gromacs-2018.8/src/gromacs/utility/gmxassert.h:67:13: note: to match this ‘(’ 67 | ((void) ((condition) ? (void)0 : \ | ^ /root/Andrea/gromacs-2018.8/src/gromacs/awh/biasparams.cpp:137:9: note: in expansion of macro ‘GMX_RELEASE_ASSERT’ 137 | GMX_RELEASE_ASSERT(gridAxis[d].length()/sigma < std::numeric_limits<int>::max(), "The axis length in units of sigma should fit in an int"); | ^~~~~~~~~~~~~~~~~~ /root/Andrea/gromacs-2018.8/src/gromacs/awh/biasparams.cpp:137:147: error: expected ‘)’ before ‘;’ token 137 | GMX_RELEASE_ASSERT(gridAxis[d].length()/sigma < std::numeric_limits<int>::max(), "The axis length in units of sigma should fit in an int"); | ^ In file included from /root/Andrea/gromacs-2018.8/src/gromacs/utility/arrayref.h:54, from /root/Andrea/gromacs-2018.8/src/gromacs/awh/biasparams.cpp:55: /root/Andrea/gromacs-2018.8/src/gromacs/utility/gmxassert.h:67:5: note: to match this ‘(’ 67 | ((void) ((condition) ? (void)0 : \ | ^ /root/Andrea/gromacs-2018.8/src/gromacs/awh/biasparams.cpp:137:9: note: in expansion of macro ‘GMX_RELEASE_ASSERT’ 137 | GMX_RELEASE_ASSERT(gridAxis[d].length()/sigma < std::numeric_limits<int>::max(), "The axis length in units of sigma should fit in an int"); | ^~~~~~~~~~~~~~~~~~ -
解决方法
添加 #include <limits> 到 src/gromacs/awh/biasparams.cpp 和 src/gromacs/mdlib/minimize.cpp 两个文件的顶部 -
添加后,重新编译安装
make install -j -
安装好后
-
验证安装效果
-
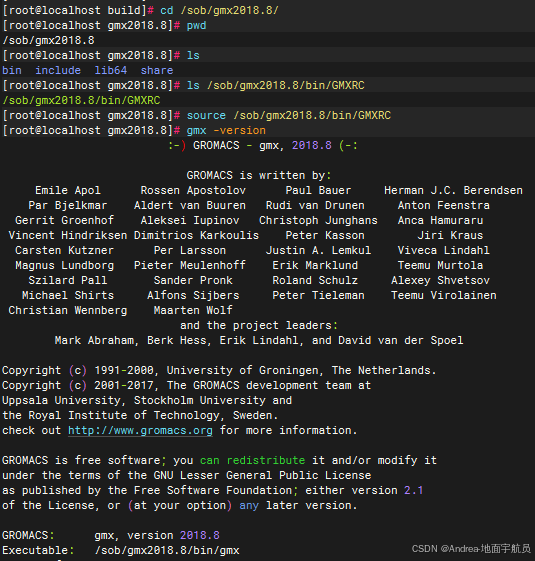
在.bashrc中添加命令
source /sob/gmx2018.8/bin/GMXRC -
重新打开终端,执行
gmx -version出现版本信息,表明安装部署成功
4.2 gromacs-2022.6
- 依赖包括如下内容
gcc-8及以上、g++-8及以上、make 4及以上、cuda(根据自己的gpu选择版本) - 需要更新gcc以及cmake ,笔者使用的是 scl + devtoolse11 ,直接安装所有的 devtoolset-11 中的软件
yum install devtoolset-11.x86_64 devtoolset-11-runtime.x86_64 devtoolset-11-annobin-annocheck.x86_64 devtoolset-11-annobin-docs.noarch devtoolset-11-annobin-plugin-gcc.x86_64 devtoolset-11-binutils.x86_64 devtoolset-11-binutils-devel.x86_64 devtoolset-11-build.x86_64 devtoolset-11-dwz.x86_64 devtoolset-11-dyninst.x86_64 devtoolset-11-dyninst-devel.x86_64 devtoolset-11-dyninst-doc.x86_64 devtoolset-11-dyninst-static.x86_64 devtoolset-11-dyninst-testsuite.x86_64 devtoolset-11-elfutils.x86_64 devtoolset-11-elfutils-debuginfod.x86_64 devtoolset-11-elfutils-debuginfod-client.x86_64 devtoolset-11-elfutils-debuginfod-client-devel.x86_64 devtoolset-11-elfutils-devel.x86_64 devtoolset-11-elfutils-libelf.x86_64 devtoolset-11-elfutils-libelf-devel.x86_64 devtoolset-11-elfutils-libs.x86_64 devtoolset-11-gcc.x86_64 devtoolset-11-gcc-c++.x86_64 devtoolset-11-gcc-gdb-plugin.x86_64 devtoolset-11-gcc-gfortran.x86_64 devtoolset-11-gcc-plugin-devel.x86_64 devtoolset-11-gdb.x86_64 devtoolset-11-gdb-doc.noarch devtoolset-11-gdb-gdbserver.x86_64 devtoolset-11-libasan-devel.x86_64 devtoolset-11-libatomic-devel.x86_64 devtoolset-11-libgccjit.x86_64 devtoolset-11-libgccjit-devel.x86_64 devtoolset-11-libgccjit-docs.x86_64 devtoolset-11-libitm-devel.x86_64 devtoolset-11-liblsan-devel.x86_64 devtoolset-11-libquadmath-devel.x86_64 devtoolset-11-libstdc++-devel.x86_64 devtoolset-11-libstdc++-docs.x86_64 devtoolset-11-libtsan-devel.x86_64 devtoolset-11-libubsan-devel.x86_64 devtoolset-11-ltrace.x86_64 devtoolset-11-make.x86_64 devtoolset-11-make-devel.x86_64 devtoolset-11-memstomp.x86_64 devtoolset-11-oprofile.x86_64 devtoolset-11-oprofile-devel.x86_64 devtoolset-11-oprofile-jit.x86_64 devtoolset-11-perftools.x86_64 devtoolset-11-strace.x86_64 devtoolset-11-systemtap.x86_64 devtoolset-11-systemtap-client.x86_64 devtoolset-11-systemtap-devel.x86_64 devtoolset-11-systemtap-initscript.x86_64 devtoolset-11-systemtap-runtime.x86_64 devtoolset-11-systemtap-sdt-devel.x86_64 devtoolset-11-systemtap-server.x86_64 devtoolset-11-systemtap-testsuite.x86_64 devtoolset-11-toolchain.x86_64 devtoolset-11-valgrind.x86_64 devtoolset-11-valgrind-devel.x86_64 devtoolset-11.x86_64 devtoolset-11-runtime.x86_64 devtoolset-11-annobin-annocheck.x86_64 devtoolset-11-annobin-docs.noarch devtoolset-11-annobin-plugin-gcc.x86_64 devtoolset-11-binutils.x86_64 devtoolset-11-binutils-devel.x86_64 devtoolset-11-build.x86_64 devtoolset-11-dwz.x86_64 devtoolset-11-dyninst.x86_64 devtoolset-11-dyninst-devel.x86_64 devtoolset-11-dyninst-doc.x86_64 devtoolset-11-dyninst-static.x86_64 devtoolset-11-dyninst-testsuite.x86_64 devtoolset-11-elfutils.x86_64 devtoolset-11-elfutils-debuginfod.x86_64 devtoolset-11-elfutils-debuginfod-client.x86_64 devtoolset-11-elfutils-debuginfod-client-devel.x86_64 devtoolset-11-elfutils-devel.x86_64 devtoolset-11-elfutils-libelf.x86_64 devtoolset-11-elfutils-libelf-devel.x86_64 devtoolset-11-elfutils-libs.x86_64 - 安装cuda (笔者使用的环境cuda版本为12.4,不是自己安装的(●ˇ∀ˇ●),cuda12.4的安装过程请参考其它博主吧 ,ԾㅂԾ, ),版本信息显示如下
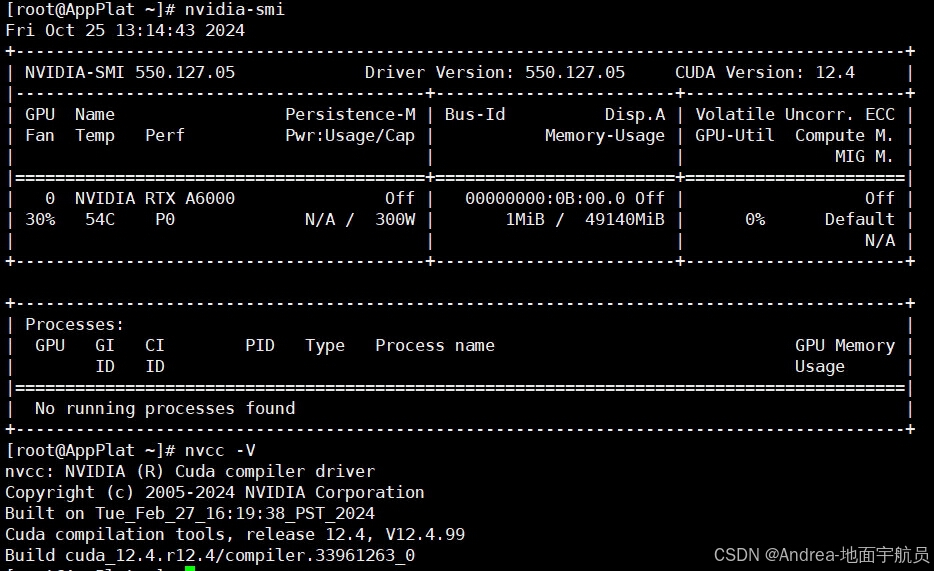
- 通过命令 查看 cuda 的安装命令
上面的 /usr/local/cuda/ 就是同事部署的位置$ which nvcc /usr/local/cuda/bin/nvcc - 下载 gromacs-2022.6.tar.gz
wget https://ftp.gromacs.org/gromacs/gromacs-2022.6.tar.gz - 解压并进入目录
tar xvf gromacs-2022.6.tar.gz cd gromacs-2022.6/ mkdir build cd build - 切换scl
检查 gcc(不低于8) 、g++(不低于8)、 make(不低于4) 是不是高版本的,scl enable devtoolset-11 bash
- 在build目录中执行 cmake 命令
cmake3 .. -DCMAEK_INSTALL_PREFIX=/opt/gromacs-2022 -DGMX_GPU=CUDA -DCUDA_TOOLKIT_ROOT_DIR=/usr/local/cuda-12.4/ -DGMX_BUILD_OWN_FFTW=ON - 生成makefile等文件后, 编译
make make check sudo make install source /opt/gromacs-2022/bin/GMXRC #建议这句加到 ~/.bashrc 中 - 查看版本信息
gmx --version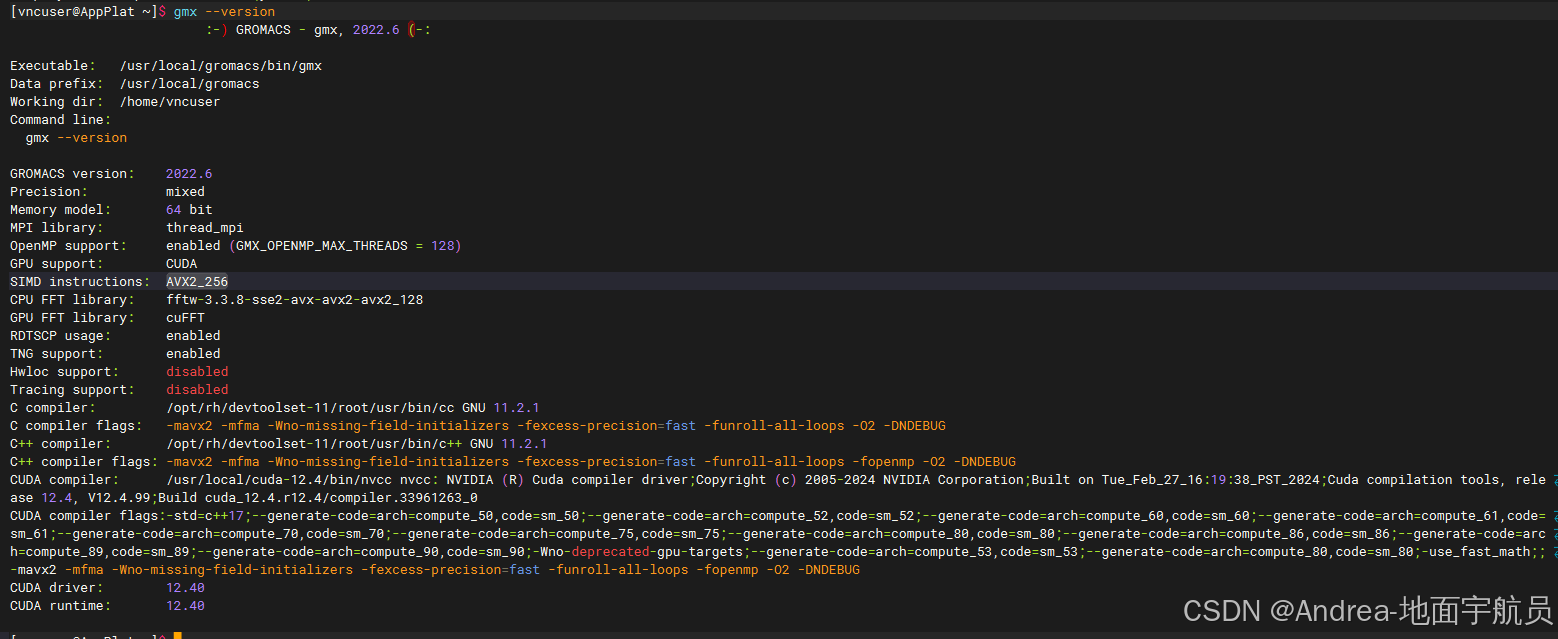
五. 安装MiniConda 以及源的配置
-
下载安装脚本
wget https://repo.anaconda.com/miniconda/Miniconda3-latest-Linux-x86_64.sh -
执行安装
chmod 777 Miniconda3-latest-Linux-x86_64.sh sudo ./Miniconda3-latest-Linux-x86_64.sh -
一路next,选yes
-
执行
source ~/.bashrc -
修改 ~/.condarc ,亲测有效的源(20241022)
annels:
  - defaults
show_channel_urls: true
default_channels:
  - https://mirrors.tuna.tsinghua.edu.cn/anaconda/pkgs/main
  - https://mirrors.tuna.tsinghua.edu.cn/anaconda/pkgs/r
  - https://mirrors.tuna.tsinghua.edu.cn/anaconda/pkgs/msys2
custom_channels:
  conda-forge: https://mirrors.tuna.tsinghua.edu.cn/anaconda/cloud
  msys2: https://mirrors.tuna.tsinghua.edu.cn/anaconda/cloud
  bioconda: https://mirrors.tuna.tsinghua.edu.cn/anaconda/cloud
  menpo: https://mirrors.tuna.tsinghua.edu.cn/anaconda/cloud
  pytorch: https://mirrors.tuna.tsinghua.edu.cn/anaconda/cloud
  pytorch-lts: https://mirrors.tuna.tsinghua.edu.cn/anaconda/cloud
  simpleitk: https://mirrors.tuna.tsinghua.edu.cn/anaconda/cloud
auto_activate_base: false   #修改默认不进入base环境
六. 安装AmberTools23
-
运行以下命令
#创建一个新的 conda “环境”
conda create --name AmberTools23
# 切换 conda 环境
conda activate AmberTools23
# 安装
conda install -c conda-forge ambertools=23
# 更新
conda update -c conda-forge ambertools
# 验证 antechamber 运行
(base) [root@localhost Andrea]# conda activate AmberTools23
(AmberTools23) [root@localhost Andrea]# antechamber

Welcome to antechamber 22.0: molecular input file processor.

Usage: antechamber -i     input file name
                   -fi    input file format
                   -o     output file name
                   -fo    output file format
                   -c     charge method
                   -cf    charge file name
                   -nc    net molecular charge (int)
                   -a     additional file name
                   -fa    additional file format
                   -ao    additional file operation
                          crd   : only read in coordinate
                          crg   : only read in charge
                          radius: only read in radius
                          name  : only read in atom name
                          type  : only read in atom type
                          bond  : only read in bond type
                   -m     multiplicity (2S+1), default is 1
                   -rn    residue name, overrides input file, default is MOL
                   -rf    residue toplogy file name in prep input file,
                          default is molecule.res
                   -ch    check file name for gaussian, default is 'molecule'
                   -ek    mopac or sqm keyword, inside quotes; overwrites previous ones
                   -gk    gaussian job keyword, inside quotes, is ignored when both -gopt and -gsp are used
                   -gopt  gaussian job keyword for optimization, inside quotes
                   -gsp   gaussian job keyword for single point calculation, inside quotes
                   -gm    gaussian memory keyword, inside quotes, such as "%mem=1000MB"
                   -gn    gaussian number of processors keyword, inside quotes, such as "%nproc=8"
                   -gdsk  gaussian maximum disk usage keyword, inside quotes, such as "%maxdisk=50GB"
                   -gv    add keyword to generate gesp file (for Gaussian 09 only)
                          1    : yes
                          0    : no, the default
                   -ge    gaussian esp file generated by iop(6/50=1), default is g09.gesp
                   -tor   torsional angle list, inside a pair of quotes, such as "1-2-3-4:0,5-6-7-8"
                          ':1' or ':0' indicates the torsional angle is frozen or not
                   -df    am1-bcc precharge flag, 2 - use sqm(default); 0 - use mopac
                   -at    atom type
                          gaff : the default
                          gaff2: for gaff2 (beta-version)
                          amber: for PARM94/99/99SB
                          bcc  : bcc
                          sybyl: sybyl
                   -du    fix duplicate atom names: yes(y)[default] or no(n)
                   -bk    component/block Id, for ccif
                   -an    adjust atom names: yes(y) or no(n)
                          the default is 'y' for 'mol2' and 'ac' and 'n' for the other formats
                   -j     atom type and bond type prediction index, default is 4
                          0    : no assignment
                          1    : atom type
                          2    : full  bond types
                          3    : part  bond types
                          4    : atom and full bond type
                          5    : atom and part bond type
                   -s     status information: 0(brief), 1(default) or 2(verbose)
                   -eq    equalizing atomic charge, default is 1 for '-c resp' and '-c bcc' and 0 for the other charge methods
                          0    : no use
                          1    : by atomic paths
                          2    : by atomic paths and structural information, i.e. E/Z configurations
                   -pf    remove intermediate files: yes(y) or no(n)[default]
                   -pl    maximum path length to determin equivalence of atomic charges for resp and bcc,
                          the smaller the value, the faster the algorithm, default is -1 (use full length),
                          set this parameter to 10 to 30 if your molecule is big (# atoms >= 100)
                   -seq   atomic sequence order changable: yes(y)[default] or no(n)
                   -dr    acdoctor mode: yes(y)[default] or no(n)
                   -i -o -fi and -fo must appear; others are optional
                   Use 'antechamber -L' to list the supported file formats and charge methods
七. 安装VMD
-
下载vmd安装包
wget https://www.ks.uiuc.edu/Research/vmd/alpha/vmd-1.9.4a55.bin.LINUXAMD64-CUDA102-OptiX650-OSPRay185-RTXRTRT.opengl.tar.gz -
解压
tar xvf vmd-1.9.4a55.bin.LINUXAMD64-CUDA102-OptiX650-OSPRay185-RTXRTRT.opengl.tar.gz -
进入解压目录
cd vmd-1.9.4a55 -
执行 configure
sudo ./configure -
编译
sudo make install -
终端输入vmd启动
su root
conda activate AmberTools23 # 切换到自己的conda环境
vmd xxx.pdb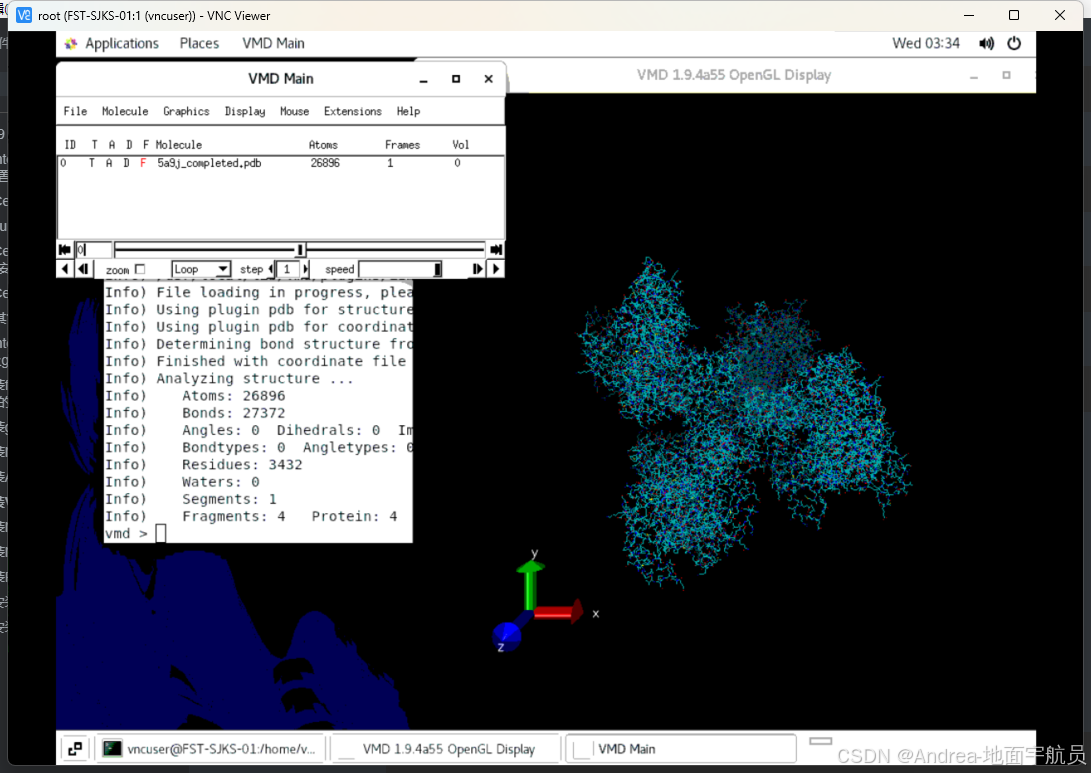
-
vmd的配置
vi ~/.vmdrc添加命令
user add key Control-q "quit"保存并退出
这样在下次启动VMD时,就可以使用Control+q组合键退出了。
八. 安装MDAnalysis
-
使用conda安装
conda install -c conda-forge mdanalysis
# conda update mdanalysis # 升级
# conda install -c conda-forge MDAnalysisTests  # 安装测试数据
九. 安装MDTraj
-
使用conda安装
conda install conda-forge::mdtraj
十. 安装PyMol
-
使用conda安装
conda install -c conda-forge pymol-open-source -
执行效果
su root
conda activate AmberTools23  # 切换到自己的conda环境
pymol xxxx.pdb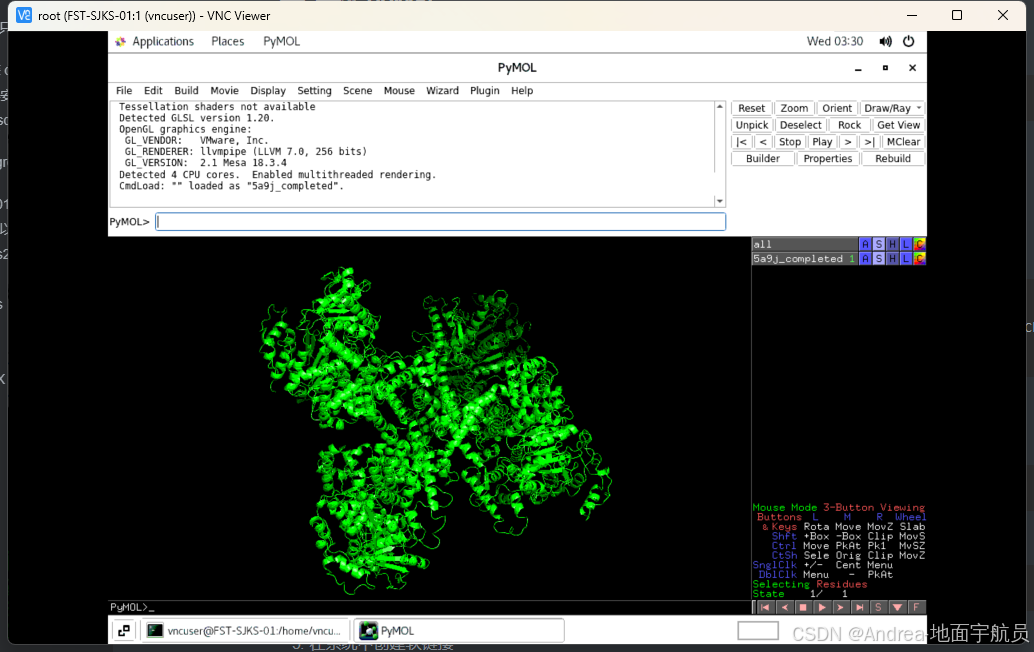
十一. 安装ChimeraX
-
执行以下命令
wget https://www.rbvi.ucsf.edu/chimerax/cgi-bin/secure/chimerax-get.py?ident=OHeQer2WSqdn9%2BJyqX5K%2BP9jvVBVQtzx0hx21QjmnvcirOjLdw%3D%3D&file=1.2%2Flinux%2FChimeraX-1.2.5.tar.gz&choice=Notified -
下载下来 ChimeraX-1.2.5.tar.gz
-
解压
tar xvf ChimeraX-1.2.5.tar.gz -
将解压目录拷贝到 /usr/local
cp chimerax-1.2.5-rc-2021.05.24/ /usr/local/ -r -
在系统中创建软链接
ln -s /usr/local/chimerax-1.2.5-rc-2021.05.24/bin/ChimeraX /usr/bin/ChimeraX -
安装效果,注意事项,ChimeraX 不要使用root用户和使用sudo权限运行
ChimeraX xxx.pdb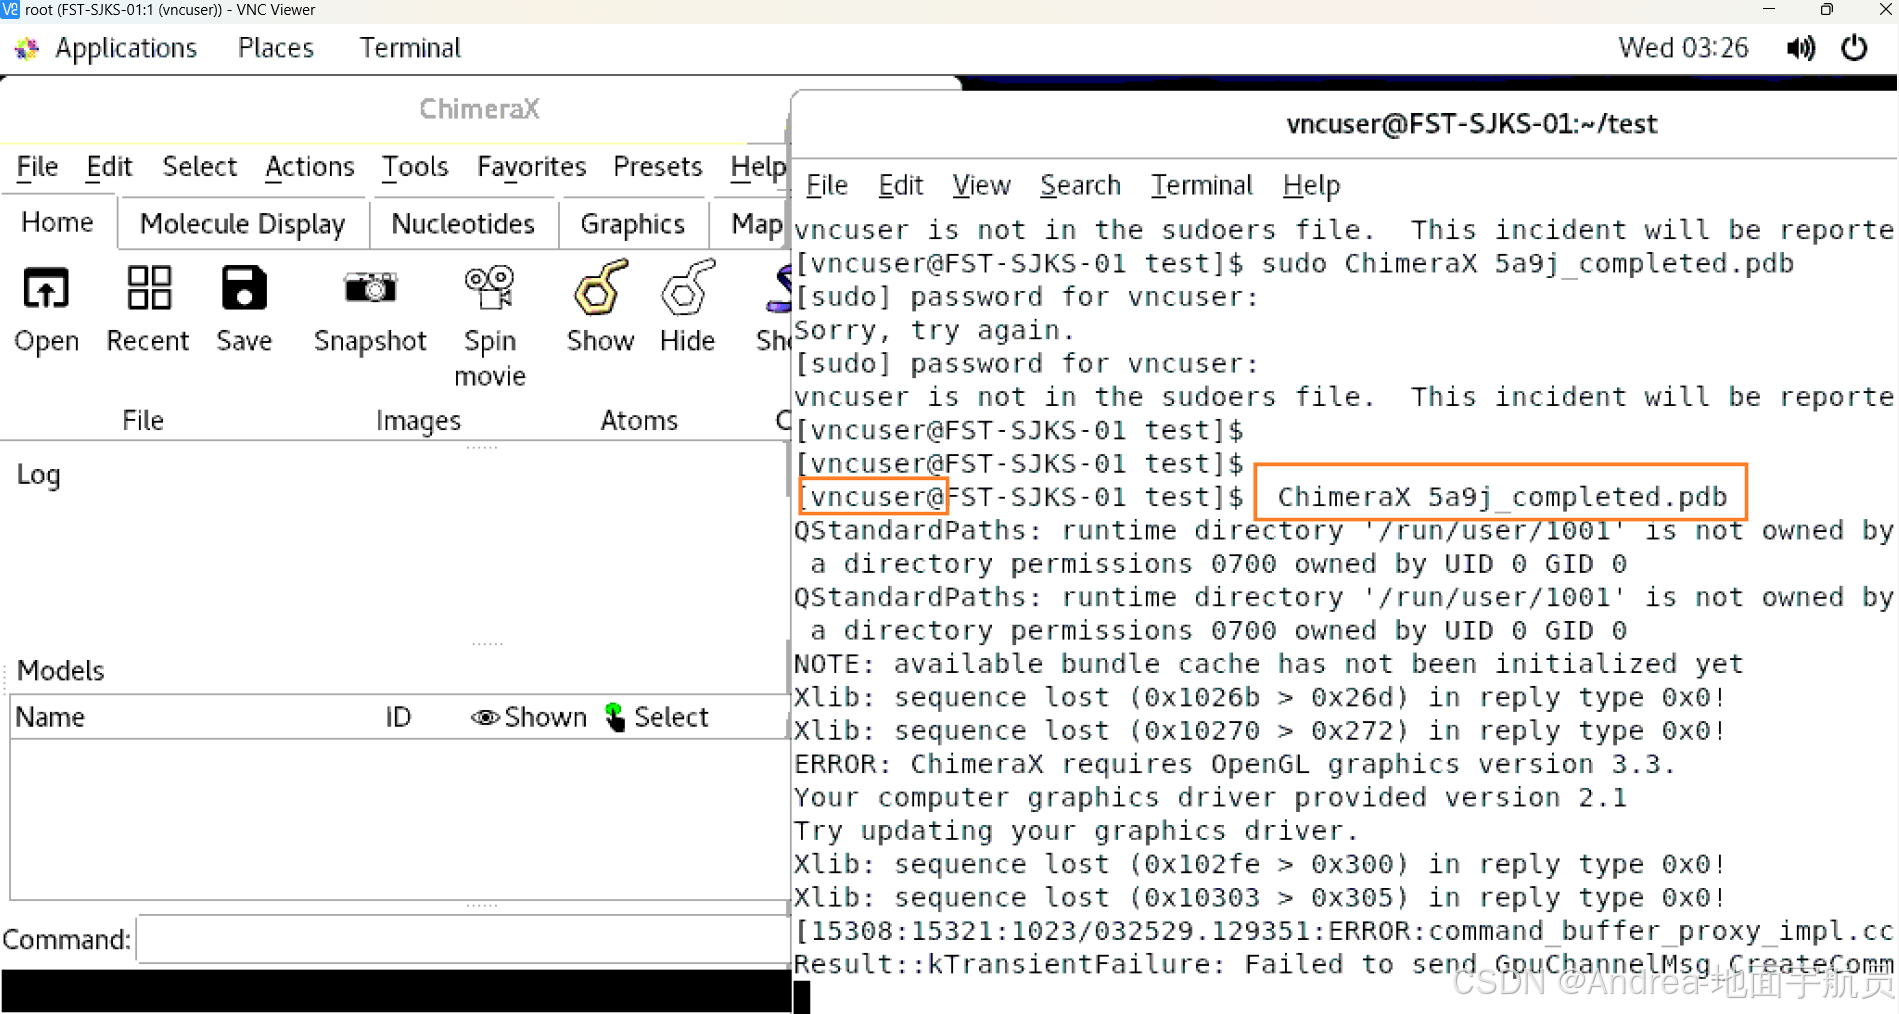
十二. 安装Namd
-
下载namd
wget https://www.ks.uiuc.edu/Research/namd/2.13/download/412487/NAMD_2.13_Linux-x86_64.tar.gz -
解压
tar xvf NAMD_2.13_Linux-x86_64.tar.gz -
拷贝
cp NAMD_2.13_Linux-x86_64 /usr/local/ -r -
创建软链接
ln -s /usr/local/NAMD_2.13_Linux-x86_64/namd2 /usr/local/bin/namd2


 被折叠的 条评论
为什么被折叠?
被折叠的 条评论
为什么被折叠?
 到【灌水乐园】发言


