


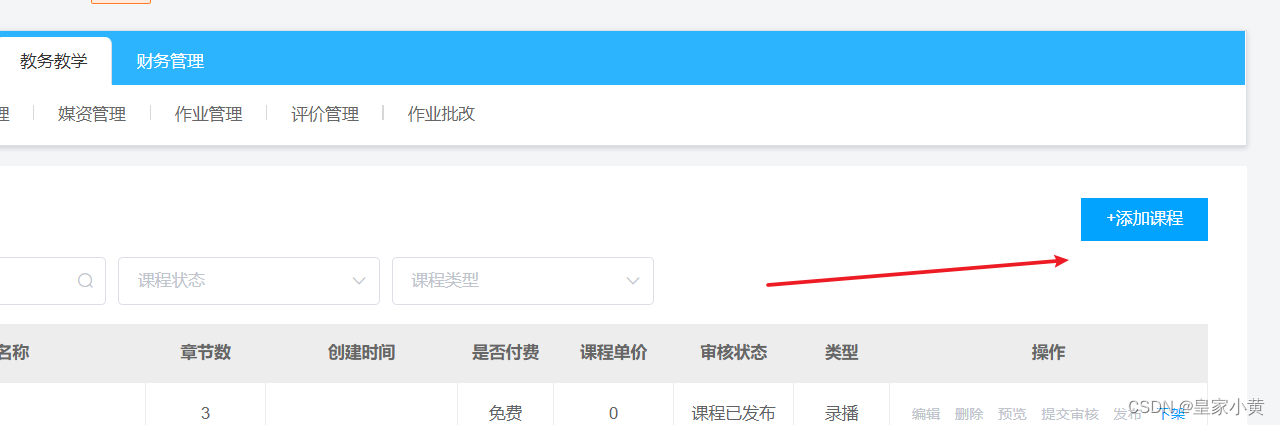
基础信息管理
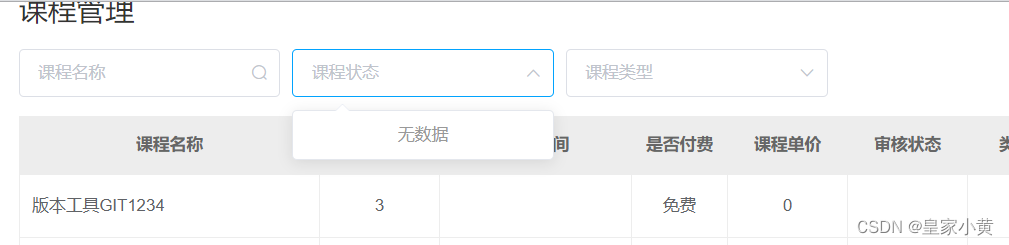
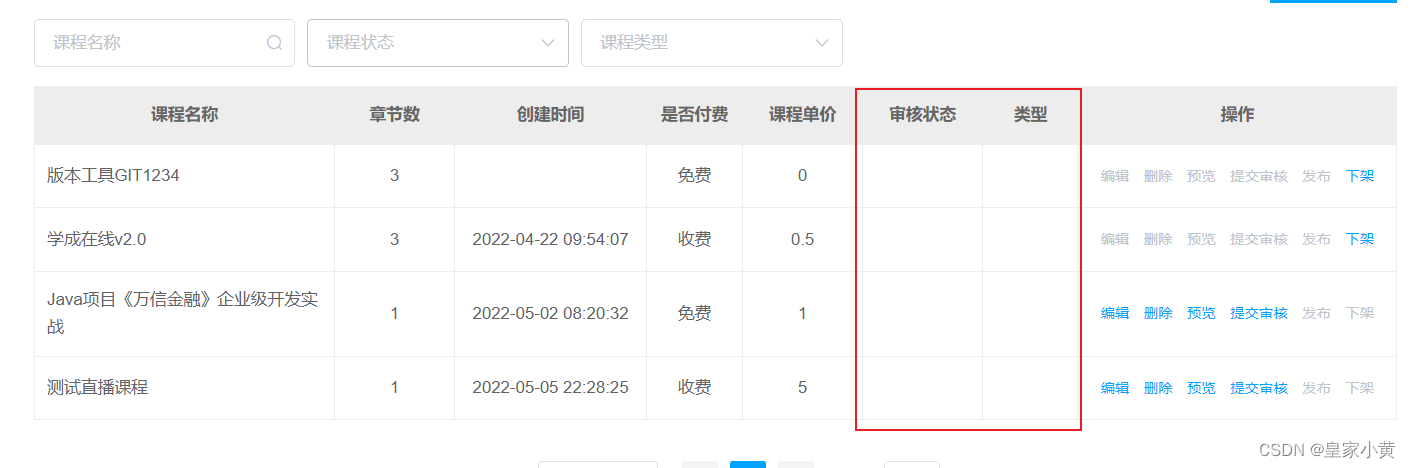
数据字典:
昨天的大家也看到了这里完全没有显示
在开发中我们会遇到两种情况:
- 开发中有些变量信息,其内容固定,并在多个地方使用。面对多变的需求,这些变量可能会有所调整。
- 在用户界面中显示下拉框菜单里的数据,一般不会写死,需要进行统一管理。
- 在学成在线项目中,数据状态,数据类型等都是使用数据字段对比展示的。在页面初始化的时候,会从服务端获取数据字段内容,并存储到前端缓存。
具体实现:
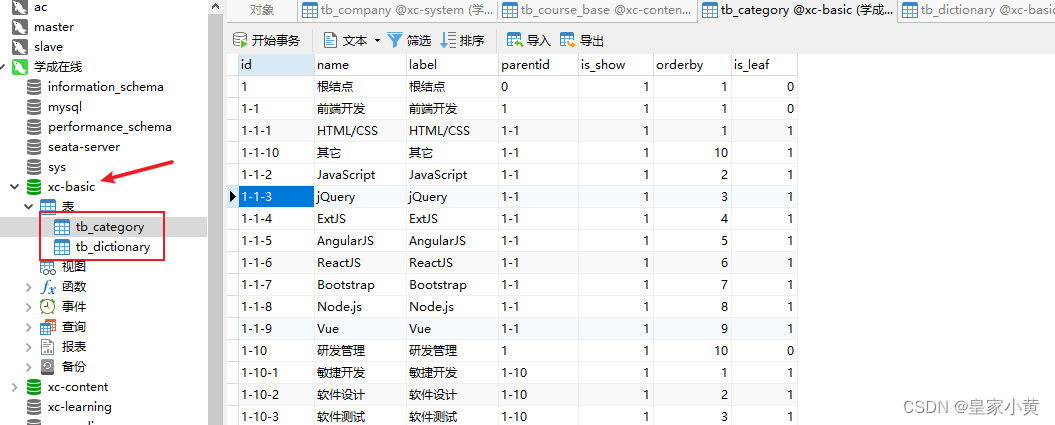
需要数据库表:
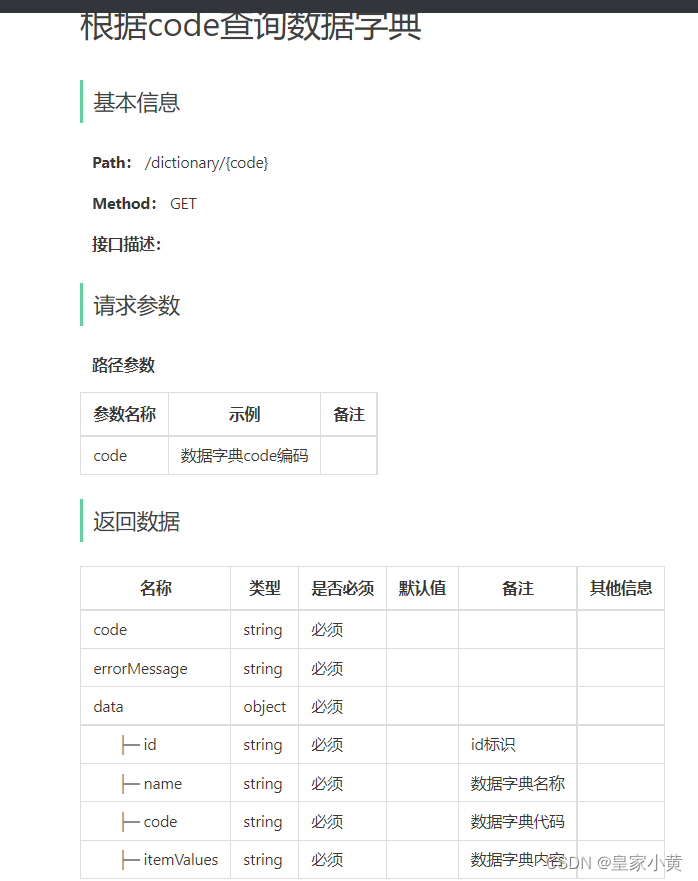
YAPI接口文档:
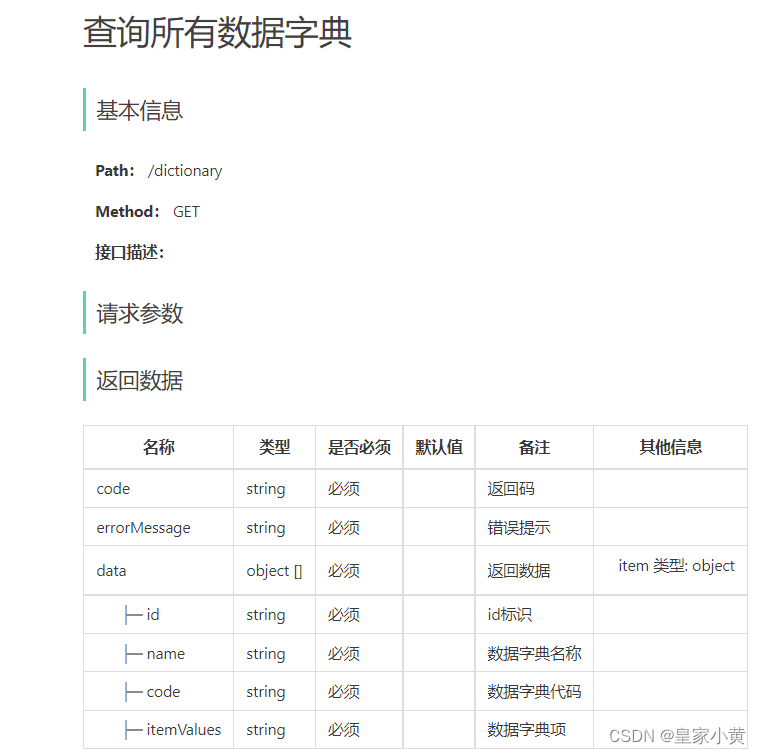
代码展示
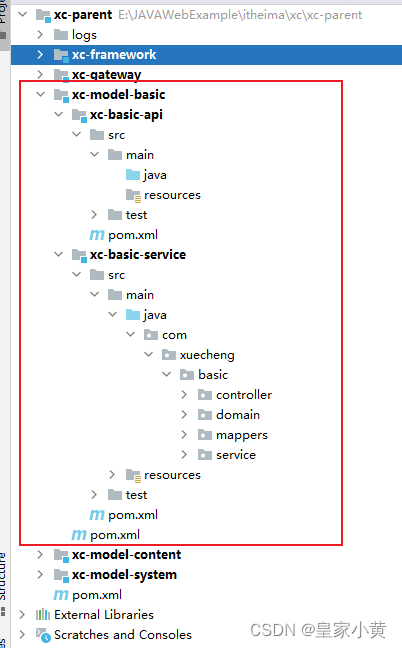
首先使用mybatis-plus代码生成器,生成模块结构
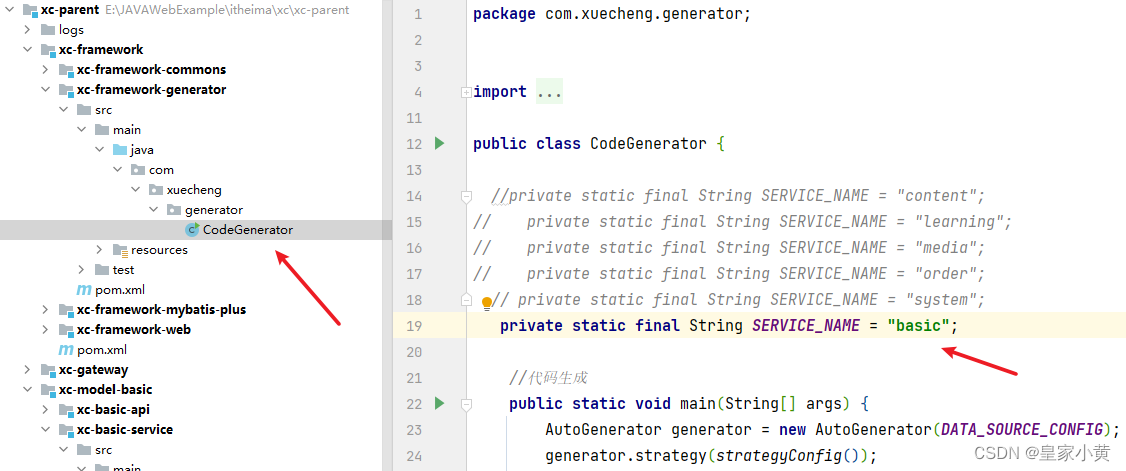
具体结构:
web代码:
package com.xuecheng.basic.controller;

import com.xuecheng.commons.model.vo.ResponseResult;
import org.springframework.web.bind.annotation.GetMapping;
import org.springframework.web.bind.annotation.PathVariable;
import org.springframework.web.bind.annotation.RequestMapping;
import org.springframework.web.bind.annotation.RestController;
import com.xuecheng.basic.service.DictionaryService;
import lombok.extern.slf4j.Slf4j;
import org.springframework.beans.factory.annotation.Autowired;

/**
 * <p>
 * 数据字典前端控制器
 * </p>
 *
 * @author itheima
 */
@Slf4j
@RestController
@RequestMapping("/dictionary")
public class DictionaryController {

    @Autowired
    private DictionaryService dictionaryService;

    //查询所有数据字典
    @GetMapping
    public ResponseResult findAllDictionary(){
    return dictionaryService.findAllDictionary();
    }
    //根据code查询数据字典
    @GetMapping("/{code}")
    public ResponseResult findCode(@PathVariable("code") String code){
        return dictionaryService.findCode(code);
    }
}
serverImpl层:
package com.xuecheng.basic.service.impl;

import cn.hutool.core.bean.BeanUtil;
import com.baomidou.mybatisplus.core.conditions.query.LambdaQueryWrapper;
import com.xuecheng.basic.domain.Dictionary;
import com.xuecheng.basic.mappers.DictionaryMapper;
import com.xuecheng.basic.service.DictionaryService;
import com.baomidou.mybatisplus.extension.service.impl.ServiceImpl;
import com.xuecheng.commons.enums.ErrorCode;
import com.xuecheng.commons.model.vo.DictionaryVo;
import com.xuecheng.commons.model.vo.ResponseResult;
import com.xuecheng.commons.utils.BeanHelper;
import com.xuecheng.web.exception.BusinessException;
import org.springframework.beans.factory.annotation.Autowired;
import org.springframework.stereotype.Service;

import java.util.List;

/**
 * <p>
 * 数据字典 服务实现类
 * </p>
 *
 * @author itheima
 * @since 2022-07-30
 */
@Service
public class DictionaryServiceImpl extends ServiceImpl<DictionaryMapper, Dictionary> implements DictionaryService {

    @Autowired
    private DictionaryService dictionaryService;
    @Autowired
    private DictionaryMapper dictionaryMapper;
    @Override
    public ResponseResult findAllDictionary() {
        List<Dictionary> list = dictionaryService.list();
        List<DictionaryVo> vos = BeanHelper.copyWithCollection(list, DictionaryVo.class);
        return ResponseResult.okResult(vos);

    }

    @Override
    public ResponseResult findCode(String code) {
        LambdaQueryWrapper<Dictionary> wrapper = new LambdaQueryWrapper<>();
        wrapper.eq(Dictionary::getCode,code);
        Dictionary one = dictionaryMapper.selectOne(wrapper);
        if (BeanUtil.isEmpty(one)){
            throw new BusinessException(ErrorCode.NOTFOUND);
        }
        DictionaryVo vo = BeanHelper.copyProperties(one, DictionaryVo.class);
        return ResponseResult.okResult(vo);
    }
}
效果展示:
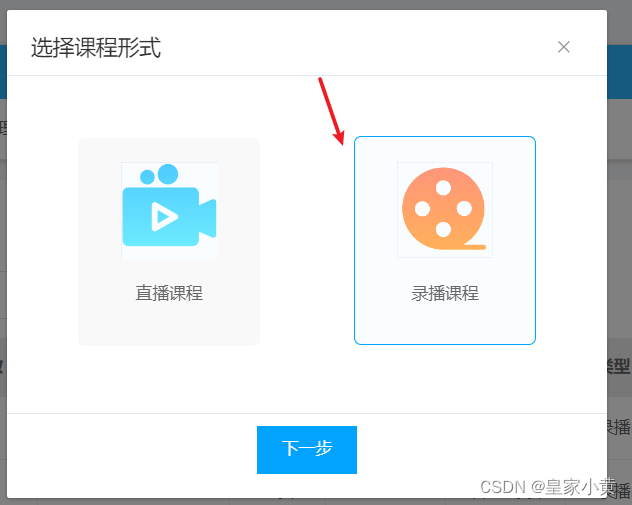
添加课程中的数据字典:

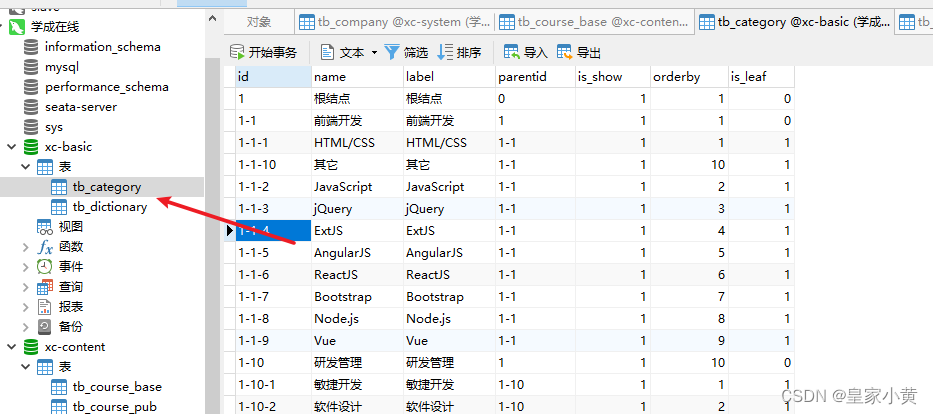
需要的表:
YAPI接口文档;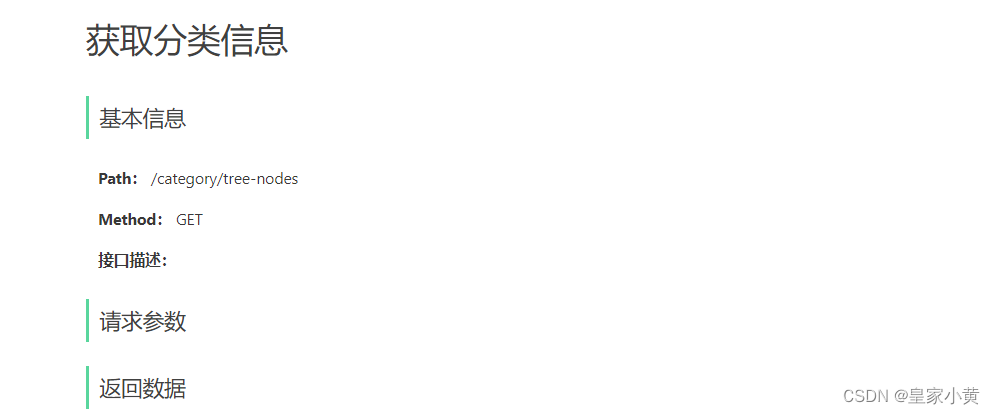
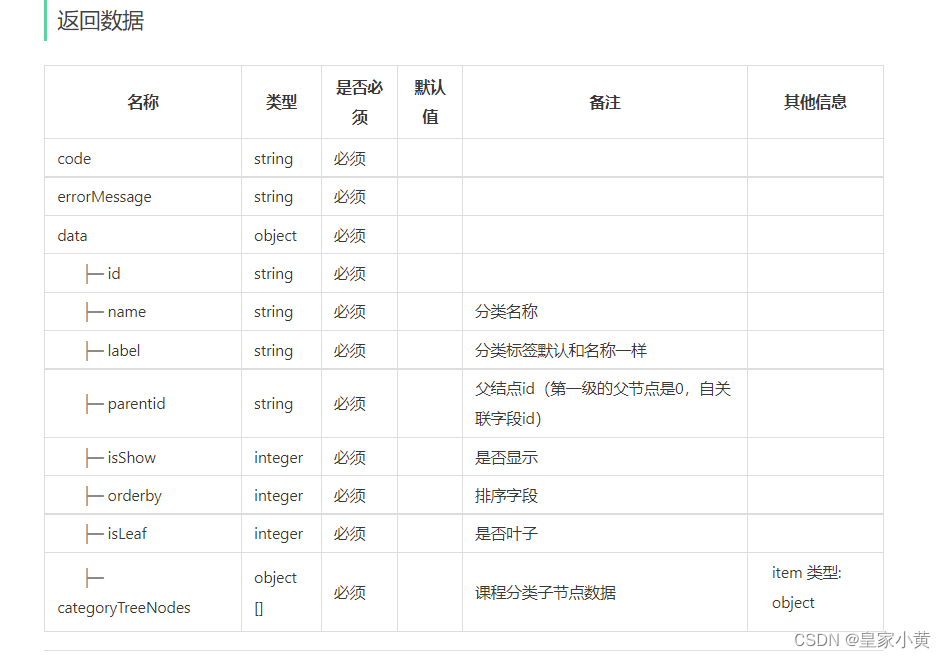
这个课程分类功能就有点点难度,他是一个嵌套三级结构,具体如下图:
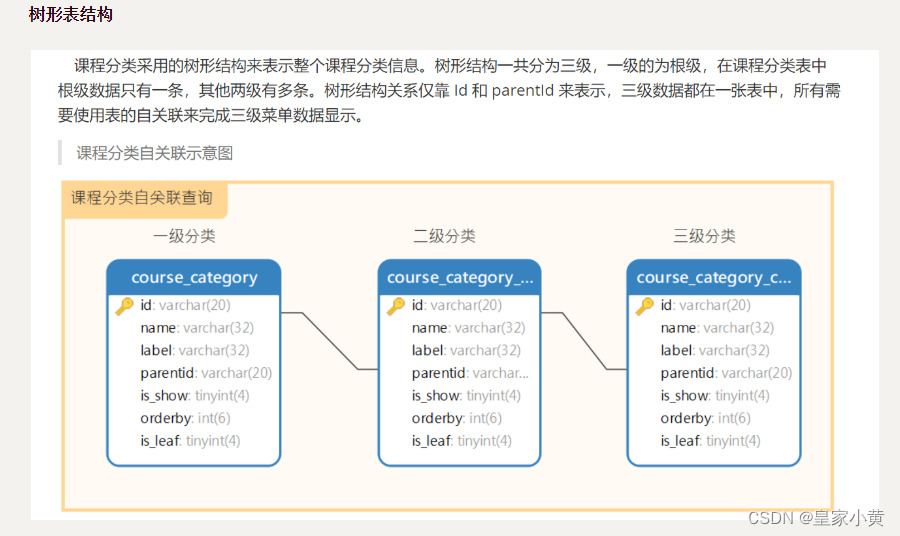
根据图片我们可以知道这三级结构是根据id,相联系
具体的json格式;
[
  {
    "courseCategoryId": "1",
    "name": "根结点",
    "label": "根结点",
    "parentid": "0",
    "isShow": 1,
    "orderby": 1,
    "isLeaf": 0,
    "categoryTreeNodes": [
      {
        "id": "1-1",
        "name": "前端开发",
        "label": "前端开发",
        "parentid": "1",
        "isShow": 1,
        "orderby": 1,
        "isLeaf": 0,
        "categoryTreeNodes": [
          {
            "id": "1-1-1",
            "name": "HTML/CSS",
            "label": "HTML/CSS",
            "parentid": "1-1",
            "isShow": 1,
            "orderby": 1,
            "isLeaf": 1,
            "categoryTreeNodes": null
          },
          ..........
        ]
      },
      ..........
    ]
  }
]
VO对象:
package com.xuecheng.commons.model.vo;

import lombok.Data;

import java.io.Serializable;
import java.util.List;

/**
 * <p>
 * 课程分类
 * </p>
 *
 * @author itcast
 */
@Data
public class CategoryVo implements Serializable {

    private String id;

    //分类名称
    private String name;

    //分类标签默认和名称一样
    private String label;

    //父结点id(第一级的父节点是0,自关联字段id)
    private String parentid;

    //是否显示
    private Integer isShow;

    //排序字段
    private Integer orderby;

    //是否叶子
    private Integer isLeaf;

    //课程分类子节点数据
    private List<CategoryVo> categoryTreeNodes;
}
web层:
package com.xuecheng.basic.controller;

import com.xuecheng.commons.model.vo.ResponseResult;
import org.springframework.web.bind.annotation.GetMapping;
import org.springframework.web.bind.annotation.RequestMapping;
import org.springframework.web.bind.annotation.RestController;
import com.xuecheng.basic.service.CategoryService;
import lombok.extern.slf4j.Slf4j;
import org.springframework.beans.factory.annotation.Autowired;

/**
 * <p>
 * 课程分类前端控制器
 * </p>
 *
 * @author itheima
 */
@Slf4j
@RestController
@RequestMapping("/category")
public class CategoryController {

    @Autowired
    private CategoryService  categoryService;

    //获取分类信息
    @GetMapping("/tree-nodes")
    public ResponseResult findCategory(){
       return categoryService.findCategory();
    }
}
serviceImpl层:
package com.xuecheng.basic.service.impl;

import com.baomidou.mybatisplus.core.conditions.query.LambdaQueryWrapper;
import com.xuecheng.basic.domain.Category;
import com.xuecheng.basic.mappers.CategoryMapper;
import com.xuecheng.basic.service.CategoryService;
import com.baomidou.mybatisplus.extension.service.impl.ServiceImpl;
import com.xuecheng.commons.model.vo.CategoryVo;
import com.xuecheng.commons.model.vo.ResponseResult;
import com.xuecheng.commons.utils.BeanHelper;
import org.springframework.beans.factory.annotation.Autowired;
import org.springframework.stereotype.Service;

import java.util.List;

/**
 * <p>
 * 课程分类 服务实现类
 * </p>
 *
 * @author itheima
 * @since 2022-07-30
 */
@Service
public class CategoryServiceImpl extends ServiceImpl<CategoryMapper, Category> implements CategoryService {

    @Autowired
    private CategoryMapper categoryMapper;
    @Override
    public ResponseResult findCategory() {

        //先查询一级
        LambdaQueryWrapper<Category> wrapper = new LambdaQueryWrapper<>();
        wrapper.eq(Category::getParentid,"0");
        Category category = categoryMapper.selectOne(wrapper);
        CategoryVo categoryVo = BeanHelper.copyProperties(category, CategoryVo.class);
        //再根据id查询二级
        LambdaQueryWrapper<Category> wrapper1 = new LambdaQueryWrapper<>();
        wrapper1.eq(Category::getParentid,category.getId());
        List<Category> categories = this.list(wrapper1);//id=1-1,1-10 .....
        List<CategoryVo> twos = BeanHelper.copyWithCollection(categories, CategoryVo.class);
        categoryVo.setCategoryTreeNodes(twos);
        //根据二级id查询三级 id=1-1-1.....
        for (CategoryVo c : twos) {
        LambdaQueryWrapper<Category> wrapper2 = new LambdaQueryWrapper<>();
           wrapper2.eq(Category::getParentid,c.getId());
            List<Category> list = this.list(wrapper2);
            List<CategoryVo> categoryVos = BeanHelper.copyWithCollection(list, CategoryVo.class);
            c.setCategoryTreeNodes(categoryVos);
        }
      return ResponseResult.okResult(categoryVo);
    }
}
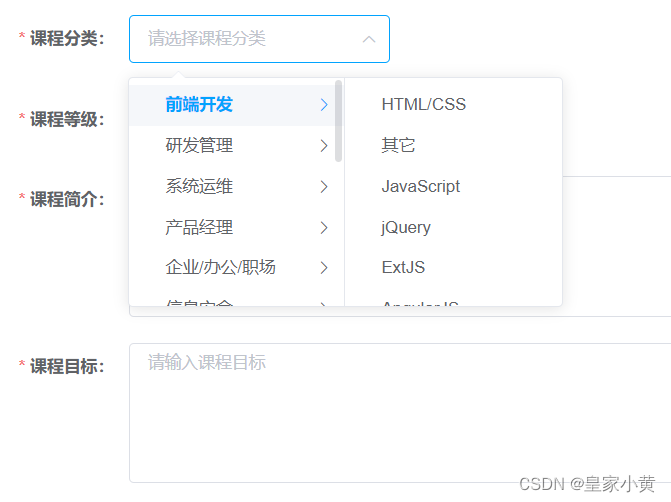
效果展示:
静态文件的存储
静态文件的上传,本人在瑞吉外卖中使用的是阿里云OSS,但在本项目中我们介绍一个新的分布式文件存储系统——>MinIO,如果你要问我OSS跟MinIo哪个好,那我只能说肯定花钱的比免费的好
MinIo:官网文档
首先我们需要查看虚拟机是否已启动MinIo。

启动成功后直接访问: http://192.168.136.150:9000
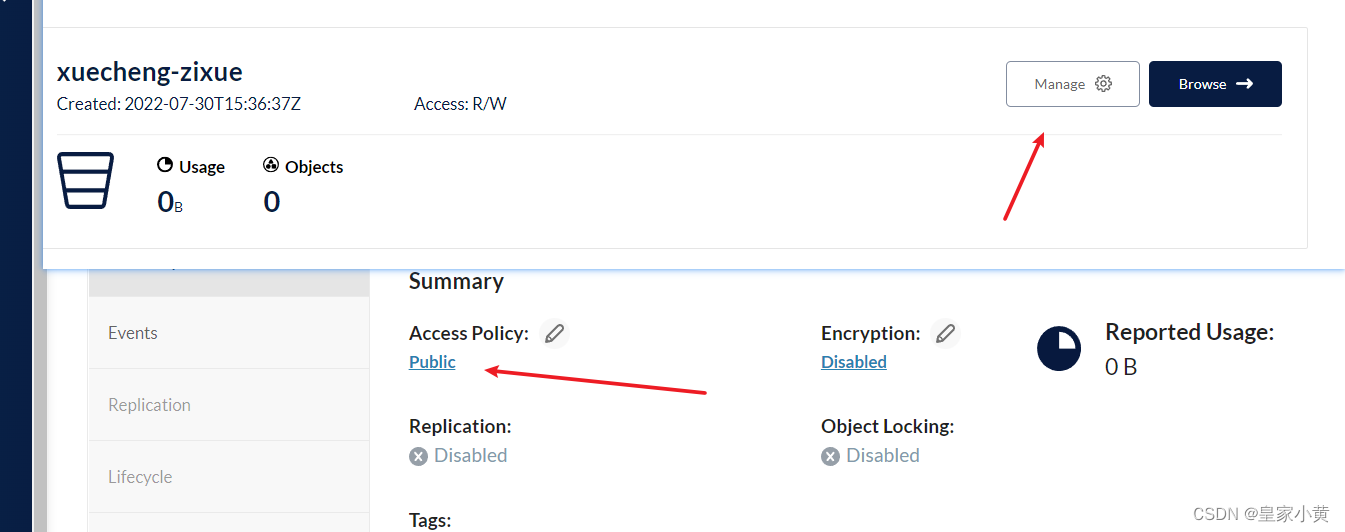
创建一个新的问价夹
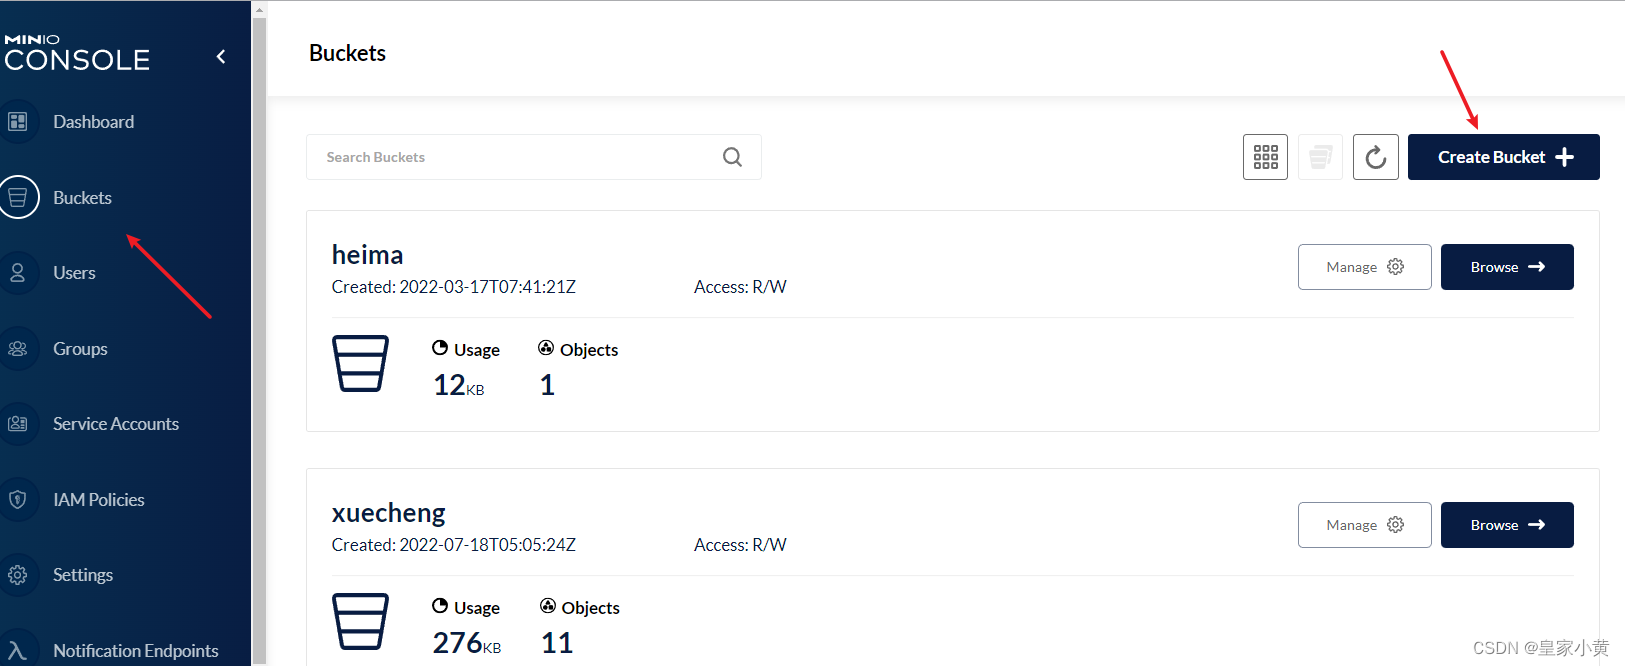
注意:这里我们需要将buckets的权限改为public
在 xc-content-service导入依赖
<dependency>
    <groupId>io.minio</groupId>
    <artifactId>minio</artifactId>
    <version>7.1.0</version>
</dependency>
入门练习:
public class MinioTest {

    private String ak = "";//申请的账号
    private String sk = "";//申请的密码
    private String endPoint= "http://192.168.136.150:9000";
    private String bucket = "xuecheng";//桶名
    private String domain ="http://192.168.136.150:9000";


    @Test
    public void testUpload() throws Exception {

        FileInputStream inputStream = new FileInputStream("D:\\2.jpg");
        String filename = "2.jpg";

        //1、初始化client对象
        MinioClient client = MinioClient
                .builder()
                .credentials(ak, sk)
                .endpoint(endPoint)
                .build();
        //2、配置上传的请求地址
        String filePath = "/images/"+
                DateTime.now().toString("yyyy/MM/dd/") +
                UUID.randomUUID().toString() + filename;

        //3、文件上传
        PutObjectArgs putObjectArgs = PutObjectArgs.builder()
                .object(filePath)
                .contentType("image/jpg")
                .bucket(bucket)
                .stream(inputStream, inputStream.available(), -1)
                .build();

        client.putObject(putObjectArgs);

        //4、获取请求地址
        String urlPath = domain +"/" + bucket + filePath;
        System.out.println(urlPath);
    }
}
这里可能在会出现点小错误:
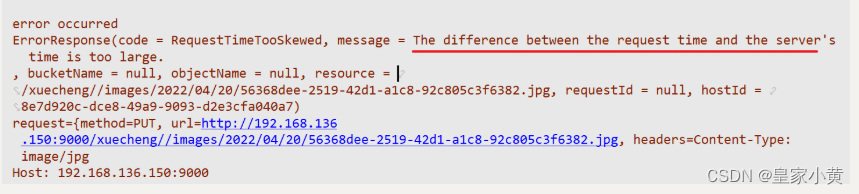
我们需要在虚拟机中输入命令:
#安装ntpdate工具
yum -y install ntp ntpdate
#自动同步时间
ntpdate ntp.ubuntu.com
项目集成:
首先我们需要在yml文件在配置:
minio:
<!--注册的账号密码-->
  accessKey:
  secretKey:
  bucket: xuecheng-zixue
  endpoint: http://192.168.136.150:9000
  domain: http://192.168.136.150:9000
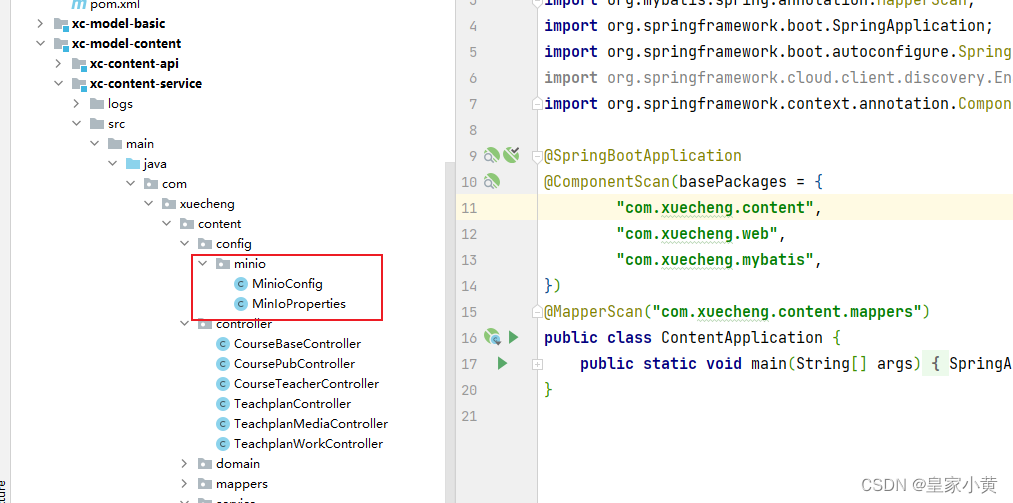
package com.xuecheng.content.config.minio;

import io.minio.MinioClient;
import org.springframework.beans.factory.annotation.Autowired;
import org.springframework.context.annotation.Bean;
import org.springframework.context.annotation.Configuration;

@Configuration
public class MinioConfig {
    @Autowired
    private MinIoProperties prop;

    @Bean
    public MinioClient minioClient(){
        return MinioClient
                .builder()
                .credentials(prop.getAccessKey(),prop.getSecretKey())
                .endpoint(prop.getEndpoint())
                .build();
    }
}
package com.xuecheng.content.config.minio;

import lombok.Data;
import org.springframework.boot.context.properties.ConfigurationProperties;
import org.springframework.context.annotation.Configuration;

import java.io.Serializable;

@ConfigurationProperties(prefix = "minio")
@Configuration
@Data
public class MinIoProperties implements Serializable {
    private String accessKey;
    private String secretKey;
    private String bucket;
    private String endpoint;
    private String domain;
}
集成测试
@SpringBootTest
@RunWith(SpringRunner.class)//这句话必须加,不加获取不到yml的值
public class MinioTest {

    @Autowired
    private MinioClient minioClient;

    @Autowired
    private MinioProperties properties;

    @Test
    public void testUpload() throws Exception {
        //1、指定文件
        FileInputStream inputStream = new FileInputStream("D:\\2.jpg");
        String filename = "2.jpg";
        //2、指定文件上传的位置和文件名称   /images/2022/07/17/uuid +filename
        String filepath = "/images/"+new SimpleDateFormat("yyyy/MM/dd/")
                .format(new Date()) +
                UUID.randomUUID().toString()+filename;
        //3、构造PutObjectArgs参数,并发送请求
        PutObjectArgs objectArgs = PutObjectArgs.builder()
              .contentType("image/jpg") //文件类型
              .stream(inputStream, inputStream.available(), -1) //文件流
              .bucket(properties.getBucket()) //存储空间
              .object(filepath) //文件
              .build();
        minioClient.putObject(objectArgs);
        //5、拼接访问地址
        String urlPath = properties.getDomain() +"/" + properties.getBucket() + filepath;
        System.out.println(urlPath);
    }
}
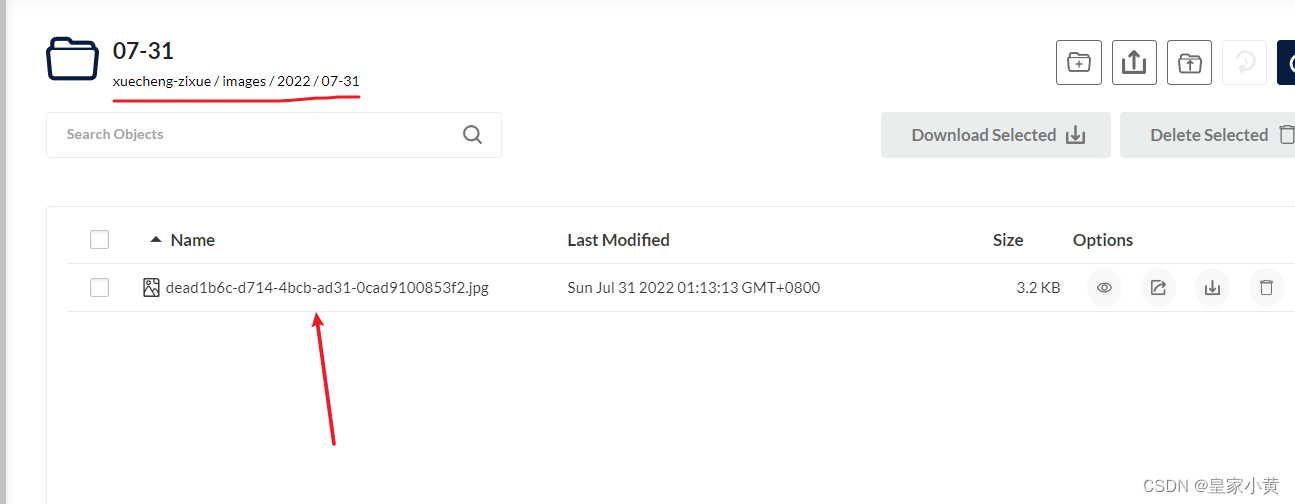
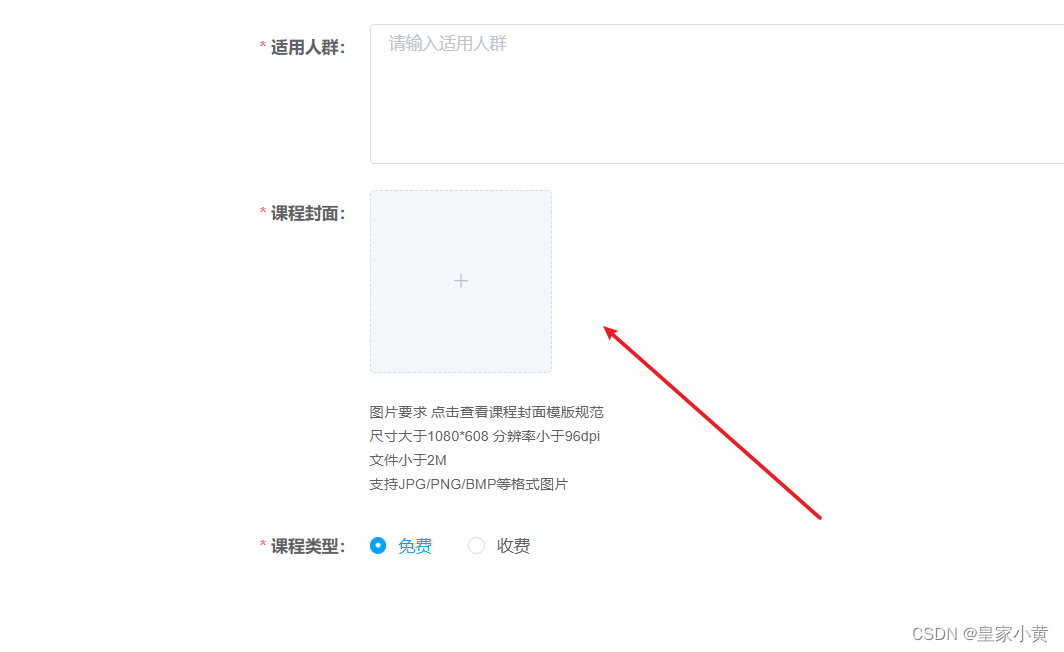
课程图片上传:
YAPI接口:
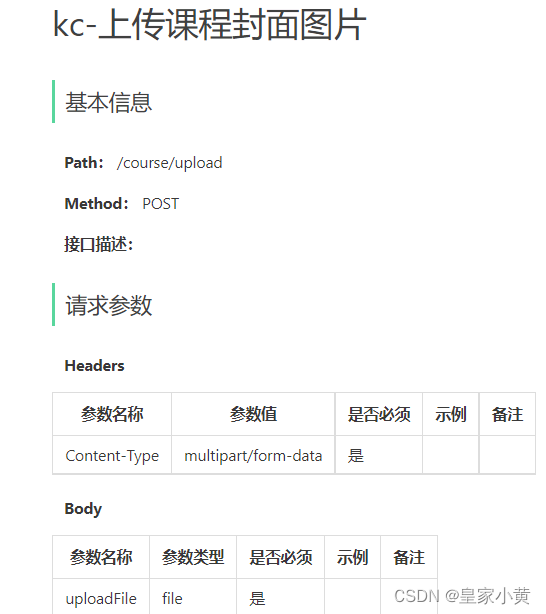

代码展示:
web层:
    //上传课程封面图片
    @PostMapping("/upload")
    public ResponseResult upload(MultipartFile uploadFile) throws IOException, ServerException, InvalidBucketNameException, InsufficientDataException, ErrorResponseException, NoSuchAlgorithmException, InvalidKeyException, InvalidResponseException, XmlParserException, InternalException {
     return courseBaseService.upload(uploadFile);
    }
servceImpl层:
   @Autowired
    private MinioClient minioClient;
    @Autowired
    private MinIoProperties minIoProperties;
    @Override
    public ResponseResult upload(MultipartFile uploadFile) throws IOException, ServerException, InvalidBucketNameException, InsufficientDataException, ErrorResponseException, NoSuchAlgorithmException, InvalidKeyException, InvalidResponseException, XmlParserException, InternalException {
        String filename = uploadFile.getOriginalFilename();
        InputStream inputStream = uploadFile.getInputStream();
        //指定文件上传的位置和文件名称
        String filePath="/images/"+new SimpleDateFormat("yyyy/MM-dd/")
                .format(new Date())+ UUID.randomUUID().toString()+filename;
        //3、构造PutObjectArgs参数,并发送请求
        PutObjectArgs objectArgs = PutObjectArgs.builder()
                .contentType("image/jpg") //文件类型
                .stream(inputStream, inputStream.available(), -1) //文件流
                .bucket(minIoProperties.getBucket()) //存储空间
                .object(filePath) //文件
                .build();
        minioClient.putObject(objectArgs);

       String imagesURl= minIoProperties.getDomain()+"/"+minIoProperties.getBucket()+ filePath;
               return ResponseResult.okResult(imagesURl);
    }
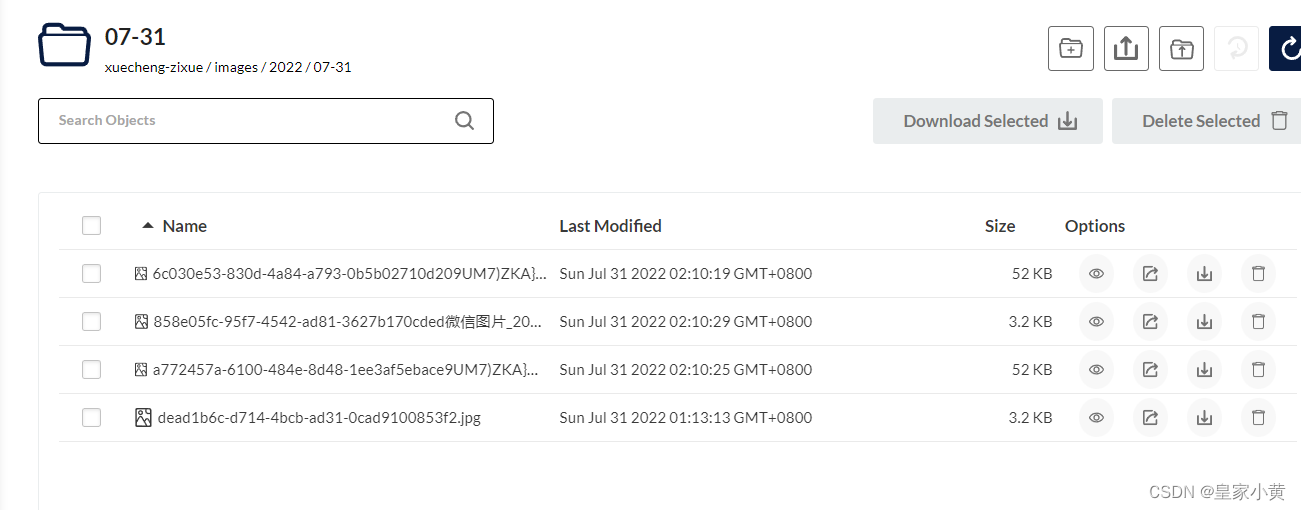
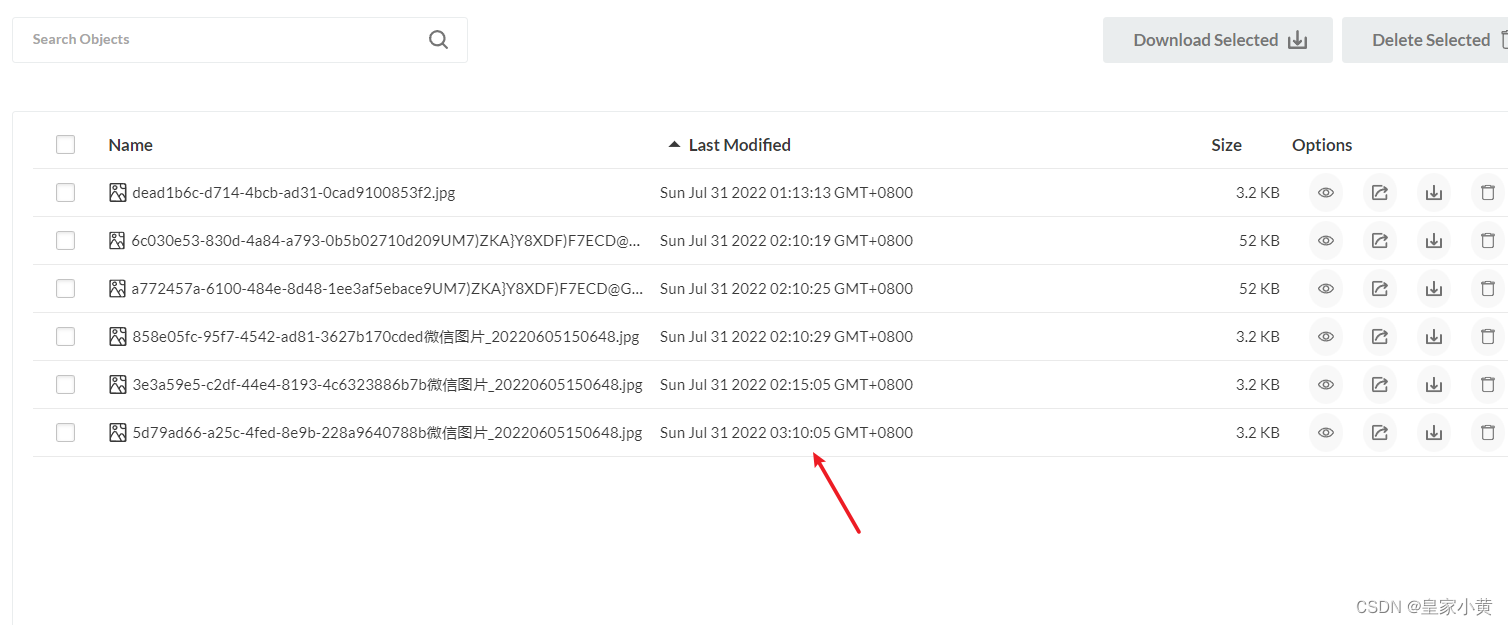
效果展示

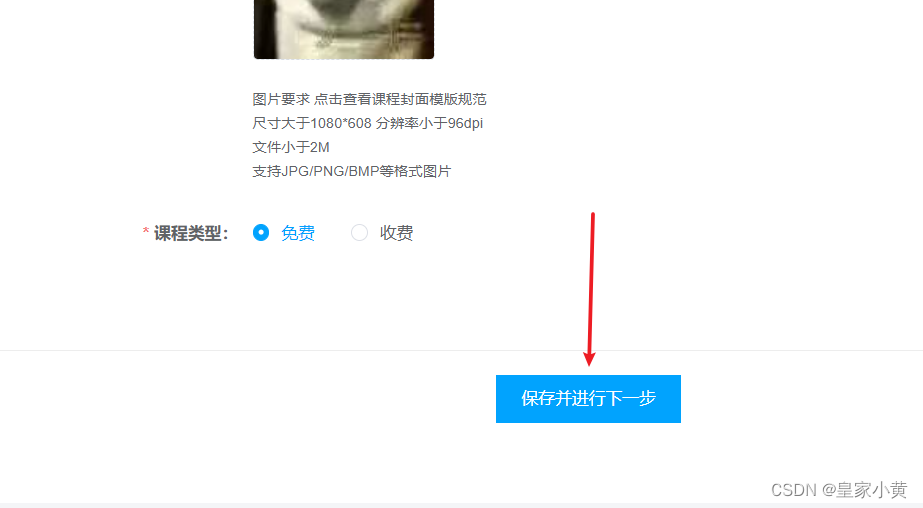
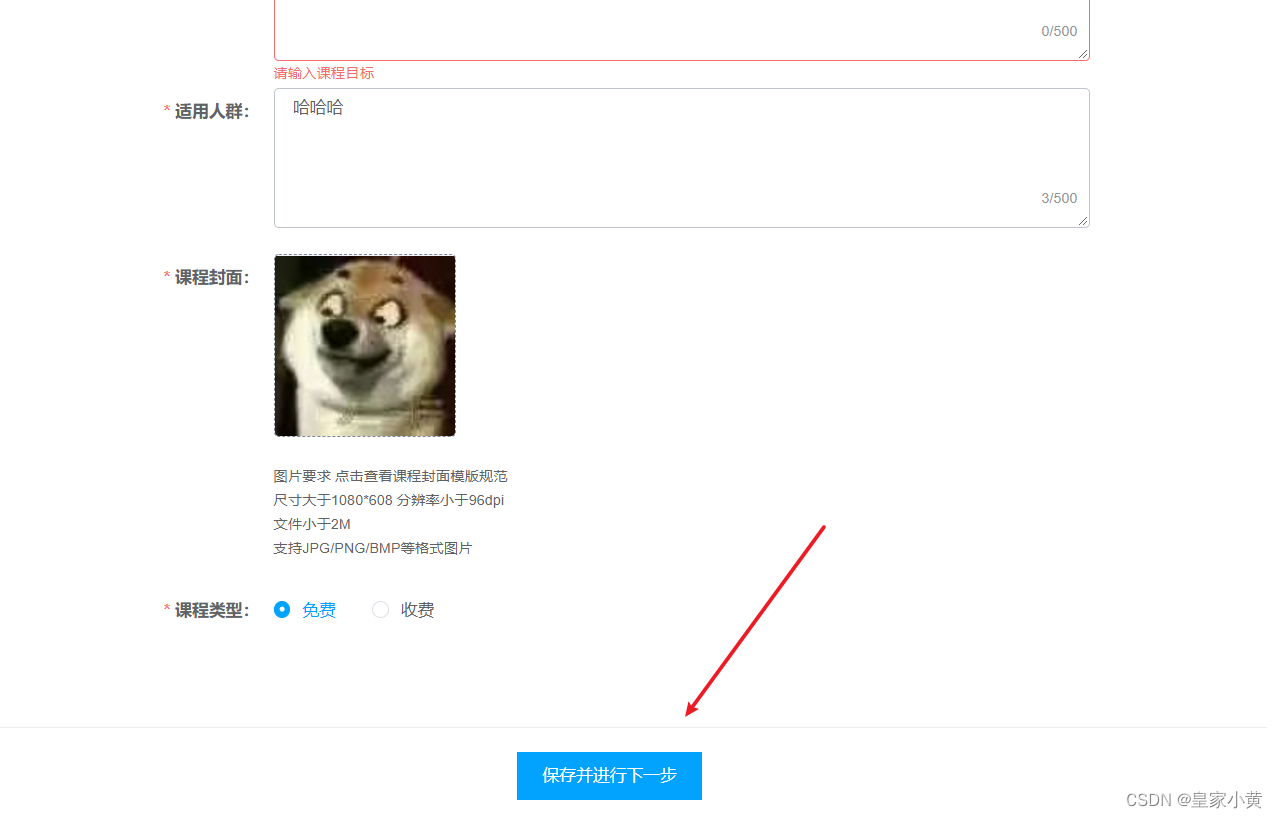
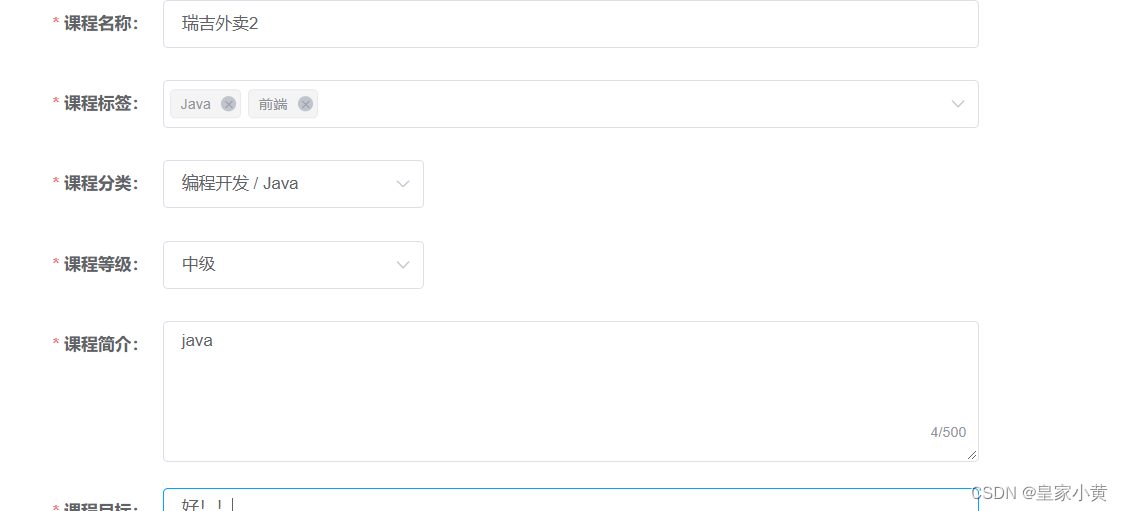
保存课程信息:
课程发布的业务流程:
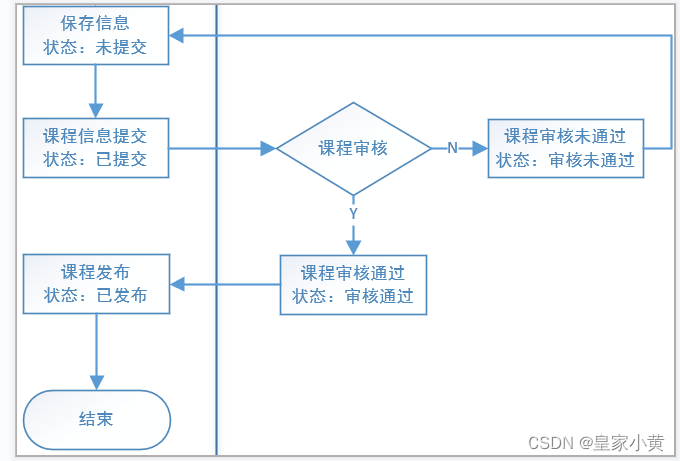
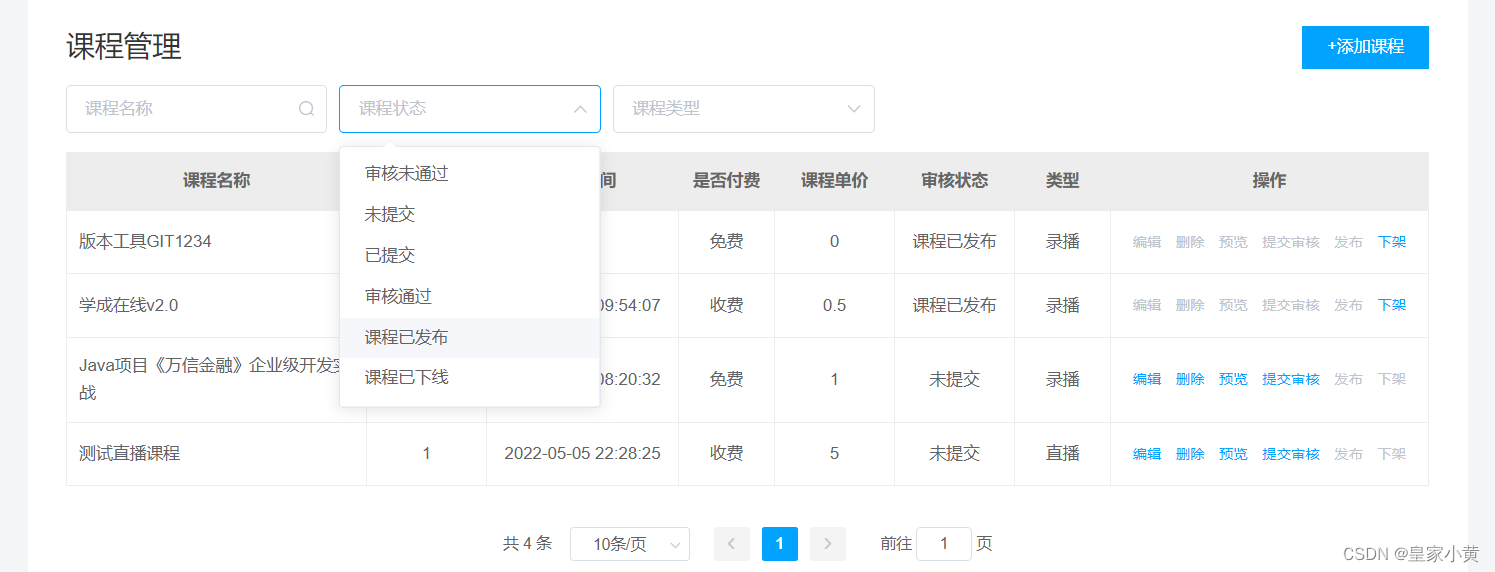
课程基础信息在内容管理中会有状态的显示,课程状态为 5 个状态,分别为:
课程初始化,未提交:202002
已提交,待审核:202003
审核通过:202004
审核未通过:202001
已发布:202005
已下架:202006
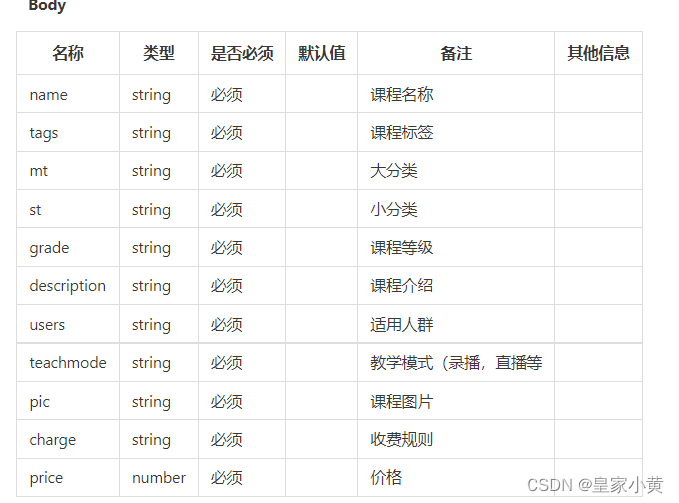
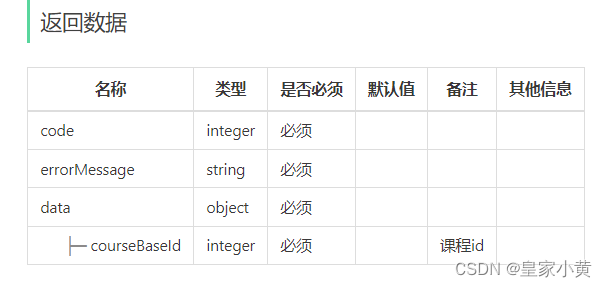
YAPI文档接口:
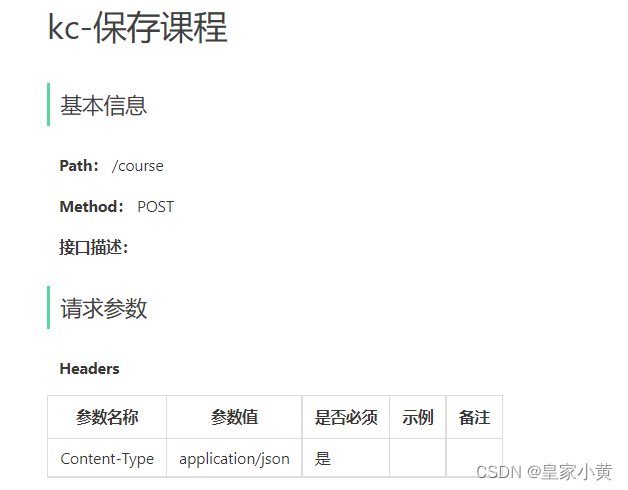
代码展示:
web层:
  //保存课程
    @PostMapping
    public ResponseResult saveCourse(@RequestBody CourseBaseDto courseBaseDto){
     return courseBaseService.saveCourse(courseBaseDto);
    }
serviceImpl层:
    @Override
    public ResponseResult saveCourse(CourseBaseDto courseBaseDto) {

        CourseBase courseBase = BeanHelper.copyProperties(courseBaseDto, CourseBase.class);
        //补全信息
        courseBase.setStatus(CommonConstants.USING_FLAG);
        courseBase.setCompanyId(AuthInfoHolder.getCompanyId());
        courseBase.setCompanyName(AuthInfoHolder.getAuthInfo().getCompanyName());
        courseBase.setAuditStatus(CourseConstants.AUDIT_UNPAST_STATUS);
        courseBase.setCreateDate(new Date());
        courseBase.setPlanNum(0);//默认章节
        int i = courseBaseMapper.insert(courseBase);
        if (i==0){
            throw  new BusinessException(ErrorCode.ADDEERROR);
        }
        HashMap<String, Long> map = new HashMap<>();
        map.put("courseBaseId",courseBase.getId());
        return ResponseResult.okResult(map);
    }
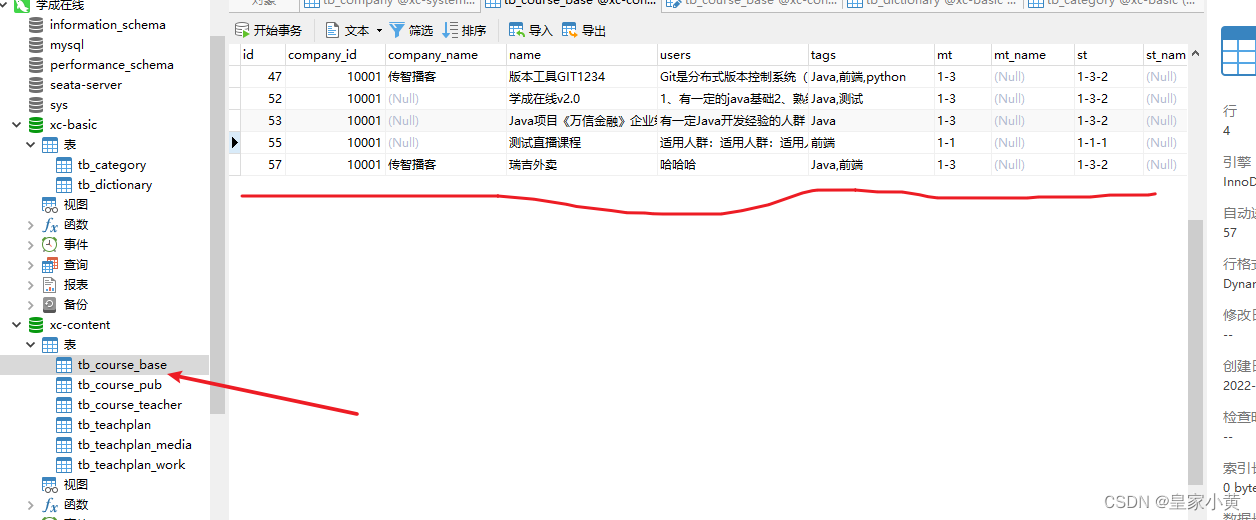
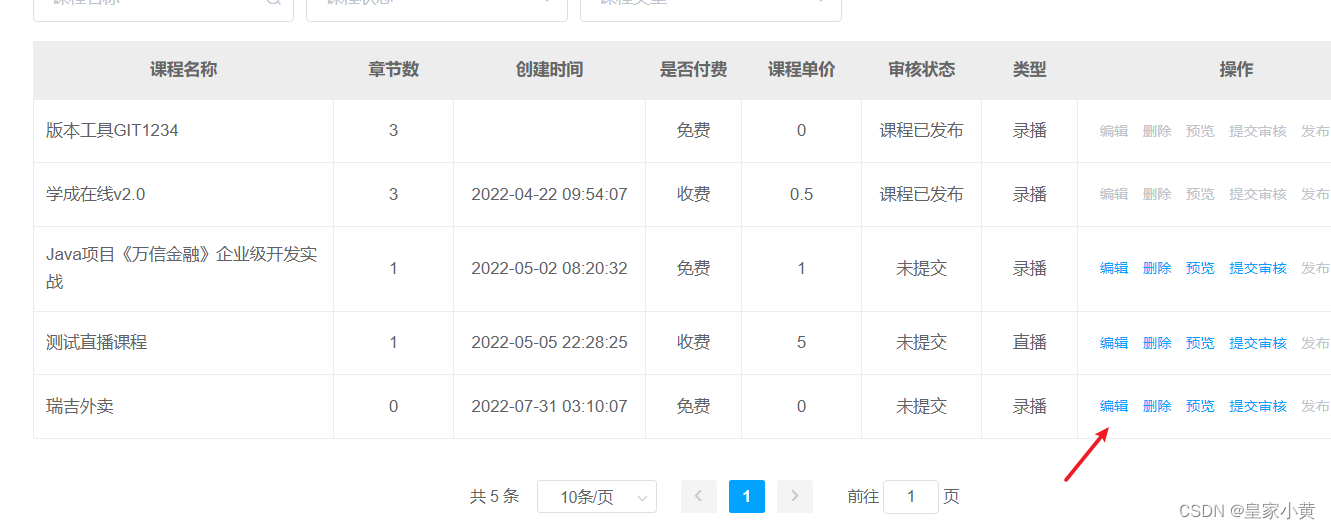
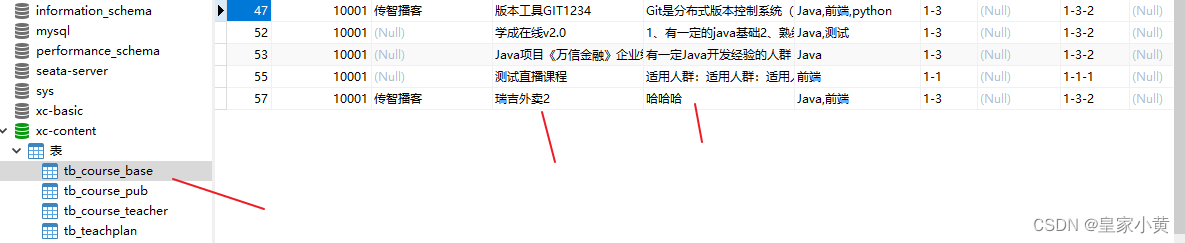
效果展示:
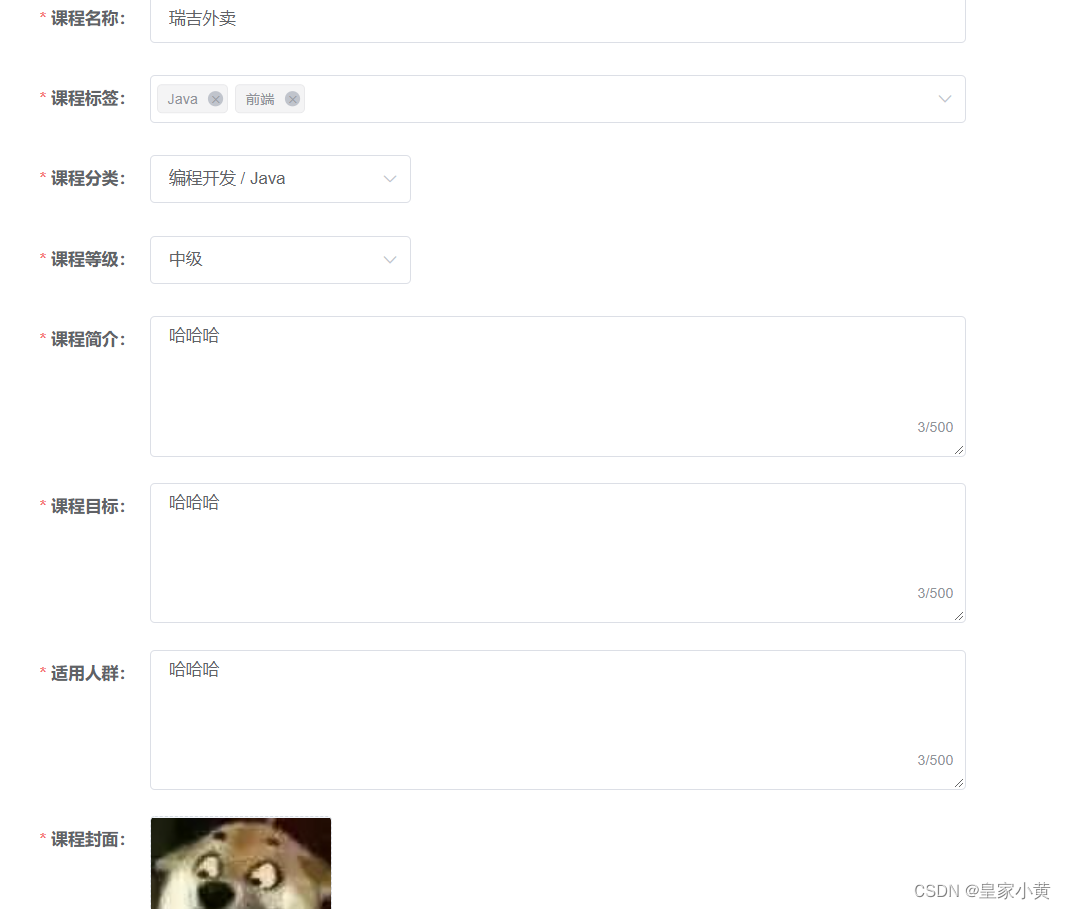
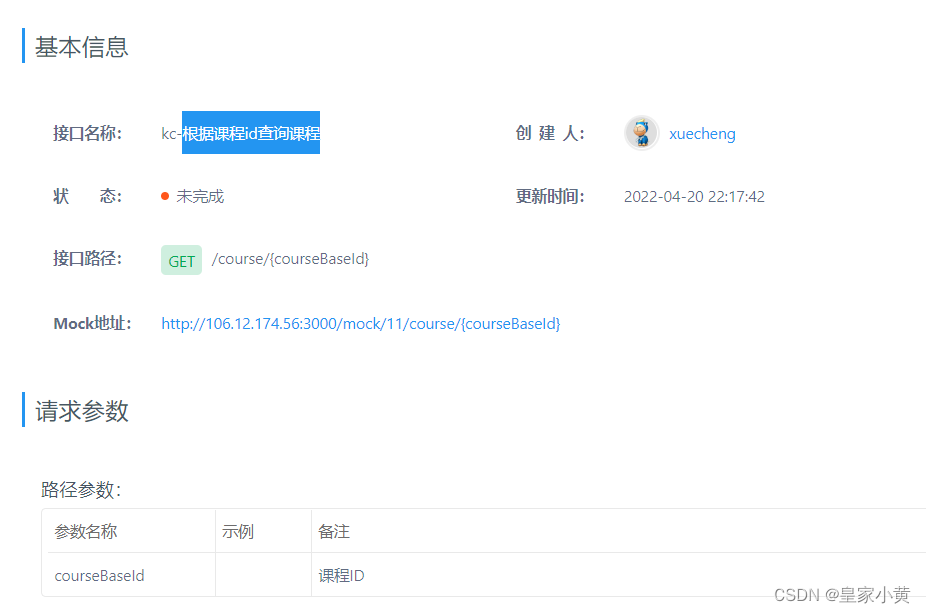
根据课程id查询课程
当我们点击编辑,会进入到编辑界面,这要进行数据的回显
YAPI接口文档:
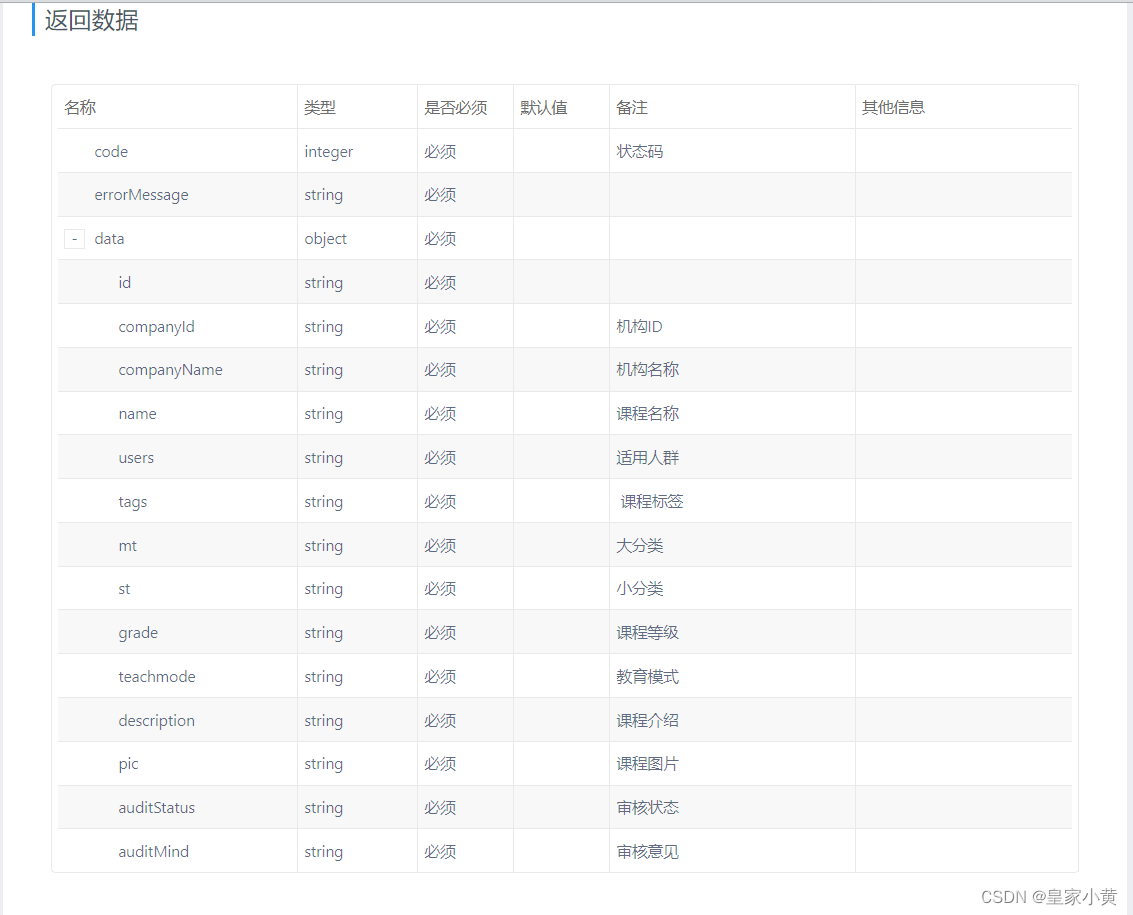
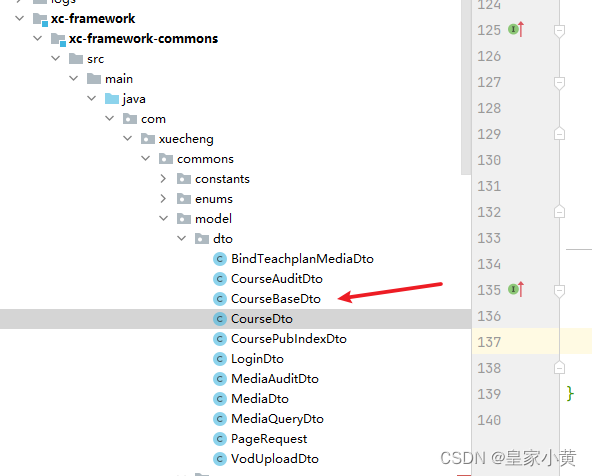
需要的VO对象:
package com.xuecheng.commons.model.vo;

import lombok.Data;

import java.math.BigDecimal;
import java.util.Date;

@Data
public class CourseBaseVo {

    private Long id;

    /**
     * 机构ID
     */
    private Long companyId;

    /**
     * 机构名称
     */
    private String companyName;

    /**
     * 课程名称
     */
    private String name;

    /**
     * 适用人群
     */
    private String users;

    /**
     * 课程标签
     */
    private String tags;

    /**
     * 大分类
     */
    private String mt;

    /**
     * 课程大类名称
     */
    private String mtName;

    /**
     * 小分类
     */
    private String st;

    /**
     * 课程小类名称
     */
    private String stName;

    /**
     * 课程等级
     */
    private String grade;

    /**
     * 教育模式(common普通,record 录播,live直播等)
     */
    private String teachmode;

    /**
     * 课程介绍
     */
    private String description;

    /**
     * 课程图片
     */
    private String pic;

    /**
     * 创建时间
     */
    private Date createDate;

    /**
     * 审核状态
     */
    private String auditStatus;

    /**
     * 审核意见
     */
    private String auditMind;

    /**
     * 审核时间
     */
    private Date auditDate;

    /**
     * 是否删除:1为未删除,0为删除
     */
    private Integer status;

    /**
     * 课程发布标识
     */
    private Long coursePubId;

    private Integer planNum;

    private String charge;

    private BigDecimal price;
}
代码展示:
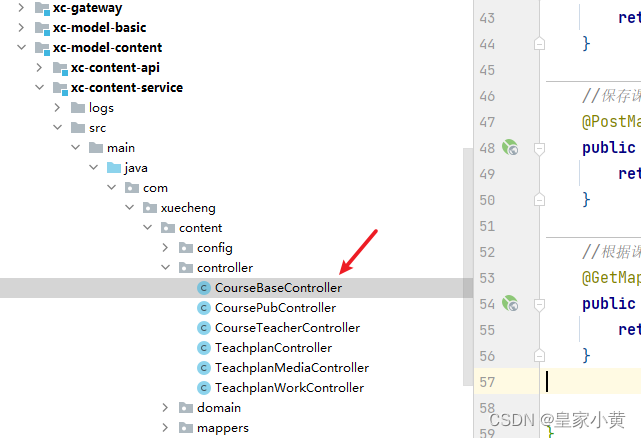
web层:
  //根据课程id查询课程
    @GetMapping("/{courseBaseId}")
    public ResponseResult findCourseById(@PathVariable("courseBaseId") Long courseBaseId) {
        return courseBaseService.findCourseById(courseBaseId);
    }
serviceImpl层:
   @Override
    public ResponseResult findCourseById(Long courseBaseId) {
        CourseBase courseBase = courseBaseMapper.selectById(courseBaseId);
        if (BeanUtil.isEmpty(courseBase)){
            throw new BusinessException(ErrorCode.COMPANYERROR);
        }
        CourseBaseVo vo = BeanHelper.copyProperties(courseBase, CourseBaseVo.class);
        return ResponseResult.okResult(vo);
    }
效果展示:
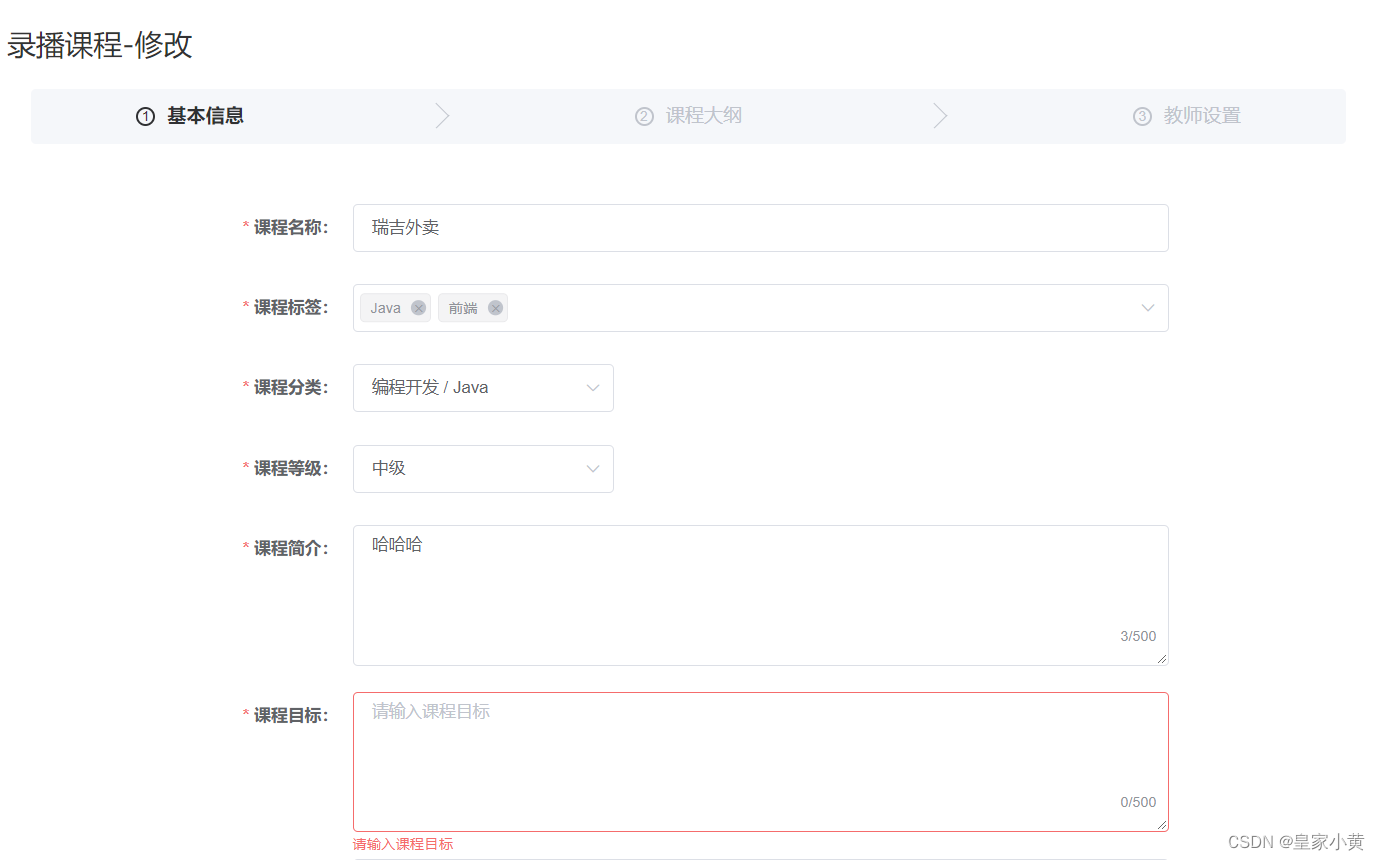
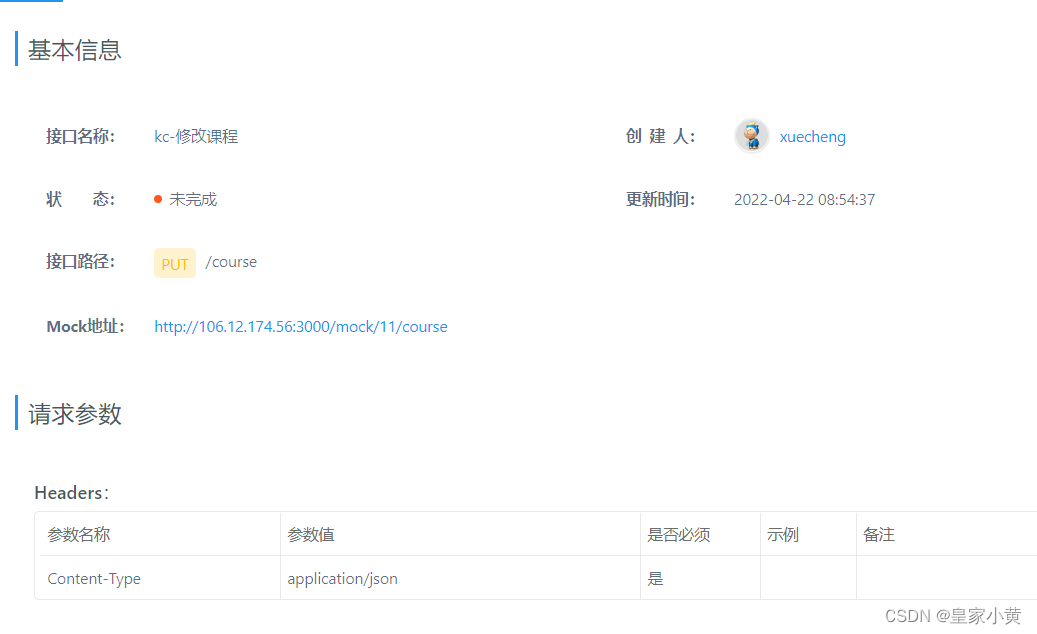
修改课程信息
进行完信息的回显后,就行信息的修改保存功能
YAPI文档接口:
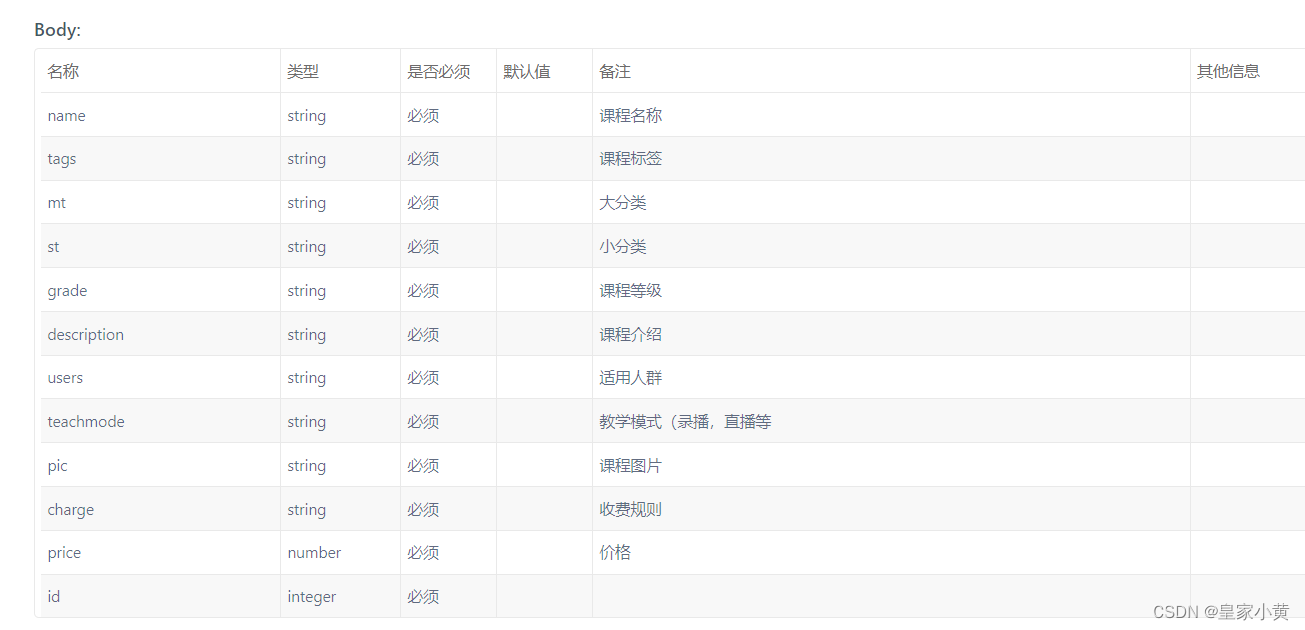
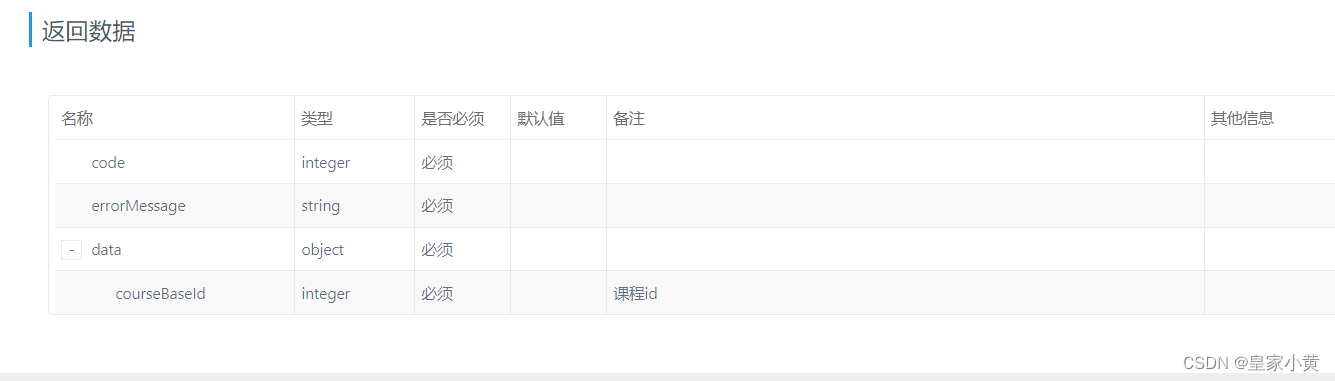
代码展示:
需要的实体:
实体:
带 ++++ 号的都是dto没有的,其中dto.id==courseBase.companyId
package com.xuecheng.content.domain;

import com.baomidou.mybatisplus.annotation.IdType;
import com.baomidou.mybatisplus.annotation.TableId;
import com.baomidou.mybatisplus.annotation.TableName;
import java.io.Serializable;
import java.math.BigDecimal;
import java.util.Date;
import lombok.Getter;
import lombok.Setter;

/**
 * <p>
 * 课程基本信息
 * </p>
 *
 * @author itheima
 * @since 2022-07-27
 */
@Getter
@Setter
@TableName("tb_course_base")
public class CourseBase implements Serializable {

    private static final long serialVersionUID = 1L;

    /**
     * 主键
     */
    @TableId(value = "id", type = IdType.AUTO)
    private Long id;

    /**
     * 机构ID
     */
    private Long companyId;

    /**
     * 机构名称 ++++++++++++++++
     */
    private String companyName;

    /**
     * 课程名称
     */
    private String name;

    /**
     * 适用人群
     */
    private String users;

    /**
     * 课程标签
     */
    private String tags;

    /**
     * 大分类
     */
    private String mt;

    /**
     * 课程大类名称++++++++++++
     */
    private String mtName;

    /**
     * 小分类
     */
    private String st;

    /**
     * 课程小类名称+++++++++++
     */
    private String stName;

    /**
     * 课程等级
     */
    private String grade;

    /**
     * 教育模式(common普通,record 录播,live直播等)
     */
    private String teachmode;

    /**
     * 课程介绍
     */
    private String description;

    /**
     * 课程图片
     */
    private String pic;

    /**
     * 审核状态++++++++++
     */
    private String auditStatus;

    /**
     * 审核意见+++++++++++++
     */
    private String auditMind;

    /**
     * 是否删除:1为未删除,0为删除++++++++++++
     */
    private Integer status;

    /**
     * 课程发布标识+++++++++++++++++
     */
    private Long coursePubId;

    /**
     * 是否收费
     */
    private String charge;

    /**
     * 单价
     */
    private BigDecimal price;

    /**
     * 创建时间+++++++++++++++
     */
    private Date createDate;

    /**
     * 审核时间+++++++++++++
     */
    private Date auditDate;
//++++++++++++++++++
    private Integer planNum;


}
web层:
   //修改课程
     @PutMapping
    public ResponseResult updateCourse(@RequestBody CourseBaseDto dto){
         return courseBaseService.updateCourse(dto);
     }
serviceImpl层:
    @Override
    public ResponseResult updateCourse(CourseBaseDto dto) {
        CourseBase courseBase = this.getById(dto.getId());
        //判断合法
        if (courseBase == null){
            throw new BusinessException(ErrorCode.UPDATEEERROR);
        }
        //判断状态
        String auditStatus = courseBase.getAuditStatus();
        if (StrUtil.equals(auditStatus,CourseConstants.AUDIT_COMMIT_STATUS) ||               StrUtil.equals(auditStatus,CourseConstants.AUDIT_PASTED_STATUS)||
                StrUtil.equals(auditStatus,AUDIT_PUBLISHED_STATUS)
        ){
            throw new BusinessException(ErrorCode.DATAERROR);
        }
        CourseBase base = BeanHelper.copyProperties(dto, CourseBase.class);
        int i = courseBaseMapper.updateById(base);
        if (i == 0){
            throw new BusinessException(ErrorCode.ADDEERROR);
        }
        HashMap<String, Long> map = new HashMap<>();
        map.put("courseBaseId",dto.getId());
        return ResponseResult.okResult(map);
    }
}
效果展示:
注意:这里有404很正常,还有一个功能没做,看看数据库有没有更新就好了
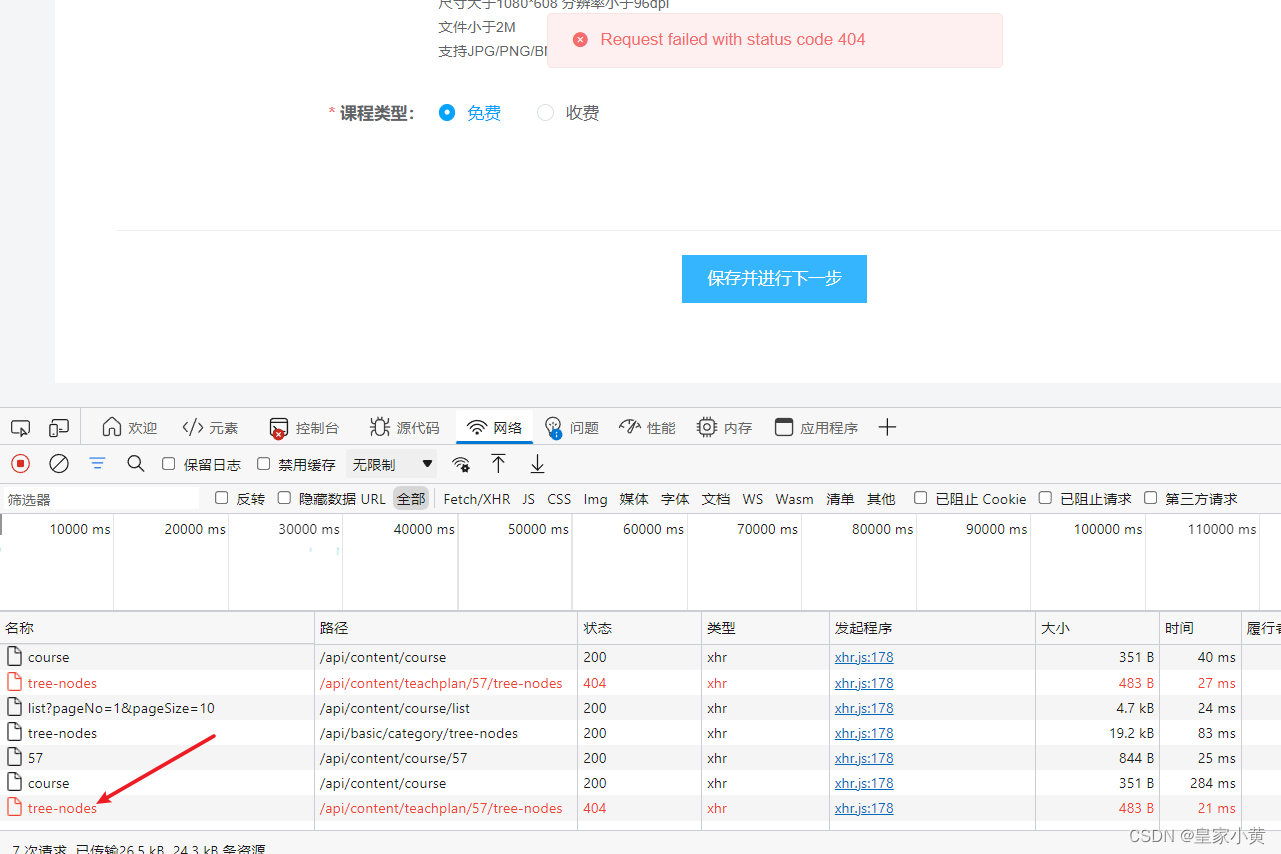
好了今天的任务完成


 被折叠的 条评论
为什么被折叠?
被折叠的 条评论
为什么被折叠?
 到【灌水乐园】发言


