


win11 wsl子系统centos7安装docker(2024年无坑版)
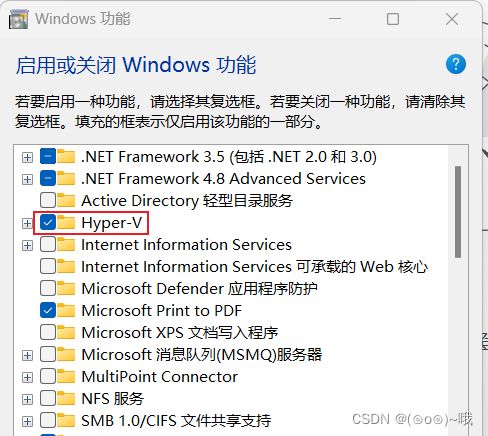
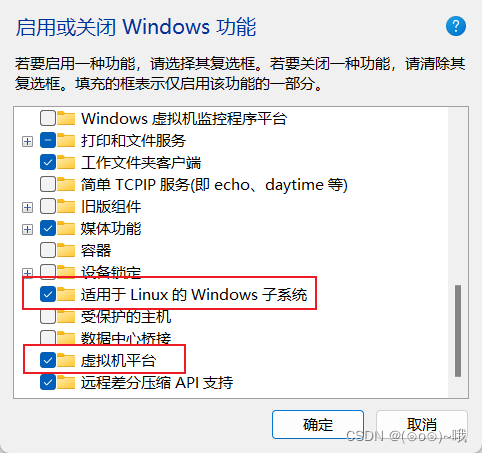
1、使用前需打开window功能
2、安装或更新wsl
wsl --install
wsl --update
3、下载镜像包
centos7镜像安装包:https://github.com/mishamosher/CentOS-WSL
下载解压,双击exe文件执行安装,安装完会在同目录下生产镜像文件,所以在哪里执行这个安装包,你的子系统就会被安装在哪。
接着打开cmd,输入
wsl
即可进入系统。如果想进入指定发行版,
wsl -d 发行版名字
如:
wsl -d CentOS792
4、启用 systemd 管理 Linux 服务
echo -e "[boot]\nsystemd=true" | sudo tee -a /etc/wsl.conf
然后通过 PowerShell 使用 wsl.exe --shutdown 来关闭 WSL 发行版以重启 WSL 实例,其实叉掉cmd界面再打开也可以。
参考官方文档:https://learn.microsoft.com/zh-cn/windows/wsl/systemd
5、重新设置密码
passwd root
6、软件源配置
先备份一下
cp -rv /etc/yum.repos.d /etc/yum.repos.d_bak
配置:
配置CentOS 软件国内源仓库
方法一:
主要是替换http://mirror.centos.org为https://mirrors.tuna.tsinghua.edu.cn/
下面是替换的脚本sed -e 's|^mirrorlist=|#mirrorlist=|g' \ -e 's|^#baseurl=http://mirror.centos.org/centos|baseurl=https://mirrors.tuna.tsinghua.edu.cn/centos-vault|g' \ -i.bak \ /etc/yum.repos.d/CentOS-*.repo提示: 也可以使用vim打开页面手动替换
方法二:
sed -e 's|^mirrorlist=|#mirrorlist=|g' \
    -e 's|^#baseurl=http://mirror.centos.org/centos|baseurl=http://mirrors.aliyun.com/centos|g' \
    -i.bak \
    /etc/yum.repos.d/CentOS-*.repo
方法三(推荐):
wget -O /etc/yum.repos.d/CentOS-Base.repo https://mirrors.aliyun.com/repo/Centos-7.repo或者
curl -o /etc/yum.repos.d/CentOS-Base.repo https://mirrors.aliyun.com/repo/Centos-7.repo然后运行
yum makecache生成缓存
7、安装docker
升级软件包
yum update
卸载旧版本(如果之前安装过的话)
yum remove docker docker-common docker-selinux docker-engine
安装需要的软件包, yum-util 提供yum-config-manager功能,另两个是devicemapper驱动依赖
yum install -y yum-utils device-mapper-persistent-data lvm2
添加docker-ce安装源
yum-config-manager --add-repo http://download.docker.com/linux/centos/docker-ce.repo(中央仓库)
yum-config-manager --add-repo http://mirrors.aliyun.com/docker-ce/linux/centos/docker-ce.repo(阿里仓库)(推荐)
如果不可用,可以自己手动创建一个docker-ce.repo文件
vim /etc/yum.repos.d/docker-ce.repo
填入:
[< 最低0.47元/天 解锁文章


 3150
3150


 到【灌水乐园】发言


