


模型导入与预测
按照正常顺序,应该是先讲训练,再讲测试,但模型的训练过程中,每训练完一个epoch都会做一次测试,训练的时候包括标签分配、损失函数计算,测试的时候包括损失函数计算、输出值解码、非极大值抑制、mAP的计算等,这几部分是目标检测任务中最难的,程序非常复杂。如果先讲训练的话,势必要一块讲测试,这么多内容一篇博客很难讲完,因此我这里先介绍模型的推理,即导入预训练模型在指定图片上做预测,在这个过程中,包括了输出解码、非极大值抑制、在原始图片上绘制目标框等,这样的话,讲训练的时候,内容就会少一些。
1 输出解码
从刚刚的显示结果可以看到三个yolo检测头的输出形状(shape),现在要将这些检测头的输出转化为图片中目标的类型、目标的位置参数(边框中心点坐标和高宽)、目标的置信度等信息。
在yolox_from_scratch/utils中增加一个名为utils_bbox.py的文件
在该文件中加上下面的代码:
import torch


def decode_outputs(outputs, input_shape):
    """

    Args:
        outputs:列表,里面的元素分别为各个检测头的输出
        input_shape:列表或元组,里面的两个元素分别为模型输入图片的高宽,如[640, 640]

    Returns:

    """

    """以下代码的注释,都是假设只有三个检测头,要检测的类别数是80,input_shape为[640, 640]的情况下的结果"""
    grids = []
    strides = []
    hw = [x.shape[-2:] for x in outputs]    # 三个检测头输出结果的高宽
    outputs = torch.cat([x.flatten(start_dim=2) for x in outputs], dim=2).permute(0, 2, 1)
    # [x.flatten(start_dim=2) for x in outputs]每次获得的x都是4个维度,
    # 第一个x的维度为torch.Size([batch_size, 85, 80, 80])
    # x.flatten(start_dim=2) 表示从2号维度开始打平,打平后的维度为torch.Size([batch_size, 85, 6400])
    # 列表推导式获得的列表中,有三个张量,维度分别为(batch_size, 85, 6400)、(batch_size, 85, 1600)、(batch_size, 85, 400)
    # torch.cat将列表中的三个张量按指定维度(dim=2)拼接进行拼接,得到的张量维度为torch.Size([batch_size, 85, 8400])
    # .permute(0, 2, 1)表示调整维度顺序,得到的张量维度为torch.Size([batch_size, 8400, 85])
    # 最后的outputs的shape变为torch.Size([batch_size, 8400, 85])

    outputs[:, :, 4:] = torch.sigmoid(outputs[:, :, 4:])
    # 最后一个维度,前面4个数是中心点坐标和高宽,从第5个数是执行都,后面是各个类别的概率,
    # 这里使用sigmoid函数将置信度和各个类别的概率压缩到0-1之间

    for h, w in hw:
        """循环中代码的注释时在第一轮循环时的结果,第一次循环,h和w是第一个特征图(dark3)的高宽,它们都是80
        第二轮循环h和w是40,第三轮循环h和w是20"""
        # 根据特征层生成网格点
        grid_y, grid_x = torch.meshgrid([torch.arange(h), torch.arange(w)])
        # grid_y和grid_x的维度都是torch.Size([80, 80])

        grid = torch.stack((grid_x, grid_y), 2).view(1, -1, 2)
        # shape为torch.Size([1, 6400, 2]),最后一个维度是2,为网格点的横纵坐标,而6400表示当前特征层的网格点数量
        # torch.stack((grid_x, grid_y), 2)对张量进行扩维拼接,返回的shape为torch.Size([80, 80, 2])
        # 关于torch.stack的用法,可以看这篇博客:https://blog.csdn.net/Teeyohuang/article/details/80362756/

        shape = grid.shape[:2]      # shape为torch.Size([1, 6400])

        grids.append(grid)
        strides.append(torch.full((shape[0], shape[1], 1), input_shape[0] / h))
        # input_shape[0]/h 获得当前特征图(检测头对应的特征图)高h方向的步长,这个步长也是宽w方向上的步长
        # 因为因为输入图片和检测头输出的特征图,在高和宽两个方向上的缩放比例是一样的,所以步长也是一样
        # torch.full((shape[0], shape[1], 1), input_shape[0]/h是由步长填充而成的张量

    # 将网格点堆叠到一起
    grids = torch.cat(grids, dim=1).type(outputs.type())        # torch.cat是让张量按照指定维度拼接,但得到的新张量维度数不会变
    # grides的维度为(1, 8400, 2),中间的8400表示8400个特征点

    strides = torch.cat(strides, dim=1).type(outputs.type())    # .type(outputs.type())指定张量的类型
    # strides的维度为(1, 8400, 1)

    # 根据网格点进行解码
    outputs[..., :2] = (outputs[..., :2] + grids) * strides     # 解码得到中心点的坐标
    # 因为outputs[..., :2]是在0-1之间,而且其表示的中心点坐标是相对于网格点进行归一化后的,现在要将其转变成相对于整张图片
    outputs[..., 2:4] = torch.exp(outputs[..., 2:4]) * strides  # 解码得到预测框的高宽

    # 归一化(相对于图片大小)
    outputs[..., [0, 2]] = outputs[..., [0, 2]] / input_shape[1]
    outputs[..., [1, 3]] = outputs[..., [1, 3]] / input_shape[0]

    # 返回的outputs的维度为(batch_size, 8400, 85)
    return outputs
在yolox_from_scratch下新建一个名为decode_test.py的测试脚本,
decode_test.py的内容如下:
import torch

from utils.utils import load_model
from nets.yolo import YoloBody
from utils.utils_bbox import decode_outputs

if __name__ == '__main__':
    """模型的导入"""
    # 模型路径
    model_path = "model_data/yolox_s.pth"
    # 新建模型
    model = YoloBody(80, 's')  # 's'表示新建的为yolox_s模型
    # 导入模型权重
    load_model(model, model_path, 'cpu')

    """生成模拟数据"""
    image_data = torch.rand(8, 3, 640, 640)

    """将图片(模拟数据)输入到模型中"""
    outputs = model(image_data)

    """对输出进行解码"""
    input_shape = (640, 640)
    outputs = decode_outputs(outputs, input_shape)
    print(outputs.shape)
    print(outputs)
输出如下:
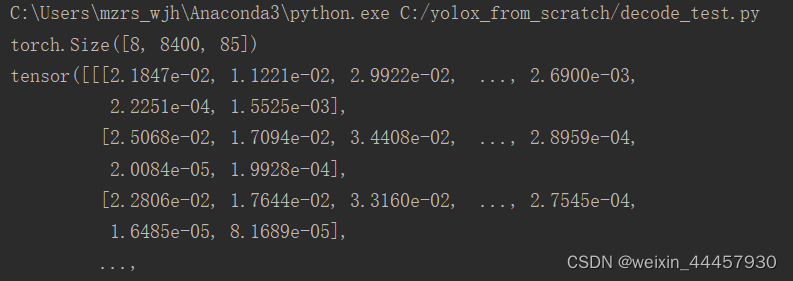
OK,说明解码成功!
2 对预测框进行筛选(置信度过滤和非极大值抑制)
一张640x640的图片输入到模型,会有8400个预测框,图片中不可能有那么目标,即便有,也无法绘制出来,我们需要对预测框进行筛选。筛选共分为两轮,第一轮是把置信度(目标置信度)低的预测框给过滤掉,第二轮是NMS,由于第一轮比较简单,并且两轮都需要遍历图片,所以我们把两轮写到同一个函数中。
在yolox_from_scratch\utils\utils_bbox.py中增加一个函数:
def non_max_suppression(prediction, conf_thres=0.5, nms_thres=0.4):
    """
    使用置信度过滤和非极大值抑制
    Args:
        prediction: 模型的预测结果(经过解码后的数据),
                如果要预测80个类别,那么prediction的维度为torch.Size([batch_size, num_anchors, 85])
        conf_thres: 置信度阈值
        nms_thres: NMS阈值

    Returns:一个列表,其元素个数为batch_size,每个元组都是torch张量,对应每张图片经过两轮筛选后的结果,
            如果图片中存在目标,那么对应的元素维度为(num_objs, 7),
                    7列的内容分别为:x1, y1, x2, y2, obj_conf, class_conf, class_pred,
            其中坐标为归一化后的数值,如果图片中不存在目标,那么对应的元素为None

    """

    # 将解码结果的中心点坐标和宽高转换成左上角和右下角的坐标
    box_corner = prediction.new(prediction.shape)
    box_corner[:, :, 0] = prediction[:, :, 0] - prediction[:, :, 2] / 2
    box_corner[:, :, 1] = prediction[:, :, 1] - prediction[:, :, 3] / 2
    box_corner[:, :, 2] = prediction[:, :, 0] + prediction[:, :, 2] / 2
    box_corner[:, :, 3] = prediction[:, :, 1] + prediction[:, :, 3] / 2
    prediction[:, :, :4] = box_corner[:, :, :4]

    output = [None for _ in range(len(prediction))]     # len(prediction))是batch_size,即图片数量
    for image_i, image_pred in enumerate(prediction):
        """第一轮过滤"""
        # 利用目标置信度(即对应的预测框存在要检测的目标的概率)做第一轮过滤
        image_pred = image_pred[image_pred[:, 4] >= conf_thres]

        # 如果当前图片中,所有目标的置信度都小于阈值,那么就进行下一轮循环,检测下一张图片
        if not image_pred.size(0):
            continue

        # 目标置信度乘以各个类别的概率,并对结果取最大值,获得各个预测框的score
        score = image_pred[:, 4] * image_pred[:, 5:].max(1)[0]
        # image_pred[:, 4]是置信度,image_pred[:, 5:].max(1)[0]是各个类别的概率最大值

        # 将image_pred中的预测框按score从大到小排序
        image_pred = image_pred[(-score).argsort()]
        # argsort()是将(-score)中的元素从小到大排序,返回排序后索引
        # 将(-score)中的元素从小到大排序,实际上是对score从大到小排序
        # 将排序后的索引放入image_pred中作为索引,实际上是对本张图片中预测出来的目标,按score从大到小排序

        # 获得第一轮过滤后的各个预测框的类别概率最大值及其索引
        class_confs, class_preds = image_pred[:, 5:].max(1, keepdim=True)
        # class_confs 类别概率最大值,class_preds 预测类别在80个类别中的索引

        # 将各个目标框的上下角点坐标、目标置信度、类别置信度、类别索引串起来
        detections = torch.cat((image_pred[:, :5], class_confs.float(), class_preds.float()), 1)
        # 经过上条命令之后,detections的维度为(number_pred, 7)
        # 7列的内容分别为:x1, y1, x2, y2, obj_conf, class_conf, class_pred

        """第二轮过滤"""
        keep_boxes = []     # 用来存储符合要求的目标框
        while detections.size(0):   # 如果detections中还有目标
            """以下标注是执行第一轮循环时的标注,后面几轮以此类推"""

            # 获得与第一个box(最大score对应的box)具有高重叠的预测框的布尔索引
            from utils.utils import bbox_iou
            large_overlap = bbox_iou(detections[0, :4].unsqueeze(0), detections[:, :4]) > nms_thres
            # bbox_iou(detections[0, :4].unsqueeze(0), detections[:, :4])返回值的维度为(num_objects, )
            # bbox_iou的返回值与非极大值抑制的阈值相比较,获得布尔索引
            # 即剩下的边框中,只有detection[0]的iou大于nms_thres的,才抑制,即认为这些边框与detection[0]检测的是同一个目标

            # 获得与第一个box相同类别的预测框的索引
            label_match = detections[0, -1] == detections[:, -1]
            # 布尔索引,获得所有与detection[0]相同类别的对象的索引

            # 获得需要抑制的预测框的布尔索引
            invalid = large_overlap & label_match   # &是位运算符,两个布尔索引进行位运算
            # 经过第一轮筛选后的剩余预测框,如果同时满足和第一个box有高重叠、类别相同这两个条件,那么就该被抑制
            # 这些应该被抑制的边框,其对应的索引即为无效索引

            # 获得被抑制预测框的置信度
            weights = detections[invalid, 4:5]

            # 加权获得最后的预测框坐标
            detections[0, :4] = (weights * detections[invalid, :4]).sum(0) / weights.sum()
            # 上面的命令是将当前边框,和被抑制的边框进行加权,
            # 类似于好几个边框都检测到了同一张人脸,将这几个边框的左上角点横坐标x进行加权(按照置信度加权),
            # 获得最后边框的x,对左上角点的纵坐标y,以及右下角点的横纵坐标也进行加权处理
            # 其他的obj_conf, class_conf, class_pred则使用当前box的

            keep_boxes += [detections[0]]       # 将第一个box加入到 keep_boxes 中
            detections = detections[~invalid]   # 去掉无效的预测框,更新detections

        if keep_boxes:                          # 如果keep_boxes不是空列表
            output[image_i] = torch.stack(keep_boxes)   # 将目标堆叠,然后加入到列表
            # 假设NMS之后,第i张图中有num_obj个目标,那么torch.stack(keep_boxes)的结果是就是一个(num_obj, 7)的张量,没有图片索引

        # 如果keep_boxes为空列表,那么output[image_i]则未被赋值,保留原来的值(原来的为None)
    return output
这里使用了一个名为bbox_iou的函数,它是用来求边框之间的IOU,具体看如下代码,将下面的函数加入到文件yolox_from_scratch\utils\utils.py中:
def bbox_iou(box1, box2, x1y1x2y2=True):
    """
    Returns the IoU of two bounding boxes
    Args:
        box1: 维度为(num_objects, 4)
        box2: 维度为(num_objects, 4)
        x1y1x2y2: 表示输入的目标框是否为上下角点坐标

    Returns:

    """

    # 获得边框左上角点和右下角点的坐标
    if not x1y1x2y2:
        # Transform from center and width to exact coordinates
        b1_x1, b1_x2 = box1[:, 0] - box1[:, 2] / 2, box1[:, 0] + box1[:, 2] / 2
        b1_y1, b1_y2 = box1[:, 1] - box1[:, 3] / 2, box1[:, 1] + box1[:, 3] / 2
        b2_x1, b2_x2 = box2[:, 0] - box2[:, 2] / 2, box2[:, 0] + box2[:, 2] / 2
        b2_y1, b2_y2 = box2[:, 1] - box2[:, 3] / 2, box2[:, 1] + box2[:, 3] / 2
    else:
        # Get the coordinates of bounding boxes
        b1_x1, b1_y1, b1_x2, b1_y2 = box1[:, 0], box1[:, 1], box1[:, 2], box1[:, 3]
        b2_x1, b2_y1, b2_x2, b2_y2 = box2[:, 0], box2[:, 1], box2[:, 2], box2[:, 3]

    # get the corrdinates of the intersection rectangle
    # 计算真实框与预测框的交集矩形的左上角点和右下角点的坐标
    inter_rect_x1 = torch.max(b1_x1, b2_x1)
    inter_rect_y1 = torch.max(b1_y1, b2_y1)
    inter_rect_x2 = torch.min(b1_x2, b2_x2)
    inter_rect_y2 = torch.min(b1_y2, b2_y2)

    # Intersection area交集面积
    inter_area = torch.clamp(inter_rect_x2 - inter_rect_x1 + 1, min=0) * torch.clamp(
        inter_rect_y2 - inter_rect_y1 + 1, min=0
    )
    # torch.clamp是上下限控制函数,这里使用这个函数,是因为真实框与目标框可能不存在交集
    # 那么inter_rect_x2-inter_rect_x1+1 或者 inter_rect_y2 - inter_rect_y1+1 就是负的
    # TODO 这里inter_rect_x2-inter_rect_x1+1,后面为什么要加1,有评论说是计算交集像素值
    # TODO 这里inter_rect_x2是相对于特征层的位置,这里不再深究,就先把问题放在这里

    # Union Area
    b1_area = (b1_x2 - b1_x1 + 1) * (b1_y2 - b1_y1 + 1)     # box1的面积
    b2_area = (b2_x2 - b2_x1 + 1) * (b2_y2 - b2_y1 + 1)     # box2的面积

    iou = inter_area / (b1_area + b2_area - inter_area + 1e-16)     # 计算交并比

    return iou
现在我们可以写一个测试脚本,来测试一下NMS。
在yolox_from_scratch下新建一个名为nms_test.py的文件

在nms_test.py中加入下面的程序:
import torch

from utils.utils import load_model
from nets.yolo import YoloBody
from utils.utils_bbox import decode_outputs, non_max_suppression

if __name__ == '__main__':
    """模型的导入"""
    # 模型路径
    model_path = "model_data/yolox_s.pth"
    # 新建模型
    model = YoloBody(80, 's')  # 's'表示新建的为yolox_s模型
    # 导入模型权重
    load_model(model, model_path, 'cpu')

    """生成模拟数据"""
    torch.manual_seed(0)
    image_data = torch.rand(8, 3, 640, 640)

    """将图片(模拟数据)输入到模型中"""
    outputs = model(image_data)

    """对输出进行解码"""
    input_shape = (640, 640)
    outputs = decode_outputs(outputs, input_shape)

    """置信度过滤和NMS"""
    result = non_max_suppression(outputs)

    for item in result:
        print(item)
为了能复现,我设置了pytorch随机种子,输出如下:
C:\Users\mzrs_wjh\Anaconda3\python.exe C:/yolox_from_scratch/nms_test.py
None
None
None
tensor([[0.5037, 0.0206, 0.5893, 0.1807, 0.7317, 0.7699, 0.0000]],
       grad_fn=<StackBackward>)
None
None
tensor([[0.7942, 0.0025, 0.8371, 0.1032, 0.7394, 0.7584, 0.0000],
        [0.4932, 0.4831, 0.6837, 0.7926, 0.6119, 0.7408, 0.0000]],
       grad_fn=<StackBackward>)
None
我们可以看到,模拟数据有8张图片,但只有两张图片中检测到了目标,其中一张图片中有一个目标,另一张图有两个目标
3 将预测框绘制在图片中
之前为了方便,一直使用模拟数据,现在我们来开始使用真实图片。
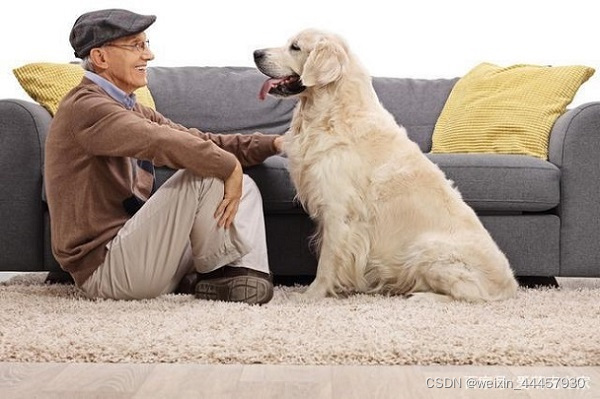
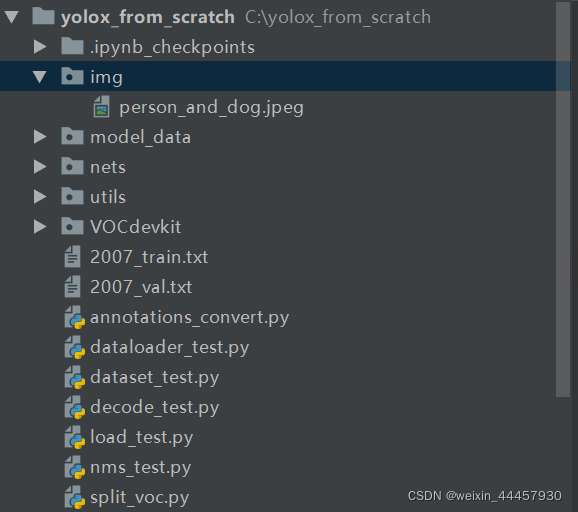
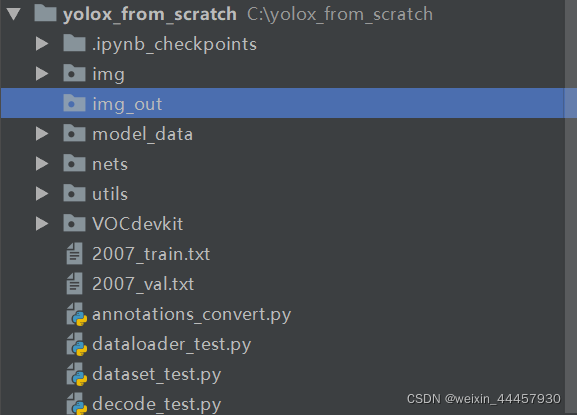
在yolox_from_scratch下新建一个名为img的文件夹,并将下面这张图片放入
现在的项目结构如下:
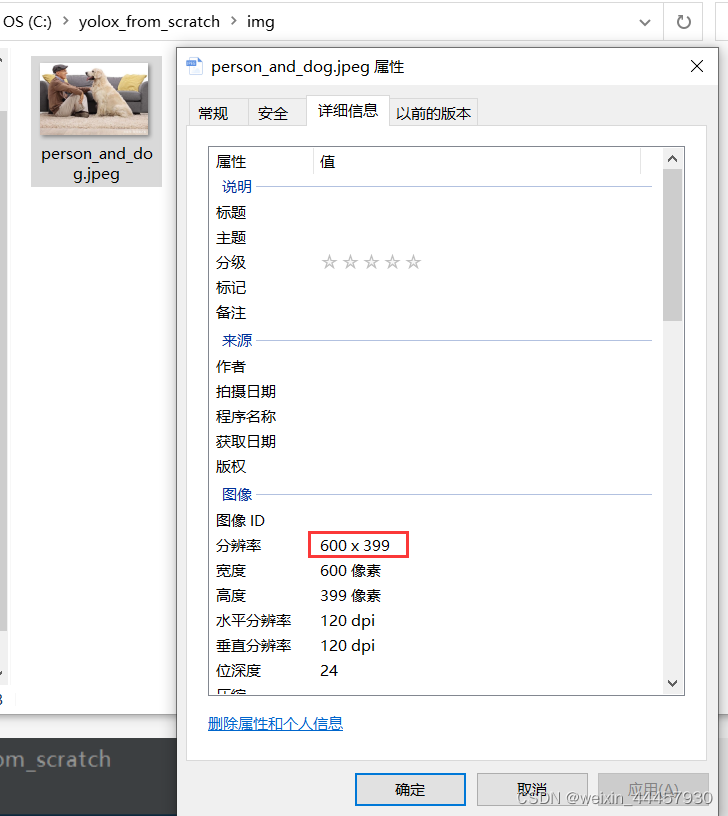
上述图片的像素是600*399,不能直接输入到模型中,因为输入图片必须是正方形,而且边长必须是32的倍数。
(1)对输入图片进行调整(letterbox及缩放)
这里调整到指定大小,不是直接暴力缩放,而是要高宽等比缩放,那么需要先使用letterbox算法,即在上下或者左右添加灰条,添加上灰条后再进行缩放。
在C:\yolox_from_scratch\utils\utils.py中,添加下面的函数:
def resize_image(image, size, letterbox_image):
    """
        对输入图像进行resize
    Args:
        image:PIL.Image.open的返回值,RGB三通道图像
        size:目标尺寸
        letterbox_image: bool 是否进行letterbox变换

    Returns:指定尺寸的图像

    """
    from PIL import Image
    iw, ih = image.size
    w, h = size
    if letterbox_image:
        scale = min(w/iw, h/ih)     # 获得长边对应的高宽比
        nw = int(iw*scale)          # 新的宽
        nh = int(ih*scale)          # 新的高

        image = image.resize((nw, nh), Image.BICUBIC)           # 调整原图的大小
        new_image = Image.new('RGB', size, (128, 128, 128))     # 生成画布
        new_image.paste(image, ((w-nw)//2, (h-nh)//2))          # 将调整后的图像放入画布中
    else:
        new_image = image.resize((w, h), Image.BICUBIC)
    return new_image
我们可以写一段测试代码
from PIL import Image
from utils.utils import resize_image

file_path = r"C:\yolox_from_scratch\img\person_and_dog.jpeg"

# 打开图片
img = Image.open(file_path)

# 缩放并进行letterbox转化
letterbox_img = resize_image(img, (640, 640), True)

print(letterbox_img.size)
输出
(640, 640)
(2)将边框绘制在图片中
这部分不难,但却非常琐碎,也花了我最多的时间
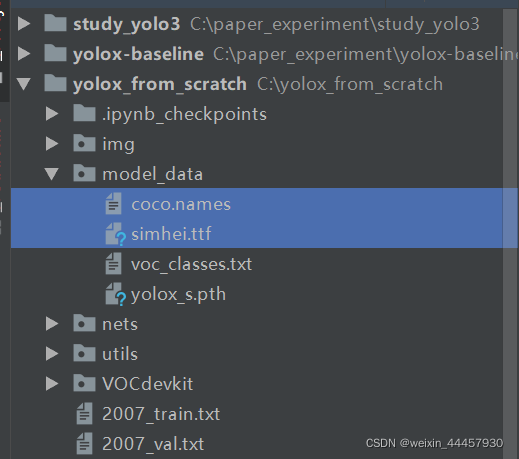
先将字体文件simhei.ttf和coco类名文件下载下来,复制到yolox_from_scratch/model_data中,结果如下:
类名文件的下载链接:https://github.com/pjreddie/darknet/blob/master/data/coco.names
将下面这段代码是绘制边框的函数,将其复制到yolox_from_scratch\utils\utils_bbox.py中
def draw_boxes(image, outputs, font_file, class_names, colors_list=[]):
    """
    在图片上画框
    Args:
        image: 要画框的图片,PIL.Image.open的返回值
        outputs: 一个列表,NMS后的结果,其中的坐标为归一化后的坐标
        font_file:字体文件路径
        class_names:类名列表
        colors_list:颜色列表

    Returns:

    """
    # 根据图片的宽,动态调整字体大小
    font_size = np.floor(3e-2 * image.size[1] + 0.5).astype('int32')
    font = ImageFont.truetype(font=font_file, size=font_size)  # 创建字体对象,包括字体和字号
    draw = ImageDraw.Draw(image)                # 将letterbox_img作为画布

    for output in outputs:                      # ouput是每张图片的检测结果,当然这里batch_size为1就是了
        if output is not None:
            for obj in output:                  # 一张图片可能有多个目标,obj就是其中之一
                """从obj中获得信息"""
                box = obj[:4] * 640             # 将归一化后的坐标转化为输入图片(letterbox_img)中的坐标
                cls_index = int(obj[6])         # 类别索引
                score = obj[4] * obj[5]         # score,可以理解为类别置信度
                x1, y1, x2, y2 = map(int, box)          # 转化为整数
                pred_class = class_names[cls_index]     # 目标类别名称
                color = 'red'                           # TODO 具体使用时,还得改成colors_list[cls_index]

                """组建要显示的文字信息"""
                label = ' {} {:.2f}'.format(pred_class, score)
                print(label, x1, y1, x2, y2)

                """获得文字的尺寸"""
                label_size = draw.textsize(label, font)
                label = label.encode('utf-8')

                """防止文字背景框在上边缘越界"""
                if y1 - label_size[1] >= 0:
                    text_origin = np.array([x1, y1 - label_size[1]])
                else:
                    # 如果越界,则将文字信息写在边框内部
                    text_origin = np.array([x1, y1 + 1])

                """绘制边框"""
                thickness = 2               # 边框厚度
                for i in range(thickness):  # 根据厚度确定循环的执行次数
                    draw.rectangle([x1 + i, y1 + i, x2 - i, y2 - i], outline=color)  # colors[cls_index]

                """绘制文字框"""
                draw.rectangle([tuple(text_origin), tuple(text_origin + label_size)], fill=color)   # 背景
                draw.text(text_origin, str(label, 'UTF-8'), fill=(0, 0, 0), font=font)              # 文字
            del draw

    return image
好的,现在我们来写一个测试脚本,新建一个名为draw_box_test.py的脚本
将下面这段代码写入:
from PIL import Image, ImageFont

import numpy as np
import torch

from nets.yolo import YoloBody
from utils.utils_bbox import decode_outputs, non_max_suppression, draw_boxes
from utils.utils import preprocess_input, resize_image, load_model


"""图片导入及预处理"""
file_path = r"C:\Users\mzrs_wjh\Desktop\01\person_and_dog.jpeg"    # 图片路径
img = Image.open(file_path)                             # 打开图片
letterbox_img = resize_image(img, (640, 640), True)     # 缩放并进行letterbox转化

# 使用ImageNet的均值和方差对图片进行归一化
img_data = preprocess_input(np.array(letterbox_img, dtype='float32'))
img_data = np.transpose(img_data, (2, 0, 1))            # 调整图片的维度
img_data = np.expand_dims(img_data, 0)                  # 添加batch_size维度
images = torch.from_numpy(img_data)                     # 将图片数据转化为torch张量

"""模型导入与推理"""
model_path = "model_data/yolox_s.pth"       # 模型路径
class_path = "model_data/coco.names"        # 类名文件
font_path = "model_data/simhei.ttf"         # 字体文件

"""获得类名列表"""
with open(class_path, 'r') as f:
    class_names = f.read().split("\n")[:-1]         # 最后一个去掉,是因最后一个字符是空格

"""建立模型对象并导入权重"""
model = YoloBody(80, 's')                   # 新建模型,'s'表示新建的为yolox_s模型
load_model(model, model_path, 'cpu')        # 导入模型权重

with torch.no_grad():
    outputs = model(images)                         # 模型推理
    outputs = decode_outputs(outputs, [640, 640])   # 输出解码
    outputs = non_max_suppression(outputs)          # NMS
    letterbox_img = draw_boxes(letterbox_img, outputs, font_file=font_path, class_names=class_names)    # 画框
    # 这里之所以用letterbox,是因为我们获得的预测框,坐标是在letterbox_ima上的

letterbox_img.show()
控制台输出:
 person 0.92 44 112 280 435
 dog 0.73 260 136 559 437
屏幕显示:
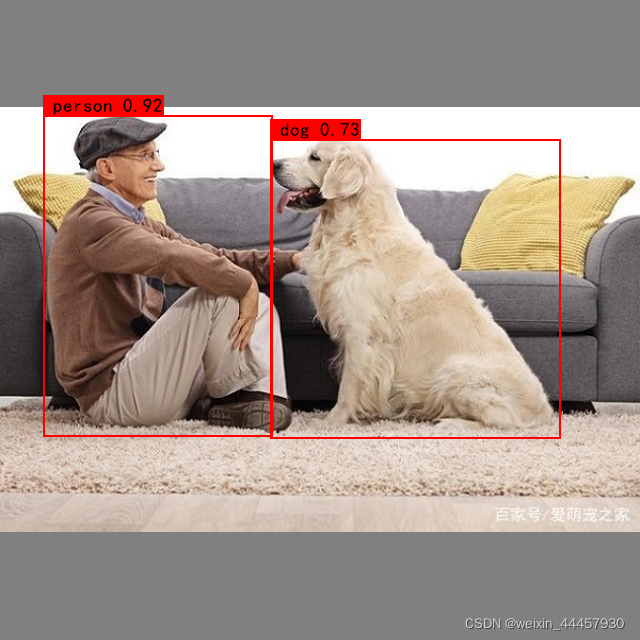
好的,除了边框颜色之外,基本达到目的。
(3)对输出边框进行调整
我们刚刚是在letterbox后的图片中画框的,如果我们想在原图中画框,只需要把上下角点坐标转化一下即可。
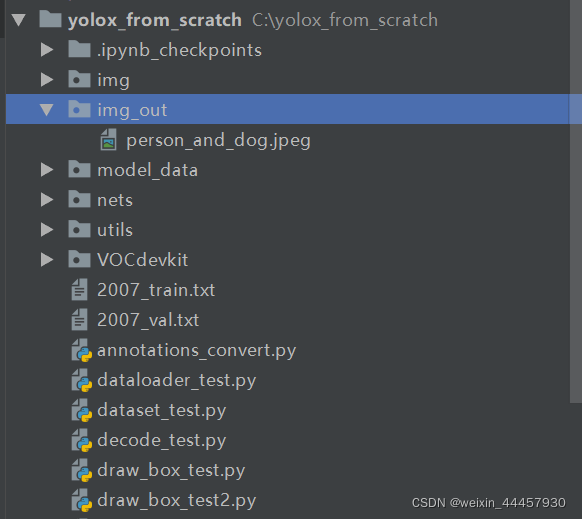
我们先建一个图像保存的文件夹,名为img_out
然后在yolox_from_scratch\utils\utils_bbox.py中加入下面的函数:
def yolo_correct_boxes(outputs, input_shape, image_shape, is_letterbox):
    """

    Args:
        outputs: 一个列表,NMS后的输出,详见non_max_suppression的函数文档
        input_shape:输入图片尺寸,列表或数组
        image_shape:图片原尺寸,列表或数组
        is_letterbox:布尔值,是否对原图进行过letterbox处理

    Returns:

    """
    if is_letterbox:
        for output in outputs:  # output是单张图片中检测到的目标
            if output is not None:
                # 输入图像与真实图像比例
                scale = np.min(np.array(input_shape) / np.array(image_shape))
                # 左右、上下的灰条宽度
                offset = (np.array(input_shape)-np.array(image_shape) * scale)/input_shape / 2.

                # 将letterbox中的坐标转化为原图像中的坐标(归一化后的坐标)
                output[:, 0] = (output[:, 0] - offset[0]) / scale
                output[:, 1] = (output[:, 1] - offset[1]) / scale
                output[:, 2] = (output[:, 2] - offset[0]) / scale
                output[:, 3] = (output[:, 3] - offset[1]) / scale
接下来在yolox_from_scratch中新建一个名为draw_box_test2.py的脚本,

将下列代码写入:
from PIL import Image, ImageFont

import numpy as np
import torch

from nets.yolo import YoloBody
from utils.utils import cvtColor, preprocess_input, resize_image, load_model
from utils.utils_bbox import decode_outputs, non_max_suppression, draw_boxes, yolo_correct_boxes

"""图片导入及预处理"""
file_path = r"C:\Users\mzrs_wjh\Desktop\01\person_and_dog.jpeg"    # 图片路径
img = Image.open(file_path)                             # 打开图片
img = cvtColor(img)                                     # 使用cvtColor,这样即便是灰度图,也能检测
letterbox_img = resize_image(img, (640, 640), True)     # 缩放并进行letterbox转化

# 使用ImageNet的均值和方差对图片进行归一化
img_data = preprocess_input(np.array(letterbox_img, dtype='float32'))
img_data = np.transpose(img_data, (2, 0, 1))            # 调整图片的维度
img_data = np.expand_dims(img_data, 0)                  # 添加batch_size维度
images = torch.from_numpy(img_data)                     # 将图片数据转化为torch张量

"""模型导入与推理"""
model_path = "model_data/yolox_s.pth"       # 模型路径
class_path = "model_data/coco.names"        # 类名文件
font_path = "model_data/simhei.ttf"         # 字体文件

"""获得类名列表"""
with open(class_path, 'r') as f:
    class_names = f.read().split("\n")[:-1]         # 最后一个去掉,是因最后一个字符是空格

"""建立模型对象并导入权重"""
model = YoloBody(80, 's')                   # 新建模型,'s'表示新建的为yolox_s模型
load_model(model, model_path, 'cpu')        # 导入模型权重

with torch.no_grad():
    outputs = model(images)                         # 模型推理
    outputs = decode_outputs(outputs, [640, 640])   # 输出解码
    outputs = non_max_suppression(outputs)          # NMS
    yolo_correct_boxes(outputs, (640, 640), img.size, True)                         # 坐标变换
    img = draw_boxes(img, outputs, font_file=font_path, class_names=class_names)    # 画框
    # 这里之所以用letterbox,是因为我们获得的预测框,坐标是在letterbox_ima上的

img.show()

"""图像保存"""
img_name = file_path.split('\\')[-1]
img.save(r'img_out/' + img_name)
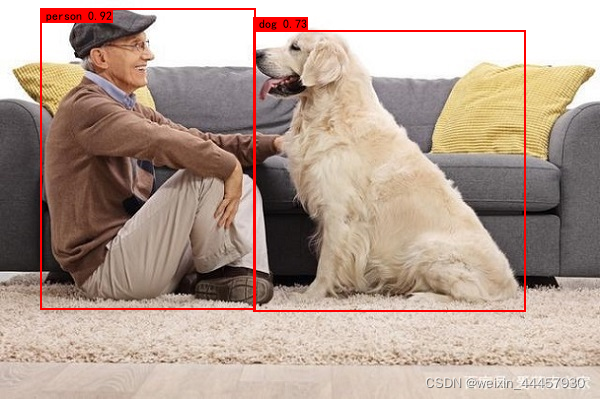
控制台输出:
 person 0.92 43 115 272 436
 dog 0.73 270 139 560 438
图像显示:
将上述图像关闭之后,会在img_out文件夹下看到这张图片:
好的,模型推理的工作完成!


 2796
2796


 被折叠的 条评论
为什么被折叠?
被折叠的 条评论
为什么被折叠?
 到【灌水乐园】发言


