


一、过滤敏感词
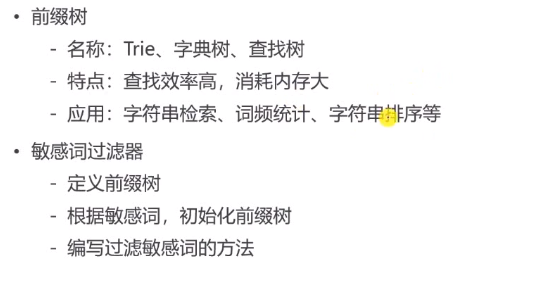
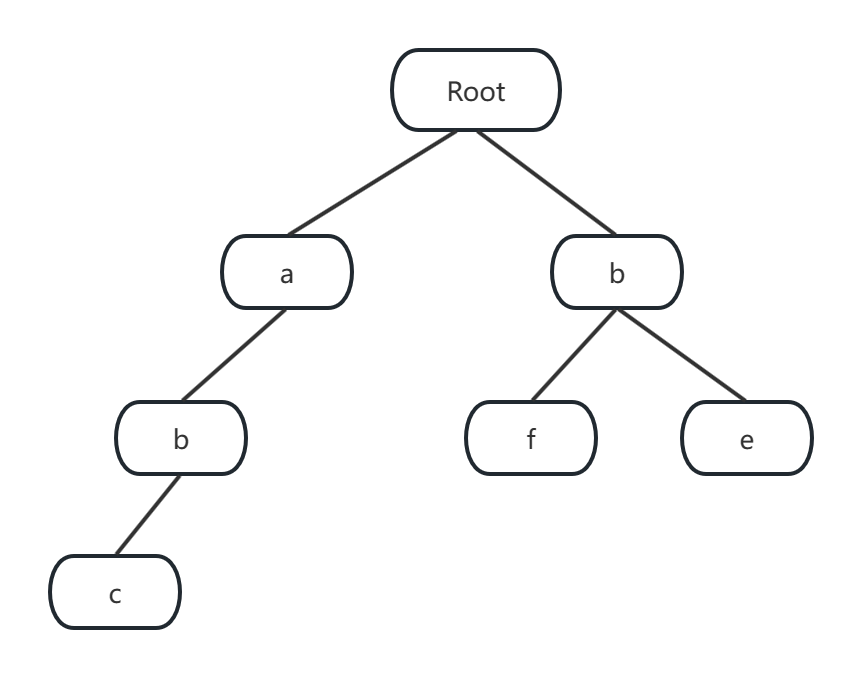
敏感词:abc,bf,be
特性:
1)根节点不包含字符,除根节点外的每一个子节点都包含一个字符。
2)从根节点到某一节点的路径上的字符连接起来,就是该节点对应的字符串。
3)每个节点的所有子节点包含的字符都不相同。
4)每条边对应一个字母。每个节点对应一项前缀。叶节点对应最长前缀,即单词本身。
定义敏感词
为简便处理定义一个敏感词文件,resources目录下新建一个sensitive-words.txt文件

定义前缀树
因为不会被外界访问,所以在util包下的SensitiveFilter类中定义了内部类
@Component
public class SensitiveFilter {
    //定义前缀树
    private class TireNode{
        //关键词结束的标识
        private boolean isKeywordEnd = false;
        //子节点(key是下级字符,value是下级节点)
        private Map<Character,TireNode> subNodes = new HashMap<>();
        //添加子节点
        public void addSubNode(Character c,TireNode node){
            subNodes.put(c,node);
        }
        //获取子节点
        public TireNode getSubNode(Character c){
            return subNodes.get(c);
        }
        public boolean isKeywordEnd() {
            return isKeywordEnd;
        }
        public void setKeywordEnd(boolean keywordEnd) {
            isKeywordEnd = keywordEnd;
        }
    }
}
根据敏感词初始化前缀树
@Component
public class SensitiveFilter {
    private static final Logger logger = LoggerFactory.getLogger(SensitiveFilter.class);
    //要替换的符号
    private static final String REPLACEMENT="***";
    //根节点
    private TireNode rootNode = new TireNode();
    @PostConstruct //服务启动初始化bean时构造器之后执行
    public void init(){
        try(
                InputStream is = this.getClass().getClassLoader().getResourceAsStream("sensitive-words.txt");
                BufferedReader br =new BufferedReader(new InputStreamReader(is));
        ) {
            String keyword;
            while((keyword = br.readLine())!=null){
                //添加到前缀树
                this.addKeyWord(keyword);
            }
        } catch (Exception e) {
            logger.error("加载敏感词文件失败:"+e.getMessage());
        }
    }
    //将一个敏感词添加到前缀树
    private void addKeyWord(String keyword) {
        if(StringUtils.isBlank(keyword)) return;
        char[] arr = keyword.toCharArray();
        TireNode tmpNode = rootNode;
        for(int i=0;i<arr.length;i++){
            TireNode subNode = tmpNode.getSubNode(arr[i]);
            if(subNode==null){
                //初始化化子节点
                subNode = new TireNode();
                tmpNode.addSubNode(arr[i],subNode);
            }
            tmpNode = subNode;
        }
        tmpNode.setKeywordEnd(true);
    }
    //定义前缀树
    private class TireNode{
        //关键词结束的标识
        private boolean isKeywordEnd = false;
        //子节点(key是下级字符,value是下级节点)
        private Map<Character,TireNode> subNodes = new HashMap<>();
        //添加子节点
        public void addSubNode(Character c,TireNode node){
            subNodes.put(c,node);
        }
        //获取子节点
        public TireNode getSubNode(Character c){
            return subNodes.get(c);
        }
        public boolean isKeywordEnd() {
            return isKeywordEnd;
        }
        public void setKeywordEnd(boolean keywordEnd) {
            isKeywordEnd = keywordEnd;
        }
    }
}
过滤敏感词方法
/**
     * 过滤敏感词
     * @param text 待过虑的词
     * @return
     */
    public String filter(String text){
        if(StringUtils.isBlank(text)) return null;
        //指针1 指向树
        TireNode tmpNode = rootNode;
        //指针2
        int begin = 0;
        //指针3
        int position = 0;
        //结果
        StringBuilder sb = new StringBuilder();
        while(position<text.length()){
            char c = text.charAt(position);
            //跳过符号
            if(isSysbol(c)){
                //若指针1处于根节点,将此符号计入结果,让指针2向下走一步
                if(tmpNode==rootNode){
                    sb.append(c);
                    begin++;
                }
                //无论符号在开头或者中间指针3都向下走一步
                position++;
                continue;
            }
            //检查下级节点
            tmpNode = tmpNode.getSubNode(c);
            if(tmpNode==null){
                //以begin为开头的字符不是敏感词
                sb.append(text.charAt(begin));
                //进入下一个词的判断
                position = ++begin;
                tmpNode = rootNode;
            }else if(tmpNode.isKeywordEnd()){
                //发现敏感词以begin开头,position结尾的词
                sb.append(REPLACEMENT);
                begin = ++position;
                tmpNode = rootNode;
            }else{
                //继续检查下一个字符
                position++;
            }
        }
        //将最后一批字符记录
        sb.append(text.substring(begin));
        return sb.toString();
    }
    //判读是否为符号
    private boolean isSysbol(Character c){
        //c<0x2E80||c>0x9FFF 东亚文字之外
        return !CharUtils.isAsciiAlphanumeric(c)&&(c<0x2E80||c>0x9FFF);
    }
二、发布帖子
1.配置DiscussPostMapper
· 在DiscussPostMapper.java中添加
int insertDiscussPost(DiscussPost discussPost);·配置xml文件
    <insert id="insertDiscussPost" parameterType="DiscussPost">
        insert into discuss_post (<include refid="insertFields"></include>)
        values(#{userId},#{title},#{content},#{type},#{status},#{createTime},#{commentCount},#{score})
    </insert>
2.在DiscussPostService中追加方法addDiscussPost
 public int addDiscussPost(DiscussPost post){
        if (post==null){
            throw new IllegalArgumentException("参数不能为空!");
        }
        //1.转义HTML标记
        post.setTitle(HtmlUtils.htmlEscape(post.getTitle()));
        post.setContent(HtmlUtils.htmlEscape(post.getContent()));
        //过滤敏感词
        post.setTitle(sensitiveFilter.filter(post.getTitle()));
        post.setContent(sensitiveFilter.filter(post.getContent()));
        return discussPostMapper.insertDiscussPost(post);


    }
3.controller层
@Controller
@RequestMapping("/discuss")
public class DiscussPostController {
    @Autowired
    private DiscussPostService discussPostService;
    @Autowired
    private HostHolder hostHolder;
    @RequestMapping(value = "/add",method = RequestMethod.POST)
    //返回的是字符串,不是网页,所以加上ResponseBody
    @ResponseBody
    public String addDiscussPost(String title,String content){
        User user =hostHolder.getUser();
        if(user ==null){
//            403表示没有权限
            return CommunityUtil.getJSONString(403,"你还没有登陆!");
        }
        DiscussPost post =new DiscussPost();
        post.setUserId(user.getId());
        post.setTitle(title);
        post.setContent(content);
        post.setCreateTime(new Date());
        discussPostService.addDiscussPost(post);
        return CommunityUtil.getJSONString(0,"发布成功!");

    }

}
三、帖子详情

-
数据访问层
- 在DiscussPostMapper中添加查询帖子方法
public DiscussPost findDiscussPostById(int id){ return discussPostMapper.selectDiscussPostById(id ); } - 在discusspost-mapper.xml 下添加方法
<select id="selectDiscussPostById" resultType="DiscussPost">
    select <include refid="selectFields"></include>
    from discuss_post
    where id = #{id}
</select>
-
业务层
1.在DiscussPostService添加方法
  public DiscussPost findDiscussPostById(int id){
        return discussPostMapper.selectDiscussPostById(id );

}-
表现层
在DiscussPostController中添加方法
    @RequestMapping(path = "/detail/{discussPostId}",method = RequestMethod.GET)
    public String getDiscussPost(@PathVariable("discussPostId") int discussPostId, Model model){
        //查询帖子
        DiscussPost post=discussPostService.findDiscussPostById(discussPostId);
        model.addAttribute("post",post);
        //查询帖子的作者
        User user=userService.findUserById(post.getUserId());
        model.addAttribute("user",user);
        return "/site/discuss-detail";

    }
在DisscussPostController下添加方法getDiscussPost
- 声明访问路径 path = "/detail/{discussPostId},请求方式 method = RequestMethod.GET
- 需要返回模板,不要写responsebody
- 方法中加参数接受变量,需要用到路径中的 “discussPostId”,查询的结果通过model携带数据
- 调用discussPostService.findDiscussPostById得到 DiscussPost 的id
- 用户id要处理。法一在mapper中使用关联查询,法二先查帖子数据,得到id再查用户名。前者效率肯定高,但是查询方法有些冗余耦合,不是所有业务需要。法二简单方便,后面通过redis提高效率。
四、事务管理

事务的隔离性

串行化需要加锁,会降低性能
丢失更新


实现机制

Spring事务管理

五、显示评论

创建实体类-数据层
开发数据访问组件Mappeer,新的表要创建新的Mapper
在DAO包下,创建CommentMapper
package com.nowcoder.community.dao;

import com.nowcoder.community.entity.Comment;
import org.apache.ibatis.annotations.Mapper;

import java.util.List;
@Mapper
public interface CommentMapper {
    List<Comment> selectCommentsByEntity(int entityType,int entityId,int offset,int limit);
    //数据的条目数
    int selectCountByEntity(int entityType,int entityId);

}
业务层
package com.nowcoder.community.service;

import com.nowcoder.community.dao.CommentMapper;
import com.nowcoder.community.entity.Comment;
import org.springframework.beans.factory.annotation.Autowired;
import org.springframework.stereotype.Service;

import java.util.List;

@Service
public class CommentService {
    @Autowired
    private CommentMapper commentMapper;

    public List<Comment> findCommentByEntity(int entityType,int entityId,int offset,int limit){
        return commentMapper.selectCommentsByEntity(entityType, entityId, offset, limit);
    }
    public int findCommentCount(int entityType,int entityId){
        return commentMapper.selectCountByEntity(entityType, entityId);
    }
}
表现层
@RequestMapping(path = "/detail/{discussPostId}",method = RequestMethod.GET)
    public String getDiscussPost(@PathVariable("discussPostId") int discussPostId, Model model ,Page page){
        //查询帖子
        DiscussPost post=discussPostService.findDiscussPostById(discussPostId);
        model.addAttribute("post",post);
        //查询帖子的作者
        User user=userService.findUserById(post.getUserId());
        model.addAttribute("user",user);
        //评论的分页数据
        //当前 帖子的所有评论
        page.setLimit(5);
        page.setPath("/discuss/detail/"+discussPostId);
        page.setRows(post.getCommentCount());
        //评论:给帖子的评论
        //回复:给评论的评论
        //评论列表
        List<Comment> commentList=commentService.findCommentByEntity(
                ENTITY_TYPE_POST,post.getId(), page.getOffset(), page.getLimit());
        //评论的VO列表
        List<Map<String,Object>> commentVoList=new ArrayList<>();
        if (commentList!=null){
            for(Comment comment:commentList){
                //评论VO
                Map<String,Object> commentVo=new HashMap<>();
                //评论
                commentVo.put("comment",comment);
//                评论的作者
                commentVo.put("user",userService.findUserById(comment.getUserId()));
                //回复列表
                List<Comment> replyList=commentService.findCommentByEntity(
                        ENTITY_TYPE_POST,comment.getId(),0,MAX_VALUE);
                //回复的VO列表
                List<Map<String,Object>> replyVOList=new ArrayList<>();
                if (replyList!=null){
                    for (Comment reply:replyList){
                        Map<String,Object> replyVo=new HashMap<>();
                        //回复
                        replyVo.put("reply",reply);
                        //作者
                        replyVo.put("user",userService.findUserById(reply.getUserId()));
                        //回复的目标
                        //判断是否有回复的目标
                       User target= reply.getTargetId()==0?null:userService.findUserById(reply.getTargetId());
                       replyVo.put("target",target);

                       replyVOList.add(replyVo);
                    }
                }
                commentVo.put("replys",replyVOList);

                //回复数量
                int replyCount=commentService.findCommentCount(ENTITY_TYPE_COMMENT,comment.getId());
                commentVo.put("replyCount",replyCount);
                commentVoList.add(commentVo);


            }
        }
        model.addAttribute("comments",commentVoList);
        return "/site/discuss-detail";

    }
六、添加评论

数据层
CommentMapper
  //增加评论
    int insertComment(Comment comment);
comment-mapper.xml
     <sql id="insertFields">
        user_id,entity_type,entity_id,target_id,content,status,create_time
    </sql>
 <insert id="insertComment" parameterType="Comment">
        insert into comment (<include refid="insertFields"></include>)
        values(#{userId},#{entityType},#{entityId},#{targetId},#{content},#{status},#{createTime})
    </insert>
在DiscussPostMapper中增加更新评论数量的方法
int updateCommentCount(int id,int commentCount);discusspost-mapper.xml
  <update id="updateCommentCount">
        update discuss_post set comment_count = #{commentCount} where id = #{id}
  </update>
业务层
根据数据访问层实现业务层的逻辑
DiscussPostService
    public int updateCommentCount(int id ,int commentCount){
        return discussPostMapper.updateCommentCount(id, commentCount);

    }
CommentService处理增加评论的业务
增加评论时,会用到事务管理
 @Transactional(isolation = Isolation.READ_COMMITTED, propagation = Propagation.REQUIRED)
    public int addComment(Comment comment) {
        if (comment == null) {
            throw new IllegalArgumentException("参数不能为空!");
        }

        // 添加评论----过滤
        comment.setContent(HtmlUtils.htmlEscape(comment.getContent()));
        comment.setContent(sensitiveFilter.filter(comment.getContent()));
        int rows = commentMapper.insertComment(comment);

        // 更新帖子评论数量
        if (comment.getEntityType() == ENTITY_TYPE_POST) {
            int count = commentMapper.selectCountByEntity(comment.getEntityType(), comment.getEntityId());
            discussPostService.updateCommentCount(comment.getEntityId(), count);
        }

        return rows;
    }
表现层
处理Controller的请求
@Controller
@RequestMapping("/comment")
public class CommentController implements CommunityConstant {

    @Autowired
    private CommentService commentService;
    @Autowired
    private HostHolder hostHolder;
    @RequestMapping(path = "add/{discussPostId}",method = RequestMethod.POST)
    //要得到discussPostId参数,需要用到PathVariable注解
    public String addComment(@PathVariable("discussPostId") int discussPostId, Comment comment)
    {
       comment.setUserId(hostHolder.getUser().getId());
       comment.setStatus(0);
       comment.setCreateTime(new Date());
       commentService.addComment(comment);

       return "redirect:/discuss/detail/"+discussPostId;
    }
}
七、私信列表
实体类
数据库表-message
根据数据库表添加实体类Message
数据访问层
增加接口MessageMapper


 5245
5245

 被折叠的 条评论
为什么被折叠?
被折叠的 条评论
为什么被折叠?
 到【灌水乐园】发言


