


 本文介绍如何在SpringBoot项目中集成Freemarker模板引擎,包括依赖添加、配置文件修改、通用模板定义及宏布局使用,通过实例展示首页创建过程。
springboot集成freemarker
我们首先在layui上下了一套fly模板,然后首先把index.html的代码移过来看看效果(注意css,js文件都需要自己去官网下载,然后fly模板里的引入要自己去修改,不然会无法引入会导致排版出问题),现在的话这些数据都是静态的,然后我们需要创建一些模板例如头部栏,尾部栏等等。
集成依赖
首先我们需要添加依赖
<dependency>
    <groupId>org.springframework.boot</groupId>
    <artifactId>spring-boot-starter-freemarker</artifactId>
</dependency>
然后对配置文件(properties或者yml)进行修改
spring:
  freemarker:
    suffix: .ftl
    request-context-attribute: request
    cache: false
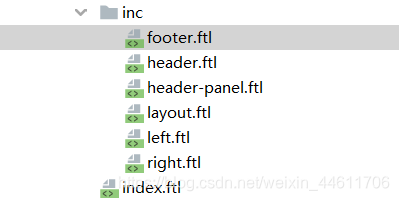
把一些通用的导航栏定义成模板
我们可以看到有些部分是通用的,不管你在哪一功能界面,比如说顶部导航栏,尾部一些产权信息等等,这些都可以做成一个模板,例如footer,header,left,right等等。
我们引用模板的时候可以用这个标签
<#include "/inc/header.ftl" />,具体参照下图。
定义个全局layout(宏)
接下来我们定义个全局layout(宏),用于统一所有的页面。一些js脚本都可已放在这里面,因为是全局通用的,然后介绍一下几个标签
- <#macro layout title> 定义一个宏(模板),名字是layout,title是参数
- <#nested> 表示在引入layout这个宏的地方,标签内容的所有内容都会替换到这个标签中。有点类似于数据填充的一个功能
<#macro layout title>

    <!DOCTYPE html>
    <html>
    <head>
        <meta charset="utf-8">
        <title>基于 layui 的极简社区页面模版</title>
        <meta name="viewport" content="width=device-width, initial-scale=1, maximum-scale=1">
        <meta name="keywords" content="fly,layui,前端社区">
        <meta name="description" content="Fly社区是模块化前端UI框架Layui的官网社区,致力于为web开发提供强劲动力">
        <link rel="stylesheet" href="res/layui/css/layui.css">
        <link rel="stylesheet" href="res/css/global.css">
    </head>
    <body>

    <#include "/inc/header.ftl"  />

    <#nested >

    <#include "/inc/footer.ftl"  />

    <script src="res/layui/layui.js"></script>
    <script>
        layui.cache.page = '';
        layui.cache.user = {
            username: '游客'
            ,uid: -1
            ,avatar: '../res/images/avatar/00.jpg'
            ,experience: 83
            ,sex: '男'
        };
        layui.config({
            version: "3.0.0"
            ,base: '../res/mods/' //这里实际使用时,建议改成绝对路径
        }).extend({
            fly: 'index'
        }).use('fly');
    </script>

    <script type="text/javascript">var cnzz_protocol = (("https:" == document.location.protocol) ? " https://" : " http://");document.write(unescape("%3Cspan id='cnzz_stat_icon_30088308'%3E%3C/span%3E%3Cscript src='" + cnzz_protocol + "w.cnzz.com/c.php%3Fid%3D30088308' type='text/javascript'%3E%3C/script%3E"));</script>

    </body>
    </html>
</#macro>
创建首页index.ftl
上面我们已经定义了一个layout宏,一些css、js文件我们直接放到layout中即可。
然后具体的页面我们直接引入宏。
方法是在标签<@layout>内写内容即可,此标签的内容会填充到<#nested>这里。这个@layout也正好对应了上面<#macro layout title>标签中的layout。
<#include "/inc/layout.ftl"  />
<@layout "首页">

    <#include "/inc/header-panel.ftl"  /><#---->

    <div class="layui-container"><#---->
        <div class="layui-row layui-col-space15">
            <#include "/inc/left.ftl"  />
            <#include "/inc/right.ftl"  />
        </div>
    </div>

</@layout>
写个controller跳转过来
然后我们写一个IndexController来跳到这个首页。
package com.example.controller;

import org.springframework.stereotype.Controller;
import org.springframework.web.bind.annotation.RequestMapping;


@Controller

public class IndexController {

    @RequestMapping({"","/"})
    public String index (){
        return  "index";
    }

}
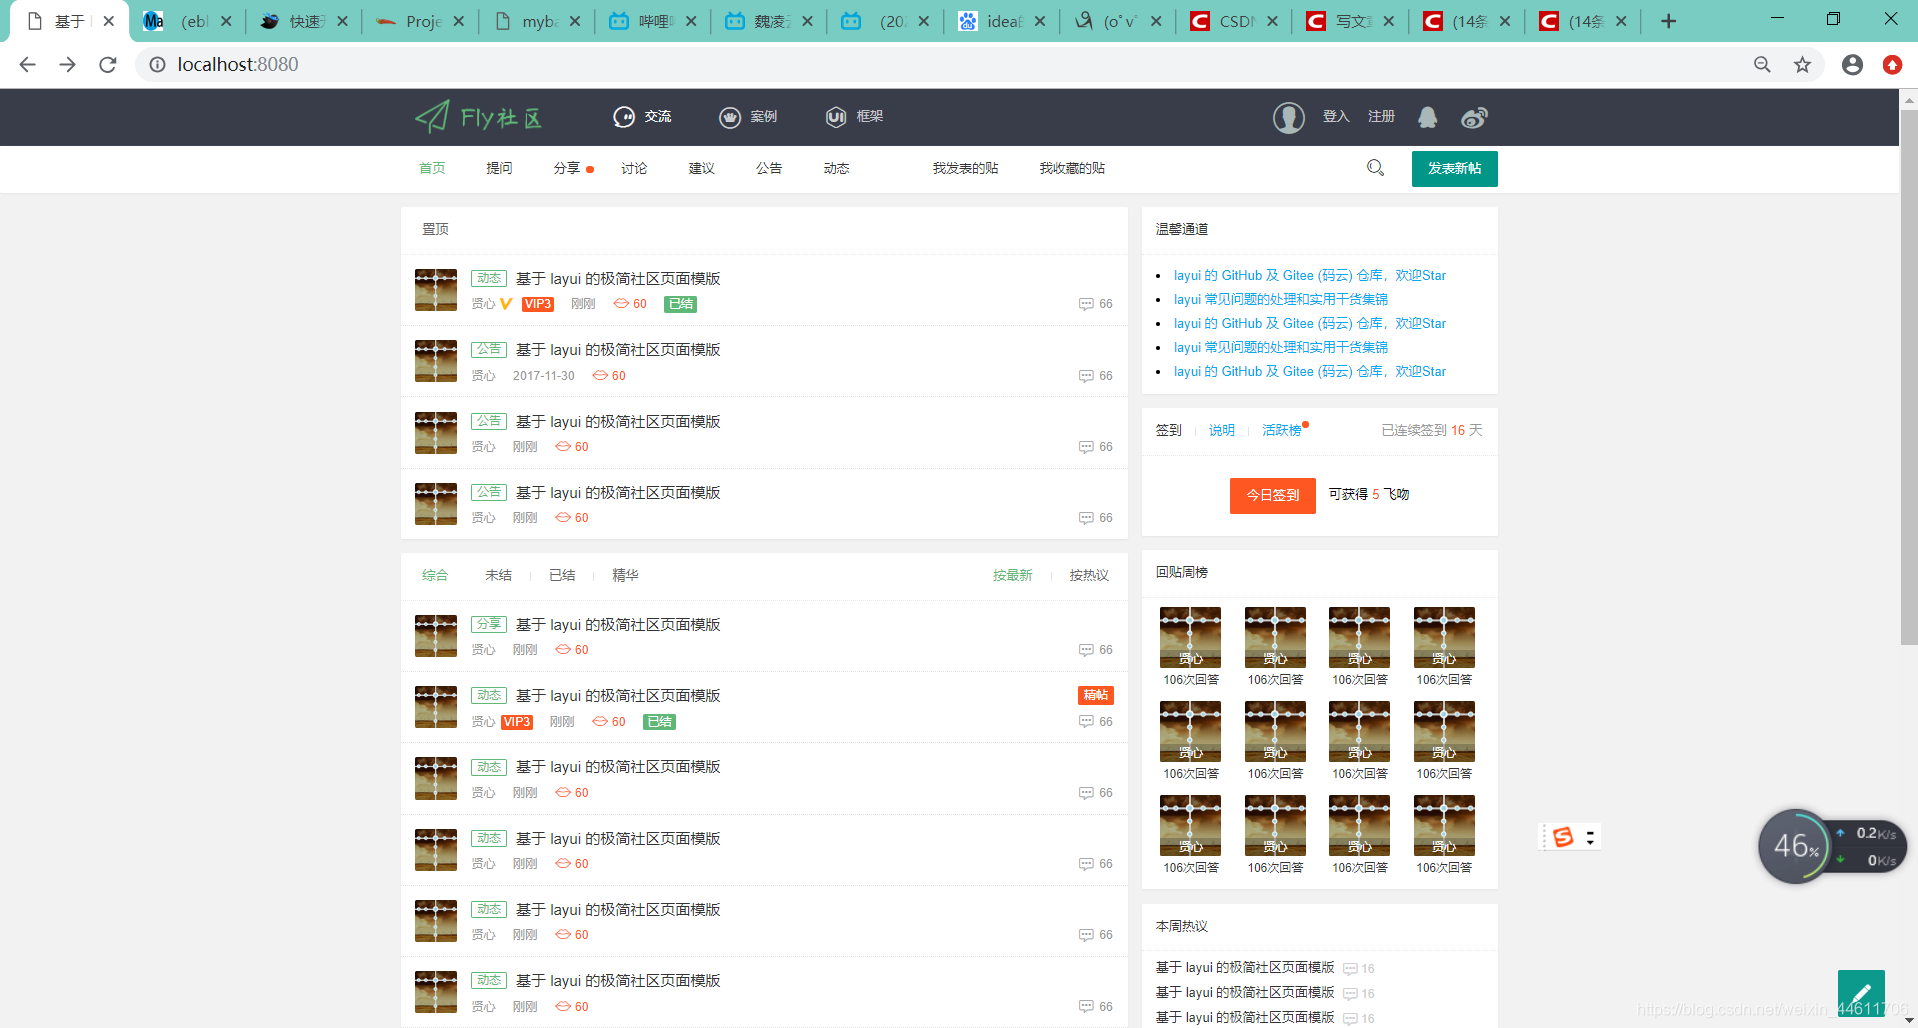
渲染之后效果如下:与index.html效果无差别


 822
822

 被折叠的 条评论
为什么被折叠?
被折叠的 条评论
为什么被折叠?
 到【灌水乐园】发言


