


BlueTooth蓝牙通信
作业内容
在类微信程序的第一子项中完成“蓝牙聊天功能”
配置蓝牙使用权限
在AndroidManifest.xml文件里,添加蓝牙使用权限:
<!--下面2个是普通权限,只需要在清单文件里注册,不需要在程序里动态申请-->
<uses-permission android:name="android.permission.BLUETOOTH_ADMIN" />
<uses-permission android:name="android.permission.BLUETOOTH" />
页面布局
Layout文件夹中
在页面对应的布局文件里,添加Toolbar控件、ListView控件、EditText控件和Button控件。
<androidx.appcompat.widget.Toolbar
    android:id="@+id/toolbar"
    android:layout_width="match_parent"
    android:layout_height="wrap_content">
    <LinearLayout
        android:layout_width="match_parent"
        android:layout_height="match_parent"
        android:orientation="horizontal">
        <TextView
            android:id="@+id/title_left_text"
            style="?android:attr/windowTitleStyle"
            android:layout_width="0dp"
            android:layout_height="match_parent"
            android:layout_alignParentLeft="true"
            android:layout_weight="1"
            android:gravity="left"
            android:ellipsize="end"
            android:singleLine="true" />
        <TextView
            android:id="@+id/title_right_text"
            android:layout_width="0dp"
            android:layout_height="match_parent"
            android:layout_alignParentRight="true"
            android:layout_weight="1"
            android:ellipsize="end"
            android:gravity="right"
            android:singleLine="true"
            android:textColor="#fff" />
    </LinearLayout>
</androidx.appcompat.widget.Toolbar>
device_list.xml文件中,显示“我的好友”以及搜索好友:
<TextView android:id="@+id/title_paired_devices"
        android:layout_width="match_parent"
        android:layout_height="wrap_content"
        android:text="@string/title_paired_devices"
        android:visibility="gone"
        android:background="#666"
        android:textColor="#fff"
        android:paddingLeft="5dp" />
    <ListView android:id="@+id/paired_devices"
        android:layout_width="match_parent"
        android:layout_height="wrap_content"
        android:layout_weight="1" />
    <TextView android:id="@+id/title_new_devices"
        android:layout_width="match_parent"
        android:layout_height="wrap_content"
        android:text="@string/title_other_devices"
        android:visibility="gone"
        android:background="#666"
        android:textColor="#fff"
        android:paddingLeft="5dp" />
    <!--android:visibility="gone"表示不占空间的隐藏,invisible是占空间-->
    <ListView android:id="@+id/new_devices"
        android:layout_width="match_parent"
        android:layout_height="wrap_content"
        android:layout_weight="2" />
    <Button android:id="@+id/button_scan"
        android:layout_width="match_parent"
        android:layout_height="wrap_content"
        android:text="@string/button_scan" />
Values文件夹中
在strings.xml文件里,添加程序运行过程中的状态描述文本等。
    <string name="send">发送</string>
    <string name="not_connected">你没有链接一个设备</string>
    <string name="bt_not_enabled_leaving">蓝牙不可用,离开聊天室</string>
    <string name="title_connecting">链接中...</string>
    <string name="title_connected_to">连接到:</string>
    <string name="title_not_connected">无链接</string>
    <string name="scanning">蓝牙设备搜索中...</string>
    <string name="select_device">选择一个好友链接</string>
    <string name="none_paired">没有配对好友</string>
    <string name="none_found">附近没有发现好友</string>
    <string name="title_paired_devices">已配对好友</string>
    <string name="title_other_devices">其它可连接好友</string>
    <string name="button_scan">搜索好友</string>
    <string name="connect">我的好友</string>
    <string name="discoverable">设置在线</string>
    <string name="back">退出</string>
    <string name="startVideo">开始聊天</string>
    <string name="stopVideo">结束聊天</string>
Menu文件夹中
<?xml version="1.0" encoding="utf-8"?>
<menu xmlns:android="http://schemas.android.com/apk/res/android">
    <item android:id="@+id/scan"
        android:icon="@android:drawable/ic_menu_myplaces"
        android:title="@string/connect" />
    <item android:id="@+id/discoverable"
        android:icon="@android:drawable/ic_menu_view"
        android:title="@string/discoverable" />
    <item android:id="@+id/back"
        android:icon="@android:drawable/ic_menu_close_clear_cancel"
        android:title="@string/back" />
</menu>
事件监听控制
服务组件ChatService.java
三个内部类:AcceptThread(接受新连接)、ConnectThread(发出连接)和ConnectedThread (已连接)
    // 创建监听线程,准备接受新连接。使用阻塞方式,调用 BluetoothServerSocket.accept()
    private class AcceptThread extends Thread {
        private final BluetoothServerSocket mmServerSocket;

        public AcceptThread() {
            BluetoothServerSocket tmp = null;
            try {
                //使用射频端口(RF comm)监听
                tmp = mAdapter.listenUsingRfcommWithServiceRecord(NAME, MY_UUID);
            } catch (IOException e) {
            }
            mmServerSocket = tmp;
        }

        @Override
        public void run() {
            setName("AcceptThread");
            BluetoothSocket socket = null;
            while (mState != STATE_CONNECTED) {
                try {
                    socket = mmServerSocket.accept();
                } catch (IOException e) {
                    break;
                }
                if (socket != null) {
                    synchronized (ChatService.this) {
                        switch (mState) {
                            case STATE_LISTEN:
                            case STATE_CONNECTING:
                                connected(socket, socket.getRemoteDevice());
                                break;
                            case STATE_NONE:
                            case STATE_CONNECTED:
                                try {
                                    socket.close();
                                } catch (IOException e) {
                                    e.printStackTrace();
                                }
                                break;
                        }
                    }
                }
            }
        }

        public void cancel() {
            try {
                mmServerSocket.close();
            } catch (IOException e) {
                e.printStackTrace();
            }
        }
    }

    /*
        连接线程,专门用来对外发出连接对方蓝牙的请求和处理流程。
        构造函数里通过 BluetoothDevice.createRfcommSocketToServiceRecord() ,
        从待连接的 device 产生 BluetoothSocket. 然后在 run 方法中 connect ,
        成功后调用 BluetoothChatSevice 的 connected() 方法。定义 cancel() 在关闭线程时能够关闭相关socket 。
     */
    private class ConnectThread extends Thread {
        private final BluetoothSocket mmSocket;
        private final BluetoothDevice mmDevice;

        public ConnectThread(BluetoothDevice device) {
            mmDevice = device;
            BluetoothSocket tmp = null;
            try {
                tmp = device.createRfcommSocketToServiceRecord(MY_UUID);
            } catch (IOException e) {
                e.printStackTrace();
            }
            mmSocket = tmp;
        }

        @Override
        public void run() {
            setName("ConnectThread");
            mAdapter.cancelDiscovery();
            try {
                mmSocket.connect();
            } catch (IOException e) {
                connectionFailed();
                try {
                    mmSocket.close();
                } catch (IOException e2) {
                    e.printStackTrace();
                }
                ChatService.this.start();
                return;
            }
            synchronized (ChatService.this) {
                mConnectThread = null;
            }
            connected(mmSocket, mmDevice);
        }

        public void cancel() {
            try {
                mmSocket.close();
            } catch (IOException e) {
                e.printStackTrace();
            }
        }
    }

    /*
        双方蓝牙连接后一直运行的线程;构造函数中设置输入输出流。
        run()方法中使用阻塞模式的 InputStream.read()循环读取输入流,然后发送到 UI 线程中更新聊天消息。
        本线程也提供了 write() 将聊天消息写入输出流传输至对方,传输成功后回写入 UI 线程。最后使用cancel()关闭连接的 socket
     */
    private class ConnectedThread extends Thread {
        private final BluetoothSocket mmSocket;
        private final InputStream mmInStream;
        private final OutputStream mmOutStream;

        public ConnectedThread(BluetoothSocket socket) {
            mmSocket = socket;
            InputStream tmpIn = null;
            OutputStream tmpOut = null;
            try {
                tmpIn = socket.getInputStream();
                tmpOut = socket.getOutputStream();
            } catch (IOException e) {
                e.printStackTrace();
            }
            mmInStream = tmpIn;
            mmOutStream = tmpOut;
        }

        @Override
        public void run() {
            byte[] buffer = new byte[1024];
            int bytes;
            while (true) {
                try {
                    bytes = mmInStream.read(buffer);
                    mHandler.obtainMessage(weixinFragment.MESSAGE_READ, bytes, -1, buffer).sendToTarget();
                } catch (IOException e) {
                    connectionLost();
                    break;
                }
            }
        }

        public void write(byte[] buffer) {
            try {
                mmOutStream.write(buffer);
                mHandler.obtainMessage(weixinFragment.MESSAGE_WRITE, -1, -1, buffer).sendToTarget();
            } catch (IOException e) {
                e.printStackTrace();
            }
        }

        public void cancel() {
            try {
                mmSocket.close();
            } catch (IOException e) {
                e.printStackTrace();
            }
        }
    }
weixinFragment.java
创建选项菜单-选项菜单监听-得到本地蓝牙适配器
    public View onCreateView(LayoutInflater inflater, ViewGroup container,
                             Bundle savedInstanceState) {
        // Inflate the layout for this fragment
        view= inflater.inflate(R.layout.tab01, container, false);

        Toolbar toolbar = view.findViewById(R.id.toolbar);
        setHasOptionsMenu(true);

        if (Build.VERSION.SDK_INT >= Build.VERSION_CODES.M) {
            if (ContextCompat.checkSelfPermission(this.getContext(), Manifest.permission.ACCESS_COARSE_LOCATION) != PackageManager.PERMISSION_GRANTED) {
                ActivityCompat.requestPermissions(getActivity(),new String[]{Manifest.permission.ACCESS_COARSE_LOCATION}, 1);
            }
        }


        toolbar.inflateMenu(R.menu.option_menu);

        toolbar.setOnMenuItemClickListener(new MyMenuItemClickListener());
        mTitle = view.findViewById(R.id.title_left_text);
        mTitle.setText(R.string.app_name);
        mTitle = view.findViewById(R.id.title_right_text);

        mBluetoothAdapter = BluetoothAdapter.getDefaultAdapter();
        if (mBluetoothAdapter == null) {
            Toast.makeText(view.getContext(), "蓝牙不可用", Toast.LENGTH_LONG).show();
            getActivity().finish();
            return view;
        }
        if (!mBluetoothAdapter.isEnabled()) { //若当前设备蓝牙功能未开启
            Intent enableIntent = new Intent(BluetoothAdapter.ACTION_REQUEST_ENABLE);
            startActivityForResult(enableIntent, REQUEST_ENABLE_BT); //
        } else {
            if (mChatService == null) {
                setupChat();  //创建会话
            }
        }

        return view;
    }
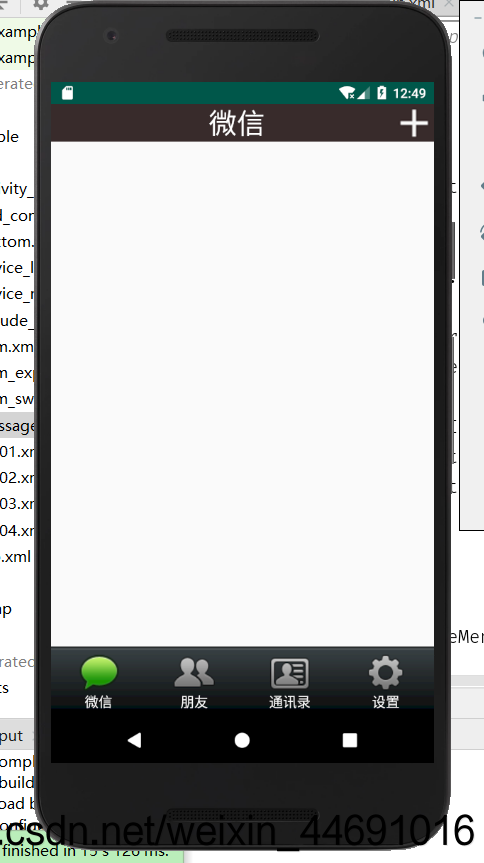
实现界面展示
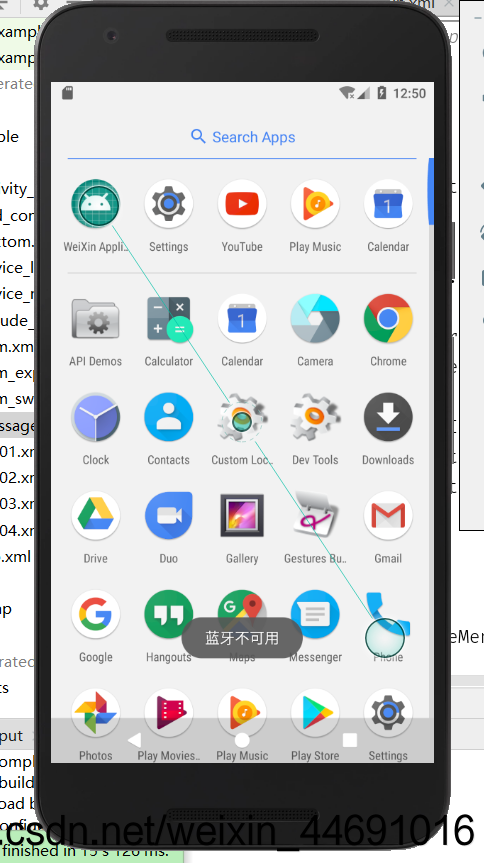
模拟器蓝牙不可用。因身边无安卓系统手机,于是无法安装到手机上运行。
附上源码: 蓝牙通信BlueTooth(Gitee).


 4644
4644


 被折叠的 条评论
为什么被折叠?
被折叠的 条评论
为什么被折叠?
 到【灌水乐园】发言


