


Hive数仓:操作分区表
文章目录
- Hive数仓:操作分区表
- 实验环境
- 实验内容
- 实验步骤
- 1.点击"命令行终端",打开新窗口
- 2.启动MySQL
- 3.指定元数据数据库类型并初始化Schema
- 4.启动Hadoop
- 5.启动hive
- 6.创建名为dolphin的数据库
- 7.查看已有的数据库,并使用dolphin数据库
- 8.创建内部静态分区表
- 9.向分区表partition_table导入数据
- 10.增加分区
- 11.创建名为partition_table1的动态分区表
- 12.查看动态分区表partition_table1
- 13.在HDFS上查看partition_table1的数据
- 14.创建一个外部分区表partition_table2
- 15.删除内部分区表和外部分区表
- 16.查看表的数据
- 17.查看表的分区信息
- 15-17总结操作
- 18.在HDFS查看两张表格的数据
- 结论:
- 个人思考:
- 小实验
实验环境
Linux Ubuntu 16.04
前提条件:
1)Java 运行环境部署完成
2)Hadoop2.7.6的单点部署完成
3)MySQL数据库安装完成
4)Hive单点部署完成
上述前提条件,我们已经为你准备就绪了。
实验内容
使用Hive完成以下实验:
- 创建数据库
- 创建内、外部分区
- 导入数据到分区表
- 创建动态分区表
- 删除分区表,分析两种分区表的差异性
现在开始我们的学习吧!
实验步骤
1.点击"命令行终端",打开新窗口
2.启动MySQL
本实验平台已经提前安装好了MySql(账户名root,密码123456),这里只需要启动MySql服务即可
sudo /etc/init.d/mysql start
启动成功显示如下

3.指定元数据数据库类型并初始化Schema
schematool -initSchema -dbType mysql
初始化成功后,效果如下:
dolphin@tools:~$ schematool -initSchema -dbType mysql
SLF4J: Class path contains multiple SLF4J bindings.
SLF4J: Found binding in [jar:file:/apps/hive/lib/log4j-slf4j-impl-2.6.2.jar!/org/slf4j/impl/StaticLoggerBinder.class]
SLF4J: Found binding in [jar:file:/apps/hadoop/share/hadoop/common/lib/slf4j-log4j12-1.7.25.jar!/org/slf4j/impl/StaticLoggerBinder.class]
SLF4J: See http://www.slf4j.org/codes.html#multiple_bindings for an explanation.
SLF4J: Actual binding is of type [org.apache.logging.slf4j.Log4jLoggerFactory]
Metastore connection URL:    jdbc:mysql://localhost:3306/hive_metadata?createDatabaseIfNotExist=true
Metastore Connection Driver :    com.mysql.jdbc.Driver
Metastore connection User:   root
Starting metastore schema initialization to 2.3.0
Initialization script hive-schema-2.3.0.mysql.sql
Initialization script completed
schemaTool completed
4.启动Hadoop
进入/apps/hadoop/bin目录
cd /apps/hadoop/sbin
执行启动脚本
./start-all.sh
注意,如果终端显示Are you sure you want to continue connecting (yes/no)? 提示,我们需要输入yes,再按回车即可。
检验hadoop是否启动成功
jps
如下,6个进程都出现了,表明Hadoop启动成功

5.启动hive
hive
启动成功后,显示效果如下
dolphin@tools:~$ hive
SLF4J: Class path contains multiple SLF4J bindings.
SLF4J: Found binding in [jar:file:/apps/hive/lib/log4j-slf4j-impl-2.6.2.jar!/org/slf4j/impl/StaticLoggerBinder.class]
SLF4J: Found binding in [jar:file:/apps/hadoop/share/hadoop/common/lib/slf4j-log4j12-1.7.25.jar!/org/slf4j/impl/StaticLoggerBinder.class]
SLF4J: See http://www.slf4j.org/codes.html#multiple_bindings for an explanation.
SLF4J: Actual binding is of type [org.apache.logging.slf4j.Log4jLoggerFactory]

Logging initialized using configuration in jar:file:/apps/hive/lib/hive-common-2.3.3.jar!/hive-log4j2.properties Async: true
Hive-on-MR is deprecated in Hive 2 and may not be available in the future versions. Consider using a different execution engine (i.e. spark, tez) or using Hive 1.X releases.
hive>
此时,终端显示hive>,表明已经进入hive的命令行模式。
6.创建名为dolphin的数据库
create database if not exists dolphin;
执行后显示如下:
[外链图片转存失败,源站可能有防盗链机制,建议将图片保存下来直接上传(img-RSldKmA1-1620753897864)(C:\Users\56550\AppData\Roaming\Typora\typora-user-images\image-20210507113505481.png)]
7.查看已有的数据库,并使用dolphin数据库
show databases;
执行后显示如下:
[外链图片转存失败,源站可能有防盗链机制,建议将图片保存下来直接上传(img-lTPZSuhp-1620753897867)(C:\Users\56550\AppData\Roaming\Typora\typora-user-images\image-20210507113547926.png)]
use dolphin;
执行后显示如下:
hive> use dolphin;
OK
Time taken: 0.101 seconds
8.创建内部静态分区表
partition_table表中一共有3个字段id,name,city,并以","为分割符
create table partition_table(id int,name string)
partitioned by(city string)
row format delimited
fields terminated by ',';

9.向分区表partition_table导入数据
我们已经在本地准备好数据集dome1.txt,输入以下命令,回车

load data local inpath '/home/dolphin/Desktop/dome1.txt' into table partition_table partition(city="beijing");
执行后显示如下:

查看partition_table表中的数据,输入以下命令,回车
select * from partition_table;
执行后显示如下:

10.增加分区
给partition_table增加一个分区,以字段值city="hangzhou"为新增分区
alter table partition_table add partition(city="hangzhou");
查看partition_table的分区,输入以下命令,回车
show partitions partition_table;
执行后显示如下:

导入新增的分区数据,输入以下命令,回车,如果没导入数据执行select * from partition_table不会出现hangzhou,和原先的一样。


load data local inpath '/home/dolphin/Desktop/dome2.txt' into table partition_table partition(city="hangzhou");
select * from partition_table;
执行后显示如下:

11.创建名为partition_table1的动态分区表
首先,修改hive的默认配置,开启动态分区,输入以下命令,回车
set hive.exec.dynamici.partition=true; #开启动态分区,默认是false
set hive.exec.dynamic.partition.mode=nonstrict; #开启允许所有分区都是动态的,否则必须要有静态分区才能使用。
创建动态分区表partition_table1
create table partition_table1(id int,name string)
partitioned by(city string)
row format delimited
fields terminated by ',';
执行后显示如下:

查看此时partition_table1的分区,输入以下命令,回车
show partitions partition_table1;
执行后显示如下:

向表partition_table1导入数据
insert into table partition_table1 partition (city) select id,name,city from partition_table;
注意:hive此时会执行Mapreduce任务,等待任务结束。 部分日志如下

12.查看动态分区表partition_table1
查看partition_table1分区
show partitions partition_table1;
执行后显示如下:

查看partition_table1的数据
select * from partition_table1;
执行后显示如下:

13.在HDFS上查看partition_table1的数据
新打开一个命令终端,输入如下命令,回车
hadoop fs -ls /user/hive/warehouse/dolphin.db
执行后显示如下:

查看hive的分区数据在HDFS上的状态
hadoop fs -ls /user/hive/warehouse/dolphin.db/partition_table1
执行后显示如下:

查看partition_table1表在“beijing”分区的数据
hadoop fs -cat /user/hive/warehouse/dolphin.db/partition_table1/city=beijing/000000_0
执行后显示如下:

14.创建一个外部分区表partition_table2
create external table partition_table2(id int,name string)
partitioned by(city string)
row format delimited
fields terminated by ',';
执行后显示如下:

导入数据:
insert into table partition_table2 partition (country) select * from partition_table;
BUG的问题:插入分区字段名必须跟创建表分区字段名相同。
修改为以下两种都可以:
insert into table partition_table2 partition (city) select * from partition_table;
insert into table partition_table2 partition (city) select id,name,city from partition_table;
执行后部分日志显示如下:

查看数据:
select * from partition_table2;
执行后显示如下:

15.删除内部分区表和外部分区表
alter table partition_table1 drop partition(city="beijing");
alter table partition_table2 drop partition(city="beijing");
执行后显示如下:

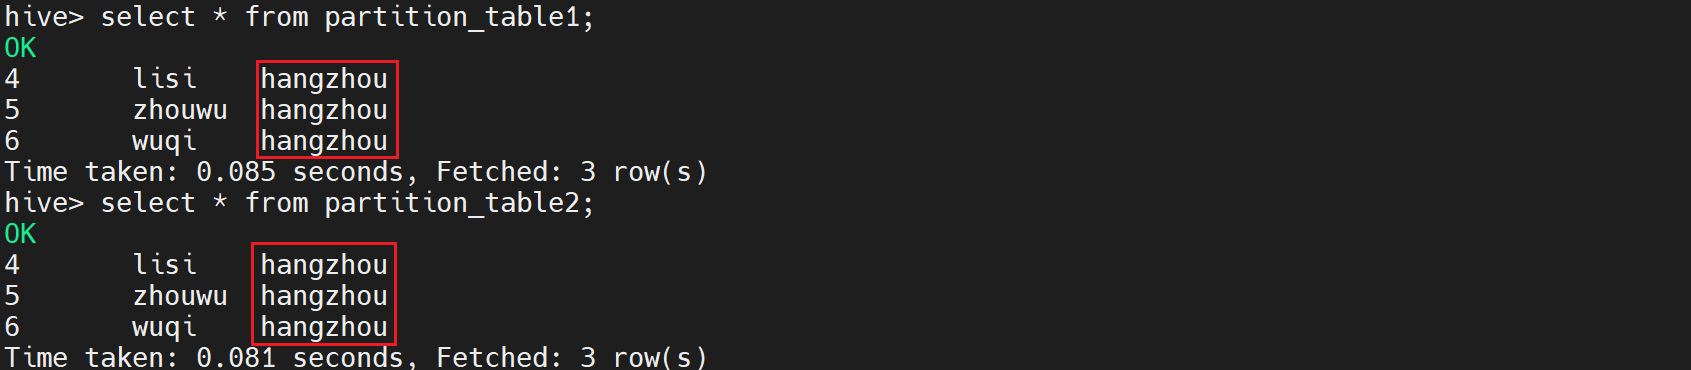
16.查看表的数据
select * from partition_table1;
select * from partition_table2;
执行后显示如下:
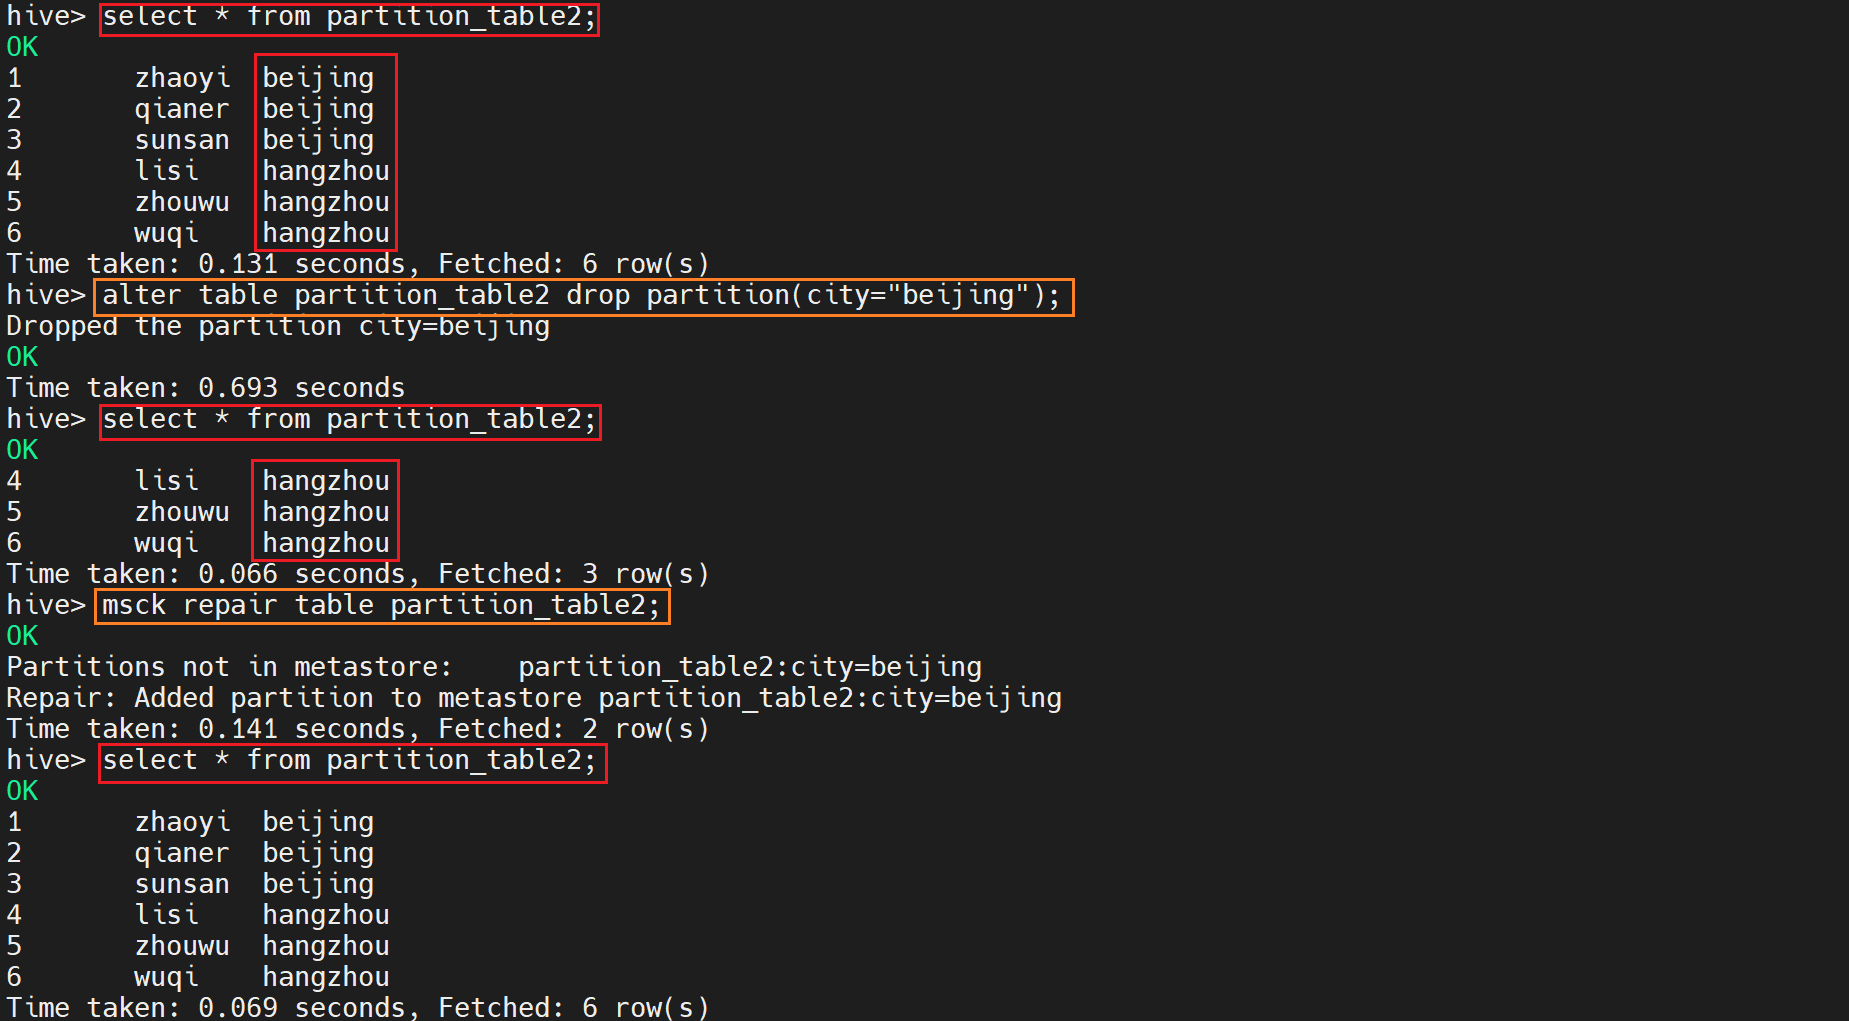
17.查看表的分区信息
更新表的信息,输入如下命令
msck repair table partition_table1;
msck repair table partition_table2;
执行后显示如下:

查看表分区信息
show partitions partition_table1;
show partitions partition_table2; (如果不更新表的信息,不将原始数据重写会metastore那么只是显示hangzhou)
执行后显示如下:

select * from partition_table2;

15-17总结操作
18.在HDFS查看两张表格的数据
hadoop fs -ls /user/hive/warehouse/dolphin.db/partition_table1/
hadoop fs -ls /user/hive/warehouse/dolphin.db/partition_table2/
执行后显示如下:

hadoop fs -cat /user/hive/warehouse/dolphin.db/partition_table2/city=beijing/000000_0
执行后显示如下:

结论:
对比partition_table1和partition_table2两种表,我们发现在进行内部表和外部表的修改时,如果我们进行的操作时删除分区,那么对于外部表而言并没有删除数据源的内容,即hdfs文件系统中的数据源,只是删除了元数据中的分区内容,导致在hive中,分区被删除,但是在hdfs文件系统中,分区依旧存在。
个人思考:
Q:问题是partition_table2的数据是从partition_table中导入的,相当于table2 load hdfs文件系统中/user/hive/warehouse/dolphin.db/partition_table/目录下的数据。那么出现在/user/hive/warehouse/dolphin.db/partition_table2/目录下的数据是否和定义一样时前者目录文件的链接呢?
A:应该不是,是复制/移动了一份到warehouse/dolphin.db/partition_table2/中。
Q:即修改partition_table的内容是否会导致partition_table2的内容改变。结果是不会的,Why?
A:因为table和table2没有联系,在hive中进行的操作不会影响warehouse/dolphin.db/partition_table2/下的数据,只会改变metastore。如果执行msck repair table partition_table2;,那么metastore(元数据)会恢复到warehouse下的状态。
小实验
- data3为外部表通过insert一个内部表的数据
- data2为外部表直接load文件(内部表也是直接load同样的文件)

内部表删除的时候,user/hive/warehouse/dolphin.db/内部表目录也删除了

外部表删除的时候,目录和文件都没有删除。
如果外部表是用内部表的data进行insert的,即使内部表被删除了,user/hive/warehouse/dolphin.db/外部表数据依旧存在。

所以外部表应该也是移动了一份数据到user/hive/warehouse/dolphin.db/外部表目录中。


 5259
5259


 被折叠的 条评论
为什么被折叠?
被折叠的 条评论
为什么被折叠?
 到【灌水乐园】发言


