


文章目录
1. 前置条件
- 版本: 基础版
- 环境: 自管理
- 参考链接:
2. Git Hook
与许多其他版本控制系统一样,Git 有一种方法可以在发生某些重要操作时,触发自定义脚本,即 Git Hook(Git 钩子)。

当我们初始化一个项目之后,.git 目录下有一个 hooks 目录,可以看到上图左侧有很多执行任务,比如 pre-commit,代表在运行这些命令之后或之前,会进行一些校验和检测来执行相应任务。
2.1 Git Hook 分为两部分:本地和远程
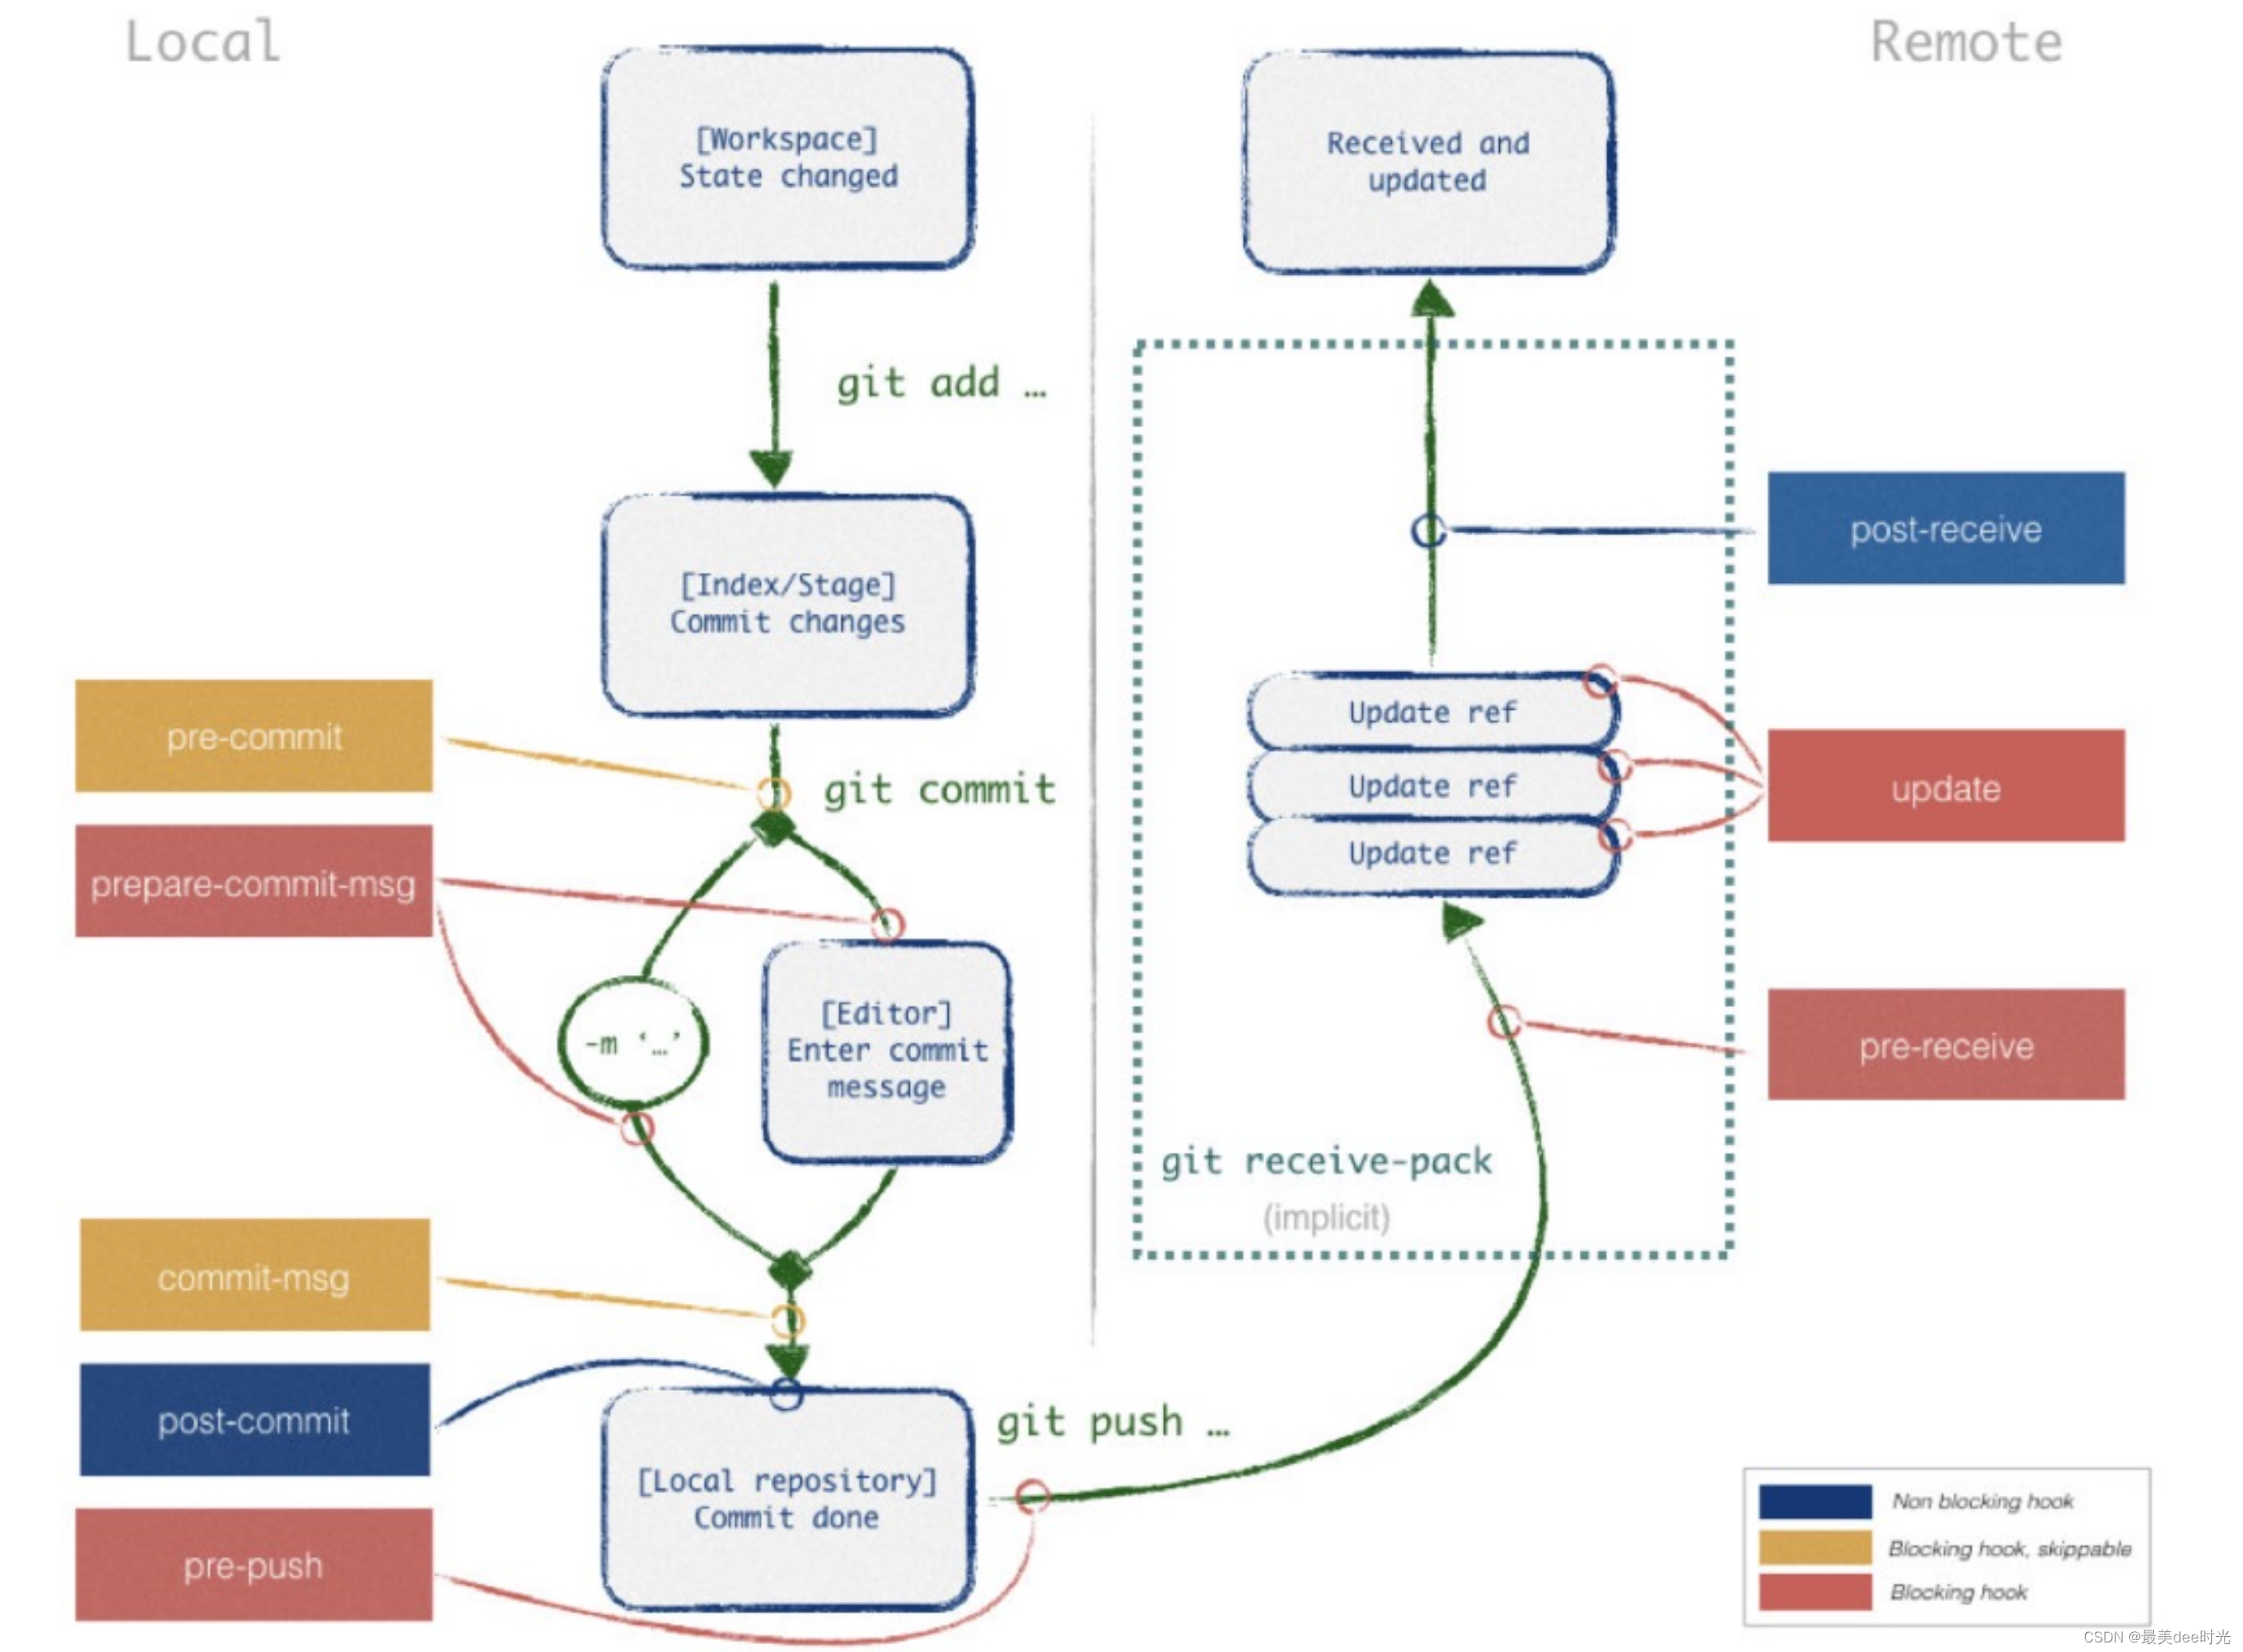
2.1.1 本地 Git Hook,由提交和合并等操作触发:
- 比如代码发生变更,进行 git add,把 message 进行 commit changes;
- 当 git commit 时,就会执行一个钩子叫 pre-commit(准备提交钩子)。
2.1.2 远程 Git Hook,运行在网络操作上,例如接收推送的提交:
- 在 commit 之后,要推送到远端,此时有一个叫 pre-push 钩子,把信息推送 git 仓库;
- 在远程阶段,极狐GitLab 相当于一个远程仓库。如图有很多仓库,分别承担不同功能,比如 pre-receive ,主要在服务器端接收通过本地推上来代码,然后 update 相关代码,post-receive 说明代码接受成功,同时有一个服务器钩子执行。
在这里,我们主要关注本地 hook,比如说 pre-message 和 pre-push,因此我们会借助这些工具来实现规范化代码内容。
3. 操作步骤
3.1 对所有的仓库配置server hooks
3.1.1 全局配置
参考地址:git hooks all repo
gitaly['custom_hooks_dir'] = "/var/opt/gitlab/gitaly/custom_hooks"
gitlab-ctl reconfigure

3.1.2 编写脚本
创建目录custom_hooks
mkdir -p /var/opt/gitlab/gitaly/custom_hooks/pre-receive.d/
编写脚本
该脚本的作用是规范gitlab提交的信息
cat /var/opt/gitlab/gitaly/custom_hooks/pre-receive.d/pre-receive.sh
#!/bin/bash
while read oldrev newrev refname; do
# 从标准输入读取每个引用的旧版本、新版本和引用名称
commits=$(git rev-list --pretty=oneline $oldrev..$newrev)
# 遍历每个提交信息
while read commit; do
# 提取提交信息的前缀
prefix=$(echo "$commit" | awk '{print $2}' | awk -F ":" '{print $1}')
# 检查前缀是否符合要求
if [[ $prefix != "feat" && $prefix != "fix" && $prefix != "hotfix" ]]; then
echo "Error: Invalid commit prefix in one or more commits:"
echo "$commit"
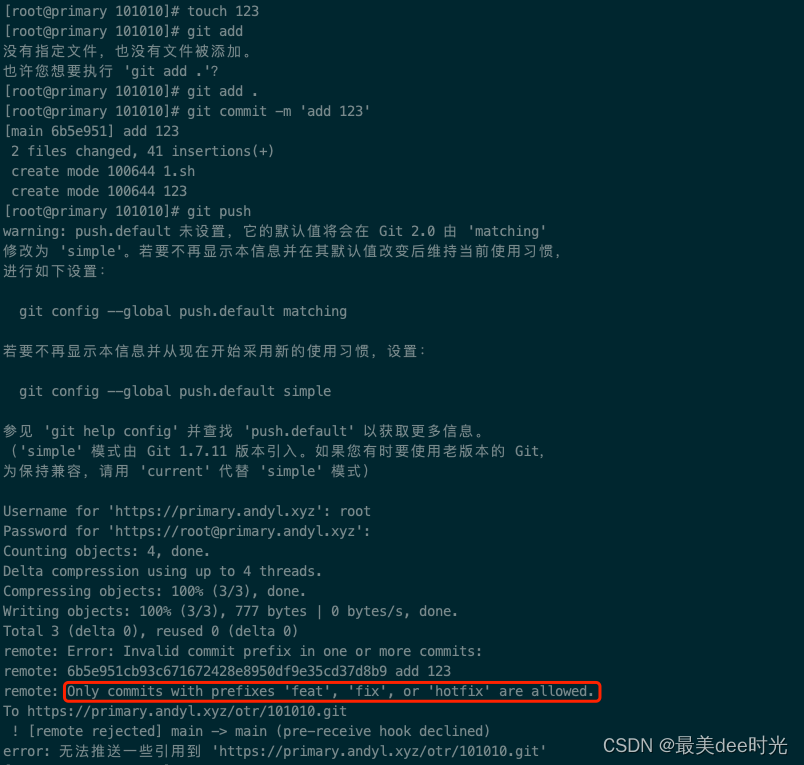
echo "Only commits with prefixes 'feat', 'fix', or 'hotfix' are allowed."
exit 1
fi
done <<< "$commits"
done
给脚本权限
chown -R git.root /var/opt/gitlab/gitaly/custom_hooks/pre-receive.d
chmod +x git.root /var/opt/gitlab/gitaly/custom_hooks/pre-receive.d/pre-receive.sh
3.1.3 测试
测试提交
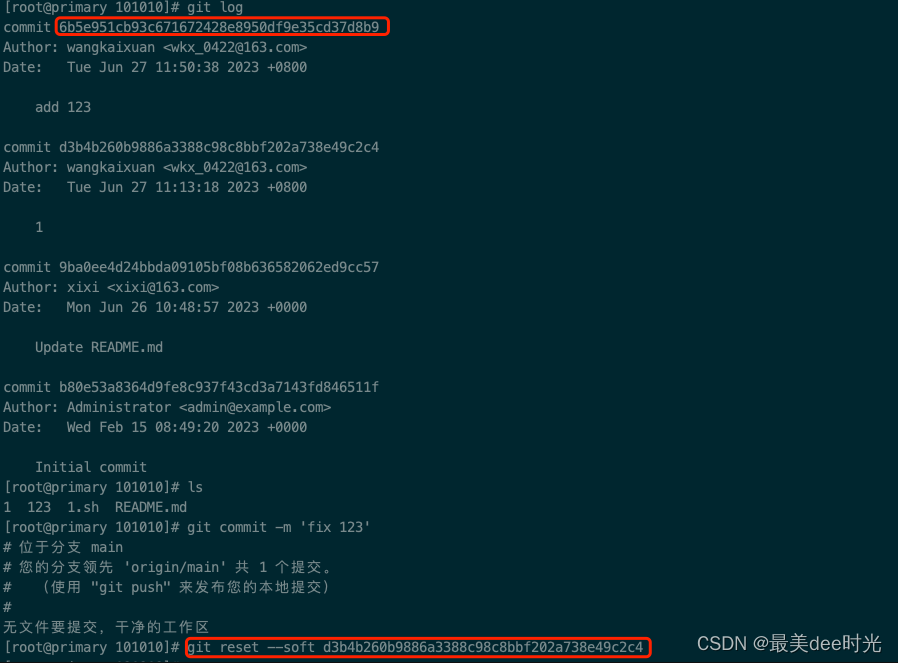
回退commit
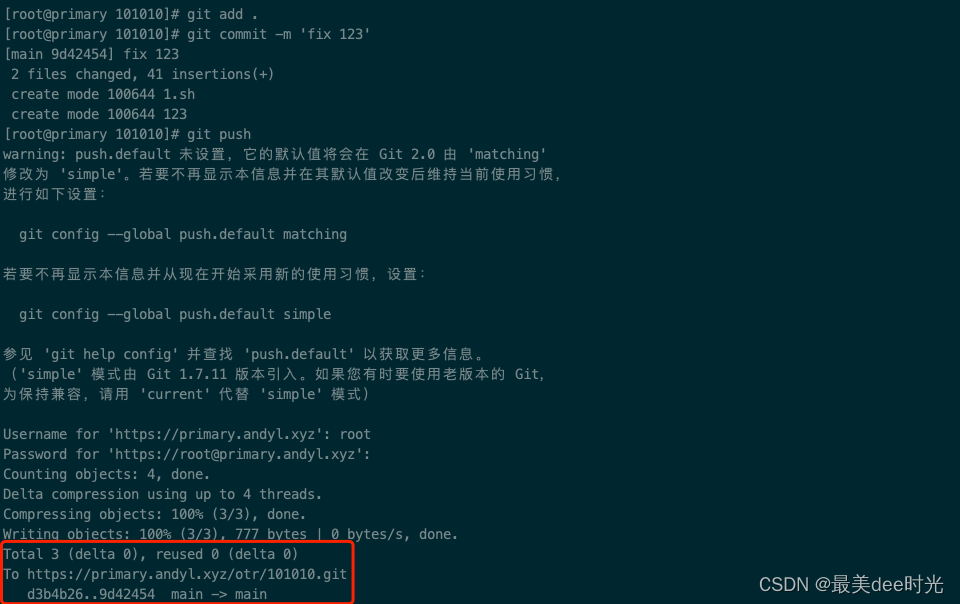
再次提交
3.2 对单个仓库配置server hooks
3.1.1 全局配置
gitaly['custom_hooks_dir'] = "/var/opt/gitlab/gitaly/custom_hooks"
gitlab-ctl reconfigure

对于配置单个仓库的server hooks也是需要开启全局的配置,否则会导致脚本在某个repo的相对路径下不会生效
3.1.2 编写脚本
创建目录custom_hooks
# 进入到仓库在gitlab中的存储路径下
cd /var/opt/gitlab/git-data/repositories/
# 根据在gitlab的`管理界面 - 项目`中查看项目的相对路径(是一个hash路径)
cd @hashed/6b/86/6b86b273ff34fce19d6b804eff5a3f5747ada4eaa22f1d49c01e52ddb7875b4b.git
# 创建custom_hooks目录
mkdir -p custom_hooks/pre-receive.d
chown -R git.root custom_hooks
编写脚本
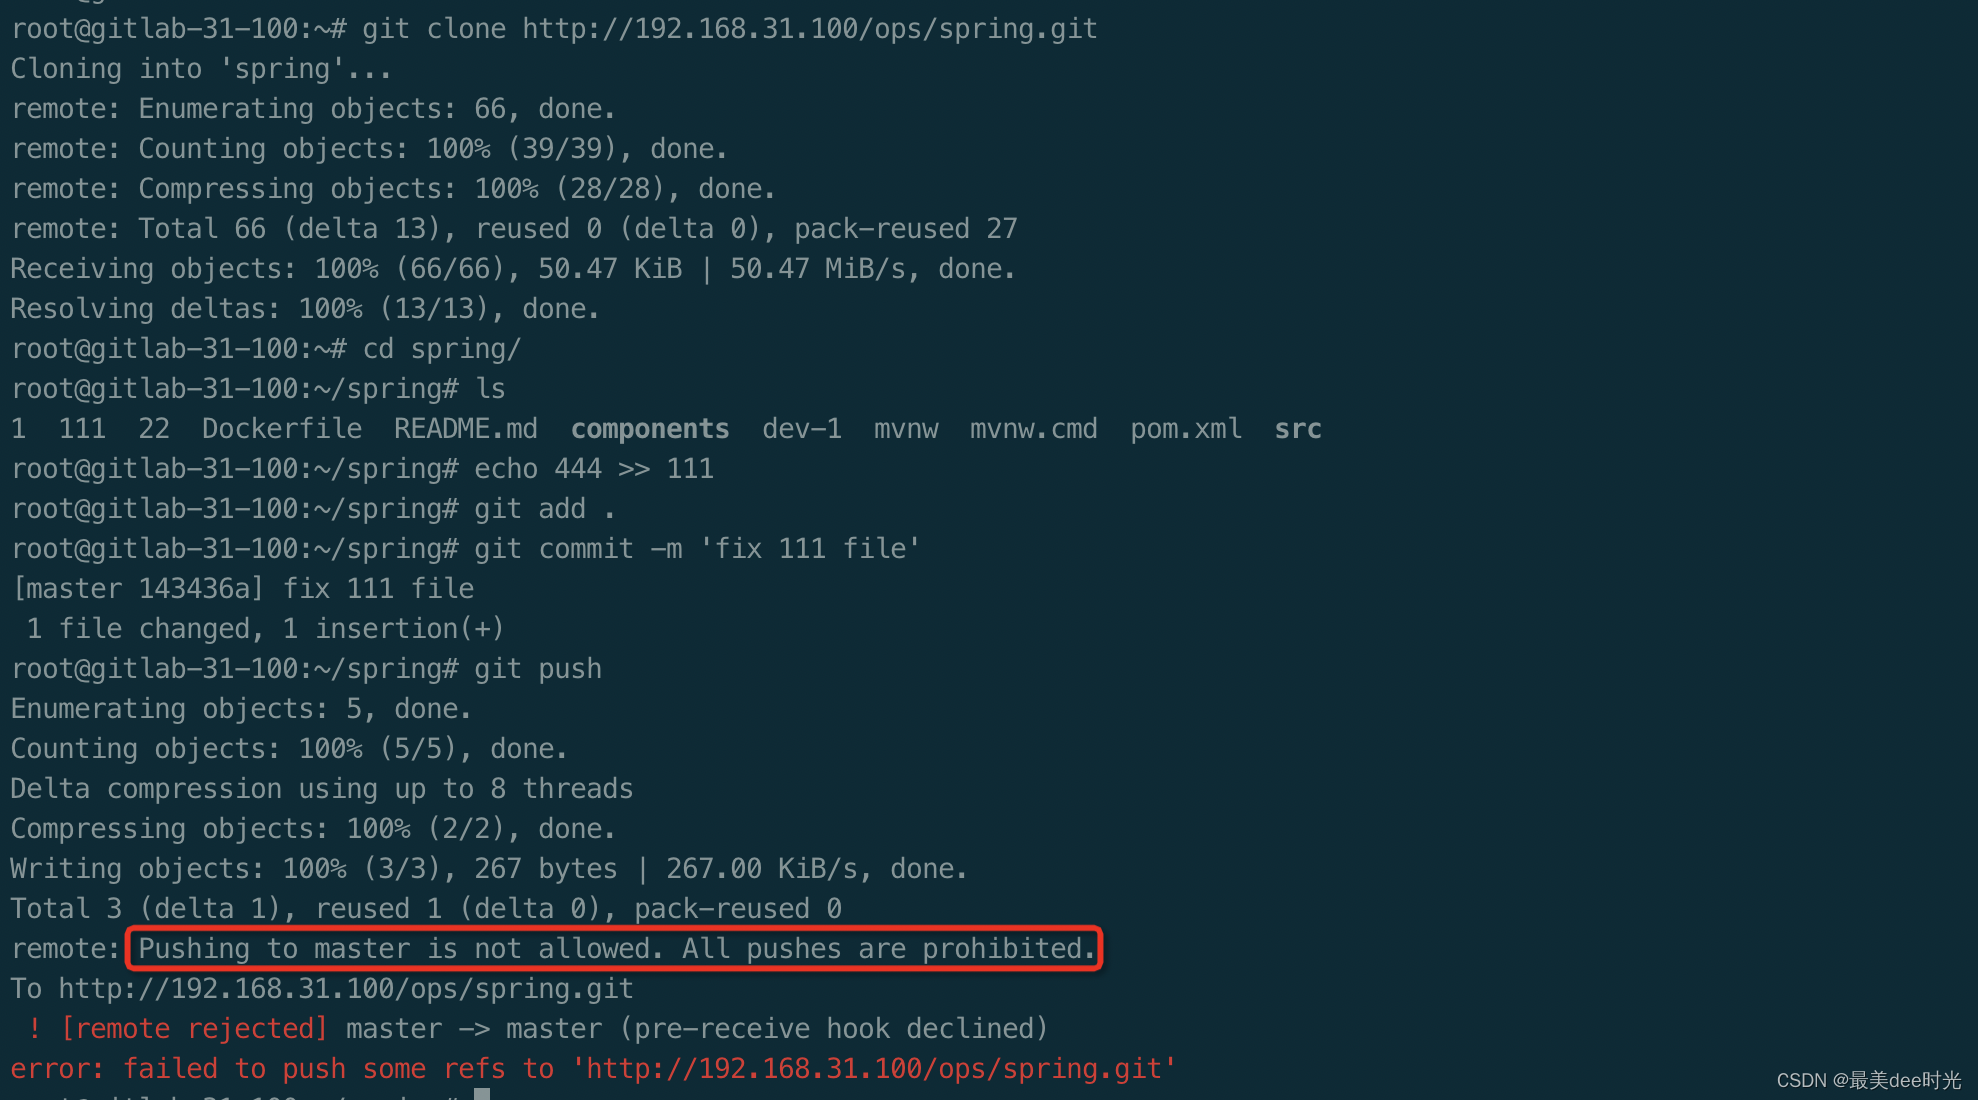
该脚本的作用是禁用对该仓库做任何的push操作
cat pre-receive.sh
#!/bin/bash

while read oldrev newrev refname; do
    branch=$(git rev-parse --symbolic --abbrev-ref $refname)

    # 检查是否有提交,如果有则拒绝
    if [ "$oldrev" != "0000000000000000000000000000000000000000" ]; then
        echo "Pushing to $branch is not allowed. All pushes are prohibited."
        exit 1
    fi
done
给脚本权限
# 进入到仓库在gitlab中的存储路径下
cd /var/opt/gitlab/git-data/repositories/
# 根据在gitlab的`管理界面 - 项目`中查看项目的相对路径(是一个hash路径)
cd @hashed/6b/86/6b86b273ff34fce19d6b804eff5a3f5747ada4eaa22f1d49c01e52ddb7875b4b.git
chown -R git.root custom_hooks/
chmod +x git.root custom_hooks/pre-receive.d/pre-receive.sh

3.1.3 测试
测试提交


 1511
1511


 被折叠的 条评论
为什么被折叠?
被折叠的 条评论
为什么被折叠?
 到【灌水乐园】发言


