


准备工作
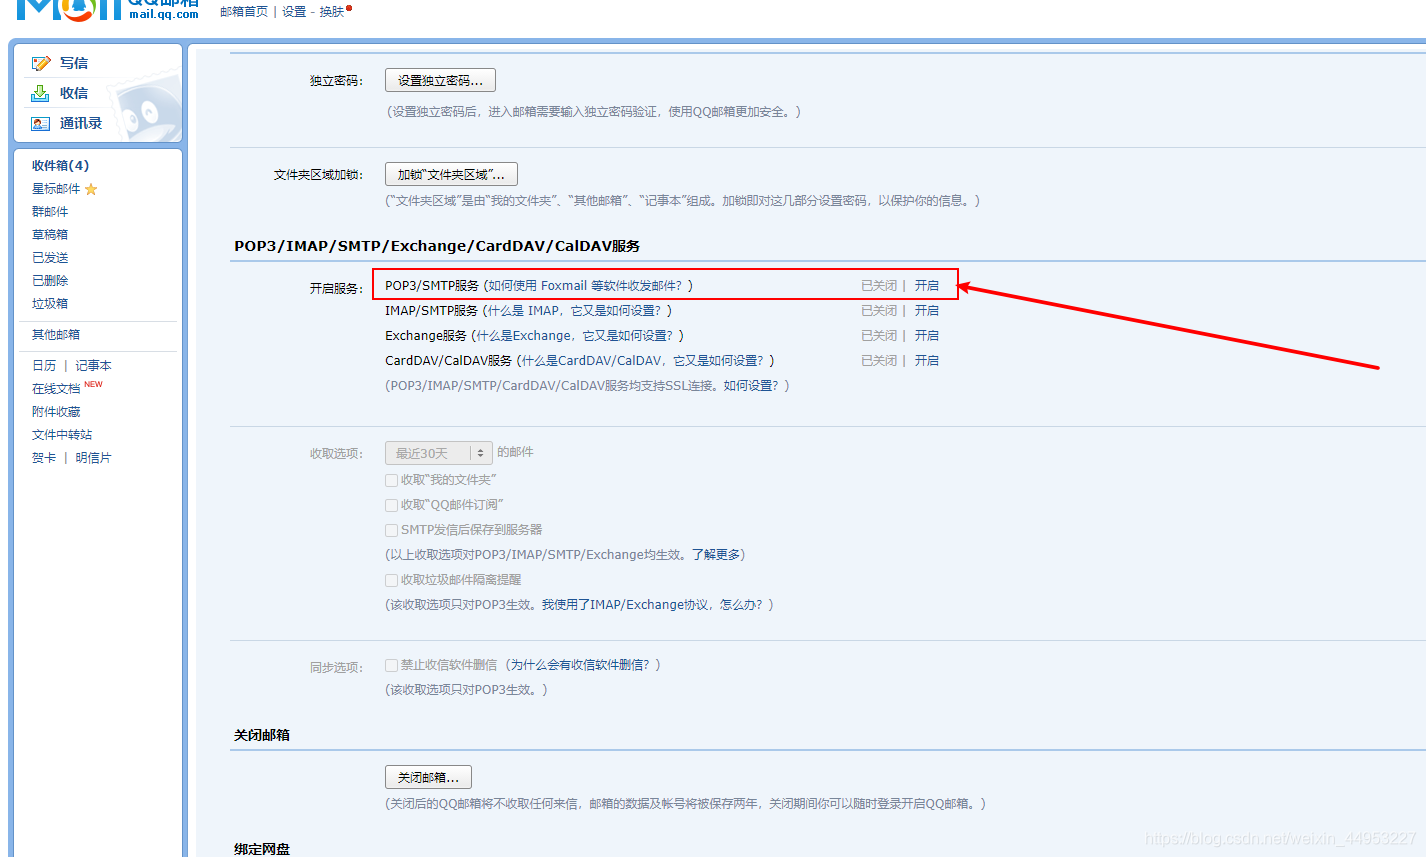
要想实现邮件发送, 需要先打开发送邮箱的 POP3/SMTP 服务,打开方式在 设置>帐户 中去打开,打开之后如果是qq邮箱会获得一个授权码,用授权码登录qq邮箱的服务器。其他邮箱开启方法都类似
使用到的 jar 包
mail.jar:https://repo1.maven.org/maven2/javax/mail/mail/1.4.7/mail-1.4.7.jar
activation.jar:https://repo1.maven.org/maven2/javax/activation/activation/1.1.1/activation-1.1.1.jar
maven 地址:
<!-- https://mvnrepository.com/artifact/javax.mail/mail -->
<dependency>
    <groupId>javax.mail</groupId>
    <artifactId>mail</artifactId>
    <version>1.4.7</version>
</dependency>
<!-- https://mvnrepository.com/artifact/javax.activation/activation -->
<dependency>
    <groupId>javax.activation</groupId>
    <artifactId>activation</artifactId>
    <version>1.1.1</version>
</dependency>
实现代码
package com.pro.email;

import com.sun.mail.util.MailSSLSocketFactory;

import javax.activation.DataHandler;
import javax.activation.FileDataSource;
import javax.mail.*;
import javax.mail.internet.InternetAddress;
import javax.mail.internet.MimeBodyPart;
import javax.mail.internet.MimeMessage;
import javax.mail.internet.MimeMultipart;
import java.util.Properties;

public class MailDemo {
    public static void main(String[] args) throws Exception {
        Properties prop = new Properties();
        prop.setProperty("mail.host", "smtp.qq.com"); // 设置qq邮件服务器
        prop.setProperty("mail.transport.protocol", "smtp"); // 邮件发送协议
        prop.setProperty("mail.smtp.auth", "true"); // 需要验证用户名密码

        // 关于qq邮箱, 还要设置SSL加密
        MailSSLSocketFactory sf = new MailSSLSocketFactory();
        sf.setTrustAllHosts(true);
        prop.put("mail.smtp.ssl.enable", "true");
        prop.put("mail.smtp.ssl.socketFactory", sf);

        // 使用 JavaMail 发送邮件的5个步骤

        // 1. 定义整个应用程序所需要的环境信息的 Session 对象
        // 这一步是qq邮箱才有, 其他邮箱不用
        Session session = Session.getDefaultInstance(prop, new Authenticator() {
            @Override
            public PasswordAuthentication getPasswordAuthentication() {
                // 发件人邮箱 用户名和授权码
                return new PasswordAuthentication("334466@qq.com", "abssktasyncawait");
            }
        });

        // 开启 Session debugger 模式, 可以看到邮件发送的运行状态
        session.setDebug(true);

        // 2. 通过 Session得到 transport 对象
        Transport transport = session.getTransport();

        // 3. 使用邮箱用户名和授权码连上邮件服务器 (登陆)
        transport.connect("smtp.qq.com", "334466@qq.com", "abssktasyncawait");

        // 4. 创建邮件: 写邮件
        MimeMessage message = new MimeMessage(session);

        // 设置邮件的发件人
        message.setFrom(new InternetAddress("334466@qq.com"));

        // 设置邮件的收件人
        message.setRecipient(Message.RecipientType.TO,new InternetAddress("789654123@qq.com"));

        // 邮件标题
        message.setSubject("Java Test邮件");


        // ========= 复杂邮件内容 =========
        // 准备附件数据
        MimeBodyPart fileMime = new MimeBodyPart();
        fileMime.setDataHandler(new DataHandler(new FileDataSource("src/resource/pro.txt")));
        fileMime.setFileName("pro.txt"); // 设置文件名称

        // 准备图片数据
        MimeBodyPart image = new MimeBodyPart();
        // 图片需要经过数据处理,  DataHandler: 数据处理
        DataHandler dh = new DataHandler(new FileDataSource("src/resource/test.jpg"));
        image.setDataHandler(dh); // 把处理的图片数据放到body中
        image.setContentID("test.jpg"); // 给图片设置ID, 后面可以用到
        image.setFileName("test.jpg");

        // 准备正文数据
        MimeBodyPart text = new MimeBodyPart();
        text.setContent("<a href='https://www.tmall.com/' target='_blank'>这是一封正文带图片的邮件 <img src='cid:test.jpg' /></a>", "text/html; charset=UTF-8");

        // 描述数据关系
        MimeMultipart mm = new MimeMultipart();
        mm.addBodyPart(text);
        mm.addBodyPart(image);
        mm.addBodyPart(fileMime);
        mm.setSubType("mixed"); // mixed 最大 支持附件, related 支持图片

        // 把编辑的邮件保存到消息中, 保存更改
        message.setContent(mm);
        message.saveChanges();
        // ========= 复杂邮件内容 =========


        // 5. 发送邮件
        transport.sendMessage(message, message.getAllRecipients());

        // 关闭连接
        transport.close();
    }
}


 被折叠的 条评论
为什么被折叠?
被折叠的 条评论
为什么被折叠?
 到【灌水乐园】发言


