


1.template中的代码
<BasicTable @register="registerTable" :canResize="false">
        <!-- 表格左边的插槽 -->
      <template #tableTitle>
        <div class="btn-group">
          <a-button
            ghost
            type="primary"
            preIcon="ant-design:plus-circle-outlined"
            @click="handleCreate"
            >新增</a-button
          >
          <a-button ghost type="success" preIcon="ant-design:vertical-align-bottom-outlined">
            导入</a-button
          >
          <a-button ghost type="warning" preIcon="ant-design:upload-outlined">导出</a-button>
          <a-button ghost type="danger" preIcon="ant-design:delete-outlined">删除</a-button>
        </div>
      </template>
      <!-- 表格右边的插槽 -->
      <!-- <template #toolbar> </template> -->
      <template #action="{ record }">
        <TableAction
          :actions="[
            {
              label: '详情',
              color: 'success',
              onClick: queryDetails.bind(null, record),
            },
            {
              label: '编辑',
              onClick: handleEdit.bind(null, record),
            },
            {
              label: '删除',
              color: 'error',
              popConfirm: {
                title: '是否删除该数据',
                confirm: handleDelete.bind(null, record),
              },
            },
            {
              label: '生成代码',
              color: 'warning',
              onClick: handleCode.bind(null, record),
            },
          ]"
        />
      </template>
    </BasicTable>
2.script中代码:
const [registerTable, { reload }] = useTable({
        // api: list,  // 请求接口
        columns: columns, // 设置表格的表头
        dataSource: dataSources, //表格的数据
        formConfig: {
            labelWidth: 80,
          schemas: searchFormSchema,
          resetFunc: resetFunc,
        },
        pagination: true,   //展示表格下方的分页
        clickToRowSelect: true, //点击当前行多选框不选中,默认是true
        // striped: false,  //是否斑马纹(隔行变色),默认true
        rowSelection: { type: 'checkbox' },   //是否有多选功能
        useSearchForm: true, // 是否有搜索功能
        // showTableSetting: true,  // 是否有刷新和列设置
        bordered: true, // 是否显示边框
        showIndexColumn: true, // 是否显示序号列
        actionColumn: {
          //   width: 240,
          title: '操作',
          dataIndex: 'action',
          slots: { customRender: 'action' },
        },
      });
效果如下: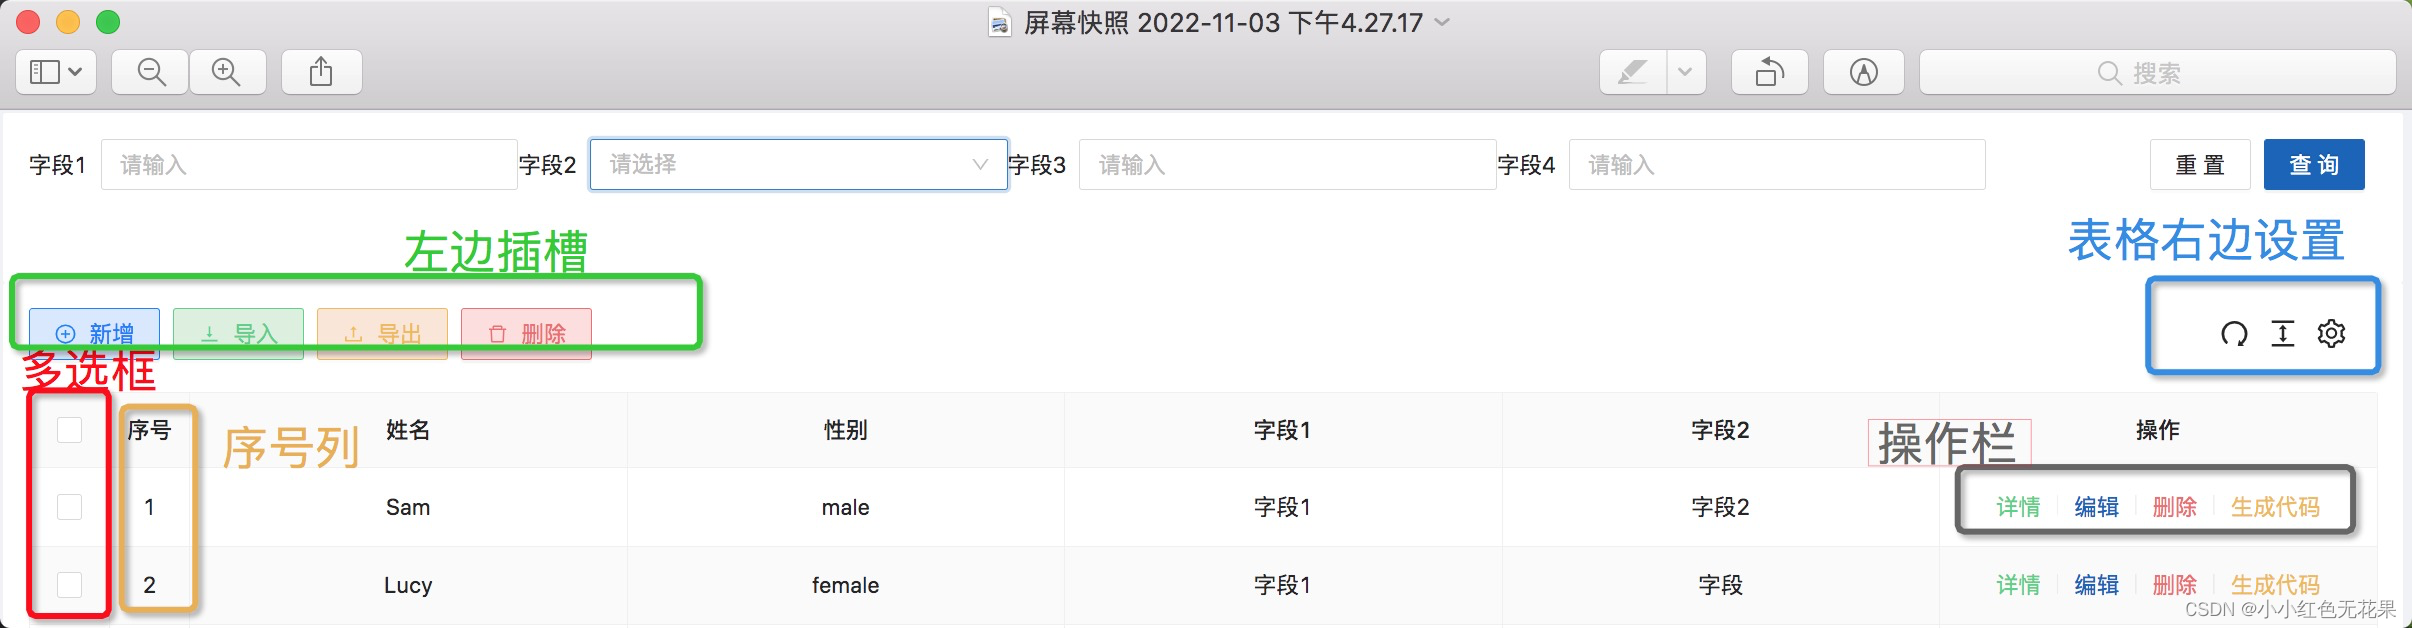
表格右边设置就是刷新和列设置
3.ts中数据格式:
import { BasicColumn } from '/@/components/Table';
import { FormSchema } from '/@/components/Table';
// 表格表头
export const columns: BasicColumn[] = [
{
title: '姓名',
dataIndex: 'name',
// slots: { customRender: 'status' },
},
{
title: '性别',
dataIndex: 'sex',
},
{
title: '字段1',
dataIndex: 'one',
},
{
title: '字段2',
dataIndex: 'two',
},
];
// 搜索框
export const searchFormSchema: FormSchema[] = [
{
field: 'one',
label: '字段1',
component: 'Input',
colProps: { span: 5 },
// componentProps: {
// options: [],
// },
},
{
// 下拉框
field: 'two',
label: '字段2',
component: 'Select',
colProps: { span: 5 },
// 下拉框数据
componentProps: {
options: [
{
label:'aa',
value:'aa',
},
{
label:'bb',
value:'bb',
},
],
},
},
{
field: 'three',
label: '字段3',
component: 'Input',
colProps: { span: 5 },
// componentProps: {
// options: [],
// },
},
{
field: 'four',
label: '字段4',
component: 'Input',
colProps: { span: 5 },
// componentProps: {
// options: [],
// },
},
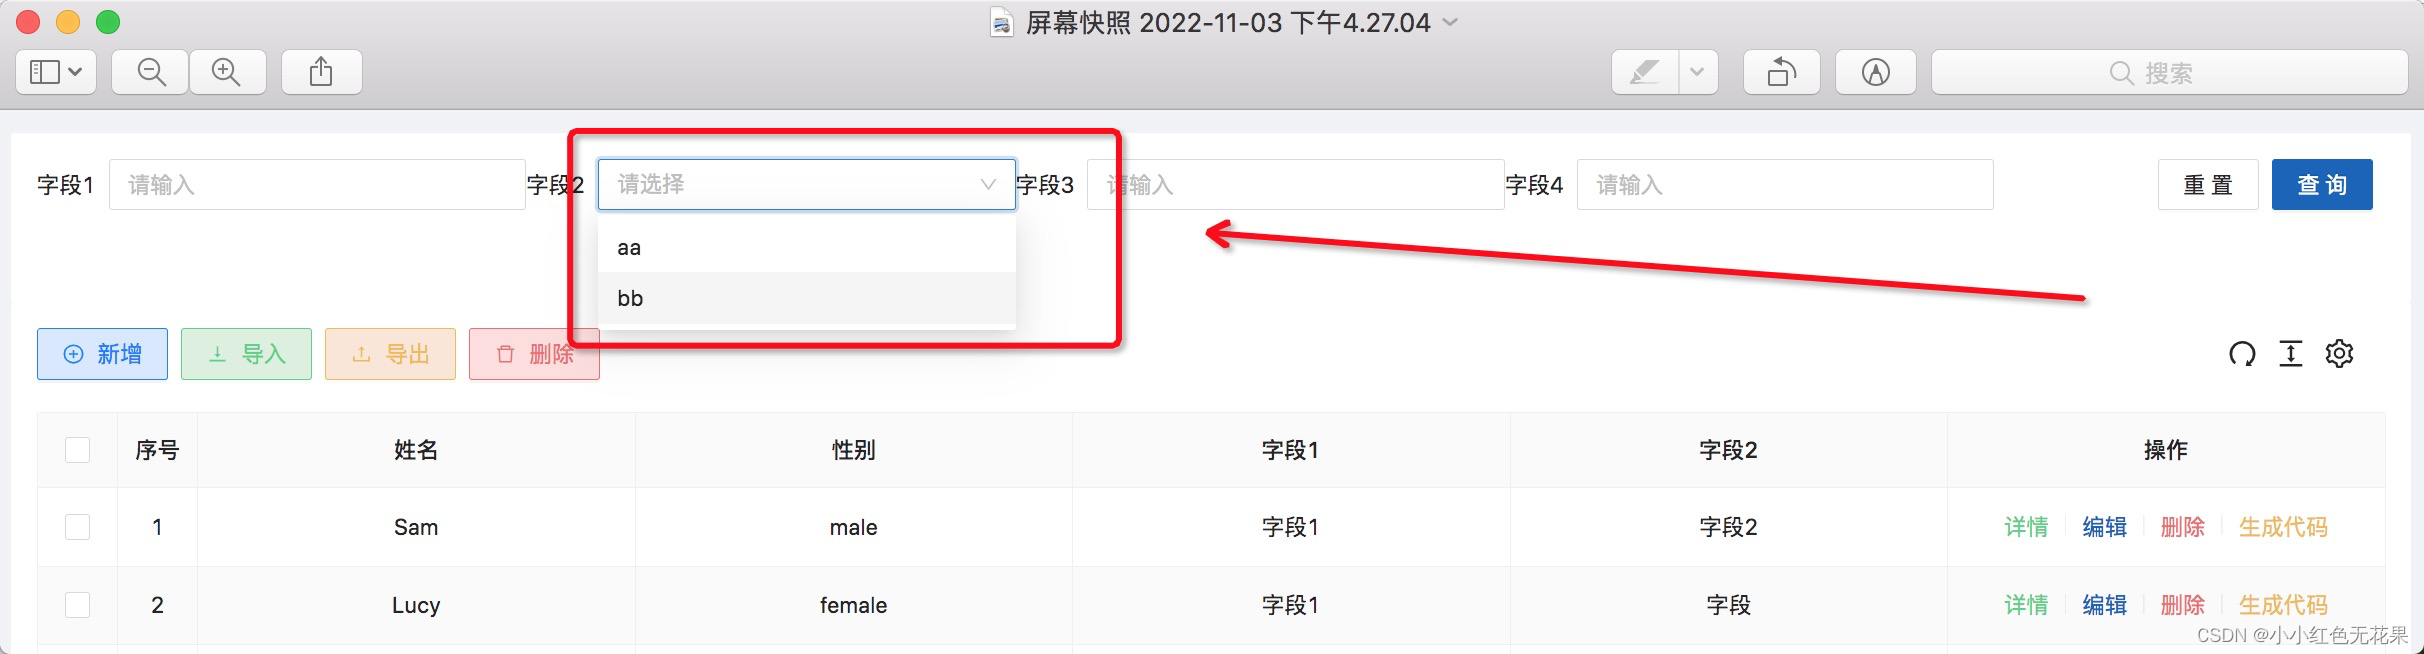
];效果图如下:
clickToRowSelect: true, 表示点击当前行多选框是否选中,默认是true,效果如下:

4.vben中methods写的位置,官方文档是这么写的:
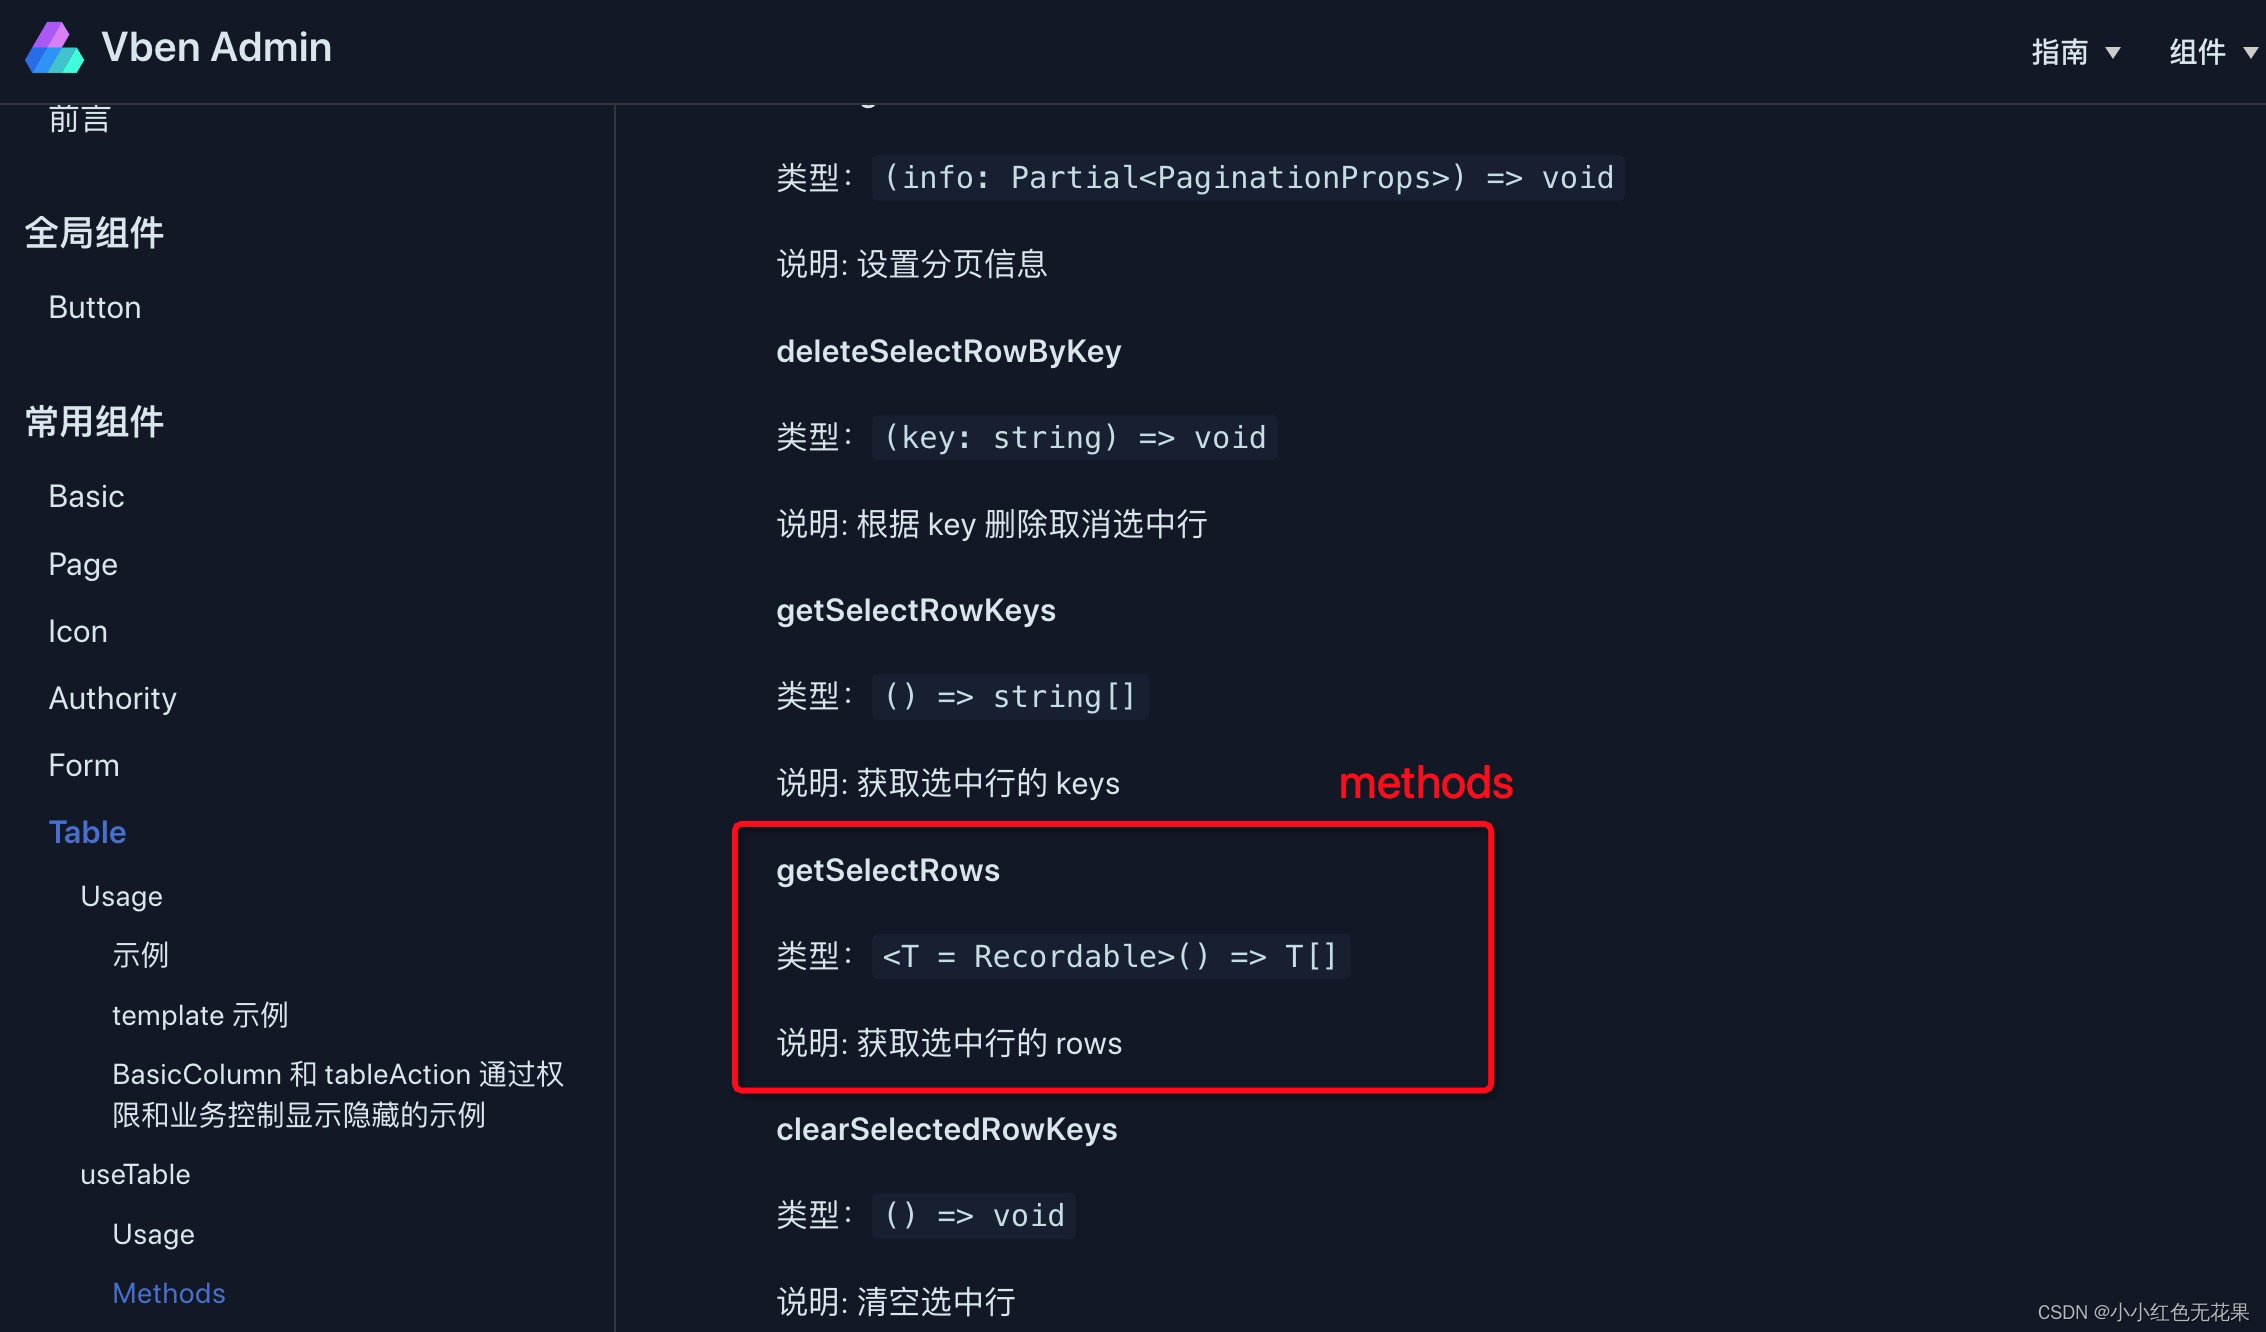
但是在代码中具体是怎么使用呢?
(1)初始化表格的时候methods写在后面那个大括号中,props写在下面
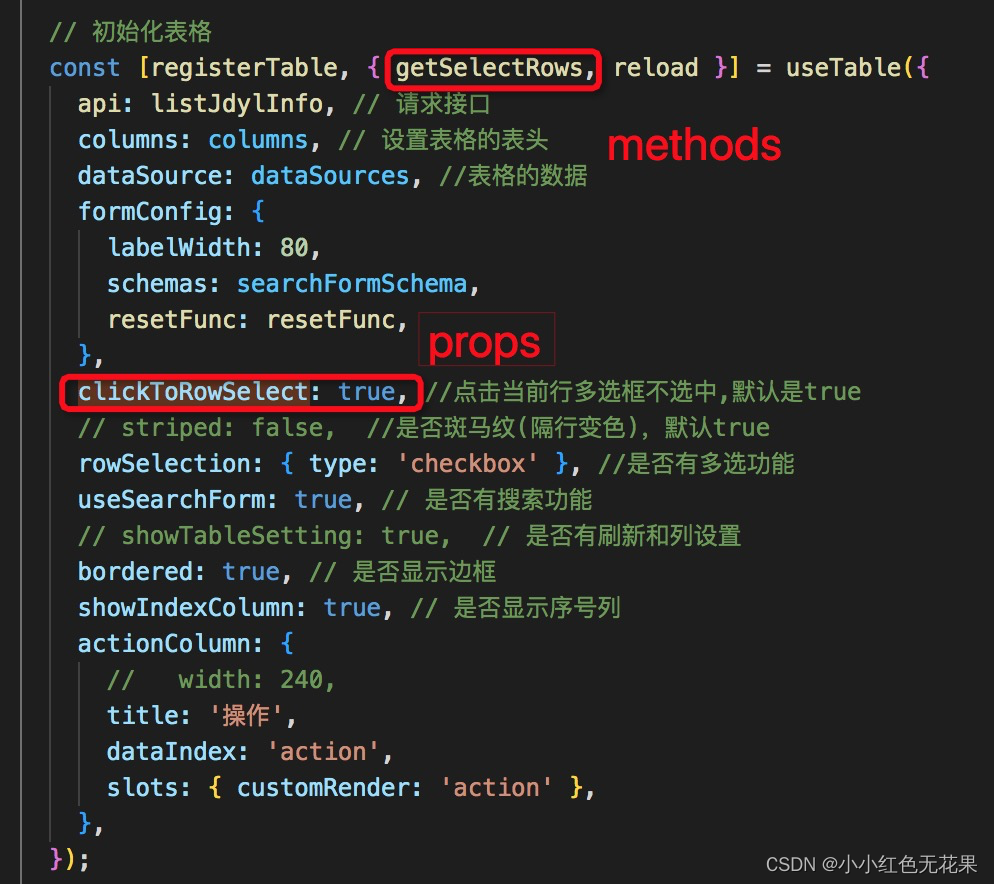
(2)getSelectRows是个函数,调用这个函数就能拿到表格中选中的数据,可以通过forEach变量:

5.表格中自带搜索功能,那个搜索框的插槽名前面要加form,
eg:表单插槽名time,在表格中的写法是
表单插槽
<template #form-time> </template>


 491
491


 被折叠的 条评论
为什么被折叠?
被折叠的 条评论
为什么被折叠?
 到【灌水乐园】发言


