


1、Hystrix集群及监控turbine
上一章的Dashboard演示的仅仅是单机服务监控,实际项目基本都是集群,所以这里集群监控用的是turbine。turbine是基于Dashboard的。
Hystrix集群
首先,先将Hystrix集群,创建一个microservice-student-provider-hystrix项目,将原先microservice-student-provider-hystrix-1004项目中的代码和配置都复制到此项目中,然后修改几个地方
1,yml文件
---
server:
  port: 1004
  context-path: /
spring:
  datasource:
    type: com.alibaba.druid.pool.DruidDataSource
    driver-class-name: com.mysql.jdbc.Driver
    url: jdbc:mysql://localhost:3306/xm?useUnicode=true&characterEncoding=utf8
    username: root
    password: 1234
  jpa:
    hibernate:
      ddl-auto: update
    show-sql: true
  application:
    name: microservice-student
  profiles: provider-hystrix-1004

eureka:
  instance:
    hostname: localhost
    appname: microservice-student
    instance-id: microservice-student:1004
    prefer-ip-address: true
  client:
    service-url:
      defaultZone: http://eureka2001.wr.com:2001/eureka/,http://eureka2002.wr.com:2002/eureka/,http://eureka2003.wr.com:2003/eureka/

info:
  groupId: com.wr.testSpringcloud
  artifactId: microservice-student-provider-hystrix-1004
  version: 1.0-SNAPSHOT
  userName: http://wr.com
  phone: 123456

hystrix:
  command:
    default:
      execution:
        isolation:
          thread:
            timeoutInMilliseconds: 1500

---
server:
  port: 1005
  context-path: /
spring:
  datasource:
    type: com.alibaba.druid.pool.DruidDataSource
    driver-class-name: com.mysql.jdbc.Driver
    url: jdbc:mysql://localhost:3306/xm?useUnicode=true&characterEncoding=utf8
    username: root
    password: 1234
  jpa:
    hibernate:
      ddl-auto: update
    show-sql: true
  application:
    name: microservice-student
  profiles: provider-hystrix-1005

eureka:
  instance:
    hostname: localhost
    appname: microservice-student
    instance-id: microservice-student:1005
    prefer-ip-address: true
  client:
    service-url:
      defaultZone: http://eureka2001.wr.com:2001/eureka/,http://eureka2002.wr.com:2002/eureka/,http://eureka2003.wr.com:2003/eureka/

info:
  groupId: com.wr.testSpringcloud
  artifactId: microservice-student-provider-hystrix-1005
  version: 1.0-SNAPSHOT
  userName: http://wr.com
  phone: 123456

hystrix:
  command:
    default:
      execution:
        isolation:
          thread:
            timeoutInMilliseconds: 1500

---
server:
  port: 1006
  context-path: /
spring:
  datasource:
    type: com.alibaba.druid.pool.DruidDataSource
    driver-class-name: com.mysql.jdbc.Driver
    url: jdbc:mysql://localhost:3306/xm?useUnicode=true&characterEncoding=utf8
    username: root
    password: 1234
  jpa:
    hibernate:
      ddl-auto: update
    show-sql: true
  application:
    name: microservice-student
  profiles: provider-hystrix-1006

eureka:
  instance:
    hostname: localhost
    appname: microservice-student
    instance-id: microservice-student:1006
    prefer-ip-address: true
  client:
    service-url:
      defaultZone: http://eureka2001.wr.com:2001/eureka/,http://eureka2002.wr.com:2002/eureka/,http://eureka2003.wr.com:2003/eureka/

info:
  groupId: com.wr.testSpringcloud
  artifactId: microservice-student-provider-hystrix-1006
  version: 1.0-SNAPSHOT
  userName: http://wr.com
  phone: 123456

hystrix:
  command:
    default:
      execution:
        isolation:
          thread:
            timeoutInMilliseconds: 1500
2、启动类配置
package com.wr.microservicestudentproviderhystrix;

import org.springframework.boot.SpringApplication;
import org.springframework.boot.autoconfigure.SpringBootApplication;
import org.springframework.boot.autoconfigure.domain.EntityScan;
import org.springframework.cloud.client.circuitbreaker.EnableCircuitBreaker;
import org.springframework.cloud.netflix.eureka.EnableEurekaClient;


@EnableCircuitBreaker   //服务熔断
@EntityScan("com.wr.*.*")  //jpa扫描实体类的
@EnableEurekaClient     //eureka注册中心
@SpringBootApplication
public class MicroserviceStudentProviderHystrixApplication {

    public static void main(String[] args) {
        SpringApplication.run(MicroserviceStudentProviderHystrixApplication.class, args);
    }

}
这样就有了hystrix集群了,不过启动这个项目时要先配置一下

Hystrix的监控dturbine
1,首先新建一个microservice-student-consumer-hystrix-turbine-91项目
2,加pom依赖
<dependency>
    <groupId>org.springframework.boot</groupId>
    <artifactId>spring-boot-starter-actuator</artifactId>
</dependency>
<dependency>
    <groupId>org.springframework.cloud</groupId>
    <artifactId>spring-cloud-starter-turbine</artifactId>
</dependency>
3、application.yml
server:
  port: 91
  context-path: /
eureka:
  client:
    service-url:
      defaultZone: http://eureka2001.wr.com:2001/eureka/,http://eureka2002.wr.com:2002/eureka/,http://eureka2003.wr.com:2003/eureka/
turbine:
  app-config: microservice-student   # 指定要监控的应用名称
  clusterNameExpression: "'default'" #表示集群的名字为default
spring:
  application:
    name: turbine
4,给启动类加注解@EnableTurbine
package com.wr.microservicestudentconsumerhystrixturbine91;

import org.springframework.boot.SpringApplication;
import org.springframework.boot.autoconfigure.SpringBootApplication;
import org.springframework.boot.autoconfigure.jdbc.DataSourceAutoConfiguration;
import org.springframework.boot.autoconfigure.orm.jpa.HibernateJpaAutoConfiguration;
import org.springframework.cloud.netflix.turbine.EnableTurbine;

//不使用数据库
@SpringBootApplication(exclude={DataSourceAutoConfiguration.class, HibernateJpaAutoConfiguration.class})
@EnableTurbine
public class MicroserviceStudentConsumerHystrixTurbine91Application {

    public static void main(String[] args) {
        SpringApplication.run(MicroserviceStudentConsumerHystrixTurbine91Application.class, args);
    }

}
最后测试!!
首先先启动三个注册中心,然后启动带hystrix的服务生产者(1004,1005,1006),启动消费者,最后启动dashbord,turbine(要先启动dashbord,再启动turbine)
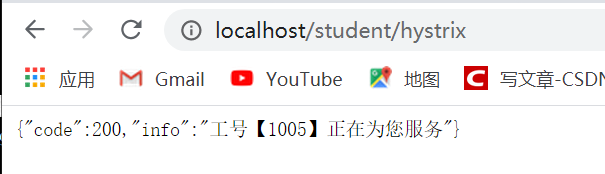
浏览:http://localhost/student/hystrix 就能调用服务集群;
http://localhost:91/turbine.stream 可以监控数据,实时ping 返回data

输入http://localhost:90/hystrix进入仪表盘,输入turbine地址

点击Monitor Stream 进入集群监控仪表:

2、Feign、Hystrix整合之服务熔断服务降级彻底解耦
前面的代码,用@HystrixCommand fallbackMethod是很不好的,因为和业务代码耦合度太高,不利于维护,所以需要解耦,这我们讲下Feign Hystrix整合。
1、microservice-student-provider-hystrix项目修改
StudentService加新的接口方法:
/**
 * 测试Hystrix服务降级
 * @return
 */
public Map<String,Object> hystrix();
StudentServiceImpl写具体实现:
@Value("${server.port}")
private String port;
@Override
public Map<String, Object> hystrix() {
Map<String,Object> map=new HashMap<String,Object>();
map.put("code", 200);
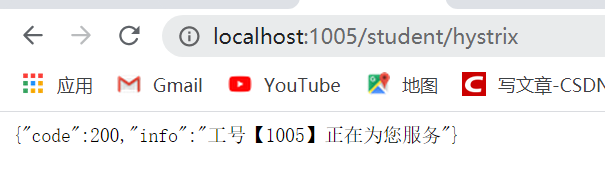
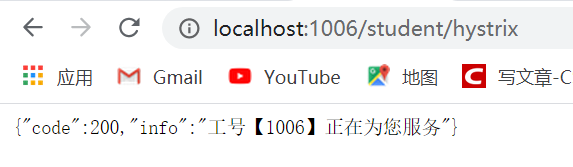
map.put("info","工号【"+port+"】正在为您服务");
return map;
}
StudentProviderController正常调用service方法:
    /**
     * 测试Hystrix服务降级
     * @return
     * @throws InterruptedException
     */
    @ResponseBody
    @GetMapping(value="/hystrix")
//    @HystrixCommand(fallbackMethod="hystrixFallback")
    //如果这个hystrix()方法没有异常以及没有超时(hystrix默认1秒算超时)的情况,才返回正常的业务数据;
    // 如果出现了异常雪崩了,那么就进入我们fallback指定的本地方法hystrixFallback()
    public Map<String,Object> hystrix() throws InterruptedException{
        Thread.sleep(2000);
//        Map<String,Object> map=new HashMap<String,Object>();
//        map.put("code", 200);
//        map.put("info","工号【"+port+"】正在为您服务");
        return studentService.hystrix();
    }

//    public Map<String,Object> hystrixFallback() throws InterruptedException{
//        Map<String,Object> map=new HashMap<String,Object>();
//        map.put("code", 500);
//        map.put("info", "系统【"+port+"】繁忙,稍后重试");
//        return map;
//    }
2、microservice-common项目新建FallbackFactory类,解耦服务熔断服务降级
StudentClientService接口,新增方法;
/**
 * 服务熔断降级
 * @return
 */
@GetMapping(value="/student/hystrix")
public Map<String,Object> hystrix();
新建 StudentClientFallbackFactory 类,实现FallbackFactory<StudentClientService>接口;
package com.wr.microservicecommon.service;

import com.wr.microservicecommon.entity.Student;
import feign.hystrix.FallbackFactory;
import org.springframework.stereotype.Component;

import java.util.HashMap;
import java.util.List;
import java.util.Map;

@Component
public class StudentClientFallbackFactory implements FallbackFactory<StudentClientService> {

    @Override
    public StudentClientService create(Throwable cause) {
        return new StudentClientService() {

            @Override
            public boolean save(Student student) {
                return false;
            }

            @Override
            public List<Student> list() {
                return null;
            }

            @Override
            public Map<String, Object> hystrix() {
                Map<String,Object> map=new HashMap<String,Object>();
                map.put("code", 500);
                map.put("info", "系统繁忙,稍后重试");
                return map;
            }

            @Override
            public Student get(Integer id) {
                return null;
            }

            @Override
            public boolean delete(Integer id) {
                return false;
            }

            @Override
            public String ribbon() {
                return null;
            }
        };
    }

}
StudentClientService接口的@FeignClient注解加下 fallbackFactory属性
@FeignClient(value="MICROSERVICE-STUDENT",fallbackFactory=StudentClientFallbackFactory.class)
就可以实现降级处理方法;
3、microservice-student-consumer-feign-80修改 支持Hystrix
StudentConsumerFeignController新增方法调用
/**
 * Feign整合Hystrix服务熔断降级
 * @return
 * @throws InterruptedException
 */
@GetMapping(value="/hystrix")
public Map<String,Object> hystrix() throws InterruptedException{
    return studentClientService.hystrix();
}
4、microservice-student-consumer-feign-80的application.yml加上hystrix支持
feign:
  hystrix:
    enabled: true
5、microservice-student-consumer-feign-80的启动类上添加公共模块
@ComponentScan(basePackages = {“com.wr.microservicecommon”,“com.wr.microservicestudentconsumerfeign80”})
package com.wr.microservicestudentconsumerfeign80;

import org.springframework.boot.SpringApplication;
import org.springframework.boot.autoconfigure.SpringBootApplication;
import org.springframework.boot.autoconfigure.jdbc.DataSourceAutoConfiguration;
import org.springframework.boot.autoconfigure.orm.jpa.HibernateJpaAutoConfiguration;
import org.springframework.cloud.netflix.eureka.EnableEurekaClient;
import org.springframework.cloud.netflix.feign.EnableFeignClients;
import org.springframework.context.annotation.ComponentScan;

@EnableEurekaClient
@EnableFeignClients(value = "com.wr.*.*")
//扫描公共模块
@ComponentScan(basePackages = {"com.wr.microservicecommon","com.wr.microservicestudentconsumerfeign80"})
@SpringBootApplication(exclude={DataSourceAutoConfiguration.class, HibernateJpaAutoConfiguration.class})
public class MicroserviceStudentConsumerFeign80Application {

    public static void main(String[] args) {
        SpringApplication.run(MicroserviceStudentConsumerFeign80Application.class, args);
    }

}
测试开启三个eureka,以及带hystrix的provider(1004,1005,1006),和带feign,hystrix的consummer。
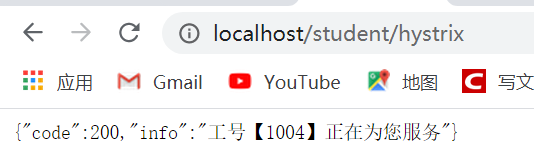
浏览器输入:http://localhost/student/hystrix
睡眠时间为3s

yml文件的服务雪崩临界值为1.1s

1004:服务熔断
当1005,1006的睡眠时间为0.3s时
可以成功访问
但是当1004的睡眠时间为300ms,而1005,1006的睡眠时间为3000ms,yml文件的服务临界值都为1500ms时
1004成功,为正常现象
1005,1006也成功,说明该现象不正常,此时他们应该服务熔断


这是为什么呢???
3、集群后超时设置
上面错误是什么原因呢,咱们明明在Hystrix中的application.yml中设置了
hystrix:
  command:
    default:
      execution:
        isolation:
          thread:
            timeoutInMilliseconds: 1500
这里因为还有一个 feign 也有一个超时时间的设置,当然feign底层是 ribbon的封装,所以 直接配置ribbon,ribbon默认超时也是1秒。
所以这里都是强制要求,ribbon的超时时间要大于hystrix的超时时间,否则 hystrix自定义的超时时间毫无意义。
所以还得在microservice-student-consumer-feign-80上加个 ribbon超时时间设置
ribbon:
  ReadTimeout: 10000
  ConnectTimeout: 9000

hystrix:
  command:
    default:
      execution:
        isolation:
          thread:
            timeoutInMilliseconds: 1500
这样就完工了。
1004成功,1005,1006应该服务熔断


 220
220


 被折叠的 条评论
为什么被折叠?
被折叠的 条评论
为什么被折叠?
 到【灌水乐园】发言


