


SpringBoot整合FastDFS上传下载+文件转存方案
背景
公司内部有一台FastDFS文件服务器,由于有多个项目上传图片文件时都是上传到了一个服务器中,导致最近出现问题:上传文件时有时成功有时失败给用户体验很不好,公司决定重新整一台FastDFS文件服务器,只允许3个相似的项目上传图片到这里,由于项目文件数据量不是非常大(目前最大的项目中只存图片3000左右),集群就不需要了,storage服务器也只要一台,然后配置多路径存储一下即可。
思路
第一想法:由于原来那些数据库中上传文件时,存储了文件的路径信息,现在只是服务器的ip变了,直接在新的FastDFS中和原先那台把配置搞的一模一样,然后程序中把ip改一下不就OK了。
于是花时间在自己的虚拟机上搞了个FastDFS文件服务器,准备试试。
但是突然被告知,原先那个文件服务器中只有两个存储路径,好几个项目的图片文件都放入到这两个路径里了,如果全部拷贝过来,肯定是不合适的。oh~谢!
第二想法:如果不能直接拷贝,那么只能用最笨的方法了。先从数据库中找到原先那台文件服务器的存储路径,从原先的服务器上把文件下载下来,然后重新上传到新FastDFS文件服务器上(并且是包含缩略图的),然后把存储路径重新给修改一下。┐(゚~゚)┌,没法,目前只能这么搞额。
开干
想法图
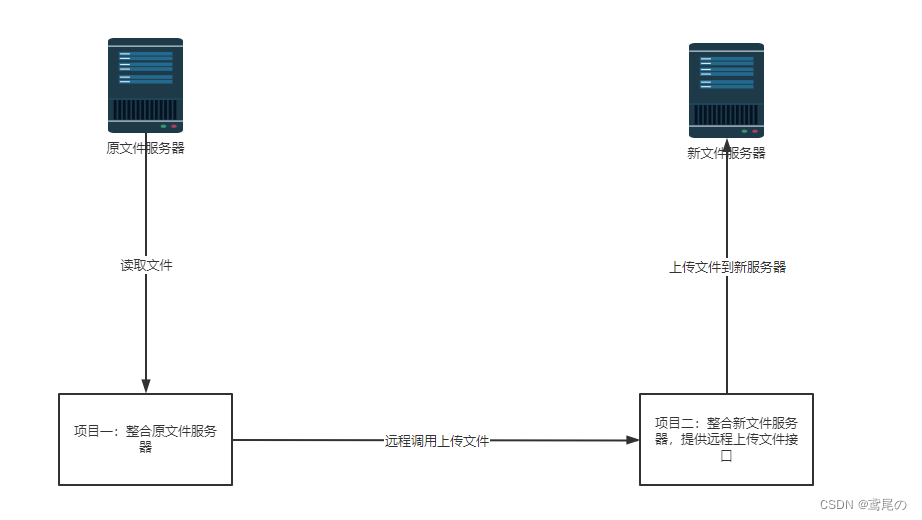
搞了两个项目,项目一整合原FastDFS服务器读取文件,然后项目二整合新FastDFS服务器上传文件,并且给项目一提供一个上传的接口。
几千个文件上传下载,为了合理利用CPU资源,单线程肯定是玩不了的。
思考:本需求其实就是IO文件上传下载这样的,属于是IO密集型任务,不用多想肯定要使用多线程的。方便协调和管理,使用线程池来实现。
得是多线程且为了方便,配置多数据源(共3个项目要上传到新文件服务器)进行整合更改。
开始之前肯定要先把新的FastDFS文件服务器安装部署好,看下我这边文章linux下载安装搭建、卸载FastDfs文件服务器、配置多存储路径(轮询、最大内存选择)、nginx反向代理实现图片预览、常用命令
项目一
引入依赖
<parent>
    <groupId>org.springframework.boot</groupId>
    <artifactId>spring-boot-starter-parent</artifactId>
    <version>2.5.12</version>
</parent>

<properties>
    <java.version>1.8</java.version>
</properties>


<dependencies>
    <dependency>
        <groupId>org.projectlombok</groupId>
        <artifactId>lombok</artifactId>
        <version>1.18.20</version>
    </dependency>

    <dependency>
        <groupId>com.baomidou</groupId>
        <artifactId>dynamic-datasource-spring-boot-starter</artifactId>
        <version>3.5.0</version>
    </dependency>

    <!--整合fastdfs-->
    <dependency>
        <groupId>com.github.tobato</groupId>
        <artifactId>fastdfs-client</artifactId>
        <version>1.27.2</version>
    </dependency>

    <dependency>
        <groupId>org.springframework.boot</groupId>
        <artifactId>spring-boot-starter-web</artifactId>
    </dependency>

    <dependency>
        <groupId>mysql</groupId>
        <artifactId>mysql-connector-java</artifactId>
    </dependency>

    <dependency>
        <groupId>com.baomidou</groupId>
        <artifactId>mybatis-plus-boot-starter</artifactId>
        <version>3.1.0</version>
    </dependency>

    <dependency>
        <groupId>cn.hutool</groupId>
        <artifactId>hutool-all</artifactId>
        <version>5.6.6</version>
    </dependency>

    <dependency>
        <groupId>com.alibaba</groupId>
        <artifactId>fastjson</artifactId>
        <version>1.2.78</version>
    </dependency>
    <dependency>
        <groupId>com.alibaba</groupId>
        <artifactId>druid-spring-boot-starter</artifactId>
        <version>1.1.14</version>
    </dependency>
</dependencies>
application.yml配置文件
spring:
  application:
    name: @artifactId@
  datasource:
    dynamic:
      # 设置默认的数据源或者数据源组
      primary: lubei
      # 严格匹配数据源,默认false.true未匹配到指定数据源时抛异常,false使用默认数据源
      strict: false
      datasource:
        lubei:
          url: jdbc:mysql://xxx:3306/beer?characterEncoding=utf8&useSSL=false
          driver-class-name: com.mysql.cj.jdbc.Driver
          username: xxx
          password: xxx
        qianan:
          url: jdbc:mysql://xxx:3306/db_qianan?characterEncoding=utf8&useSSL=false
          driver-class-name: com.mysql.cj.jdbc.Driver
          username: xxx
          password: xxx
        mine:
          url: jdbc:mysql://localhost:3306/dispatcher?characterEncoding=utf8&useSSL=false
          driver-class-name: com.mysql.cj.jdbc.Driver
          username: root
          password: 134520

server:
  port: 8080

mybatis-plus:
  configuration:
    map-underscore-to-camel-case: true
  #    log-impl: org.apache.ibatis.logging.stdout.StdOutImpl
  type-aliases-package: com.wlh.fdfs.entity.mybatis
  mapper-locations: classpath:/mapper/*.xml

fdfs:
  pool:
    max-total: 200   # 连接池最大数量
    max-total-per-key: 50  # 单个tracker最大连接数
    max-wait-millis: 5000 # 连接耗尽最大等待时间 毫秒
  so-timeout: 15011
  connect-timeout: 6011
  thumb-image:	# 缩略图大小
    width: 150
    height: 150
  tracker-list:
  - FastDFS服务器地址:22122
@RestController
@RequestMapping("/dfs")
public class DfsDocumentController {

    @Autowired
    @Qualifier("mine")
    private DfsDocumentServiceBase mine;

    // 文件转存
    @PostMapping("/mine/dt")
    public R mineDT() {
        return mine.dt();
    }

}
接口
public interface DfsDocumentServiceBase {

    // 查询所有 文件
    List listAllDocs();
	// 文件转存
    R dt();
}
实现(只展示一个数据源的)
@Service("mine")
@DS("mine") // 使用mine的数据源
@Transactional
@Slf4j
public class MineDfsDocumentServiceImpl extends ServiceImpl<DfsDocumentMapper, DfsDocumentEntity> implements IService<DfsDocumentEntity>, DfsDocumentServiceBase {

    @Autowired
    private DfsImgHandler handler;

    @Override
    public List<DfsDocumentEntity> listAllDocs() {
        log.info("开始查询本地数据库");
        LambdaQueryWrapper<DfsDocumentEntity> wrapper = Wrappers.<DfsDocumentEntity>lambdaQuery()
                .eq(DfsDocumentEntity::getStatus, 0)
                .eq(DfsDocumentEntity::getVolume, "flowerStorageGro");
        return list(wrapper);
    }

    @Override
    public R dt() {
        List<DfsDocumentEntity> imgs = listAllDocs();
        if (CollectionUtils.isEmpty(imgs)) {
            return R.buildSuccess("图片已经全部转存完毕");
        }
        log.info("开始处理--下载图片--上传到目标服务器");
        handler.handlerImg(imgs);
        return R.buildSuccess("正在转存处理所有图片...loading...");
    }
}
DfsImgHandler.java处理类
当文件数量较多时,直接分为10个segment(片段),并且开10个线程来处理。
@Service
@Slf4j
public class DfsImgHandler {
    private final int segment = 10;

    @Autowired
    private ExecutorService executorService;

    @Autowired
    DefaultFastFileStorageClient client;

    public void handlerImg(List<DfsDocumentEntity> imgs) {
        if (CollectionUtils.isEmpty(imgs)) {
            return;
        }
        // 如果 数量多大,那么分段多线程处理
        if (imgs.size() >= 100) {
            log.info("图片数量过多--多线程处理");
            List<List<DfsDocumentEntity>> lists = averageAssign(imgs, segment);
            List<DfsDocumentEntity> sub1 = lists.get(0);
            List<DfsDocumentEntity> sub2 = lists.get(1);
            List<DfsDocumentEntity> sub3 = lists.get(2);
            List<DfsDocumentEntity> sub4 = lists.get(3);
            List<DfsDocumentEntity> sub5 = lists.get(4);
            List<DfsDocumentEntity> sub6 = lists.get(5);
            List<DfsDocumentEntity> sub7 = lists.get(6);
            List<DfsDocumentEntity> sub8 = lists.get(7);
            List<DfsDocumentEntity> sub9 = lists.get(8);
            List<DfsDocumentEntity> sub10 = lists.get(9);

            // segment1
            executorService.execute(() -> hl(sub1, "sub1"));
            // segment2
            executorService.execute(() -> hl(sub2, "sub2"));
            // segment3
            executorService.execute(() -> hl(sub3, "sub3"));
            // segment4
            executorService.execute(() -> hl(sub4, "sub4"));
            // segment5
            executorService.execute(() -> hl(sub5, "sub5"));
            // segment6
            executorService.execute(() -> hl(sub6, "sub6"));
            // segment7
            executorService.execute(() -> hl(sub7, "sub7"));
            // segment8
            executorService.execute(() -> hl(sub8, "sub8"));
            // segment9
            executorService.execute(() -> hl(sub9, "sub9"));
            // segment10
            executorService.execute(() -> hl(sub10, "sub10"));
            // 创建10个线程处理,然后返回即可。
            return;
        }
        // 数量不大,单线程处理即可
        log.info("图片数量过少--单线程处理");
        hl(imgs, "单线程集合");
        return;
    }

    // 一个list分割成几等分list
    public static <T> List<List<T>> averageAssign(List<T> source, int n) {
        List<List<T>> result = new ArrayList<>();
        log.info("imgs集合中总数量{}", source.size());
        int remainder = source.size() % n;
        int number = source.size() / n;
        int offset = 0;
        for (int i = 0; i < n; i++) {
            List<T> value = null;
            if (remainder > 0) {
                value = source.subList(i * number + offset, (i + 1) * number + offset + 1);
                remainder--;
                offset++;
            } else {
                value = source.subList(i * number + offset, (i + 1) * number + offset);
            }
            log.info("第{}段的imgs集合数量有{}个", i, value.size());
            result.add(value);
        }
        return result;
    }

    // dfs下载文件
    public byte[] downloadFile(DfsDocumentEntity entity, Boolean thumb) {
        byte[] bytes = null;
        if (entity != null) {
            DownloadByteArray callback = new DownloadByteArray();
            if (entity.getThumbImagePath() != null && !entity.getThumbImagePath().equals("") && thumb) {
                bytes = this.client.downloadFile(entity.getVolume(), entity.getThumbImagePath(), callback);
            } else {
                bytes = this.client.downloadFile(entity.getVolume(), entity.getPath(), callback);
            }
        }
        return bytes;
    }

    // 具体处理逻辑
    public void hl(List<DfsDocumentEntity> list, String segmentName) {
        for (DfsDocumentEntity entity : list) {
            log.info("{}中图片id:{}在开始处理", segmentName, entity.getEntityId());

            // 下载文件,返回文件的字节数组
            byte[] bytes = downloadFile(entity, false);
            // 远程调用上传文件
            Map<String, Object> map = new HashMap<>();
            map.put("bytes", bytes);
            map.put("document", entity);
            // 处理上传文件,无返回值
            HttpUtil.post("http://127.0.0.1:8081/dfs/mine/up", JSON.toJSONString(map));
        }
    }
}
线程池配置,直接使用的 Executors的newFixedThreadPool线程池,注意这种线程池是有弊端的,如果阻塞队列(任务队列)数量太过于庞大了,会导致OOM的,当然我这里涉及不到这个问题,只有10个任务。
以后写线程池配置最好直接使用 ThreadPoolTaskExecutor,自己根据任务数量及需求配置一款适合自己的线程池。
@Configuration
public class ThreadPoolConfig {
    @Bean
    public ExecutorService getThreadPool(){
        return Executors.newFixedThreadPool(10);
    }
}
项目二
依赖和项目一,一致即可。
提供一个上传接口
@RestController
@RequestMapping("/dfs")
public class DfsDocumentController {

    @Autowired
    @Qualifier("mine")
    private DfsDocumentServiceBase mine;

    @PostMapping("/mine/up")
    public void mineUp(@RequestBody FileByteDTO dto) {
        mine.up(dto);
    }
}
DfsDocumentServiceBase.java接口
public interface DfsDocumentServiceBase {

    // 查询所有 文件
    List listAllDocs();

    // 接收到文件,写入数据库
    void up(FileByteDTO dto);
}
线程池配置,由于调用的时候使用了10个线程调用,处理的时候也设置一下配合线程池完成。
5个核心线程,5个额外线程,阻塞队列数量2000,完全够用。
@Configuration	// 配置类
@EnableAsync	// 启用一下异步任务
public class ThreadPoolConfig {
    @Bean("taskExecutor")
    public Executor asyncExecutor() {
        ThreadPoolTaskExecutor executor = new ThreadPoolTaskExecutor();
        // 核心线程数5:线程池创建时候初始化的线程数
        executor.setCorePoolSize(5);
        // 最大线程数10:线程池最大的线程数,只有在缓冲队列满了之后才会申请超过核心线程数的线程
        executor.setMaxPoolSize(10);
        // 缓冲队列2000:用来缓冲执行任务的队列
        executor.setQueueCapacity(2000);
        // 允许线程的空闲时间60秒:当超过了核心线程出之外的线程在空闲时间到达之后会被销毁
        executor.setKeepAliveSeconds(60);
        // 线程池名的前缀:设置好了之后可以方便我们定位处理任务所在的线程池
        executor.setThreadNamePrefix("executorThread-");
        // 拒绝策略
        executor.setRejectedExecutionHandler(new ThreadPoolExecutor.CallerRunsPolicy());
        // 初始化
        executor.initialize();
        return executor;
    }
}
实现,只展示一个数据源的,其他数据源的代码基本一致。
@Service("mine")
@DS("mine")
@Transactional
@Slf4j
public class MineDfsDocumentServiceImpl extends ServiceImpl<DfsDocumentMapper, DfsDocumentEntity> implements IService<DfsDocumentEntity>, DfsDocumentServiceBase {
    @Autowired
    private DefaultFastFileStorageClient client;

    @Override
    public List<DfsDocumentEntity> listAllDocs() {
        log.info("开始查询本地数据库");
        LambdaQueryWrapper<DfsDocumentEntity> wrapper = Wrappers.<DfsDocumentEntity>lambdaQuery()
                .eq(DfsDocumentEntity::getStatus, 0);
        return list(wrapper);
    }

    @Override
    @Async("taskExecutor")
    public void up(FileByteDTO dto) {
        log.info("接收到数据id为{},byte数组大小是{}", i, dto.getDocument().getEntityId(), dto.getBytes().length);
        DfsDocumentEntity document = dto.getDocument();

        // 使用ByteArrayInputStream内存流,可以快速读取字节数组
        try (ByteArrayInputStream is = new ByteArrayInputStream(dto.getBytes())){
            // FastImageFile专门处理图片类文件,new ThumbImage()可以不写,不写的话不会生成缩略图
            FastImageFile fastImageFile = new FastImageFile(is, dto.getBytes().length, FileUtil.getFileLastName(document.getFullPath()), new HashSet<>(), new ThumbImage());
            StorePath storePath = this.client.uploadImage(fastImageFile);
            Date date = new Date();
            document.setCreateTime(date);
            document.setVolume(storePath.getGroup());
            document.setPath(storePath.getPath());
            document.setFullPath(storePath.getFullPath());
           // 如果FastImageFile构造中使用了 new ThumbImage(),它会自动生成一个缩略图
            document.setThumbImagePath(fastImageFile.getThumbImagePath(storePath.getPath()));

            // 修改图片存储路径
            this.updateById(document);
        } catch (Exception e) {
            log.error("上传文件出现错误,文件id是{}", document.getEntityId());
        }
    }
}
FileUtil
public class FileUtil {

    public static String getFileLastName(String fileName) {
        int i = fileName.lastIndexOf('.');
        return fileName.substring(i + 1);
    }
}
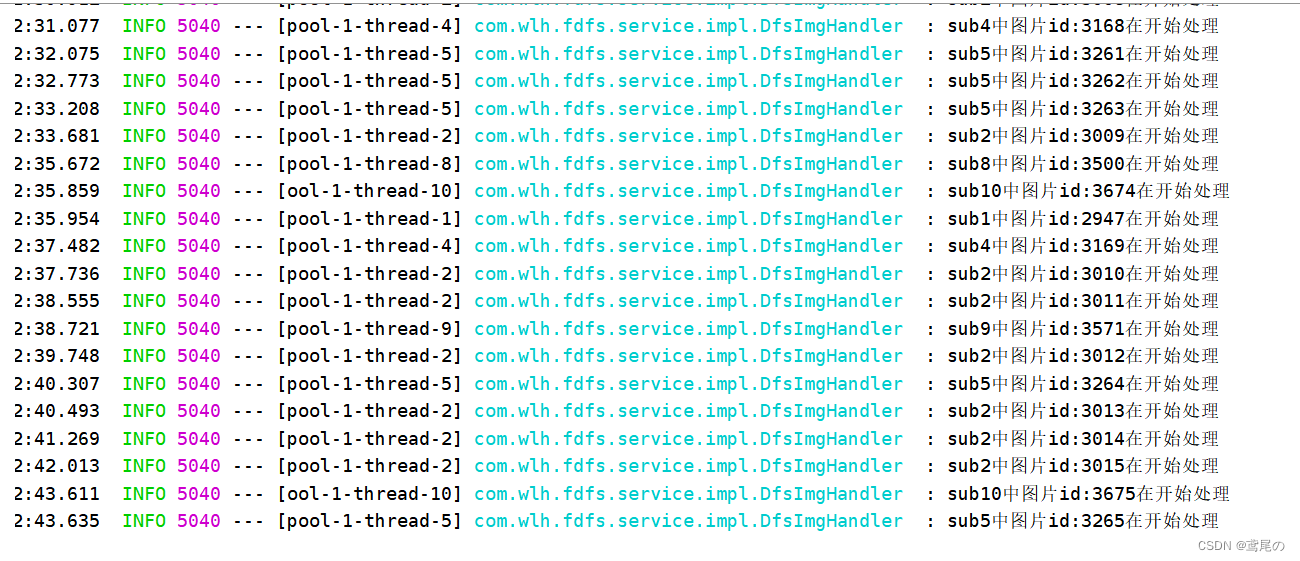
项目一从旧服务器下载文件
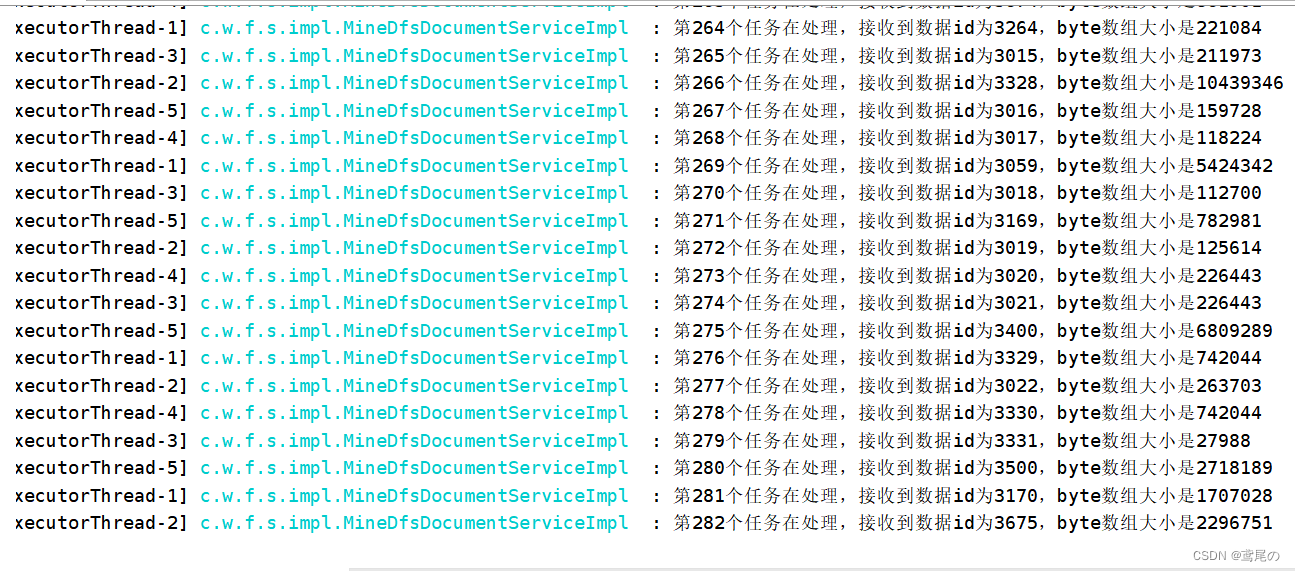
项目二上传图片文件到新服务器
顺利将文件路径存储到数据库中
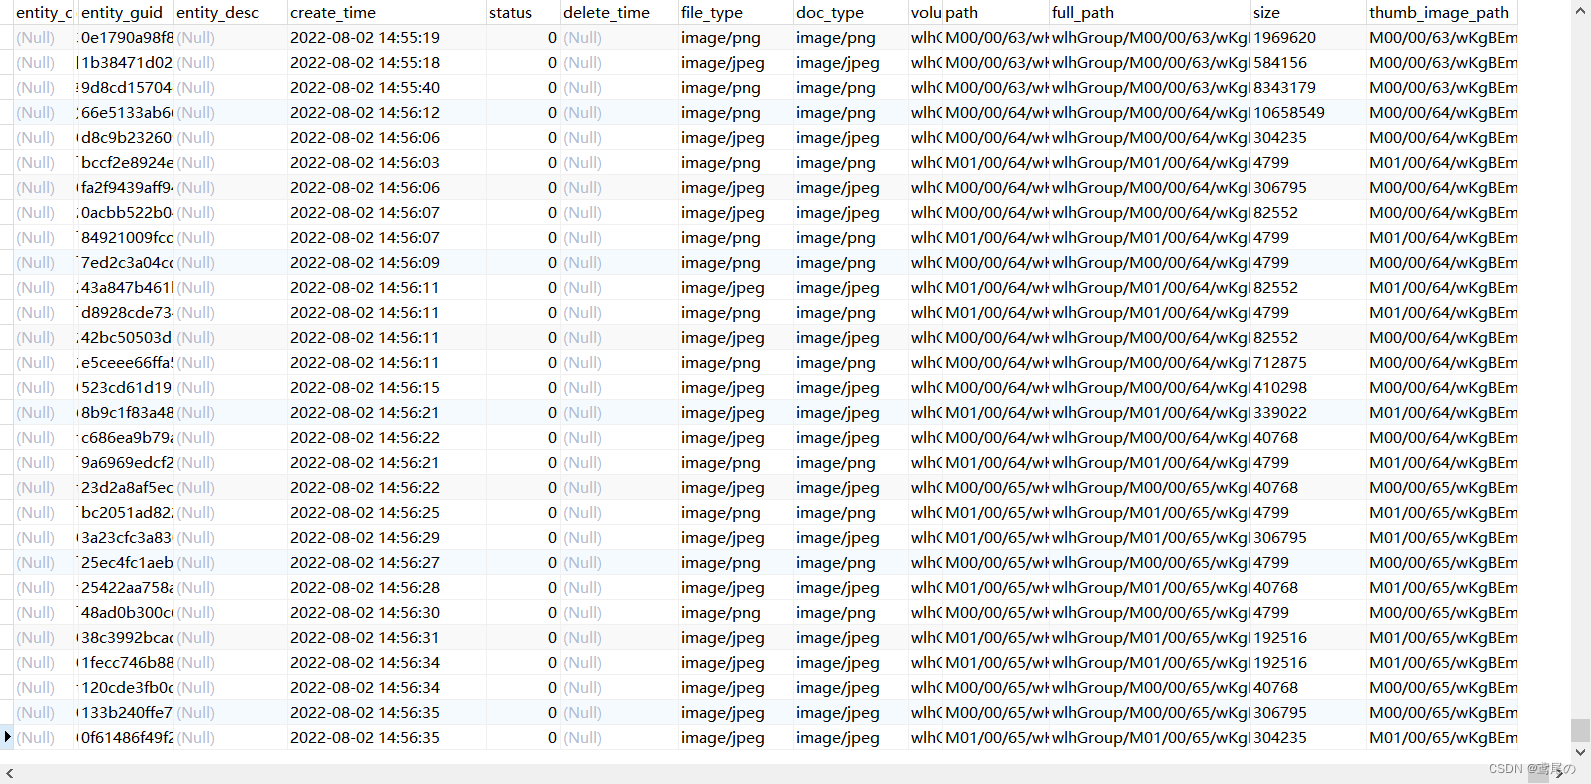
随便访问一个看看。
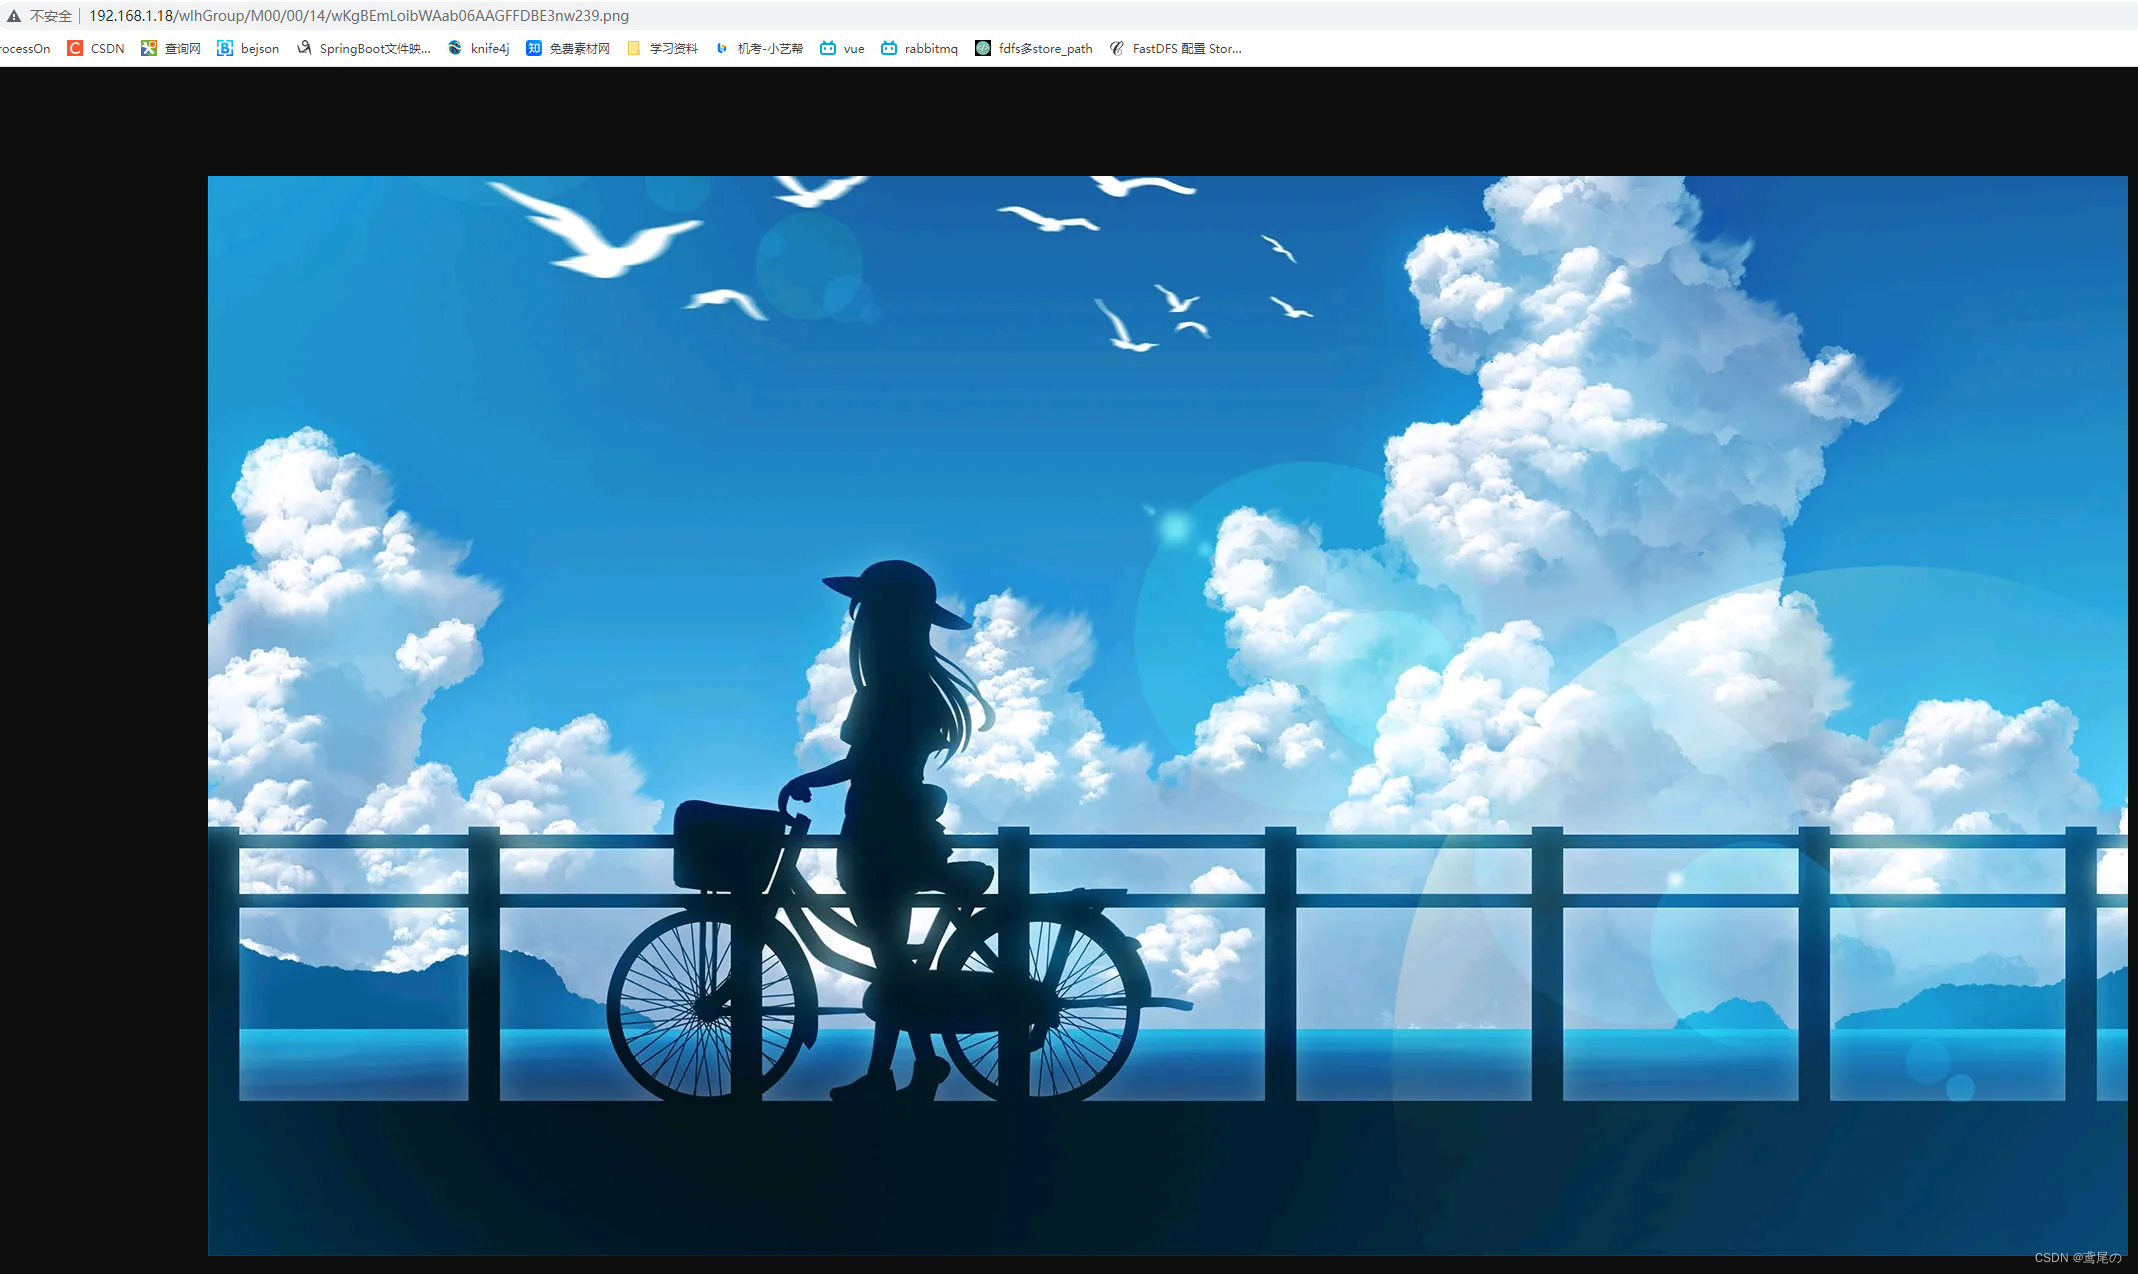
没问题。正常访问到。
虽然能正常完成了,但是几千个文件上传下载用了大概30多分钟,这还是在本地测试的,如果线上很可能出现别的问题(带宽,jvm内存、磁盘内存等)。而且时间太久了,感觉线程池的配置还是不太合理,如果有大佬懂线程池的,希望不吝赐教,多谢!
最后再提供个上传其他类型文件的例子
接口
@RequestMapping(value = "/inputFile", method = RequestMethod.POST)
public JsonResult inputFile(HttpServletRequest request, DfsDocumentEntity entity) throws Exception {
    // 此种方式,前端直接表单方式提交即可,名称是 upload 的文件
    Part part = request.getPart("upload");
    if (part == null) {
        return JsonResult.failure("文件找不到!");
    }
    this.service.inputFile(entity, part);
    return JsonResult.success(entity.getEntityGuid());
}
实现
@Override
public void inputFile(DfsDocumentEntity entity, Part part) {
    try {
        FastFile file = new FastFile(part.getInputStream(), part.getSize(), FileUtil.getFileLastName(part.getSubmittedFileName()), new HashSet<>());

        // 上传文件,返回 StorePath
        StorePath storePath = this.client.uploadFile(file);

        // 设置要存入库的一些属性
        entity.setEntityTitle(URLDecoder.decode(part.getSubmittedFileName(), "UTF-8"));
        entity.setCreateTime(new Date());
        entity.setEntityGuid(StringHelper.generateGUID());
        entity.setFileType(part.getContentType());
        entity.setDocType(part.getContentType());
        entity.setVolume(storePath.getGroup());
        entity.setPath(storePath.getPath());
        entity.setFullPath(storePath.getFullPath());
        entity.setSize(String.valueOf(part.getSize()));
        this.save(entity);
    } catch (IOException e) {
    }
}


 2827
2827


 被折叠的 条评论
为什么被折叠?
被折叠的 条评论
为什么被折叠?
 到【灌水乐园】发言


