


从0搭建属于自己的vitepress网站
1.安装
1.1新建空文件夹,cmd打开控制台,初始化项目
pnpm init
1.2安装vitepress
pnpm add vitepress
1.3使用vitepress指令快速搭建项目
pnpm vitepress init
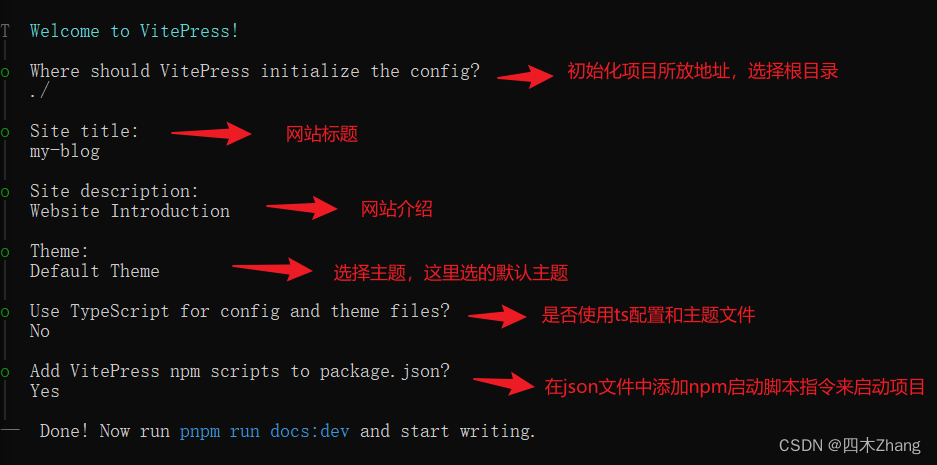
执行pnpm run docs:dev启动项目
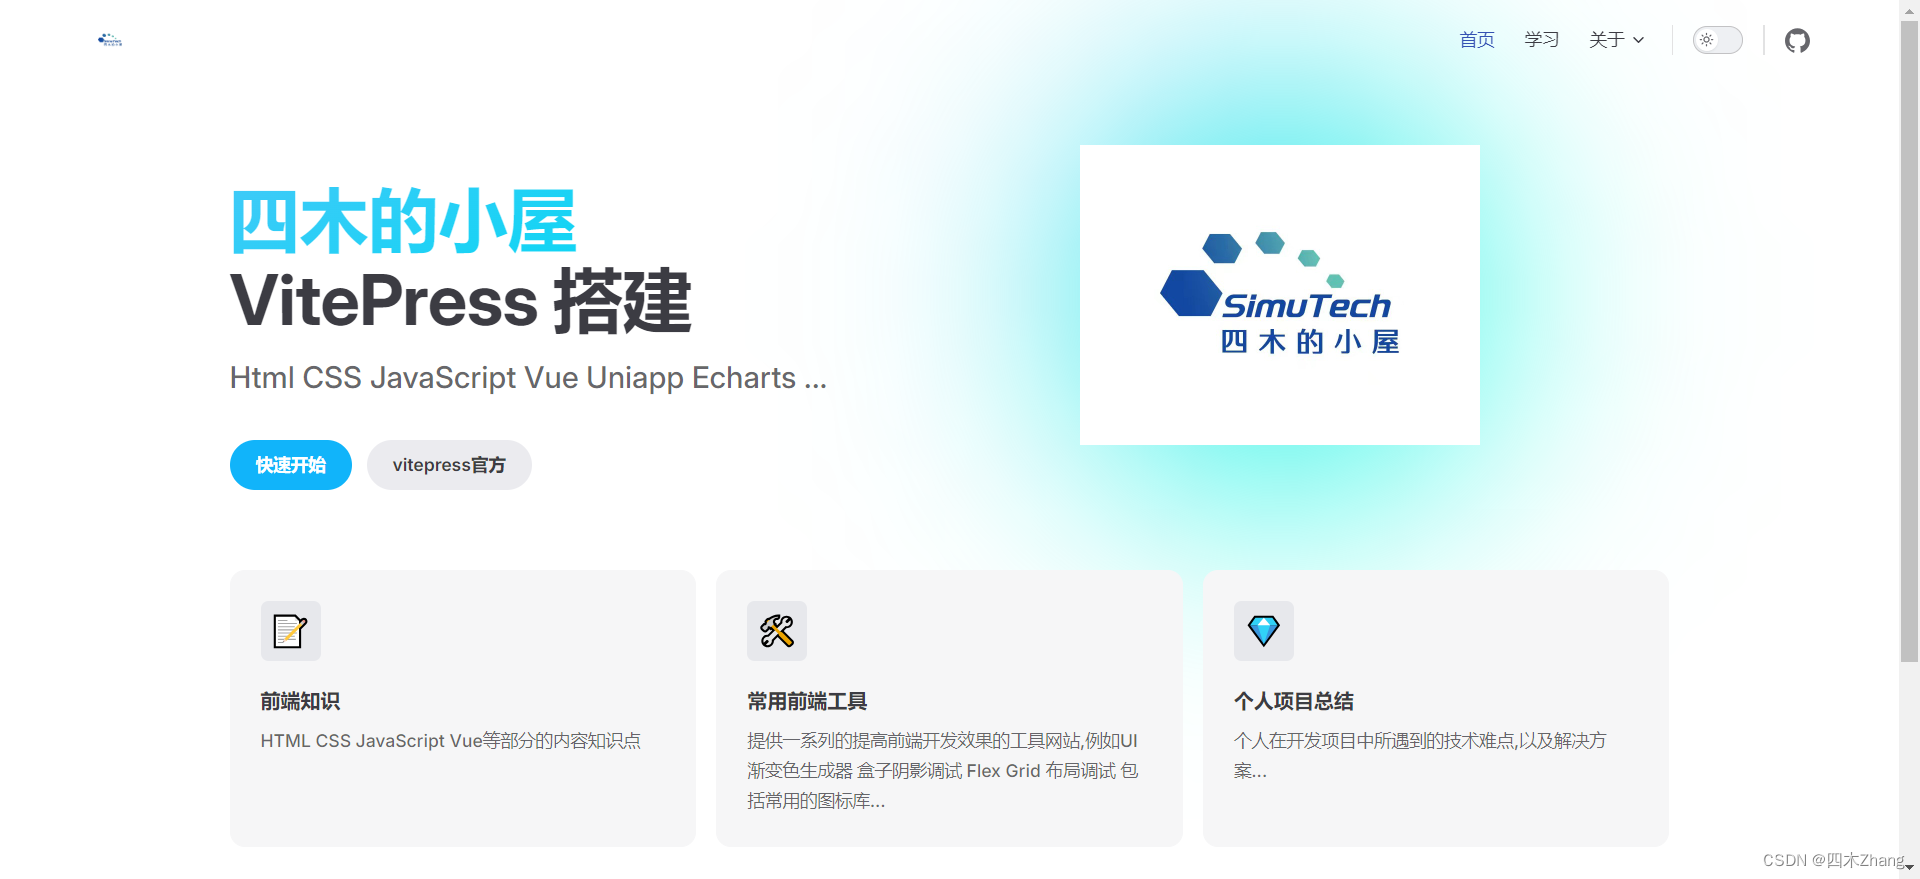
2.配置首页
官方关于首页相关的配置说明:https://vitepress.dev/zh/reference/default-theme-home-page
---
layout: home

hero:
  # 主标题
  name: 四木的小屋
  #   副标题
  text: VitePress 搭建
  #   内容介绍
  tagline:  Html CSS JavaScript Vue Uniapp Echarts ...


  # 右边图片
  image:
    src: /logo.jpg
    alt: VitePress


  actions:
    # 按钮主题
    - theme: brand
    # 按钮文字
      text: 快速开始
      link: /markdown-examples
    - theme: alt
      text: vitepress官方
      link: https://vitepress.dev/

# 特色
features:
   # icon图标,目前只支持emoji
  - icon: 📝
    # 标题
    title: 前端知识
    #  介绍
    details: HTML CSS JavaScript Vue等部分的内容知识点
  - icon: 🛠️
    title: 常用前端工具
    details: 提供一系列的提高前端开发效果的工具网站,例如UI渐变色生成器 盒子阴影调试 Flex Grid 布局调试 包括常用的图标库...
  - icon: 💓
    title: 个人项目总结
    details: 个人在开发项目中所遇到的技术难点,以及解决方案...
---
配置完成效果如下:

3.config.mjs文件配置
配置文件 (.vitepress/config.js) 让你能够自定义 VitePress 站点的各个方面,最基本的选项是站点的标题和描述,还有其他很多
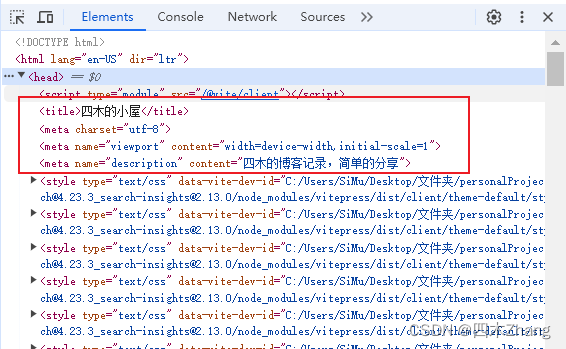
3.1站点标题与介绍
export default defineConfig({
  title: "四木的小屋",
  description: "四木的博客记录,简单的分享"
})
网站的标题与介绍可以在head中看到

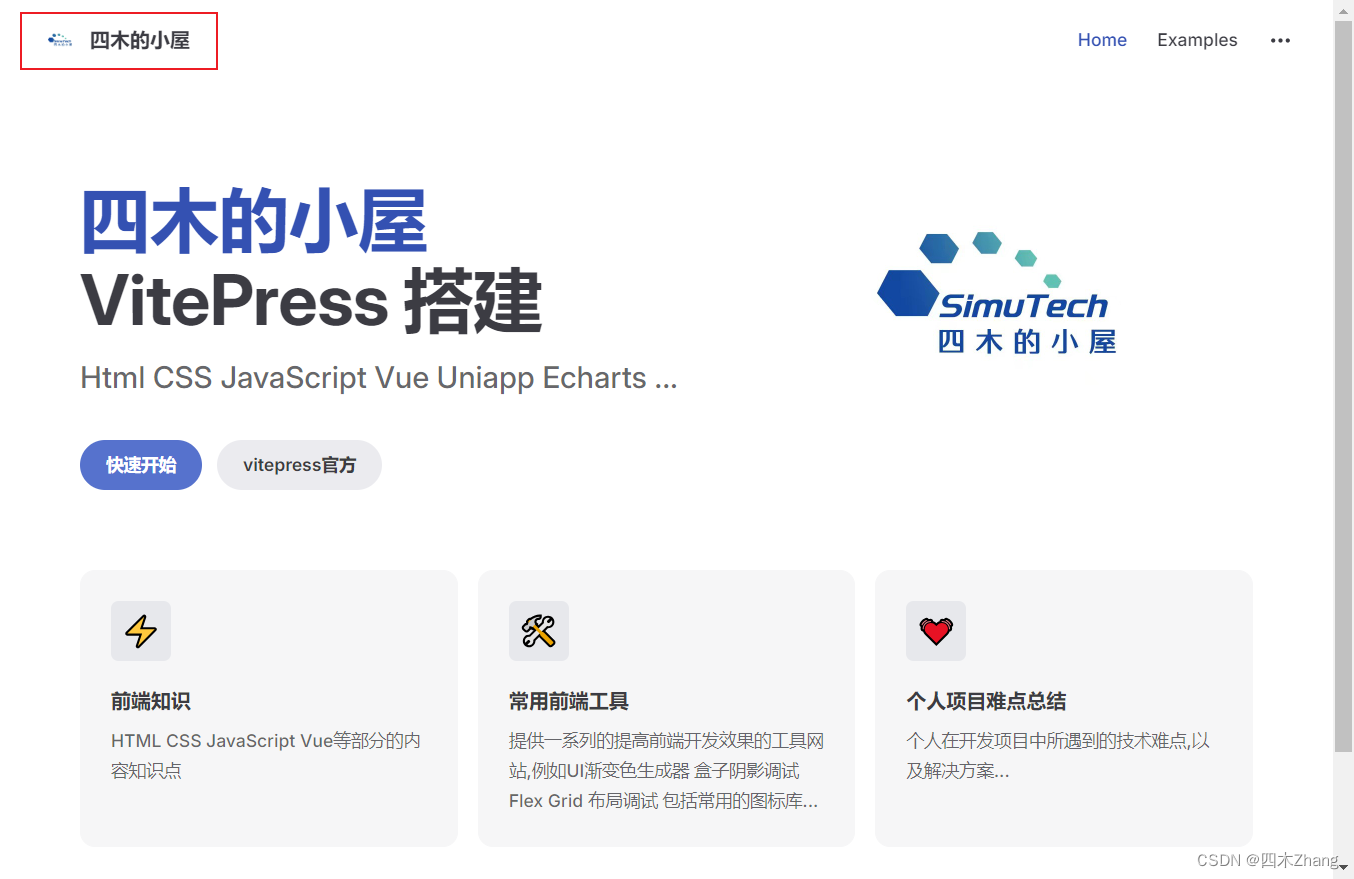
3.2导航栏标题与logo
themeConfig: {
  	siteTitle: '四木的小屋',
    logo:'/logo.jpg',
  }
siteTitle,自定义替换站点标题(配置中的title),设置false则表示不使用标题文本
在目录里面创建该public文件夹,/logo.jpg会默认读取public文件下的/logo.jpg,
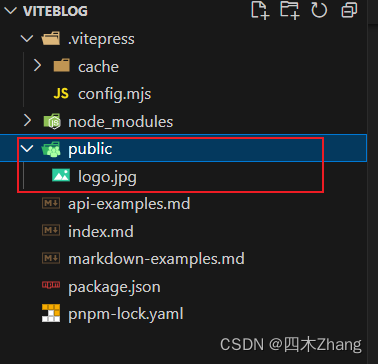
效果如下:
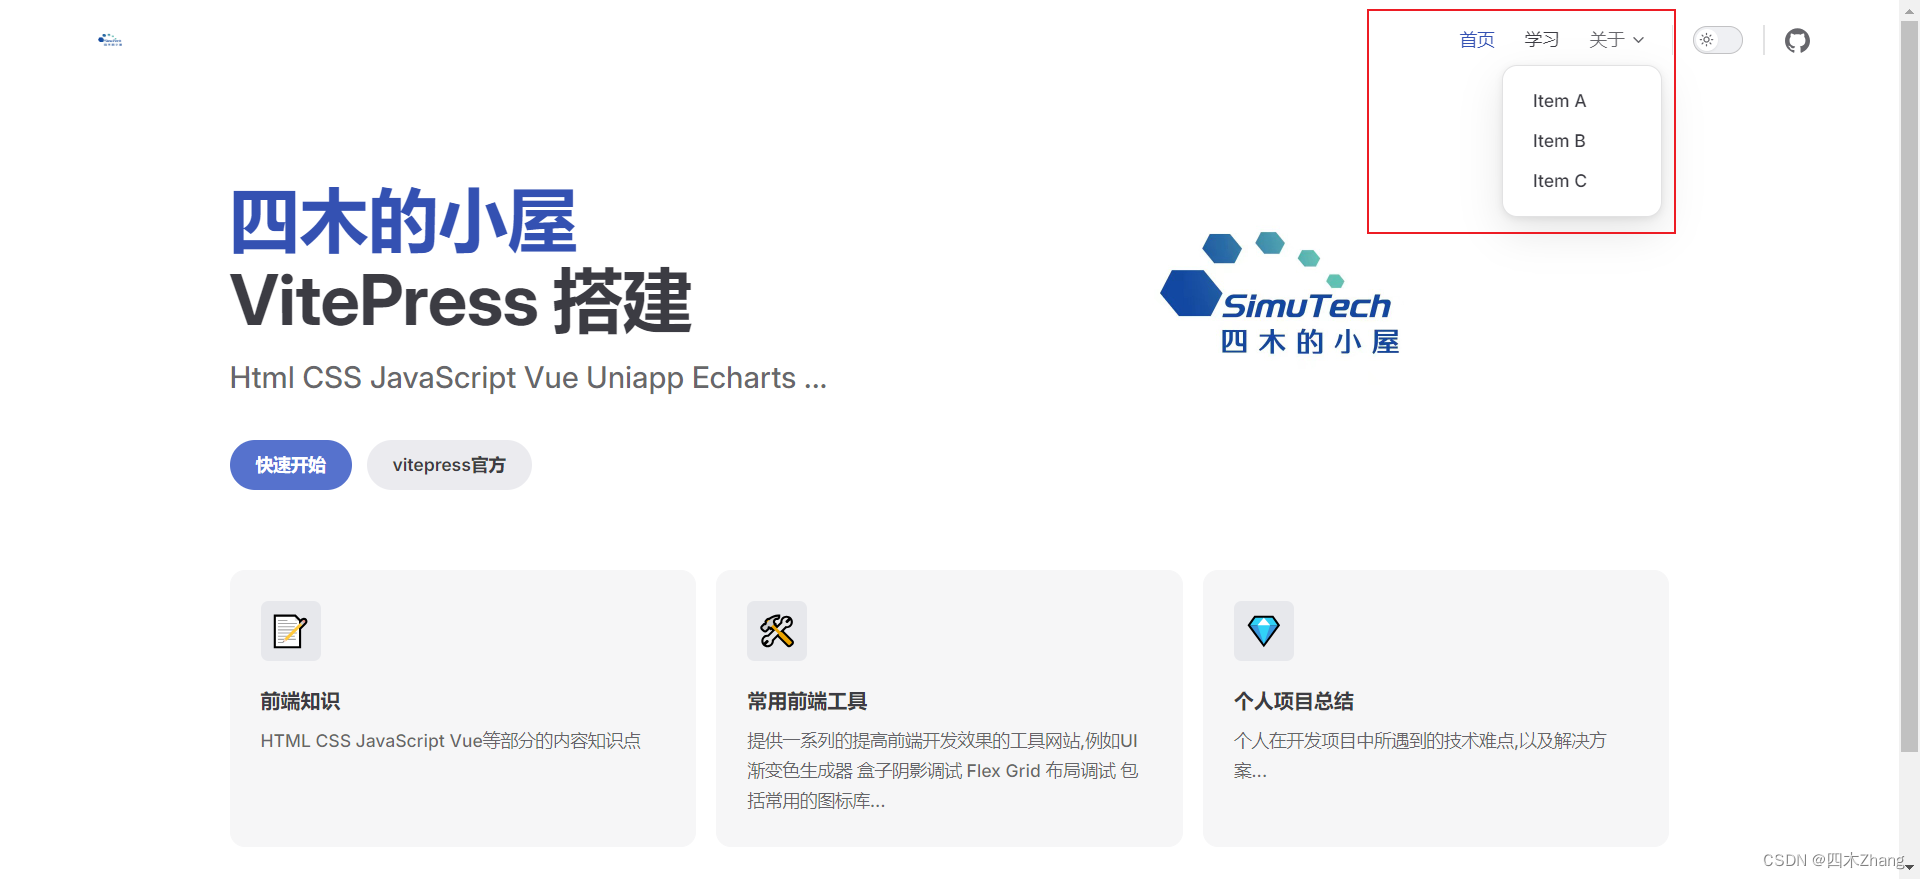
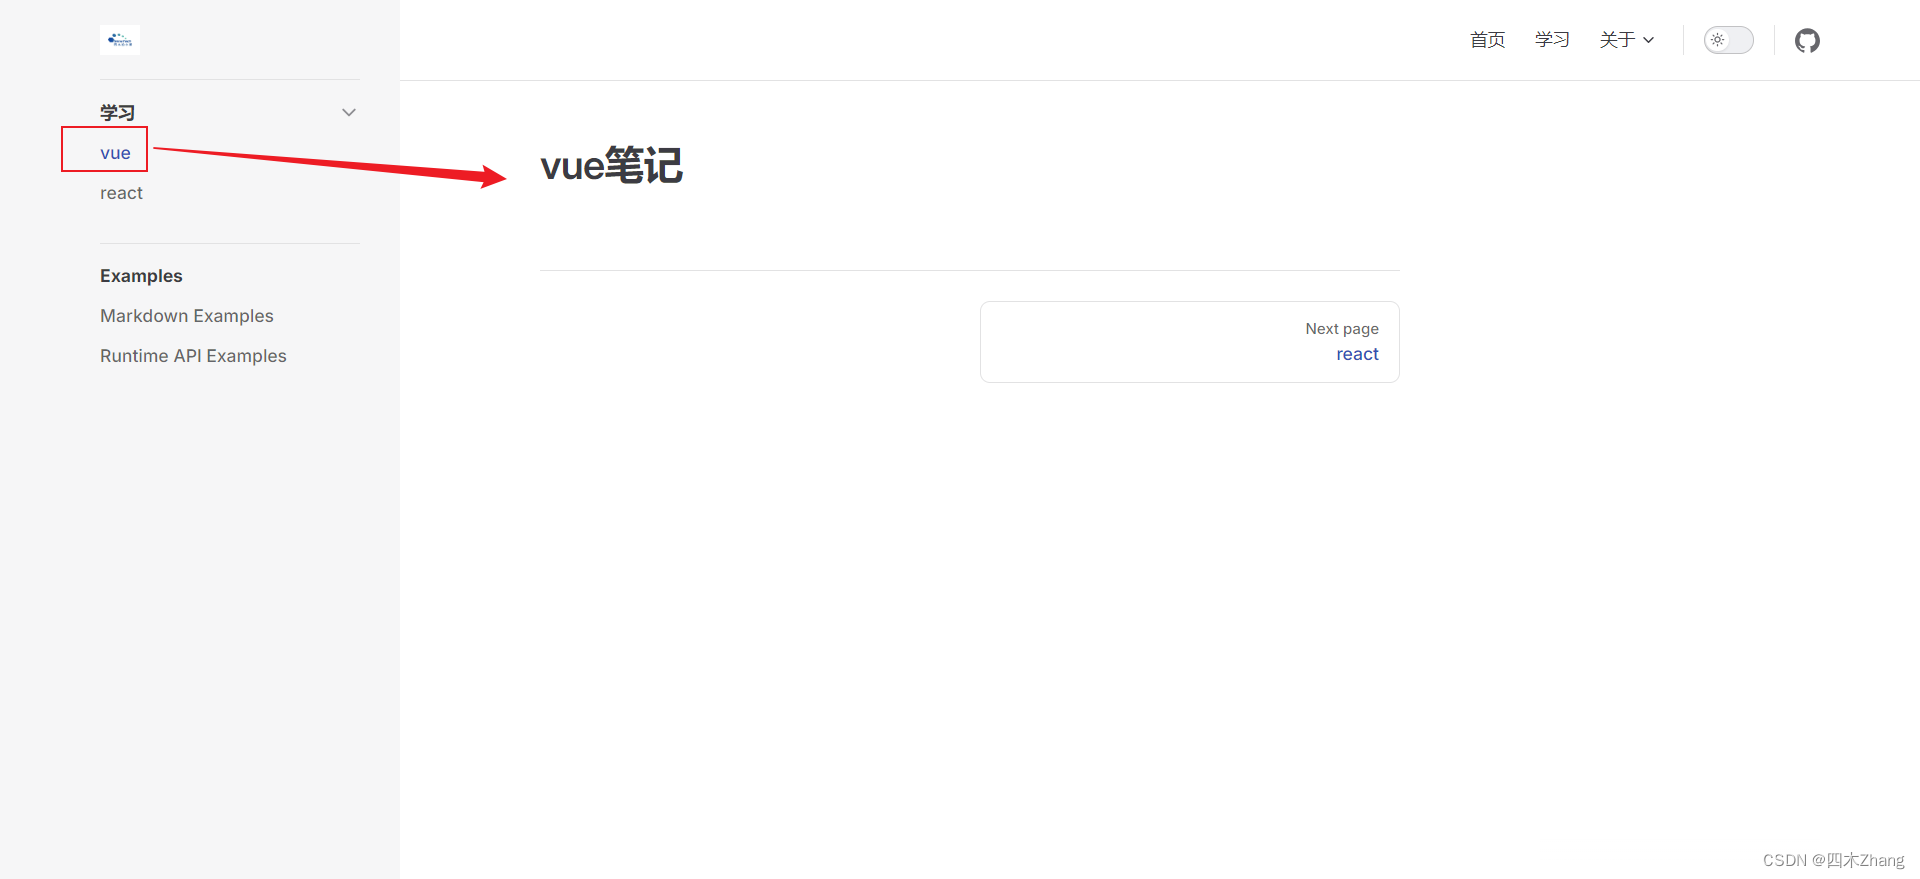
3.3顶部导航
themeConfig: {
  	...,
  	nav: [
      { text: '首页', link: '/' },
      { text: '学习', link: '/study' },
      { text: '关于',
        items: [
          { text: "Item A", link: "/item-1" },
          { text: "Item B", link: "/item-2" },
          { text: "Item C", link: "/item-3" },
        ]
       }
    ],
    socialLinks: [
      { icon: "github", link: "https://github.com/vuejs/vitepress" },
    ],
  }
text 是 显示的实际文本, link 是导航到的链接(你的md文件)。
link改设置为 items 数组,导航链接便是下拉菜单。
socialLinks在导航栏中展示带有图标的社交帐户链接
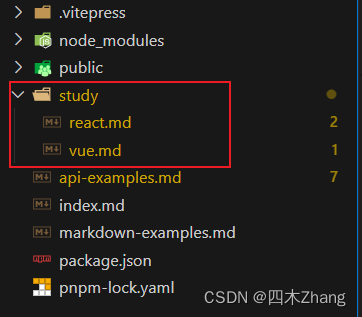
3.4侧边栏设置
themeConfig: {
  	...,
  	sidebar: [
      { text: "Markdown Examples", link: "/markdown-examples" },
      { text: "Runtime API Examples", link: "/api-examples" },
      {
        text: "学习",
        collapsed: true,
        items: [
          { text: "vue", link: "/study/vue.md" },
          { text: "react", link: "/study/react.md" },
        ],
      },
    ],
  }
collapsed 折叠按钮
3.5 底部版权配置
首页面底部展示版权相关的信息
themeConfig: {
  	...,
  	footer: {
      message: 'Released under the MIT License.',
      copyright: 'Copyright © 2024-present simu',
    },
  }

4.样式美化
在 .vitepress 中新建文件夹 theme,然后在 theme 目录下新建 index.mts 并填入如下代码
import DefaultTheme from 'vitepress/theme'
import './custom.css'

export default DefaultTheme
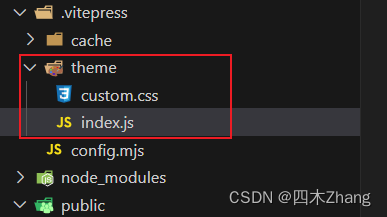
custom.css:
/* 该文件配置网站的文字  图标 等等 一系列dom元素的样式文件 */
:root {
  /* 通过配置 自定义颜色 */
  --vp-home-hero-name-color: transparent;
  /* 主页标题文字的颜色  */
  --vp-home-hero-name-background: -webkit-linear-gradient(120deg, #0fd5f4, #40caf8);

  /* 主页左侧背景添加渐变光圈 */
  --vp-home-hero-image-background-image: linear-gradient(135deg, #05b1f5 10%, #17f9e2 50%);
  --vp-home-hero-image-filter: blur(100px);


  /* botton按钮 */
  /* --vp-button-brand-border: #81634b; */
  /* 按钮文本颜色 */
  --vp-button-brand-text: #ffffff;
  /* 按钮背景颜色 */
  --vp-button-brand-bg: #11b4fa;


  /* 鼠标悬停的效果之后的样式 */
  --vp-button-brand-hover-border: #00FFEE;
  --vp-button-brand-hover-text: #000000;
  --vp-button-brand-hover-bg: #00FFEE;

  --vp-button-brand-active-border: #11c1fc;

  /* 主题基色 */
  --vp-c-brand: #11c1fc;
  /* 白色模式 主题基色 */
  --vp-c-brand-light: #11c1fc;
  /* 黑色模式 主题基色 */
  --vp-c-brand-dark: #11c1fc;
}
效果如下:
5.config.mjs完整代码
import { defineConfig } from "vitepress";

export default defineConfig({
  title: "四木的小屋",
  description: "四木的博客记录,简单的分享",
  themeConfig: {
    // 导航标题,默认使用title,设置false则表示不使用标题文本
    siteTitle: false,
    logo: "/logo.jpg",
    // 导航栏
    nav: [
      { text: "首页", link: "/" },
      { text: "学习", link: "/markdown-examples" },
      {
        text: "关于",
        items: [
          { text: "Item A", link: "/item-1" },
          { text: "Item B", link: "/item-2" },
          { text: "Item C", link: "/item-3" },
        ],
      },
    ],
    // 侧边栏
    sidebar: [
      {
        text: "学习",
        collapsed:true,
        items: [
          { text: "vue", link: "/study/vue.md" },
          { text: "react", link: "/study/react.md" },
        ],
      },
      {
        text: "Examples",
        items: [
          { text: "Markdown Examples", link: "/markdown-examples" },
          { text: "Runtime API Examples", link: "/api-examples" },
        ],
      },
    ],
    // 底部
    footer: {
      message: 'Released under the MIT License.',
      copyright: 'Copyright © 2024-present simu',
    },
    // 在导航栏中展示带有图标的社交帐户链接
    socialLinks: [
      // 改为自己的,也可添加其他的icon和地址
      { icon: "github", link: "https://github.com/SiMuZhang" },
    ],

  },
});
这是本人未完全体的博客,欢迎造访并指教 ==> 四木的小屋


 2069
2069

 被折叠的 条评论
为什么被折叠?
被折叠的 条评论
为什么被折叠?
 到【灌水乐园】发言


