


ElementPlus下的form也有新增表单 如果你写H5等没找到合适的 自己也可以进行封装
实现3个代码讲解:1:ElementPlus的代码 2:自己书写的代码 3:自己把2的代码进行封装
1:ElementPlus的运行效果
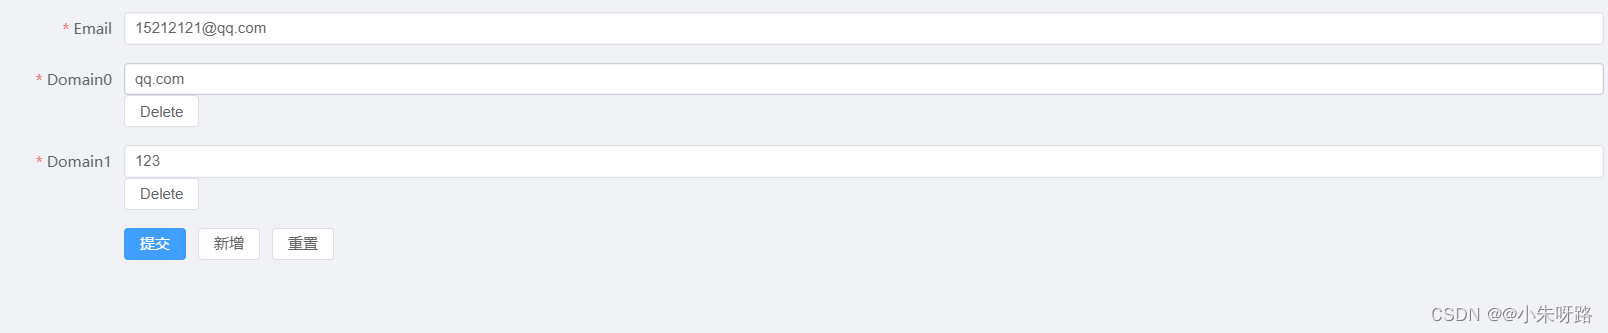
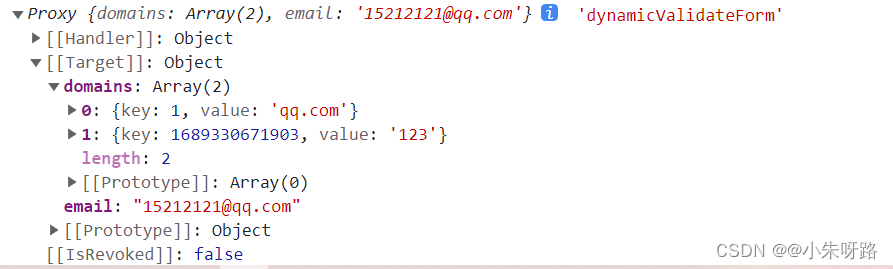
点击提交
1:ElementPlus的代码
  <template>
  <el-form
    ref="formRef"
    :model="dynamicValidateForm"
    label-width="120px"
    class="demo-dynamic"
  >
    <el-form-item
      prop="email"
      label="Email"
      :rules="[
        {
          required: true,
          message: 'Please input email address',
          trigger: 'blur',
        },
        {
          type: 'email',
          message: 'Please input correct email address',
          trigger: ['blur', 'change'],
        },
      ]"
    >
      <el-input v-model="dynamicValidateForm.email" />
    </el-form-item>
    <el-form-item
      v-for="(domain, index) in dynamicValidateForm.domains"
      :key="domain.key"
      :label="'Domain' + index"
      :prop="'domains.' + index + '.value'"
      :rules="{
        required: true,
        message: 'domain can not be null',
        trigger: 'blur',
      }"
    >
      <el-input v-model="domain.value" />
      <el-button class="mt-2" @click.prevent="removeDomain(domain)"
        >Delete</el-button
      >
    </el-form-item>
    <el-form-item>
      <el-button type="primary" @click="submitForm(formRef)">提交</el-button>
      <el-button @click="addDomain">新增</el-button>
      <el-button @click="resetForm(formRef)">重置</el-button>
    </el-form-item>
  </el-form>
</template>

<script lang="ts" setup>
import { reactive, ref } from "vue";
import type { FormInstance } from "element-plus";

const formRef = ref<FormInstance>();
const dynamicValidateForm = reactive<{
  domains: DomainItem[];
  email: string;
}>({
  domains: [
    {
      key: 1,
      value: "",
    },
  ],
  email: "",
});

interface DomainItem {
  key: number;
  value: string;
}

const removeDomain = (item: DomainItem) => {
  const index = dynamicValidateForm.domains.indexOf(item);
  if (index !== -1) {
    dynamicValidateForm.domains.splice(index, 1);
  }
};

const addDomain = () => {
  dynamicValidateForm.domains.push({
    key: Date.now(),
    value: "",
  });
};

const submitForm = (formEl: FormInstance | undefined) => {
  if (!formEl) return;
  formEl.validate((valid) => {
    if (valid) {
      console.log("submit!");
      console.log(dynamicValidateForm, "dynamicValidateForm");
    } else {
      console.log("error submit!");
      return false;
    }
  });
};

const resetForm = (formEl: FormInstance | undefined) => {
  if (!formEl) return;
  formEl.resetFields();
};
</script>
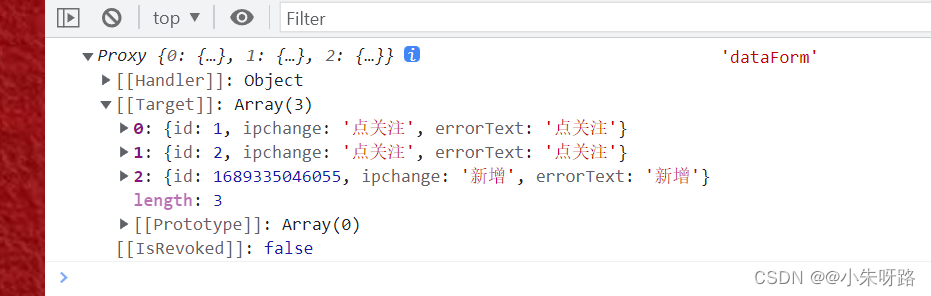
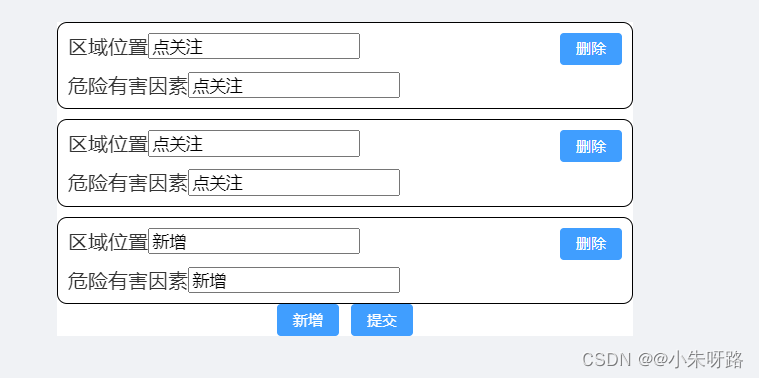
2:自己书写的代码
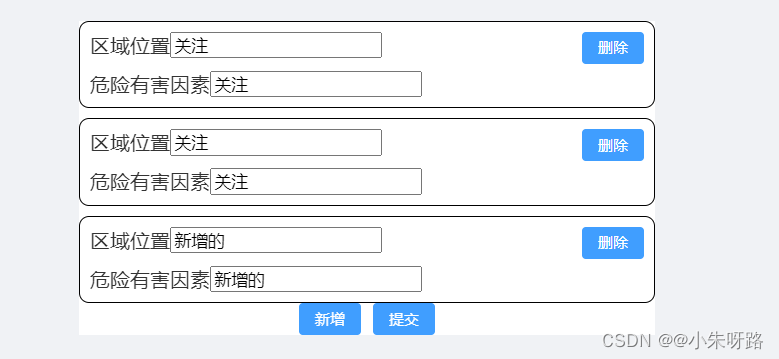
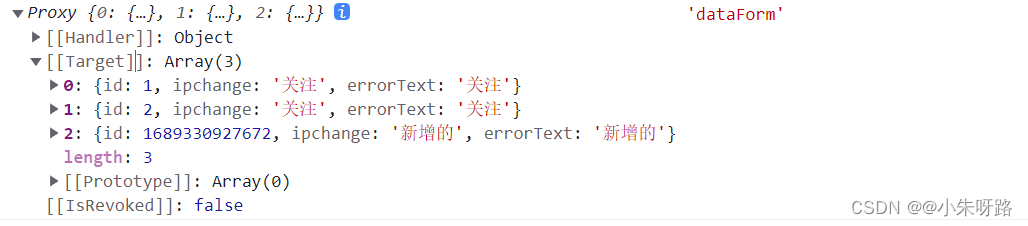
点击提交的打印效果
 <template>
  <div class="box">
    <template v-for="(item, index) in dataForm" :key="item.id">
      <div
        class="box-b bg-ff"
        style="display: flex; justify-content: space-between"
      >
        <div>
          <div style="display: flex">
            <div class="">区域位置</div>
            <input v-model="item.ipchange" type="text" />
          </div>
          <div style="display: flex; margin-top: 10px">
            <div class="">危险有害因素</div>
            <input type="text" v-model="item.errorText" />
          </div>
        </div>
        <div>
          <el-button type="primary" @click="deleteClick(item.id)"
            >删除</el-button
          >
        </div>
      </div>
    </template>

    <div>
      <el-button type="primary" @click="handlerClick">新增</el-button>
      <el-button type="primary" @click="subMitClick">提交</el-button>
    </div>
  </div>
</template>

<script setup lang="ts">
import { ref, reactive } from "vue";
const dataForm = reactive([
  { id: 1, ipchange: "", errorText: "" },
  { id: 2, ipchange: "", errorText: "" },
]);
const handlerClick = () => {
  dataForm.push({ id: Date.now(), ipchange: "", errorText: "" });
};
const deleteClick = (id: number) => {
  dataForm.forEach((item, index) => {
    item.id == id ? dataForm.splice(index, 1) : "";
  });
};
const subMitClick = () => {
  console.log(dataForm, "dataForm");
};
</script>

<style scoped>
.bg-ff {
  background: #fff;
}
.box {
  width: 30vw;
  margin: auto;

  background: #fff;
}
.box-b {
  padding: 10px;
  width: 100%;
  overflow: hidden;
  box-sizing: border-box;
  border-radius: 10px;
  border: 1px solid #000;
  margin-top: 10px;
}
</style>
2的代码量太多 我们都会进行封装
3:自己把2的代码进行封装
components/insertForm.vue
<template>
  <div>
    <template v-for="(item, index) in NewdataForm" :key="item.id">
      <div
        class="box-b bg-ff"
        style="display: flex; justify-content: space-between"
      >
        <div>
          <div style="display: flex">
            <div class="">区域位置</div>
            <input v-model="item.ipchange" type="text" />
          </div>
          <div style="display: flex; margin-top: 10px">
            <div class="">危险有害因素</div>
            <input type="text" v-model="item.errorText" />
          </div>
        </div>
        <div>
          <el-button type="primary" @click="deleteClick(item.id)"
            >删除</el-button
          >
        </div>
      </div>
    </template>
  </div>
</template>

<script setup lang="ts">
import { ref, reactive, watch } from "vue";
const emit = defineEmits(["deleteClick"]);
const define = withDefaults(defineProps<{ dataForm: any[] }>(), {
  dataForm: () => [
    { id: 1, ipchange: "", errorText: "" },
    { id: 2, ipchange: "", errorText: "" },
  ],
});

//1: 这样不可以的; 下面的watch监听进行赋值的时候 NewdataForm=newvalue不可整体的赋值这个
// reactive  只能赋值到它下的某个属性下
//1: let errors = reactive( [...define.dataForm] );
// 2:但是使用这个 太麻烦
// 2:let NewdataForm = reactive({ dataForm: [...define.dataForm] });
// 3:使用 ref这个 可以直接赋值
let NewdataForm = ref([...define.dataForm]);

watch(define.dataForm, (newvalue) => {
  // errors=newvalue  //错误的写法 如上1:
  // NewdataForm.dataForm=newvalue;可以正常运行如上2:

  NewdataForm.value = newvalue;
});
const deleteClick = (id: number) => {
  emit("deleteClick", id);
};
defineExpose({ NewdataForm });
</script>

<style scoped>
</style>
主文件引入
  <template>
  <div class="box">
    <div>
      <insertForm
        ref="insertFormRef"
        :dataForm="dataForm"
        @deleteClick="deletenewClick"
      ></insertForm>
      <el-button type="primary" @click="handlerClick">新增</el-button>
      <el-button type="primary" @click="subMitClick">提交</el-button>
    </div>
  </div>
</template>

<script setup lang="ts">
import insertForm from "@/components/insertForm/index.vue";

import { ref, reactive } from "vue";
const insertFormRef = ref<InstanceType<typeof insertForm>>();
var dataForm = ref([
  { id: 1, ipchange: "", errorText: "" },
  { id: 2, ipchange: "", errorText: "" },
]);
const handlerClick = () => {
  dataForm.value.push({ id: Date.now(), ipchange: "", errorText: "" });
};
const deletenewClick = (id: number) => {
  dataForm.value.forEach((item, index) => {
    item.id == id ? dataForm.value.splice(index, 1) : "";
  });
};
const subMitClick = () => {
  dataForm.value = insertFormRef.value.NewdataForm;
  console.log(dataForm.value, "dataForm");
};
</script>

<style >
.bg-ff {
  background: #fff;
}
.box {
  width: 30vw;
  margin: auto;

  background: #fff;
}
.box-b {
  padding: 10px;
  width: 100%;
  overflow: hidden;
  box-sizing: border-box;
  border-radius: 10px;
  border: 1px solid #000;
  margin-top: 10px;
}
</style>
效果一样
*


 652
652


 被折叠的 条评论
为什么被折叠?
被折叠的 条评论
为什么被折叠?
 到【灌水乐园】发言


