1.采用elementplus中container布局容器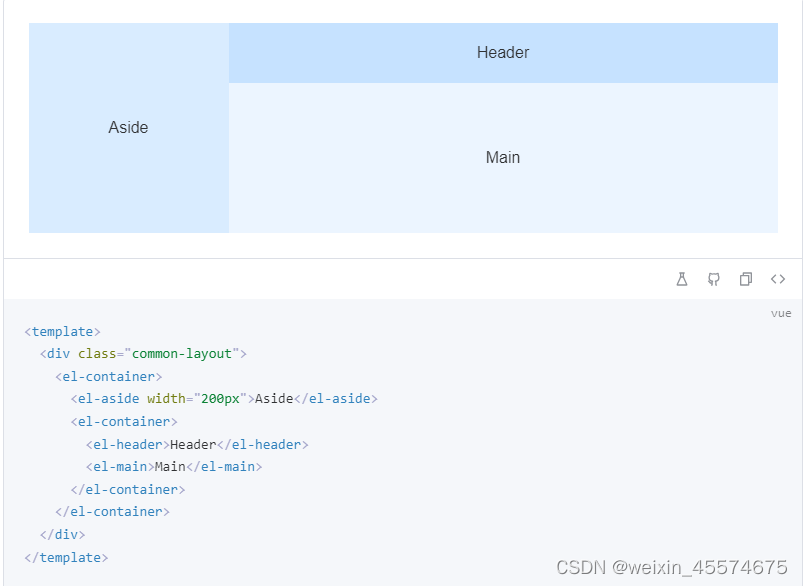
2.router.js中进行配置路由
import {
	createRouter,
	createWebHistory,
} from "vue-router";
import Layout from '@/layout/index.vue'
const routes = [{
		path: '/',
		redirect: '/login'
	},
	{
		name: 'login',
		path: '/login',
		component: () => import('@/views/login/index.vue')
	},
	{
		component: Layout,
		path: "/",
		children: [{
				path: "/home",
				name: "home",
				meta: {
					title: '首页',
					icon: 'House'
				},
				/** 在src/views 文件下创建home文件 */
				component: () => import("@/views/home/index.vue"),
			},
			{
				path: "/system",
				name: "system",
				meta: {
					title: '系统概况',
					icon: 'Grid'
				},
				/** 在src/views 文件下创建system文件 */
				component: () => import("@/views/system/index.vue"),
			},
			{
				path: "/userManagement",
				name: "userManagement",
				meta: {
					title: '用户管理',
					icon: 'Avatar'
				},
				/** 在src/views 文件下创建userManagement文件 */
				// component: () => import("@/views/userManagement/index.vue"),
				children: [{
						path: "/productAdministrator",
						name: "productAdministrator",
						meta: {
							title: '产品1',
							icon: 'TakeawayBox'
						},
						/** 在src/views 文件下创建productAdministrator文件 */
						component: () => import("@/views/userManagement/productAdministrator/index.vue"),
					},
					{
						path: "/prod",
						name: "productAdministrator",
						meta: {
							title: '产品2',
							icon: 'TakeawayBox'
						},
						/** 在src/views 文件下创建productAdministrator文件 */
						component: () => import("@/views/userManagement/productAdministrator/index.vue"),
					}
				]
			},
			{
				path: "/productManagement",
				name: "productManagement",
				meta: {
					title: '产品管理',
					icon: 'TakeawayBox'
				},
				/** 在src/views 文件下创建productManagement文件 */
				component: () => import("@/views/productManagement/index.vue"),
			},
			{
				path: "/information",
				name: "information",
				meta: {
					title: '消息管理',
					icon: 'ChatLineSquare'
				},
				/** 在src/views 文件下创建information文件 */
				component: () => import("@/views/information/index.vue"),
			},
			{
				path: "/contract",
				name: "contract",
				meta: {
					title: '合同管理',
					icon: 'Tickets'
				},
				/** 在src/views 文件下创建information文件 */
				component: () => import("@/views/contract/index.vue"),
			},
			{
				path: "/operation",
				name: "operation",
				meta: {
					title: '操作日志',
					icon: 'Pointer'
				},
				/** 在src/views 文件下创建information文件 */
				component: () => import("@/views/operation/index.vue"),
			},
			{
				path: "/conLog",
				name: "conLog",
				meta: {
					title: '登录日志',
					icon: 'Document'
				},
				/** 在src/views 文件下创建information文件 */
				component: () => import("@/views/conLog/index.vue"),
			},
			{
				path: "/setting",
				name: "setting",
				meta: {
					title: '系统设置',
					icon: 'Setting'
				},
				/** 在src/views 文件下创建information文件 */
				component: () => import("@/views/setting/index.vue"),
			}
		]

	},
];

const router = createRouter({
	history: createWebHistory(),
	routes,
});

export default router;
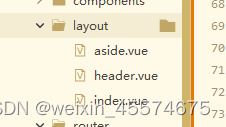
3.layout/index.vue
<template>
	<div class="common-layout">
	    <el-container>
	      <el-aside style="width:fit-content;" class="aside">
			  <Aside></Aside>
			  </el-aside>
	      <el-container>
	        <el-header class="header">
				<Header></Header>
				</el-header>
	        <el-main>
				<router-view></router-view>
			</el-main>
	      </el-container>
	    </el-container>
	  </div>
</template>

<script setup lang="ts">
import Aside from './aside.vue'
import Header from './header.vue'

</script>

<style lang="scss" scoped>
	.aside{
		height: 100vh;
		background-color: #545c64;
	}
	.header{
			background-color: #fff;
			border-bottom: 1px solid #c9c6c6;
	}
</style>
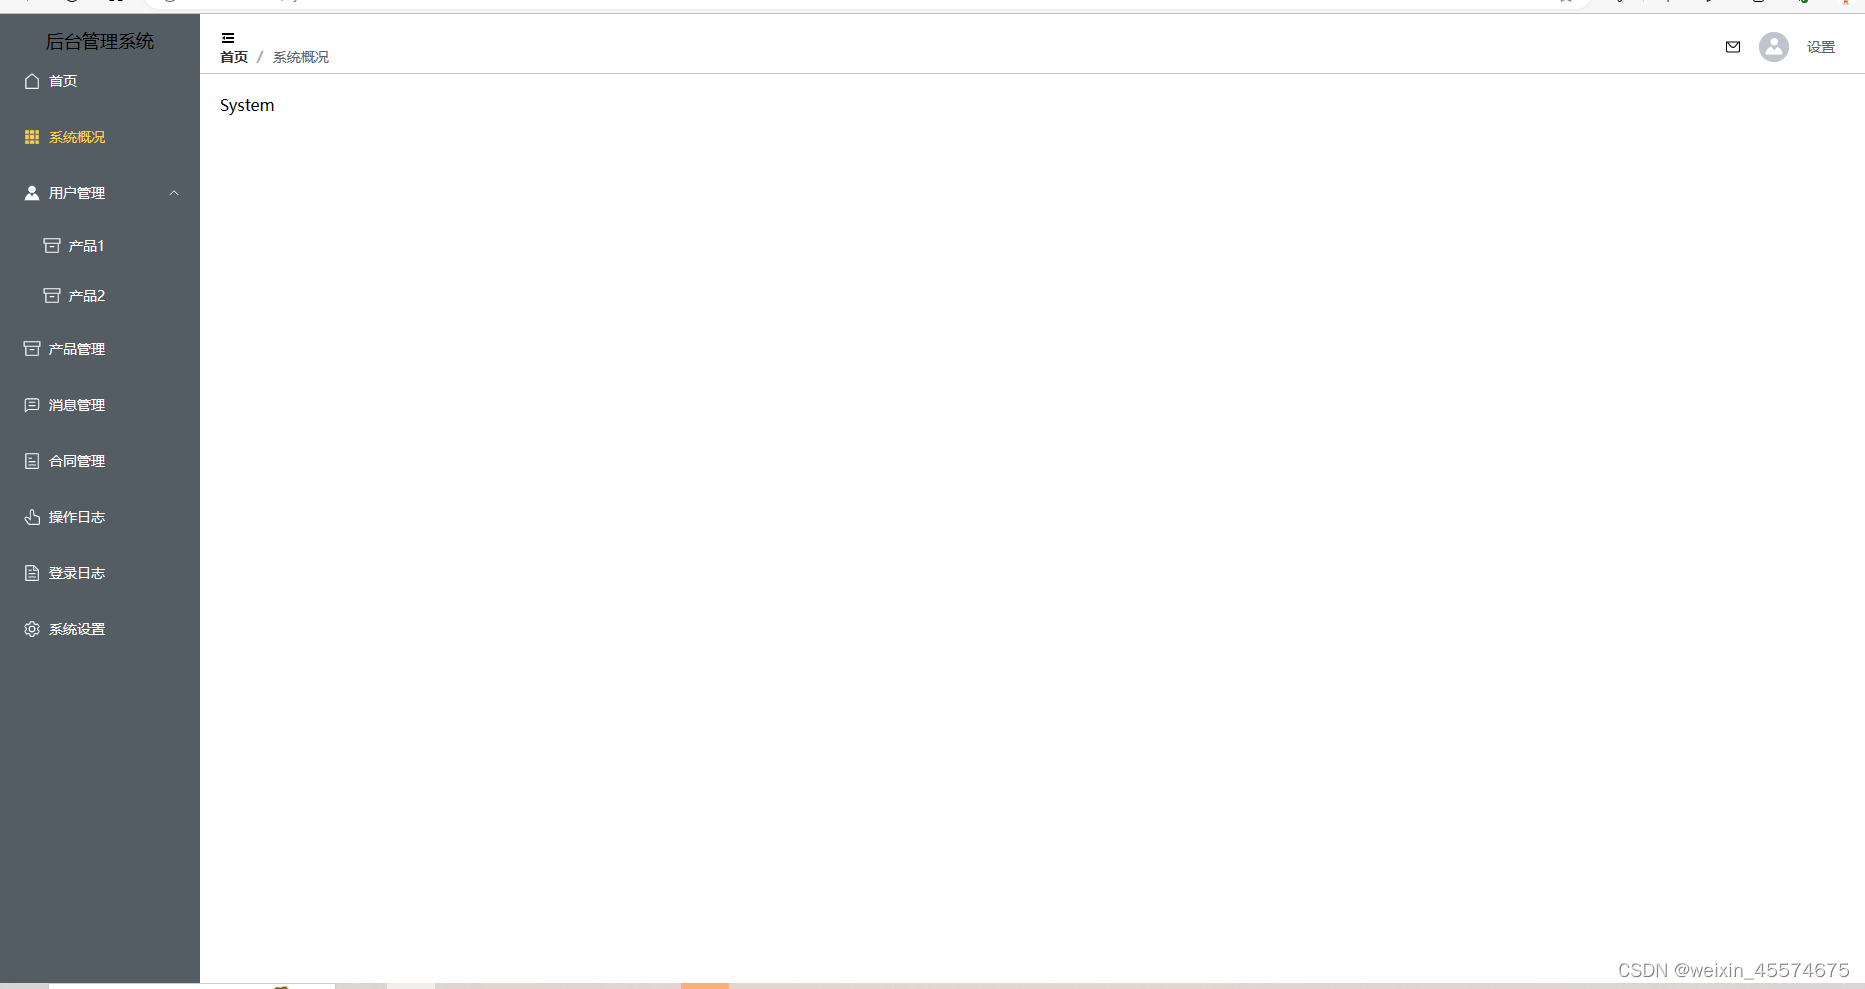
4.侧边栏导航实现
<template>
	<el-menu active-text-color="#ffd04b" background-color="#545c64" text-color="#fff" default-active="2"
		class="el-menu-vertical-demo" :collapse="isCollapse" @open="handleOpen" @close="handleClose" router>
		<div class="title">后台管理系统</div>
		<template v-for="subItem in menus" :key="subItem.path">
			<!-- 两层 -->
			<el-sub-menu v-if="subItem.children" :index="subItem.path">
				<template #title>
					<el-icon>
						<component :is="subItem.meta.icon"></component>
					</el-icon>
					<span>{{ subItem.meta.title }}</span>
				</template>
				<template v-for="item in subItem.children" :key="item.path">
					<el-menu-item :index="item.path">
						<el-icon>
							<component :is="item.meta.icon"></component>
						</el-icon>
						<template #title>
							<span>{{ item.meta.title }}</span>
						</template>
					</el-menu-item>
				</template>
			</el-sub-menu>
			<!-- 一层 -->
			<el-menu-item v-else :index="subItem.path">
				<el-icon>
					<component :is="subItem.meta.icon"></component>
				</el-icon>
				<template #title>
					<span>{{ subItem.meta.title }}</span>
				</template>
			</el-menu-item>
		</template>

	</el-menu>
</template>

<script setup lang="ts">
	import { computed, ref } from 'vue'
	import { useRouter } from 'vue-router'
	const router = useRouter();
	const top = ref(true)
	const menus = computed(() => {
		let menu = router.options.routes.filter((item) => item.children);
		return menu[0].children
	})
	import { layoutStore } from '@/store/layout.js'
	const store = layoutStore();
	// const isCollapse = ref(false)
	const isCollapse = computed(() => {
		return store.isCollapse;
	})
	const handleOpen = (key : string, keyPath : string[]) => {
		console.log(key, keyPath)
	}
	const handleClose = (key : string, keyPath : string[]) => {
		console.log(key, keyPath)
	}
</script>

<style lang="scss " scoped>
	.el-menu-vertical-demo:not(.el-menu--collapse) {
		width: 200px;
		min-height: 400px;
	}

	.el-menu {
		border-right: 0;
	}

	.title {
		font-size: 18px;
		display: flex;
		justify-content: center;
		top: 5px;
		margin-top: 15px;
	}
</style>
5.头部header实现
<template>
	<div class="icon">
		<el-icon v-if="show" @click="change">
			<Fold />
		</el-icon>
		<el-icon v-else @click="change">
			<Expand />
		</el-icon>
	</div>
	<el-breadcrumb separator="/">
		<el-breadcrumb-item :to="{ path: '/home' }">首页</el-breadcrumb-item>
		<el-breadcrumb-item>{{current.meta.title}}</el-breadcrumb-item>
	</el-breadcrumb>

	<div class="right">
		<el-icon>
			<Message />
		</el-icon>
		<el-avatar :size="30" :src="circleUrl" />
		<el-dropdown>
			<span class="el-dropdown-link">
				设置
				<el-icon class="el-icon--right">
					<arrow-down />
				</el-icon>
			</span>
			<template #dropdown>
				<el-dropdown-menu>
					<el-dropdown-item>设置账号</el-dropdown-item>
					<el-dropdown-item>更改头像</el-dropdown-item>
					<el-dropdown-item @click="exit">退出登录</el-dropdown-item>
				</el-dropdown-menu>
			</template>
		</el-dropdown>
	</div>

</template>

<script setup lang="ts">
	import { ref, reactive, toRefs, computed } from 'vue'
	import { layoutStore } from '@/store/layout.js'
	import { ArrowDown } from '@element-plus/icons-vue'
	import { useRouter } from 'vue-router'
	const router = useRouter();
	const current = computed(() => {
		return router.currentRoute.value
	})
	console.log(router.currentRoute.value)
	const store = layoutStore();
	const show = ref(true)
	const change = function () {
		show.value = !show.value;
		store.changeisCollapse();
	}
	const state = reactive({
		circleUrl: 'https://cube.elemecdn.com/3/7c/3ea6beec64369c2642b92c6726f1epng.png',
	})
	const { circleUrl } = toRefs(state)

	const exit = function () {
		router.push('/login')
	}
</script>

<style lang="scss" scoped>
	.title {
		width: 100px;
		margin: -22px 0px 0 28px;

	}

	.icon {
		margin-top: 15px;
	}

	.example-showcase .el-dropdown-link {
		cursor: pointer;
		color: var(--el-color-primary);
		display: flex;
		align-items: center;
	}

	.right {
		display: flex;
		padding-right: 10px;
		width: 110px;
		justify-content: space-between;
		align-items: center;
		float: right;
		margin-top: -32px;

		.el-icon--right {
			display: none;
		}
	}
</style>
6.效果展示


 6458
6458


 被折叠的 条评论
为什么被折叠?
被折叠的 条评论
为什么被折叠?
 到【灌水乐园】发言


