


1.整合MyBatis操作
1.引入Mybatis场景
<dependency>
<groupId>org.mybatis.spring.boot</groupId>
<artifactId>mybatis-spring-boot-starter</artifactId>
<version>2.1.4</version>
</dependency
如果是之前的配置模式:
我们需要有一个全局配置文件,还需要根据这个全局配置文件创建一个
SqlSessionFactory
然后通过SqlSessionFactory得到SqlSession
进而通过SqlSession找到Mapper接口来操作数据库。
@Configuration
@ConditionalOnClass({SqlSessionFactory.class, SqlSessionFactoryBean.class})
//容器中只有一个数据源
@ConditionalOnSingleCandidate(DataSource.class)
//
@EnableConfigurationProperties({MybatisProperties.class})
@AutoConfigureAfter({DataSourceAutoConfiguration.class, MybatisLanguageDriverAutoConfiguration.class})
public class MybatisAutoConfiguration implements InitializingBean {
  //给容器中放了一个SqlSessionFactory
  @Bean
  @ConditionalOnMissingBean
  public SqlSessionFactory sqlSessionFactory(DataSource dataSource) throws Exception {

    ...
    ...
    ...
    ...

  }

  @Bean
  @ConditionalOnMissingBean
  public SqlSessionTemplate sqlSessionTemplate(SqlSessionFactory sqlSessionFactory) {
    ...
    ...
    ...
    ...

  }

  @org.springframework.context.annotation.Configuration
  @Import(AutoConfiguredMapperScannerRegistrar.class)
  @ConditionalOnMissingBean({ MapperFactoryBean.class, MapperScannerConfigurer.class })
  public static class MapperScannerRegistrarNotFoundConfiguration implements InitializingBean {

    @Override
    public void afterPropertiesSet() {
      logger.debug(
          "Not found configuration for registering mapper bean using @MapperScan, MapperFactoryBean and MapperScannerConfigurer.");
    }

  }
@EnableConfigurationProperties({MybatisProperties.class}) Mybitis配置项绑定类
@ConfigurationProperties(
    prefix = "mybatis"
)
public class MybatisProperties {
    public static final String MYBATIS_PREFIX = "mybatis";
可以修改配置文件中mybatis开始的所有
- 给我们配置好了SqlSessionFactory
- 给我们配置了SqlSessionTemplate,这个里面组合了SqlSession
public class SqlSessionTemplate implements SqlSession, DisposableBean {
    private final SqlSessionFactory sqlSessionFactory;
    private final ExecutorType executorType;
    private final SqlSession sqlSessionProxy;
    private final PersistenceExceptionTranslator exceptionTranslator;
- 还给我们导入了一个 @Import(AutoConfiguredMapperScannerRegistrar.class)
作用:会拿到所有@Mapper注解的这个接口,会被认为带有@Mapper接口就是操作Mybatis的- Mapper接口也给我们配好了,只需我们写的操作 Mybatis 的接口标注了@Mapper 就会自动扫描进来
2. 整合Mybatis操作流程
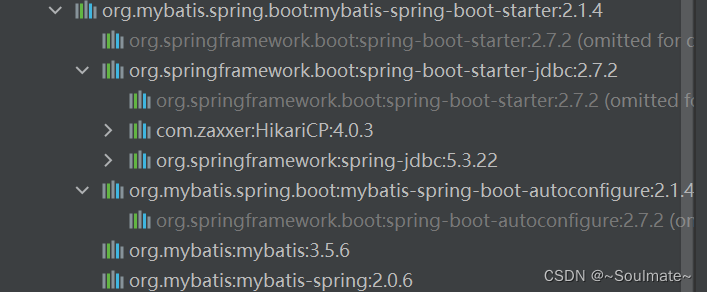
1.导入mybatis官方starter
 https://mvnrepository.com/artifact/org.mybatis.spring.boot/mybatis-spring-boot-starter
<dependency>
    <groupId>org.mybatis.spring.boot</groupId>
    <artifactId>mybatis-spring-boot-starter</artifactId>
    <version>2.1.4</version>
</dependency>
2. 编写mapper接口。标准@Mapper注解
@Mapper
public interface PeopleMapper {

    People getPeople(Integer id);
}
3.编写sql映射文件并绑定mapper接口
<?xml version="1.0" encoding="UTF-8" ?>
<!DOCTYPE mapper
        PUBLIC "-//mybatis.org//DTD Mapper 3.0//EN"
        "http://mybatis.org/dtd/mybatis-3-mapper.dtd">
<mapper namespace="com.hlq.admin.mapper.PeopleMapper">
<!--    People getPeople(Integer pId);-->
    <select id="getPeople" resultType="com.hlq.admin.bean.People">
        select * from p_table where id = #{id}
    </select>
</mapper>
4.在application.yaml中指定Mapper配置文件的位置,以及指定全局配置文件的信息 (建议;配置在mybatis.configuration)
#mybatis:
#  mapper-locations: classpath:mybatis/mapper/*.xml
3.注解模式 不需要mapper接口的配置文件
简单的数据库操作可以使用
@Mapper
public interface CityMapper {

    @Select("select * from city where id=#{id}")
    public City getById(Long id);

    public void insert(City city);

}
4、混合模式(注解与配置文件混合模式)
简单的操作用注解,复杂的操作还继续 通过mapper接口的映射文件编写
- 引入mybatis-starter
- 配置application.yaml中,指定mapper-location位置即可
- 编写Mapper接口并标注@Mapper注解
- 简单方法直接注解方式
- 复杂方法编写mapper.xml进行绑定映射
- @MapperScan("com.atguigu.admin.mapper") 简化,其他的接口就可以不用标注@Mapper注解
5、整合 MyBatis-Plus 完成CRUD
1、什么是MyBatis-Plus
MyBatis-Plus(简称 MP)是一个 MyBatis 的增强工具,在 MyBatis 的基础上只做增强不做改变,为简化开发、提高效率而生。
建议安装 MybatisX 插件
2、整合MyBatis-Plus
<!-- https://mvnrepository.com/artifact/com.baomidou/mybatis-plus-boot-starter -->
<dependency>
    <groupId>com.baomidou</groupId>
    <artifactId>mybatis-plus-boot-starter</artifactId>
    <version>3.5.1</version>
</dependency>
有了这个场景,mybatis与JDBC的场景都不用再配置
3、CRUD功能
实体类
@AllArgsConstructor
@NoArgsConstructor
@Data
//当这个类和数据库里面的表名不一样的时候
//@TableName("user_table")
public class User {
    //用户名
    //当表里没有这些字段
    @TableField(exist = false)
    private String userName;
    //密码
    @TableField(exist = false)
    private String password;

    private Long id;
    private String name;
    private Integer age;
    private String email;
}
UserMapper接口
@Mapper
public interface UserMapper extends BaseMapper<User> {

}
UserService接口
//按照以往的习惯,我们是通过UserService调用UserMapper里面的增删改查数据
//现在因为Mabatis-plus已经把增删改查在mapper里面就规定好了,每一次如果再通过service去调就会很麻烦
//
//IService是所有service层的一个总接口 这里面有一个泛型,泛型表示我们要操作哪个数据类型IService<User>
public interface UserService extends IService<User> {}
UserServiceImpl实现类
@Service
public class UserServiceImpl extends ServiceImpl<UserMapper, User> implements UserService {

}
Controller控制器
package com.hlq.admin.controller;


@Controller
public class TableController {
    @GetMapping("/basic_table")
    public String basic_table(){
        return "table/basic_table";
    }
    @Autowired
    UserService userService;
    @GetMapping("/dynamic_table")
    //第一个参数是传入的当前页的页码
    public String dynamic_table(@RequestParam(value = "pageNo",defaultValue = "1") Long pageNo,
                                Model model){
//        List<User> list = new ArrayList<>();
//        list.add(new User("魏丽丽","123456"));
//        list.add(new User("韩立强","123456"));
//        list.add(new User("hhhhh","qqqqqq"));
//        list.add(new User("lllll","111111"));
//        model.addAttribute("list",list);
        //从数据库表中查询所有的结果
        List<User> list = (List<User>) userService.list();
        //因为是对User数据进行分页,所以泛型是user 第一个参数当前页码,第二个一页最多显示多少条数据
        Page<User> userPage = new Page<>(pageNo,2);
        //查询分页数据,第一个参数是翻页对象 也就是Page对象,第二个参数被封装的查询条件
        Page<User> page = userService.page(userPage, null);

        long current = page.getCurrent();//当前第几页
        long pages = page.getPages();//一共多少页
        long total = page.getTotal();//一共多少条记录
        List<User> records = page.getRecords();//查询分页的所有用户
        //因为查询的是分页的数据,所以放的是page里面的数据
        model.addAttribute("page",page);
//        model.addAttribute("list",list);

        return "table/dynamic_table";
    }
    @GetMapping("/responsive_table")
    public String responsive_table(){
        return "table/responsive_table";
    }
    @GetMapping("/editable_table")
    public String editable_table(){
        return "table/editable_table";
    }
    @GetMapping("/pricing_table")
    public String pricing_table(){
        return "table/pricing_table";
    }
    //当我们点击删除按钮发一个请求,我们的这个请求会带着当前页码
    //这样这个当前页码我们就拿到了 通过RedirectAttributes ra它拿的
    //当我们删除之后,会带着当前页码的数据给我们重定向到指定页码页面/dynamic_table?pageNo=2
    @GetMapping("/user/delete/{id}")
    public String deleteUser(@PathVariable("id") Long id,
                             @RequestParam(value = "pageNo",defaultValue = "1") Long pageNo,
                             RedirectAttributes ra){
        userService.removeById(id);
        //RedirectAttributes ra 表示重定向携带数据
        ra.addAttribute("pageNo",pageNo);
        return "redirect:/dynamic_table";

    }
}
核心HTML
                        <div class="panel-body">
                            <div class="adv-table">
                                <table class="display table table-bordered table-striped" id="dynamic-table">
                                    <thead>
                                    <tr>
                                        <th>#</th>
                                        <th>id</th>
                                        <th>name</th>
                                        <th>age</th>
                                        <th>email</th>
                                        <th>操作</th>
                                    </tr>
                                    </thead>
                                    <tbody>
                                    <tr class="gradeX" th:each="user,stats:${page.records}">
                                        <td th:text="${stats.count}">Trident</td>
                                        <td th:text="${user.id}">id</td>
                                        <td th:text="${user.name}">Internet</td>
                                        <td th:text="${user.age}">Win 95+</td>
                                        <td class="center hidden-phone" th:text="${user.email}">4</td>
                                        <td class="center hidden-phone">
<!--                                            保证删除按钮上带页码-->
                                            <a th:href="@{/user/delete/{id}(id=${user.id},pageNo=${page.current})}">
                                                <button class="btn btn-danger" type="button">删除</button>
                                            </a>
                                        </td>
                                    </tr>
                                    </tbody>
                                </table>
                                <div class="row-fluid">
                                    <div class="span6">
                                        <div class="dataTables_info" id="dynamic-table_info">当前第 [[${page.current}]] 页
                                            总计 [[${page.pages}]] 页 共 [[${page.total}]] 条记录
                                        </div>
                                    </div>
                                    <div class="span6">
                                        <div class="dataTables_paginate paging_bootstrap pagination">
                                            <ul>
                                                <li class="prev disabled"><a href="#">← 前一页</a></li>
                                                <!--                                                th:each="${#numbers.sequence()}"遍历生成一个数字序列,从第一页到我们的最后一页-->
                                                <!--                                                th:class="${num==page.current ? 'active':''}"如果num等于当前页class就等于active,否则就为空-->
                                                <li th:class="${num==page.current ? 'active':''}" class="active"
                                                    th:each="num : ${#numbers.sequence(1,page.pages)}">
                                                    <!--                                                    如何给请求动态加参数-->
                                                    <a th:href="@{/dynamic_table(pageNo=${num})}">[[${num}]]</a></li>
                                                <li class="next"><a href="#">后一页 → </a></li>
                                            </ul>
                                        </div>
                                    </div>
                                </div>
                            </div>
                        </div>
如果有复杂查询我们依然可以在UserMapper接口写逻辑方法
然后再它的sql映射文件,书写sql语句


 3423
3423


 被折叠的 条评论
为什么被折叠?
被折叠的 条评论
为什么被折叠?
 到【灌水乐园】发言


