


项目目录
客户端可以自己抽取
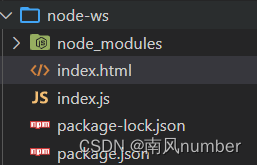
第一步 创建服务端目录 node-ws
打开 cmd终端 执行
npm init -y
第二步 安装服务端 ws包
cmd终端 执行
npm i ws
第三步 创建服务端文件 index.js
内容如下:
const WebSocket = require('ws');

const wss = new WebSocket.Server({ port: 9000 });

wss.on('connection', function connection (ws) {
  console.log('连接成功');

  ws.on('message', function incoming (message) {
    console.log(`收到客户端消息: ${message}`);


    ws.send(`回复: ${message}`);
  });
});

console.log('WebSocket server started on port 9000');
第四步 创建客户端文件 index.html
内容如下
<!DOCTYPE html>
<html lang="en">

<head>
  <meta charset="UTF-8">
  <meta http-equiv="X-UA-Compatible" content="IE=edge">
  <meta name="viewport" content="width=device-width, initial-scale=1.0">
  <title>Document</title>
</head>

<body>
  <script>
    var ws = new WebSocket("ws://localhost:9000");
    console.log(ws, 'ws')

    ws.onopen = function () {
      console.log("建立连接");
      if (ws.readyState === 1) {
        console.log("客户端发送消息");
        ws.send("你好");
      }
    }


    ws.onmessage = function (event) {
      console.log("收到服务端消息: " + event.data);
    }
  </script>
</body>

</html>
最后 启动服务端
node index.js
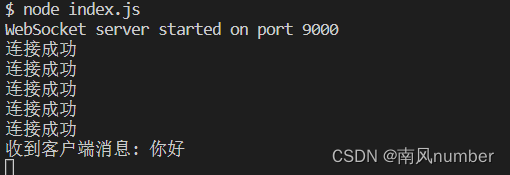
打开客户端 效果如下

后续 -完善
两个人聊天 实际肯定需要把消息存到数据库 由后端处理给谁推动消息
分析: 发送消息 知道 谁给谁发 这样后端根据两个id 发送者id和接收者id做对应处理
index.html内容变更
<!DOCTYPE html>
<html lang="en">

<head>
  <meta charset="UTF-8">
  <meta http-equiv="X-UA-Compatible" content="IE=edge">
  <meta name="viewport" content="width=device-width, initial-scale=1.0">
  <title>聊天室</title>
</head>
<style>
  .wrapper {}

  .tab {
    display: flex;
    width: 500px;
    height: 50px;
    border: 1px solid #333;
    align-items: center;
  }

  .tab-item {
    cursor: pointer;
  }

  .active {
    background: red;

  }
</style>

<body>
  <div class="wrapper">
    <div class="tab">
      <div class="tab-item active" onclick="changeUser(1,2,0)">用户1</div>
      <div class="tab-item" onclick="changeUser(2,1,1)">用户2</div>
    </div>
    <div>
      <div>收到的消息</div>
      <div class="receive-msg"></div>
      <textarea name="" id="" cols="30" rows="10"></textarea>
    </div>
    <button onclick="sendMsg()">发送消息</button>
  </div>
  <script>
    //userId 当前用户  otherId 当前用户要给他的消息
    this.userId = 1, this.otherId = 2, chatList = []
    var ws = new WebSocket("ws://localhost:9000");
    console.log(ws, 'ws')

    ws.onopen = function () {
      console.log("建立连接");
      /*       if (ws.readyState === 1) {
              console.log("客户端发送消息");
              ws.send("你好");
            } */
    }


    ws.onmessage = function (event) {
      console.log("收到服务端消息: " + event.data);
      let receiveDom = document.querySelector('.receive-msg')
      let msg = JSON.parse(event.data)
      chatList.push(msg)
      let showMsg = ''
      chatList.forEach(i => {
        showMsg += `<div>用户${i.userId}对用户${i.otherId}说${i.value}</div>`
      })
      receiveDom.innerHTML = showMsg
    }


    function sendMsg () {
      const value = document.querySelector('textarea').value

      let msg = {
        value,
      }
      msg.userId = this.userId
      msg.otherId = this.otherId
      console.log('发送消息', msg)
      ws.send(JSON.stringify(msg))
    }

    function changeUser (userId, otherId, index) {
      this.userId = userId
      this.otherId = otherId

      let tabItems = document.querySelectorAll('.tab-item')
      tabItems.forEach(i => {
        i.classList.remove('active')
      })
      tabItems[index].classList.add('active')
    }
  </script>
</body>

</html>
服务端index.js更改内容
const WebSocket = require('ws');

const wss = new WebSocket.Server({ port: 9000 });

wss.on('connection', function connection (ws) {
  console.log('连接成功');

  ws.on('message', function incoming (message) {
    console.log(`收到客户端消息: ${message}`);


    ws.send(`${message}`);
  });
});

console.log('WebSocket server started on port 9000');
效果:


 被折叠的 条评论
为什么被折叠?
被折叠的 条评论
为什么被折叠?
 到【灌水乐园】发言


