


arduino eeprom的read和get、write和put的区别
介绍
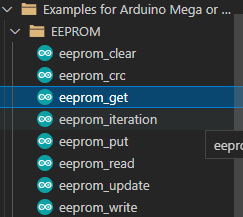
在arduino的例子里面有关于eeprom的例子,里面主要有读和写的例子。其中读写都各有两个方法:
在这里简单介绍一下。
一、get和read的区别
①read:一次读取一个字节
首先是read方法:read方法一次读取一个字节
#include <EEPROM.h>
// start reading from the first byte (address 0) of the EEPROM
int address = 0;
byte value;
void setup() {
  // initialize serial and wait for port to open:
  Serial.begin(9600);
  while (!Serial) {
    ; // wait for serial port to connect. Needed for native USB port only
  }
}
void loop() {
  // read a byte from the current address of the EEPROM
  value = EEPROM.read(address);
  Serial.print(address);
  Serial.print("\t");
  Serial.print(value, DEC);
  Serial.println();
  address = address + 1;
  if (address == EEPROM.length()) {
    address = 0;
  }
  /***
    As the EEPROM sizes are powers of two, wrapping (preventing overflow) of an
    EEPROM address is also doable by a bitwise and of the length - 1.
    ++address &= EEPROM.length() - 1;
  ***/
  delay(500);
}
其实read方法就是
uint8_t read( int idx ) { return EERef( idx ); }
②get:一次读取多个字节
再是get方法:get方法可以一次读取多个字节,其实现也是比较厉害的(对于我这个程序小白而言)
#include <EEPROM.h>
void setup() {
  float f = 0.00f;   //Variable to store data read from EEPROM.
  int eeAddress = 0; //EEPROM address to start reading from
  Serial.begin(9600);
  while (!Serial) {
    ; // wait for serial port to connect. Needed for native USB port only
  }
  Serial.print("Read float from EEPROM: ");
  //Get the float data from the EEPROM at position 'eeAddress'
  EEPROM.get(eeAddress, f);  //这里一次读取了一个float大小的数据
  Serial.println(f, 3);    //This may print 'ovf, nan' if the data inside the EEPROM is not a valid float.
  /***
    As get also returns a reference to 'f', you can use it inline.
    E.g: Serial.print( EEPROM.get( eeAddress, f ) );
  ***/
  /***
    Get can be used with custom structures too.
    I have separated this into an extra function.
  ***/
  secondTest(); //Run the next test.
}

struct MyObject {
  float field1;
  byte field2;
  char name[10];
};
void secondTest() {
  int eeAddress = sizeof(float); //Move address to the next byte after float 'f'.
  MyObject customVar; //Variable to store custom object read from EEPROM.
  EEPROM.get(eeAddress, customVar);  //这里一次读取了MyObject这个结构体这么大的数据
  Serial.println("Read custom object from EEPROM: ");
  Serial.println(customVar.field1);
  Serial.println(customVar.field2);
  Serial.println(customVar.name);
}
void loop() {
  /* Empty loop */
}
我们可以看看get函数的实现:使用了模板类来实现
template< typename T > T &get( int idx, T &t ){
        EEPtr e = idx;
        uint8_t *ptr = (uint8_t*) &t;
        for( int count = sizeof(T) ; count ; --count, ++e )  *ptr++ = *e;
        return t;
    }
另外在这个模板类中有一个EEPtr 结构体:
struct EEPtr{
	//一下全是对这个操作符重载函数
    EEPtr( const int index )
        : index( index )                {}

    operator int() const                { return index; }//当要返回int类型值时调用这个
    EEPtr &operator=( int in )          { return index = in, *this; }

    //Iterator functionality.
    bool operator!=( const EEPtr &ptr ) { return index != ptr.index; }
    EERef operator*()                   { return index; }

    /** Prefix & Postfix increment/decrement **/
    EEPtr& operator++()                 { return ++index, *this; }
    EEPtr& operator--()                 { return --index, *this; }
    EEPtr operator++ (int)              { return index++; }
    EEPtr operator-- (int)              { return index--; }

    int index; //Index of current EEPROM cell.
};
这里面有一个EERef 很重要:EERef 里有一个=符号重载:eeprom_write_byte( (uint8_t*) index, in )。这个是关键。
struct EERef{

    EERef( const int index )
        : index( index )                 {}

    //Access/read members.
    uint8_t operator*() const            { return eeprom_read_byte( (uint8_t*) index ); }
    operator uint8_t() const             { return **this; }

    //Assignment/write members.
    EERef &operator=( const EERef &ref ) { return *this = *ref; }
    EERef &operator=( uint8_t in )       { return eeprom_write_byte( (uint8_t*) index, in ), *this;  }
    EERef &operator +=( uint8_t in )     { return *this = **this + in; }
    EERef &operator -=( uint8_t in )     { return *this = **this - in; }
    EERef &operator *=( uint8_t in )     { return *this = **this * in; }
    EERef &operator /=( uint8_t in )     { return *this = **this / in; }
    EERef &operator ^=( uint8_t in )     { return *this = **this ^ in; }
    EERef &operator %=( uint8_t in )     { return *this = **this % in; }
    EERef &operator &=( uint8_t in )     { return *this = **this & in; }
    EERef &operator |=( uint8_t in )     { return *this = **this | in; }
    EERef &operator <<=( uint8_t in )    { return *this = **this << in; }
    EERef &operator >>=( uint8_t in )    { return *this = **this >> in; }

    EERef &update( uint8_t in )          { return  in != *this ? *this = in : *this; }

    /** Prefix increment/decrement **/
    EERef& operator++()                  { return *this += 1; }
    EERef& operator--()                  { return *this -= 1; }

    /** Postfix increment/decrement **/
    uint8_t operator++ (int){
        uint8_t ret = **this;
        return ++(*this), ret;
    }

    uint8_t operator-- (int){
        uint8_t ret = **this;
        return --(*this), ret;
    }

    int index; //Index of current EEPROM cell.
};
我们可以看到这个get方法的实现还是比较绕的,最后总结下这个get方法的调用过程。
- 首先调用:
EEPROM.get(eeAddress, customVar); - 然后进入到:
for( int count = sizeof(T) ; count ; --count, ++e ) *ptr++ = *e;get方法就是在这里实现多字节读取的。
根据传入的参数类型大小逐字节读取数据:*ptr++ = *e。你以为这只是一句简单的加减赋值?但它才是读数据的关键一步。
*ptr++ = *e这一句是怎么把数据读出来的呢?这就用到了前面的操作符重载了。
- 首先
*e对应EEPtr里面的*运算符重载EERef operator*() { return index; } - 再是
*e实际就是EERef,对应的是先调用EERef里面的构造函数EERef( const int index ) : index( index ) - 又因为
*ptr是uint8_t,其*ptr=EERef会调用operator uint8_t() const { return **this; } - 而
**this实际是*(*this),也就是会调用EERef的*运算符uint8_t operator*() const { return eeprom_read_byte((uint8_t*) index ); }。 - 最后去调用
eeprom_read_byte((uint8_t*) index )实现读取。
另外*ptr++;实际是*ptr;ptr+=1;
二、put和write的区别
其实了解了get的原理,对应的put和write也是一样的了
①write:单字节写入
write就是单字节写入:除了通过write外还有另一种方法写入:EEPROM[index] = 1;其实现原来跟write一样。贴个管方用例:
#include <EEPROM.h>
/** the current address in the EEPROM (i.e. which byte we're going to write to next) **/
int addr = 0;
void setup() {
  /** Empty setup. **/
}
void loop() {
  /***
    Need to divide by 4 because analog inputs range from
    0 to 1023 and each byte of the EEPROM can only hold a
    value from 0 to 255.
  ***/
  int val = analogRead(0) / 4;
  /***
    Write the value to the appropriate byte of the EEPROM.
    these values will remain there when the board is
    turned off.
  ***/
  EEPROM.write(addr, val);
  addr = addr + 1;
  if (addr == EEPROM.length()) {
    addr = 0;
  }
  /***
    As the EEPROM sizes are powers of two, wrapping (preventing overflow) of an
    EEPROM address is also doable by a bitwise and of the length - 1.
    ++addr &= EEPROM.length() - 1;
  ***/
  delay(100);
}
其实write方法就是
void write( int idx, uint8_t val ) {(EERef( idx )) = val; }
②put:多个字节的写入
put方法与get方法及其类似,也是实现多个字节的写入:实现的基本原理大致相同,有细微区别,不在赘述。
template< typename T > const T &put( int idx, const T &t ){
        EEPtr e = idx;
        const uint8_t *ptr = (const uint8_t*) &t;
        for( int count = sizeof(T) ; count ; --count, ++e )  (*e).update( *ptr++ );
        return t;
    }
三、clear,crc,iteration,update的用法
①clear:擦除所有
实际上就是把每个地址写0
/*
 * EEPROM Clear
 *
 * Sets all of the bytes of the EEPROM to 0.
 * Please see eeprom_iteration for a more in depth
 * look at how to traverse the EEPROM.
 *
 * This example code is in the public domain.
 */
#include <EEPROM.h>
void setup() {
  // initialize the LED pin as an output.
  pinMode(13, OUTPUT);
  /***
    Iterate through each byte of the EEPROM storage.

    Larger AVR processors have larger EEPROM sizes, E.g:
    - Arduno Duemilanove: 512b EEPROM storage.
    - Arduino Uno:        1kb EEPROM storage.
    - Arduino Mega:       4kb EEPROM storage.

    Rather than hard-coding the length, you should use the pre-provided length function.
    This will make your code portable to all AVR processors.
  ***/
  for (int i = 0 ; i < EEPROM.length() ; i++) {
    EEPROM.write(i, 0);
  }
  // turn the LED on when we're done
  digitalWrite(13, HIGH);
}
void loop() {
  /** Empty loop. **/
}
②crc:可以用来校验写入数据的准确性
循环冗余校验(Cyclic Redundancy Check, CRC)是一种根据网络数据包或计算机文件等数据产生简短固定位数校验码的一种信道编码技术,主要用来检测或校验数据传输或者保存后可能出现的错误。它是利用除法及余数的原理来作错误侦测的。
/***
    Written by Christopher Andrews.
    CRC algorithm generated by pycrc, MIT licence ( https://github.com/tpircher/pycrc ).

	A CRC is a simple way of checking whether data has changed or become corrupted.
	This example calculates a CRC value directly on the EEPROM values.
	The purpose of this example is to highlight how the EEPROM object can be used just like an array.
***/
#include <Arduino.h>
#include <EEPROM.h>
void setup()
{
  //Start serial
  Serial.begin(9600);
  while (!Serial)
  {
    ; // wait for serial port to connect. Needed for native USB port only
  }
  //Print length of data to run CRC on.
  Serial.print("EEPROM length: ");
  Serial.println(EEPROM.length());
  //Print the result of calling eeprom_crc()
  Serial.print("CRC32 of EEPROM data: 0x");
  Serial.println(eeprom_crc(), HEX);
  Serial.print("\n\nDone!");
}
void loop()
{
  /* Empty loop */
}
unsigned long eeprom_crc(void)
{
  const unsigned long crc_table[16] = {
      0x00000000, 0x1db71064, 0x3b6e20c8, 0x26d930ac,
      0x76dc4190, 0x6b6b51f4, 0x4db26158, 0x5005713c,
      0xedb88320, 0xf00f9344, 0xd6d6a3e8, 0xcb61b38c,
      0x9b64c2b0, 0x86d3d2d4, 0xa00ae278, 0xbdbdf21c};
  unsigned long crc = ~0L;
  for (int index = 0; index < EEPROM.length(); ++index)
  {
    crc = crc_table[(crc ^ EEPROM[index]) & 0x0f] ^ (crc >> 4);
    crc = crc_table[(crc ^ (EEPROM[index] >> 4)) & 0x0f] ^ (crc >> 4);
    crc = ~crc;
  }
  return crc;
}
③iteration:几种遍历的方法
从这里我们可以看到除了通过write外还有另一种方法写入:EEPROM[index] = 1;其实现原来跟write一样。
/***
    eeprom_iteration example.
    A set of example snippets highlighting the
    simplest methods for traversing the EEPROM.
    Running this sketch is not necessary, this is
    simply highlighting certain programming methods.
    Written by Christopher Andrews 2015
    Released under MIT licence.
***/
#include <EEPROM.h>
void setup()
{
  /***
    Iterate the EEPROM using a for loop.
  ***/
  for (int index = 0; index < EEPROM.length(); index++)
  {
    //Add one to each cell in the EEPROM
    EEPROM[index] += 1; //这也是一种写方法
  }
  /***
    Iterate the EEPROM using a while loop.
  ***/
  int index = 0;
  while (index < EEPROM.length())
  {
    //Add one to each cell in the EEPROM
    EEPROM[index] += 1;
    index++;
  }
  /***
    Iterate the EEPROM using a do-while loop.
  ***/
  int idx = 0; //Used 'idx' to avoid name conflict with 'index' above.
  do
  {
    //Add one to each cell in the EEPROM
    EEPROM[idx] += 1;
    idx++;
  } while (idx < EEPROM.length());
} //End of setup function.
void loop() {}
④update:与write相同的功能
与write相同的功能:void update(int idx, uint8_t val) { EERef(idx).update(val); }
/***
   EEPROM Update method
   Stores values read from analog input 0 into the EEPROM.
   These values will stay in the EEPROM when the board is
   turned off and may be retrieved later by another sketch.
   If a value has not changed in the EEPROM, it is not overwritten
   which would reduce the life span of the EEPROM unnecessarily.
 ***/
#include <EEPROM.h>
/** the current address in the EEPROM (i.e. which byte we're going to write to next) **/
int address = 0;
void setup()
{
  /** EMpty setup **/
}
void loop()
{
  /***
    need to divide by 4 because analog inputs range from
    0 to 1023 and each byte of the EEPROM can only hold a
    value from 0 to 255.
  ***/
  int val = analogRead(0) / 4;
  /***
    Update the particular EEPROM cell.
    these values will remain there when the board is
    turned off.
  ***/
  EEPROM.update(address, val);
  /***
    The function EEPROM.update(address, val) is equivalent to the following:
    if( EEPROM.read(address) != val ){
      EEPROM.write(address, val);
    }
  ***/
  address = address + 1;
  if (address == EEPROM.length())
  {
    address = 0;
  }
  /***
    As the EEPROM sizes are powers of two, wrapping (preventing overflow) of an
    EEPROM address is also doable by a bitwise and of the length - 1.
    ++address &= EEPROM.length() - 1;
  ***/
  delay(100);
}


 2332
2332

 被折叠的 条评论
为什么被折叠?
被折叠的 条评论
为什么被折叠?
 到【灌水乐园】发言


