


 本文介绍了如何在C#中利用ActiViz库创建并显示点云,适用于汽车行业点云数据的上位机展示,包括步骤如建立.NET项目、添加Panel控件和ActiViz包,以及编写基本的点云显示代码。
使用ActiViz包完成点云显示(小白)
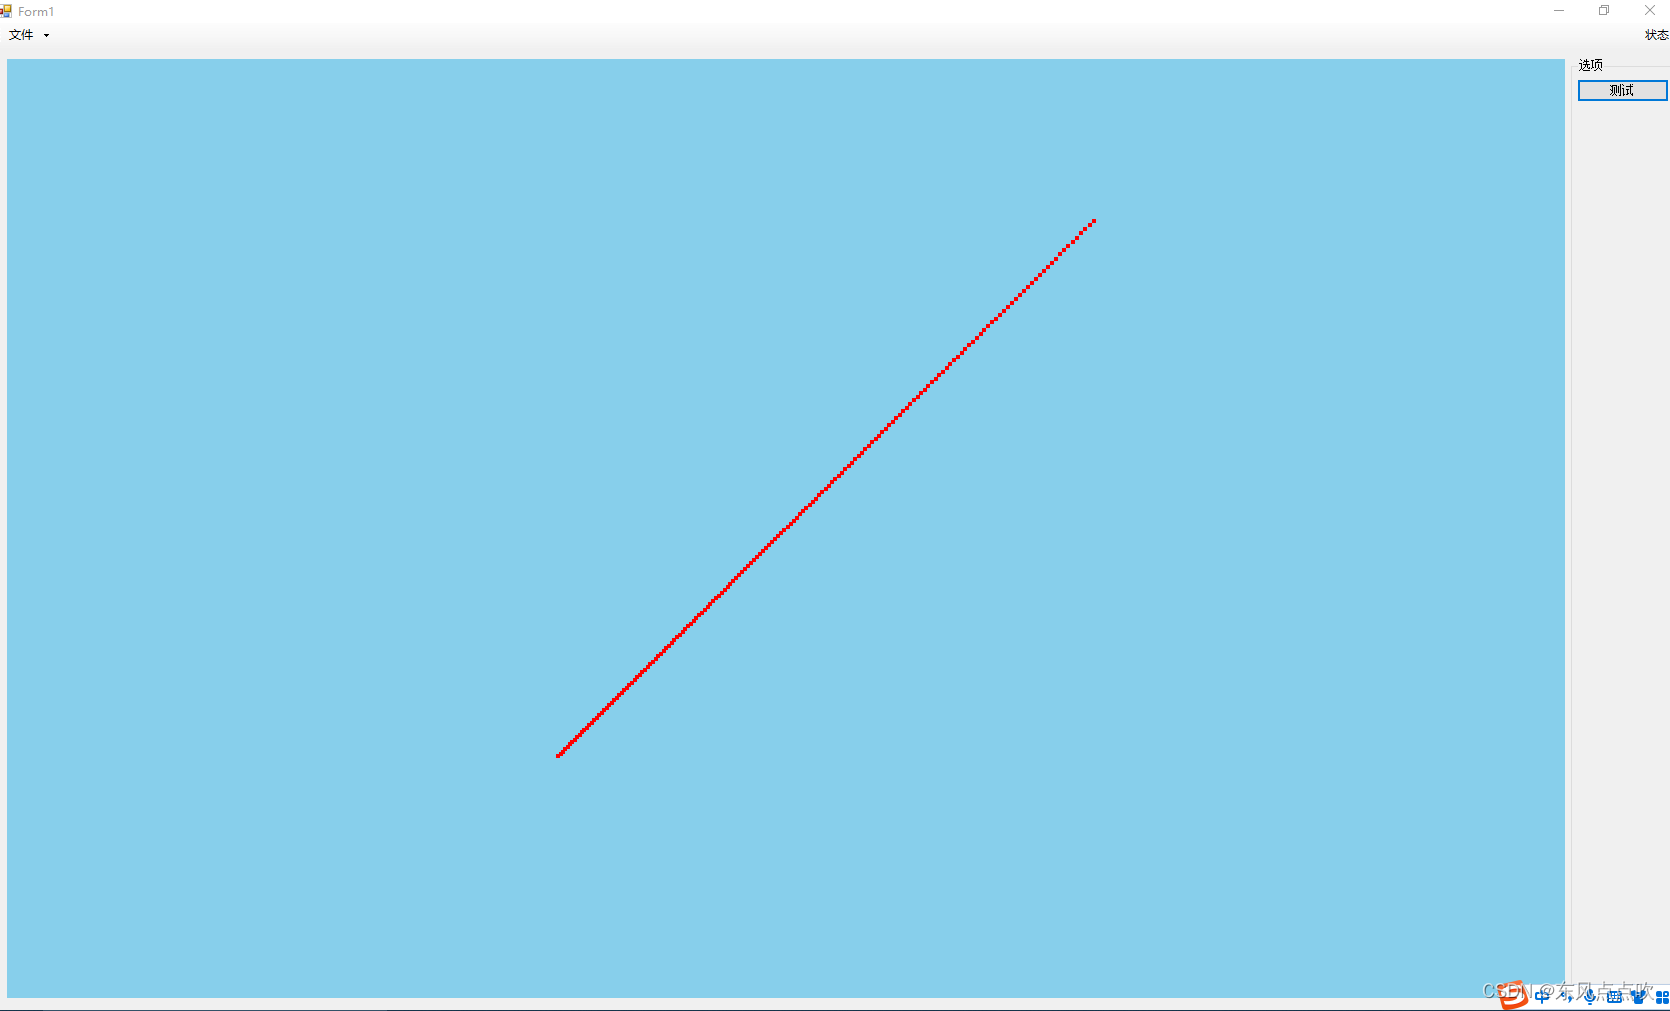
↑实际运行170个点生成的图像↑
当前汽车行业激光雷达或毫米波雷达都可以显示点云状态,由此必定会存在上位机来显示点云。介绍一种非常简单的基于C#的点云显示。
运行前需要安装环境:
1.visual studio
2.visual studio的“.NET桌面开发”
读者若无编程使用基础,建议查看此博主教程,只须看完代码改lable值即可:
C#窗体控件—Label
C#是一种比较简单的语言,适合大部分想快速学习开发软件的同学。
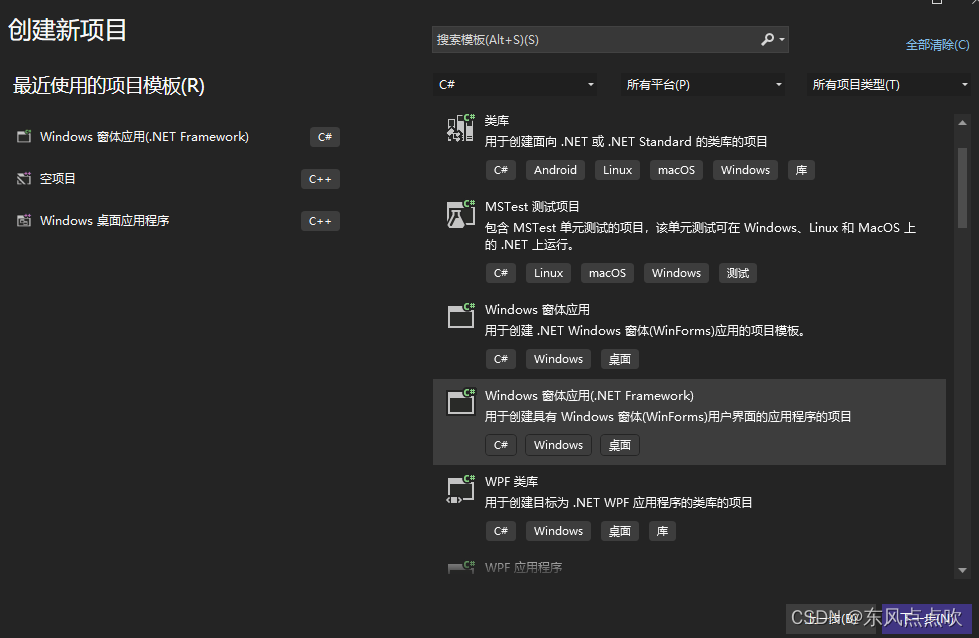
1.建立.NET项目
建议带括号版本,因为不带括号版本部分使用菜单空间有问题
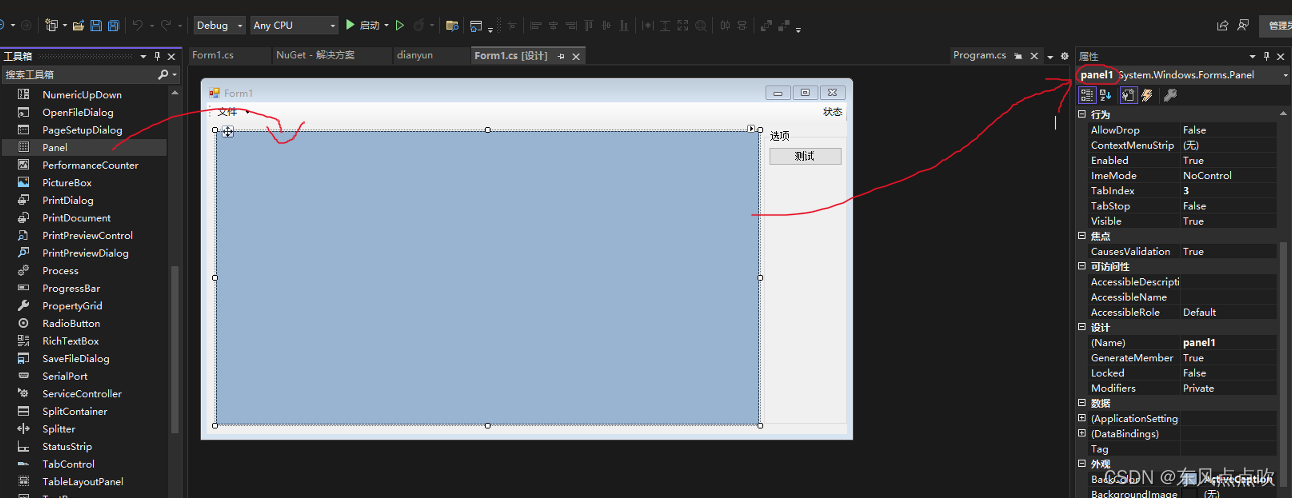
2.添加panel控件
此空间作为点云显示界面的介质
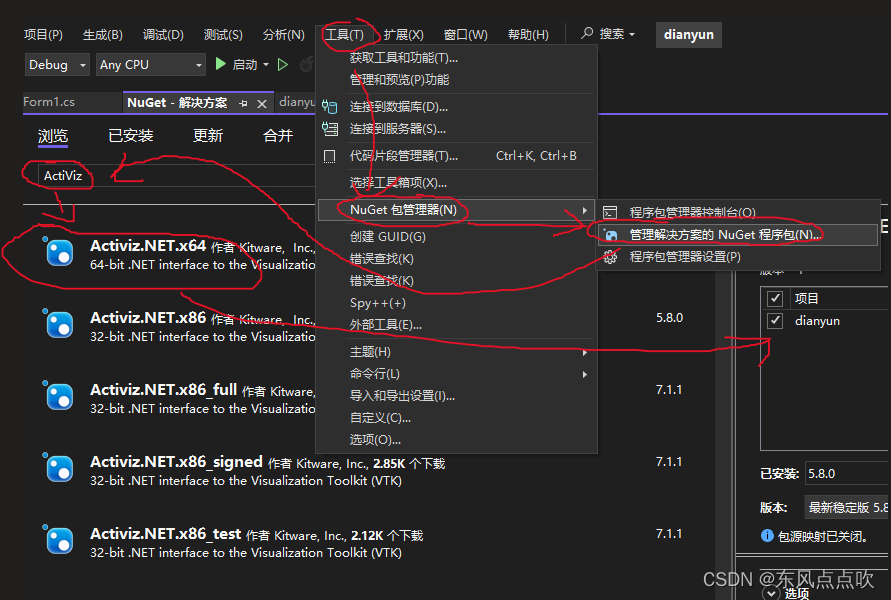
3.添加ActiViz包
此操作类似于C代码中的引入库文件,类似于引用C代码中的.h文件。
ActiViz则是将VTK集成到C#环境中的工具包,相当于将C代码中的库封装成C#内可以直接操作的库。
类似的包还有Emgu CV ,它是将opencv封装成C#可用的包。
选择“安装”后,在我的代码里可以看到“using Kitware.VTK;”已经被自动添加到代码里了
4.我的代码
小编是将显示功能加到了按钮(button)上面,其实放到public Form1()里面也可以的(就是窗体一启动,点云就启动)。
由于小编还加了一些别的控件,如果同学发现了报错可以将其删除。
using System;
using System.Collections.Generic;
using System.ComponentModel;
using System.Data;
using System.Drawing;
using System.Linq;
using System.Text;
using System.Threading.Tasks;
using System.Windows.Forms;
using Kitware.VTK;

namespace dianyun
{
    public partial class Form1 : Form
    {
        RenderWindowControl renderWindowControl;
        public Form1()
        {
            InitializeComponent();
            toolStripLabel1.Text = "准备就绪";	/* 可删除 */
        }

        private void button1_Click(object sender, EventArgs e)
        {
            renderWindowControl = new RenderWindowControl();
            renderWindowControl.Parent = panel1;	/* 指定显示空间为panel1 */
            renderWindowControl.Dock = DockStyle.Fill;	/* 指定显示方式为铺满 */
            vtkRenderer VTKrenderer = renderWindowControl.RenderWindow.GetRenderers().GetFirstRenderer();
            VTKrenderer.SetBackground(0.53, 0.81, 0.92);	/* 和上一行其实可以合成一句话 */

            vtkPoints points = new vtkPoints();		/* 新建点云类型 */

            for (int i = 1; i < 170; i++)	/* 170个点 */
            {
                points.InsertPoint(i, (double)i, (double)i, (double)i);    /* X ,Y ,Z */
            }

            show_cloud(points, 1.0, 0, 0, 4);	/* 设置点云颜色依次为r g b,设置点大小为4 */
        }

        public void show_cloud(vtkPoints points, double r = 1.0, double g = 1.0, double b = 1.0, float size = 4f)
        {
            //m_points = null;
            //m_points = points;

            vtkPolyData polydata = vtkPolyData.New();
            polydata.SetPoints(points);
            vtkVertexGlyphFilter glyphFilter = vtkVertexGlyphFilter.New();
            glyphFilter.SetInputConnection(polydata.GetProducerPort());

            vtkPolyDataMapper mapper = vtkPolyDataMapper.New();
            mapper.SetInputConnection(glyphFilter.GetOutputPort());
            vtkActor actor = vtkActor.New();
            actor.SetMapper(mapper);
            actor.GetProperty().SetPointSize(size);
            actor.GetProperty().SetColor(r, g, b);

            vtkRenderer render = renderWindowControl.RenderWindow.GetRenderers().GetFirstRenderer();

            render.AddActor(actor);	/* 开始显示 */

        }

    }
}
参考资料:
博主 十里河畔:ActiViz学习点滴(二)——设置背景色(纯色+渐变色)
博主 牵走时间的树:C#/halcon联合编程 三维点云数据可视化(ActiViz实现)


 769
769

 被折叠的 条评论
为什么被折叠?
被折叠的 条评论
为什么被折叠?
 到【灌水乐园】发言


