


目录
前言
4*4矩阵键盘对于实验来说必不可少,那么如何实现矩阵键盘基本功能呢?今天就简单地介绍一下如何利用矩阵键盘和LCD显示出对应的键值,直接进入主题。
一、4*4矩阵键盘的使用
首选,了解它的原理很重要,但在了解它的原理之前,先来看看它的样子。

我们可以看到,4*4的矩阵键盘对应有16个按键,分别对应键值0~15(也可以自己设定),然后你会看到它有8个引脚,其中四个是行控制引脚,四个是列控制引脚
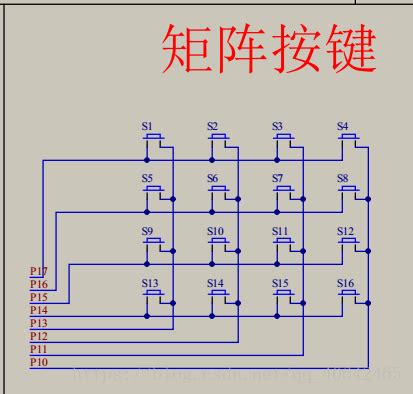
上面就是它的主要原理图了
在8个接口上,很明显的标出来C1~4和R1~4,C是column(列),R是row(行)
它的扫描原理就是通过高四位输出高电平来对矩阵键盘进行逐行扫描,当低四位接收到的数据不全为1的时候,说明有按键按下,然后通过接收到的数据是哪一位为0来判断是哪一行按键被按下。
二、代码部分
下面这个代码部分比较简单,就不一一详解了,大家可以自己解读一下,或者在评论区发表
#include "sys.h"
#include "kyscan.h"
#include "delay.h"
#include "lcd.h"


void KEY1_Init(void)
{
   GPIO_InitTypeDef GPIO_InitStructure;

   RCC_APB2PeriphClockCmd (RCC_APB2Periph_GPIOA|RCC_APB2Periph_GPIOB,ENABLE);//??GPIOA?B
   GPIO_InitStructure.GPIO_Mode=GPIO_Mode_IPU;//????
   GPIO_InitStructure.GPIO_Pin=GPIO_Pin_12|GPIO_Pin_13|GPIO_Pin_14|GPIO_Pin_15;
   GPIO_Init(GPIOB,&GPIO_InitStructure);


   GPIO_InitStructure.GPIO_Mode=GPIO_Mode_Out_PP;        //????
   GPIO_InitStructure.GPIO_Speed=GPIO_Speed_50MHz;
   GPIO_InitStructure.GPIO_Pin=GPIO_Pin_4|GPIO_Pin_5|GPIO_Pin_6|GPIO_Pin_7;
   GPIO_Init(GPIOA,&GPIO_InitStructure);
   GPIO_ResetBits(GPIOA,GPIO_Pin_4|GPIO_Pin_5|GPIO_Pin_6|GPIO_Pin_7); //??????,???
}
void KEY2_Init(void)
{
   GPIO_InitTypeDef GPIO_InitStructure;
   RCC_APB2PeriphClockCmd (RCC_APB2Periph_GPIOA|RCC_APB2Periph_GPIOB,ENABLE);


   GPIO_InitStructure.GPIO_Mode=GPIO_Mode_Out_PP;        //????
   GPIO_InitStructure.GPIO_Speed=GPIO_Speed_50MHz;
   GPIO_InitStructure.GPIO_Pin=GPIO_Pin_12|GPIO_Pin_13|GPIO_Pin_14|GPIO_Pin_15;
   GPIO_Init(GPIOB,&GPIO_InitStructure);
   GPIO_SetBits(GPIOB,GPIO_Pin_12|GPIO_Pin_13|GPIO_Pin_14|GPIO_Pin_15);  //???

   GPIO_InitStructure.GPIO_Mode=GPIO_Mode_IPD;   //????
   GPIO_InitStructure.GPIO_Pin=GPIO_Pin_4|GPIO_Pin_5|GPIO_Pin_6|GPIO_Pin_7;
	  GPIO_InitStructure.GPIO_Speed=GPIO_Speed_50MHz;
   GPIO_Init(GPIOA,&GPIO_InitStructure);
}
int KeyScan(void)
{
 u8 column=0;
u8 KeyValue=0;
    KEY1_Init();    //??????,???

  if(PBin(12)==0)
  {
   delay_ms(50);
   if(PBin(12)==0)
   {
    column=1;        //???
   }
  }
  if(PBin(13)==0)
  {
   delay_ms(50);
   if(PBin(13)==0)
   {
    column=2;        //???
   }
  }
  if(PBin(14)==0)
  {
   delay_ms(50);
   if(PBin(14)==0)
   {
    column=3;        //???
   }
  }
  if(PBin(15)==0)
  {
   delay_ms(50);
   if(PBin(15)==0)
   {
    column=4;        //???
   }
  }
  if(column==1)
  {
    KEY2_Init();     //??????,???
     if(PAin(7)==1) //??????
     {
      KeyValue=0;
     }
     if(PAin(6)==1) //??????
     {
      KeyValue=4;

     }
     if(PAin(5)==1) //??????
     {
      KeyValue=8;

     }
     if(PAin(4)==1) //??????
     {
      KeyValue=12;

     }

  }

  if(column==2)
  {
    KEY2_Init();     //????
     if(PAin(7)==1)
     {
      KeyValue=1;

     }
     if(PAin(6)==1)
     {
      KeyValue=5;

     }
     if(PAin(5)==1)
     {
      KeyValue=9;

     }
     if(PAin(4)==1)
     {
      KeyValue=13;

     }

  }
  if(column==3)
  {
    KEY2_Init();
     if(PAin(7)==1)
     {
      KeyValue=2;

     }
     if(PAin(6)==1)
     {
      KeyValue=6;

     }
     if(PAin(5)==1)
     {
      KeyValue=10;

     }
     if(PAin(4)==1)
     {
      KeyValue=14;

     }

  }

  if(column==4)
  {
    KEY2_Init();
     if(PAin(7)==1)
     {
      KeyValue=3;
		 }
     if(PAin(6)==1)
     {
      KeyValue=7;
 ;
     }
     if(PAin(5)==1)
     {
      KeyValue=11;

     }
     if(PAin(4)==1)
     {
      KeyValue=15;

     }
  }
    return KeyValue;
 }
这里其实就是采用了扫描的方式,所以可能会有一定的延迟,大家可以采用中断的方式会更快。
对了,我定义是先扫描列,因此这里列我是接PB12~15。
下面附上头文件
#ifndef __KY_H
#define __KY_H
#include "sys.h"


void KEY1_Init(void);
void KEY2_Init(void);
int KeyScan(void);
int KeyScan2(void);

#endif
三、总结
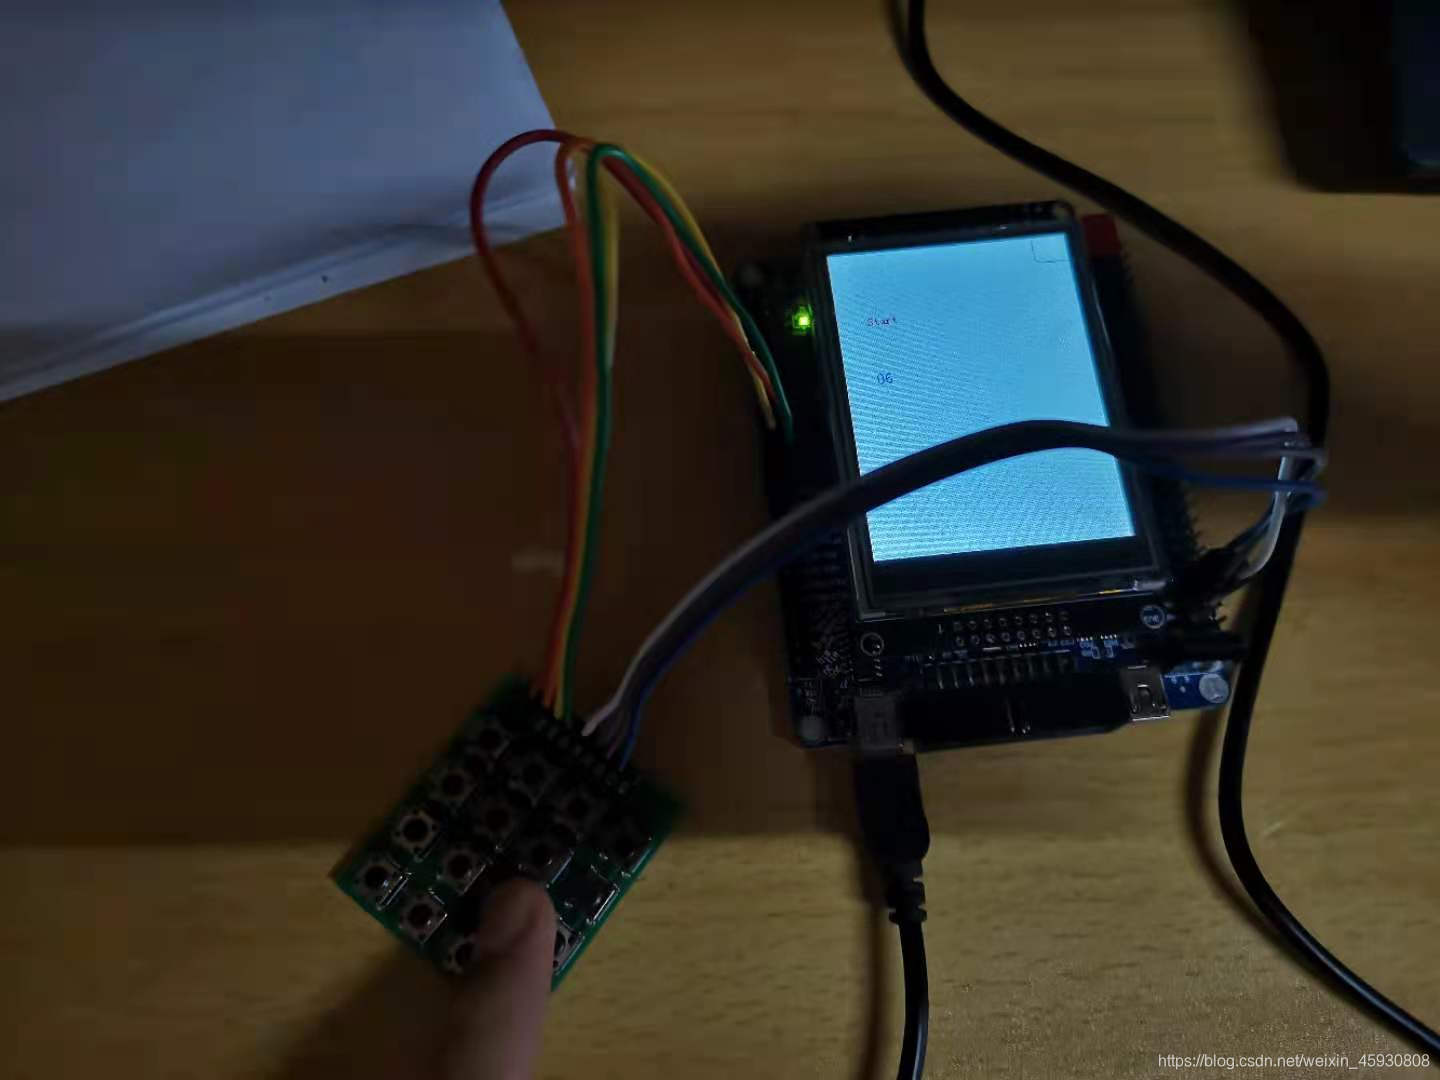
今天这一讲是比较简单的,下面会附上实现图,希望对大家有所帮助,谢谢每一位访客
如图,按下键后返回键值并显示出来,大家可以尝试一下。欢迎收藏关注!
题外话:
挺喜欢彭于晏说的一句话:“我就是没有才华,所以才用命去拼!”
学习32之路固然辛苦,但要是坚持下来了,那不是很酷?哈哈哈


 1246
1246

 被折叠的 条评论
为什么被折叠?
被折叠的 条评论
为什么被折叠?
 到【灌水乐园】发言


