


1. 环境准备

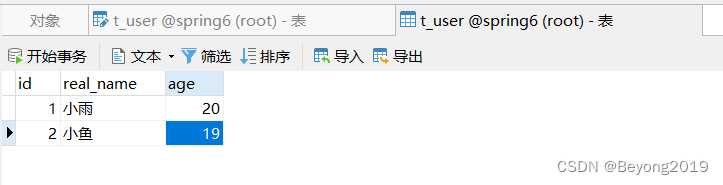
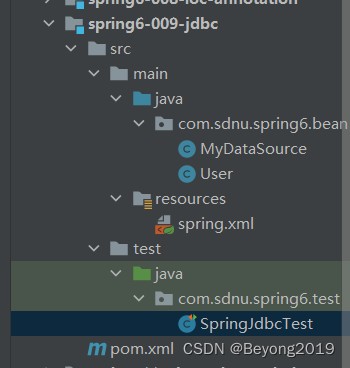
自己准备的数据源
package com.sdnu.spring6.bean;

import javax.sql.DataSource;
import java.io.PrintWriter;
import java.sql.*;
import java.util.logging.Logger;

/**
 * 自己的数据源
 */
public class MyDataSource implements DataSource {
    private String driver;
    private String url;
    private String username;
    private String password;

    public void setDriver(String driver) {
        this.driver = driver;
    }

    public void setUrl(String url) {
        this.url = url;
    }

    public void setUsername(String username) {
        this.username = username;
    }

    public void setPassword(String password) {
        this.password = password;
    }

    @Override
    public Connection getConnection() throws SQLException {
        try {
            //注册驱动
            Class.forName(driver);
            //获取数据库连接对象
            Connection connection = DriverManager.getConnection(url, username, password);
            return connection;
        } catch (Exception e) {
            e.printStackTrace();
        }
        return null;
    }

    @Override
    public Connection getConnection(String username, String password) throws SQLException {
        return null;
    }

    @Override
    public PrintWriter getLogWriter() throws SQLException {
        return null;
    }

    @Override
    public void setLogWriter(PrintWriter out) throws SQLException {

    }

    @Override
    public void setLoginTimeout(int seconds) throws SQLException {

    }

    @Override
    public int getLoginTimeout() throws SQLException {
        return 0;
    }

    @Override
    public Logger getParentLogger() throws SQLFeatureNotSupportedException {
        return null;
    }

    @Override
    public <T> T unwrap(Class<T> iface) throws SQLException {
        return null;
    }

    @Override
    public boolean isWrapperFor(Class<?> iface) throws SQLException {
        return false;
    }
}
Bean
package com.sdnu.spring6.bean;

public class User {
    private Integer id;
    private String realName;
    private Integer age;

    public User() {
    }

    public User(Integer id, String realName, Integer age) {
        this.id = id;
        this.realName = realName;
        this.age = age;
    }

    public Integer getId() {
        return id;
    }

    public void setId(Integer id) {
        this.id = id;
    }

    public String getRealName() {
        return realName;
    }

    public void setRealName(String realName) {
        this.realName = realName;
    }

    public Integer getAge() {
        return age;
    }

    public void setAge(Integer age) {
        this.age = age;
    }

    @Override
    public String toString() {
        return "User{" +
                "id=" + id +
                ", realName='" + realName + '\'' +
                ", age=" + age +
                '}';
    }
}
spring配置文件
<?xml version="1.0" encoding="UTF-8"?>
<beans xmlns="http://www.springframework.org/schema/beans"
       xmlns:xsi="http://www.w3.org/2001/XMLSchema-instance"
       xsi:schemaLocation="http://www.springframework.org/schema/beans http://www.springframework.org/schema/beans/spring-beans.xsd">

    <!--配置自己的数据源-->
    <!--也可以集成其它组织的数据源,例如druid    -->
    <bean class="com.sdnu.spring6.bean.MyDataSource" id="ds">
        <property name="driver" value="com.mysql.jdbc.Driver"/>
        <property name="url" value="jdbc:mysql://localhost:3306/spring6"/>
        <property name="username" value="root"/>
        <property name="password" value="123456"/>
    </bean>
    <!--配置jdbcTemplate-->
    <bean id="jdbcTemplate" class="org.springframework.jdbc.core.JdbcTemplate">
        <property name="dataSource" ref="ds"/>
    </bean>
</beans>
测试
package com.sdnu.spring6.test;

import org.junit.Test;
import org.springframework.context.ApplicationContext;
import org.springframework.context.support.ClassPathXmlApplicationContext;
import org.springframework.jdbc.core.JdbcTemplate;

public class SpringJdbcTest {
    @Test
    public void testJdbc(){
        ApplicationContext applicationContext = new ClassPathXmlApplicationContext("spring.xml");
        JdbcTemplate jdbcTemplate = applicationContext.getBean("jdbcTemplate", JdbcTemplate.class);
        System.out.println(jdbcTemplate);
    }
}
2. 新增
在jdbcTemplate中只要是update,delete,insert都是调用update方法。
    @Test
    public void testJdbcAdd(){
        ApplicationContext applicationContext = new ClassPathXmlApplicationContext("spring.xml");
        JdbcTemplate jdbcTemplate = applicationContext.getBean("jdbcTemplate", JdbcTemplate.class);
        String sql = "insert into t_user(real_name, age) values (?, ?)";
        int count = jdbcTemplate.update(sql, "王五", 20);
        System.out.println(count);
    }
3. 修改
	@Test
    public void testJdbcUpdate(){
        ApplicationContext applicationContext = new ClassPathXmlApplicationContext("spring.xml");
        JdbcTemplate jdbcTemplate = applicationContext.getBean("jdbcTemplate", JdbcTemplate.class);
        String sql = "update t_user set real_name = ?, age = ? where id = ?";
        int count = jdbcTemplate.update(sql, "王五", 20, 1);
        System.out.println(count);
    }
4. 删除
    @Test
    public void testJdbcDelete(){
        ApplicationContext applicationContext = new ClassPathXmlApplicationContext("spring.xml");
        JdbcTemplate jdbcTemplate = applicationContext.getBean("jdbcTemplate", JdbcTemplate.class);
        String sql = "delete from t_user where id = ?";
        int count = jdbcTemplate.update(sql, 2);
        System.out.println(count);
    }
5. 查询一个
	@Test
    public void testJdbcSelectOne(){
        ApplicationContext applicationContext = new ClassPathXmlApplicationContext("spring.xml");
        JdbcTemplate jdbcTemplate = applicationContext.getBean("jdbcTemplate", JdbcTemplate.class);
        String sql = "select id, real_name, age from t_user where id = ?";
        User user = jdbcTemplate.queryForObject(sql, new BeanPropertyRowMapper<>(User.class), 1);
        System.out.println(user);
    }
6. 查询多个对象
    @Test
    public void testJdbcQueryAll(){
        ApplicationContext applicationContext = new ClassPathXmlApplicationContext("spring.xml");
        JdbcTemplate jdbcTemplate = applicationContext.getBean("jdbcTemplate", JdbcTemplate.class);
        String sql = "select id, real_name, age from t_user";
        List<User> users = jdbcTemplate.query(sql, new BeanPropertyRowMapper<>(User.class));
        System.out.println(users);
    }
7. 查询一个值
    @Test
    public void testJdbcQueryOneValue(){
        ApplicationContext applicationContext = new ClassPathXmlApplicationContext("spring.xml");
        JdbcTemplate jdbcTemplate = applicationContext.getBean("jdbcTemplate", JdbcTemplate.class);
        String sql = "select COUNT(*) from t_user";
        Long total = jdbcTemplate.queryForObject(sql, long.class);
        System.out.println(total);
    }
8.批量添加
 	@Test
    public void testBatchInsert(){
        ApplicationContext applicationContext = new ClassPathXmlApplicationContext("spring.xml");
        JdbcTemplate jdbcTemplate = applicationContext.getBean("jdbcTemplate", JdbcTemplate.class);
        String sql = "insert into t_user (id, real_name, age) values (?, ?, ?)";
        Object[] object1 = {null, "小玉", 12};
        Object[] object2 = {null, "大车", 12};
        Object[] object3 = {null, "小年", 20};
        List<Object[]> list = new ArrayList<>();
        list.add(object1);
        list.add(object2);
        list.add(object3);
        int[] count = jdbcTemplate.batchUpdate(sql, list);
        System.out.println(Arrays.toString(count));
    }
9.批量更新
@Test
    public void testBatchUpdate(){
        ApplicationContext applicationContext = new ClassPathXmlApplicationContext("spring.xml");
        JdbcTemplate jdbcTemplate = applicationContext.getBean("jdbcTemplate", JdbcTemplate.class);
        String sql = "update t_user set real_name = ?, age = ? where id = ?";
        Object[] object1 = {"大小玉", 12, 3};
        Object[] object2 = {"大大车", 12, 4};
        Object[] object3 = {"大小年", 5};
        List<Object[]> list = new ArrayList<>();
        list.add(object1);
        list.add(object2);
        list.add(object3);
        int[] count = jdbcTemplate.batchUpdate(sql, list);
        System.out.println(Arrays.toString(count));
    }
10. 批量删除
@Test
    public void testBatchDelete(){
        ApplicationContext applicationContext = new ClassPathXmlApplicationContext("spring.xml");
        JdbcTemplate jdbcTemplate = applicationContext.getBean("jdbcTemplate", JdbcTemplate.class);
        String sql = "delete from t_user where id = ?";
        Object[] object1 = {3};
        Object[] object2 = {4};
        Object[] object3 = {5};
        List<Object[]> list = new ArrayList<>();
        list.add(object1);
        list.add(object2);
        list.add(object3);
        int[] count = jdbcTemplate.batchUpdate(sql, list);
        System.out.println(Arrays.toString(count));
    }
11.使用德鲁伊连接池
依赖
        <!--使用德鲁伊连接池-->
        <dependency>
            <groupId>com.alibaba</groupId>
            <artifactId>druid</artifactId>
            <version>1.2.13</version>
        </dependency>
配置
<bean class="com.alibaba.druid.pool.DruidDataSource" id="ds">
        <property name="driverClassName" value="com.mysql.jdbc.Driver"/>
        <property name="url" value="jdbc:mysql://localhost:3306/spring6"/>
        <property name="username" value="root"/>
        <property name="password" value="Wgf720130601"/>
    </bean>


 2701
2701


 被折叠的 条评论
为什么被折叠?
被折叠的 条评论
为什么被折叠?
 到【灌水乐园】发言


