


前言
飞桨(PaddlePaddle)是集深度学习核心框架、工具组件和服务平台为一体的技术先进、功能完备的开源深度学习平台,已被中国企业广泛使 用,深度契合企业应用需求,拥有活跃的开发者社区生态。提供丰富的官方支持模型集合,我们这里将要使用到其中的骨骼节点检测模型, 通过PaddleHub提供的人体骨骼关键点检测预训练模型,我们就可以快速实现皮影戏的效果。

PaddleHub可以便捷地获取PaddlePaddle生态下的预训练模型,完成模型的管理和一键预测。配合使用Fine-tune API,可以基于大规模预训练模型快速完成迁移学习,让预训练模型能更好地服务于用户特定场景的应用。
安装飞桨(Python环境)
进入cmd界面后
安装PaddlePaddle
python -m pip install paddlepaddle==2.0.2 -i https://mirror.baidu.com/pypi/simple
安装PaddleHub
pip install PaddleHub
安装人体骨骼关键节点检测模型:通过PaddleHub来安装人体骨骼关键点检测模型:human_pose_estimation_resnet50_mpii
hub install human_pose_estimation_resnet50_mpii==1.1.1
素材准备
| 文件夹 | 用途 |
|---|---|
| background | 存放背景图 |
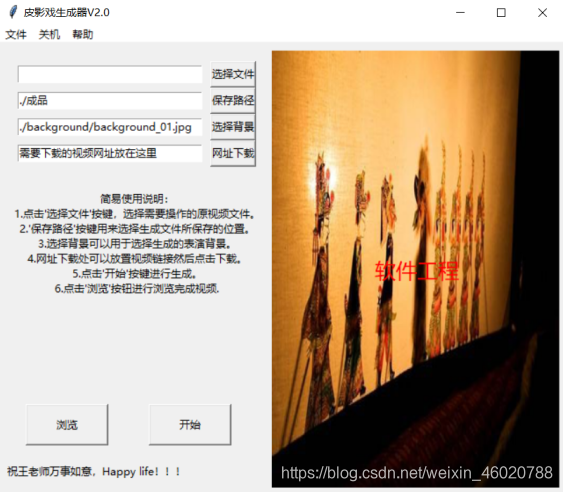
| example | 界面图片 |
| work\mp4_img | 视频素材切割帧图 |
| work\mp4_img_analysis | 合并帧图 |
| work\shadow_play_material | 皮影人关键部位图片 |
| work\test1.MP4 | 视频文件 |
| 成品 | 生成视频 |
皮影戏人关键部位素材图片请到这个网址中下载,:https://aistudio.baidu.com/aistudio/projectdetail/764130?fromQRCode=1&shared=1
效果视频
https://www.bilibili.com/video/BV1Hq4y177B6/
完整代码
from tkinter import *
from tkinter import ttk  # 导入ttk模块,因为下拉菜单控件在ttk中
import tkinter
import os
import cv2
import time
from tkinter import filedialog
from handright import Template, handwrite
from PIL import Image, ImageFont, ImageTk
import tkinter.messagebox  # 要使用messagebox先要导入模块
import paddlehub as hub
import matplotlib.pyplot as plt
from matplotlib.image import imread
import numpy as np

def show_img(img_path, size=8):
    '''
        文件读取图片显示
    '''
    im = imread(img_path)
    plt.figure(figsize=(size, size))
    plt.axis("off")
    plt.imshow(im)


def img_show_bgr(image, size=8):
    '''
        cv读取的图片显示
    '''
    image = cv2.cvtColor(image, cv2.COLOR_BGR2RGB)
    plt.figure(figsize=(size, size))
    plt.imshow(image)

    plt.axis("off")
    plt.show()

pose_estimation = hub.Module(name="human_pose_estimation_resnet50_mpii")

def get_true_angel(value):
    '''
    转转得到角度值
    '''
    return value / np.pi * 180


def get_angle(x1, y1, x2, y2):
    '''
    计算旋转角度
    '''
    dx = abs(x1 - x2)
    dy = abs(y1 - y2)
    result_angele = 0
    if x1 == x2:
        if y1 > y2:
            result_angele = 180
    else:
        if y1 != y2:
            the_angle = int(get_true_angel(np.arctan(dx / dy)))
        if x1 < x2:
            if y1 > y2:
                result_angele = -(180 - the_angle)
            elif y1 < y2:
                result_angele = -the_angle
            elif y1 == y2:
                result_angele = -90
        elif x1 > x2:
            if y1 > y2:
                result_angele = 180 - the_angle
            elif y1 < y2:
                result_angele = the_angle
            elif y1 == y2:
                result_angele = 90

    if result_angele < 0:
        result_angele = 360 + result_angele
    return result_angele


def rotate_bound(image, angle, key_point_y):
    '''
    旋转图像,并取得关节点偏移量
    '''
    # 获取图像的尺寸
    (h, w) = image.shape[:2]
    # 旋转中心
    (cx, cy) = (w / 2, h / 2)
    # 关键点必须在中心的y轴上
    (kx, ky) = cx, key_point_y
    d = abs(ky - cy)

    # 设置旋转矩阵
    M = cv2.getRotationMatrix2D((cx, cy), -angle, 1.0)
    cos = np.abs(M[0, 0])
    sin = np.abs(M[0, 1])

    # 计算图像旋转后的新边界
    nW = int((h * sin) + (w * cos))
    nH = int((h * cos) + (w * sin))

    # 计算旋转后的相对位移
    move_x = nW / 2 + np.sin(angle / 180 * np.pi) * d
    move_y = nH / 2 - np.cos(angle / 180 * np.pi) * d

    # 调整旋转矩阵的移动距离(t_{x}, t_{y})
    M[0, 2] += (nW / 2) - cx
    M[1, 2] += (nH / 2) - cy

    return cv2.warpAffine(image, M, (nW, nH)), int(move_x), int(move_y)


def get_distences(x1, y1, x2, y2):
    return ((x1 - x2) ** 2 + (y1 - y2) ** 2) ** 0.5

def append_img_by_sk_points(img, append_img_path, key_point_y, first_point, second_point, append_img_reset_width=None, append_img_max_height_rate=1, middle_flip=False, append_img_max_height=None):
    '''
    将需要添加的肢体图片进行缩放
    '''
    append_image = cv2.imdecode(np.fromfile(append_img_path, dtype=np.uint8), cv2.IMREAD_UNCHANGED)

    # 根据长度进行缩放
    sk_height = int(get_distences(first_point[0], first_point[1], second_point[0], second_point[1]) * append_img_max_height_rate)
    # 缩放制约
    if append_img_max_height:
        sk_height = min(sk_height, append_img_max_height)

    sk_width = int(
        sk_height / append_image.shape[0] * append_image.shape[1]) if append_img_reset_width is None else int(
        append_img_reset_width)
    if sk_width <= 0:
        sk_width = 1
    if sk_height <= 0:
        sk_height = 1

    # 关键点映射
    key_point_y_n
最低0.47元/天 解锁文章


 443
443

 被折叠的 条评论
为什么被折叠?
被折叠的 条评论
为什么被折叠?
 到【灌水乐园】发言


