


torchvision为我们准备好了ResNeXt网络,可以支持自定义
论文链接:https://arxiv.org/abs/1611.05431
PyTorch代码:https://github.com/miraclewkf/ResNeXt-PyTorch

ResNeXt中Aggregate块,使用了组卷积
作者证明了图中( a ), ( b ), ( c )严格相等
使用torch中的nn.conv2(group=),group参数让我们避免了像(a)和(b)所示进行相加或者concatenate,更加方便
源码
方法名:torchvision.model.resnet50x4d()
参数:
pretrain为True,会联网下载预训练权重
progress一般用不到
这里的**kwargs是个字典,使得你可以自定义ResNeXt的一些参数
def resnext50_32x4d(pretrained: bool = False, progress: bool = True, **kwargs: Any) -> ResNet:
r"""ResNeXt-50 32x4d model from
`"Aggregated Residual Transformation for Deep Neural Networks" <https://arxiv.org/pdf/1611.05431.pdf>`_.
Args:
pretrained (bool): If True, returns a model pre-trained on ImageNet
progress (bool): If True, displays a progress bar of the download to stderr
"""
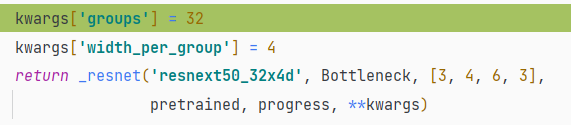
kwargs['groups'] = 32
kwargs['width_per_group'] = 4
return _resnet('resnext50_32x4d', Bottleneck, [3, 4, 6, 3],
pretrained, progress, **kwargs)
可以看出,首先进入的方法中,在kwarg这个字典里定义了groups和width_per_group,这里的groups就是分组卷积的组数,这里的width_per_group在bottleneck中有用到
class Bottleneck(nn.Module):
    # Bottleneck in torchvision places the stride for downsampling at 3x3 convolution(self.conv2)
    # while original implementation places the stride at the first 1x1 convolution(self.conv1)
    # according to "Deep residual learning for image recognition"https://arxiv.org/abs/1512.03385.
    # This variant is also known as ResNet V1.5 and improves accuracy according to
    # https://ngc.nvidia.com/catalog/model-scripts/nvidia:resnet_50_v1_5_for_pytorch.

    expansion: int = 4

    def __init__(
        self,
        inplanes: int,
        planes: int,
        stride: int = 1,
        downsample: Optional[nn.Module] = None,
        groups: int = 1,
        base_width: int = 64, #  这里传入的就是width_per_group
        dilation: int = 1,
        norm_layer: Optional[Callable[..., nn.Module]] = None
    ) -> None:
        super(Bottleneck, self).__init__()
        if norm_layer is None:
            norm_layer = nn.BatchNorm2d
        width = int(planes * (base_width / 64.)) * groups #  在这里处理成了width
        # Both self.conv2 and self.downsample layers downsample the input when stride != 1
        self.conv1 = conv1x1(inplanes, width) #  传入了width作为输出通道
        self.bn1 = norm_layer(width)
        self.conv2 = conv3x3(width, width, stride, groups, dilation)
        self.bn2 = norm_layer(width)
        self.conv3 = conv1x1(width, planes * self.expansion)
        self.bn3 = norm_layer(planes * self.expansion)
        self.relu = nn.ReLU(inplace=True)
        self.downsample = downsample
        self.stride = stride
紧接着进入了ResNet类,这里我没有放上类型判断语句,__init__方法中进行了初始化
参数:
block这里是BottleNeck
num_class是最后分类输出的类别数
norm_layer默认是使用nn.BatchNorm2d()
其他的不太重要
class ResNet(nn.Module):

    def __init__(
        self,
        block: Type[Union[BasicBlock, Bottleneck]],
        layers: List[int],
        num_classes: int = 1000,
        zero_init_residual: bool = False,
        groups: int = 1,
        width_per_group: int = 64,
        replace_stride_with_dilation: Optional[List[bool]] = None,
        norm_layer: Optional[Callable[..., nn.Module]] = None
    ) -> None:
        super(ResNet, self).__init__()
        if norm_layer is None:
            norm_layer = nn.BatchNorm2d
        self._norm_layer = norm_layer

        self.inplanes = 64
        self.dilation = 1
        if replace_stride_with_dilation is None:
            # each element in the tuple indicates if we should replace
            # the 2x2 stride with a dilated convolution instead
            replace_stride_with_dilation = [False, False, False]
        if len(replace_stride_with_dilation) != 3:
            raise ValueError("replace_stride_with_dilation should be None "
                             "or a 3-element tuple, got {}".format(replace_stride_with_dilation))
        self.groups = groups
        self.base_width = width_per_group
        self.conv1 = nn.Conv2d(3, self.inplanes, kernel_size=7, stride=2, padding=3,
                               bias=False)
        self.bn1 = norm_layer(self.inplanes)
        self.relu = nn.ReLU(inplace=True)
        self.maxpool = nn.MaxPool2d(kernel_size=3, stride=2, padding=1)
        self.layer1 = self._make_layer(block, 64, layers[0])
        self.layer2 = self._make_layer(block, 128, layers[1], stride=2,
                                       dilate=replace_stride_with_dilation[0])
        self.layer3 = self._make_layer(block, 256, layers[2], stride=2,
                                       dilate=replace_stride_with_dilation[1])
        self.layer4 = self._make_layer(block, 512, layers[3], stride=2,
                                       dilate=replace_stride_with_dilation[2])
        self.avgpool = nn.AdaptiveAvgPool2d((1, 1))
        self.fc = nn.Linear(512 * block.expansion, num_classes)
紧接着看_make_layer方法
_make_layer创建了一系列的BottleNeck块,最后使用nn.Sequential打包返回
注意这里的blocks参数,还记得在resnext50_32x4d方法中的[3, 4, 6, 3]这个列表吗,这个就是传入的blocks,不同的blocks生成不同大小的BottleNeck,例如self.layer1就是3个BottleNeck,依次类推
    def _make_layer(self, block: Type[Union[BasicBlock, Bottleneck]], planes: int, blocks: int,
                    stride: int = 1, dilate: bool = False) -> nn.Sequential:
        norm_layer = self._norm_layer
        downsample = None
        previous_dilation = self.dilation
        if dilate:
            self.dilation *= stride
            stride = 1
        if stride != 1 or self.inplanes != planes * block.expansion:
            downsample = nn.Sequential(
                conv1x1(self.inplanes, planes * block.expansion, stride),
                norm_layer(planes * block.expansion),
            )

        layers = []
        layers.append(block(self.inplanes, planes, stride, downsample, self.groups,
                            self.base_width, previous_dilation, norm_layer))
        self.inplanes = planes * block.expansion
        for _ in range(1, blocks):
            layers.append(block(self.inplanes, planes, groups=self.groups,
                                base_width=self.base_width, dilation=self.dilation,
                                norm_layer=norm_layer))

        return nn.Sequential(*layers)
这就是torchvision中ResNeXt的基本创建方法
正向传播
来看一下forward方法
    def _forward_impl(self, x: Tensor) -> Tensor:
        # See note [TorchScript super()]
        x = self.conv1(x)
        x = self.bn1(x)
        x = self.relu(x)
        x = self.maxpool(x)

        x = self.layer1(x)
        x = self.layer2(x)
        x = self.layer3(x)
        x = self.layer4(x)

        x = self.avgpool(x)
        x = torch.flatten(x, 1)
        x = self.fc(x)

        return x

    def forward(self, x: Tensor) -> Tensor:
        return self._forward_impl(x)
可以看到在传播的后三步,对x进行了平均池化,然后将x展平到1维传入全连接层,这就是分类的操作
自定义
刚开始看到ResNet这个类中的num_classes=1000以为是写死了,但是后来发现不是的
还记得resnext50_32x4d传入**kwargs字典吗,这个就可以用来设置参数
通过**kwargs就可以指定下列参数
inplanes: int,
planes: int,
stride: int = 1,
downsample: Optional[nn.Module] = None,
groups: int = 1,
base_width: int = 64,
dilation: int = 1,
norm_layer: Optional[Callable[…, nn.Module]] = None
这里以num_classes为例
dic = {'num_classes': 10}
module = torchvision.models.resnext50_32x4d(pretrained=False, progress=False, **dic)

X=torch.rand((15,3,20,20))
y=module(X)
print(y.shape)
输出:

如果我不想做分类,只是想让这个网络输出特征图该怎么办呢?
很简单,还记得前面讲过的后三步吗?去掉他们就好
module = torchvision.models.resnext50_32x4d(pretrained=False, progress=False, **dic)

net = torch.nn.Sequential(*list(module.children())[:-2])  # 去掉了后三步
net.add_module(module=torch.nn.Sequential(torch.nn.Conv2d(2048, 1, (1, 1)), torch.nn.ReLU(),
                                          torch.nn.AdaptiveAvgPool2d(output_size=(20, 20))), name='pooling')  # 得到特征图
# print(net)
y = net(torch.rand((10, 3, 20, 20)))
print(y.shape)
输出:

这里我做复杂了,我使用Module.children()方法重新创建了一个网络,只是去掉了后三步,其他部分保持不变,似乎有一个frozen方法,让网络的某些层不参与计算,查到了以后更新


 533
533


 被折叠的 条评论
为什么被折叠?
被折叠的 条评论
为什么被折叠?
 到【灌水乐园】发言


