


一、AIDL是什么?
AIDL 意思即 Android Interface Definition Language,翻译过来就是Android接口定义语言,是用于定义服务器和客户端通信接口的一种描述语言,可以拿来生成用于IPC的代码。从某种意义上说AIDL其实是一个模板,因为在使用过程中,实际起作用的并不是AIDL文件,而是据此而生成的一个IInterface的实例代码,AIDL其实是为了避免我们重复编写代码而出现的一个模板
AIDL文件以 .aidl 为后缀名
AIDL 参数支持 八种基本数据类型:byte、char、short、int、long、float、double、boolean
AIDL 分为服务端和客户端使用的时候必须是先启动服务端再启动客户端
二、使用步骤
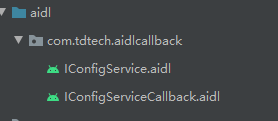
1 . 创建IConfigService.aidl
2 创建IConfigServiceCallback.aidl
3 注意定义完成aidl 文件一点要build 一下工程不然调不到接口
4. 功能实现 :(1) 实现服务端接受客户端传过来的数据 (2) 客户端实现获取服务端的数据实现
```java
 //包名一定要和客户端的包名一致
package com.tdtech.aidlcallback;

// Declare any non-default types here with import statements
import com.tdtech.aidlcallback.IConfigServiceCallback;

interface IConfigService {
    /**
      * Get current config info through callback
      */
    boolean getConfigInfo(IConfigServiceCallback callback);

    /**
     * Set config info
     */
    boolean setConfigInfo(in String xmlData);

    /**
     * get default config info 这个可以不写
     */
    boolean getConfigInfoTemplate(IConfigServiceCallback callback);
}
```java
// 定义CallBack 回调接口实现客户端 获取服务端数据 服务端接受客户端数据
// IConfigServiceCallback.aidl
package com.tdtech.aidlcallback;

// Declare any non-default types here with import statements
interface IConfigServiceCallback {
    /**
     * get result XML data from service
     */
    void onResult(boolean isSucceed, in byte[] xmlData);
}
使用步骤
一 .服务端
1 .创建一个服务端 也就是说创建一个Service
2 继承Service,重写onBind函数
3创建内部类继承Aidl接口重写Aidl接口方法
package com.tdtech.aidlcallback;//package com.tdtech.mylibrary;
import android.app.Service;
import android.content.Intent;
import android.graphics.Bitmap;
import android.graphics.BitmapFactory;
import android.os.IBinder;
import android.os.RemoteException;
import android.util.Log;
import androidx.annotation.Nullable;
import java.io.ByteArrayOutputStream;
import java.io.FileInputStream;
import java.io.InputStream;
public class AidlService extends Service {
private TdAidlService tdAidlService = new TdAidlService();
@Nullable
@Override
public IBinder onBind(Intent intent) {
return tdAidlService;
}
//创建内部类 继承 定义好的AIDL 重写 aidl 的定义的接口
public class TdAidlService extends IConfigService.Stub {
// 服务端读取数据通过回调传到客户端
@Override
public boolean getConfigInfo(IConfigServiceCallback callback) throws RemoteException {
try {
//通过 FileInputStream 读取图片
FileInputStream inputStream = new FileInputStream("/app/download.jpg");
// 转换成byte数组
byte[] bytes = readStream(inputStream);
// 通过callBack 将数据回调回去
callback.onResult(true, bytes);
} catch (Exception e) {
e.printStackTrace();
}
return false;
}
// 设置配置数据 客户端调用setConfig 服务端就会收到数据
@Override
public boolean setConfigInfo(String xmlData) throws RemoteException {
Log.i("lwx", "xmlData :" + xmlData);
return false;
}
@Override
public boolean getConfigInfoTemplate(IConfigServiceCallback callback) throws RemoteException {
return false;
}
}
//转换byte[]数组
public static byte[] readStream(InputStream inStream) throws Exception {
byte[] buffer = new byte[1024];
int len = -1;
ByteArrayOutputStream outStream = new ByteArrayOutputStream();
while ((len = inStream.read(buffer)) != -1) {
outStream.write(buffer, 0, len);
}
byte[] data = outStream.toByteArray();
outStream.close();
inStream.close();
return data;
}
}
``
**二.客户端**
1. 把服务端的aidl 接口复制过来.他的包名必须跟服务端的包名一致,
2 通过bindService绑定服务端的服务
```java
package com.tdtech.aidlservcie;
import androidx.appcompat.app.AppCompatActivity;
import android.content.ComponentName;
import android.content.Context;
import android.content.Intent;
import android.content.ServiceConnection;
import android.graphics.Bitmap;
import android.graphics.BitmapFactory;
import android.os.Bundle;
import android.os.IBinder;
import android.os.RemoteException;
import android.util.Log;
import android.view.View;
import android.widget.Button;
import android.widget.ImageView;
import com.tdtech.aidlcallback.IConfigService;
import com.tdtech.aidlcallback.IConfigServiceCallback;
import com.tdtech.bluetoothinterface.DataReporter;
public class MainActivity extends AppCompatActivity {
private IConfigService iConfigService;
private static final String PACKAGE_NAME = "com.tdtech.aidlcallback";
private static final String CLASS_NAME = "com.tdtech.aidlcallback.AidlService";
// 服务连接
public ServiceConnection connection = new ServiceConnection() {
@Override
public void onServiceConnected(ComponentName name, IBinder service) {
//只有 iConfigService!=null 才能调用他的接口
iConfigService = IConfigService.Stub.asInterface(service);
Log.i("lwx", "onServiceConnected");
}
@Override
public void onServiceDisconnected(ComponentName name) {
iConfigService = null;
}
};
private Button button3;
private Button button2;
private Button button1;
private ImageView image;
@Override
protected void onCreate(Bundle savedInstanceState) {
super.onCreate(savedInstanceState);
setContentView(R.layout.activity_main);
initView();
// bindService 绑定Service
Intent bindServiceIntent = new Intent();
//通过指定包名绑定服务
bindServiceIntent.setClassName(PACKAGE_NAME, CLASS_NAME);
boolean result = bindService(bindServiceIntent, connection, Context.BIND_AUTO_CREATE);
Log.i("lwx", "绑定成功" + result);
initData();
}
private void initData() {
button2.setOnClickListener(new View.OnClickListener() {
@Override
public void onClick(View v) {
try {
if (iConfigService != null) {
//调用设置数据接口
iConfigService.setConfigInfo("data");
} else {
Log.i("lwx", "iConfigService ==null ");
}
} catch (RemoteException e) {
Log.i("lwx", "RemoteException: ");
}
}
});
button3.setOnClickListener(new View.OnClickListener() {
@Override
public void onClick(View v) {
try {
if (iConfigService != null) {
// 调用获取数据接口
iConfigService.getConfigInfo(configServiceCallback);
}
} catch (RemoteException e) {
e.printStackTrace();
}
}
});
}
// CallBack 回调 获取服务端的图片展示到界面
public IConfigServiceCallback configServiceCallback = new IConfigServiceCallback.Stub() {
@Override
public void onResult(boolean isSucceed, byte[] xmlData) throws RemoteException {
// 转换成bitmap
Bitmap bitmap = BytesToBitmap(xmlData);
image.setImageBitmap(bitmap);
Log.i("lwx", "configServiceCallback" + xmlData);
}
};
public static Bitmap BytesToBitmap(byte[] bytes) {
if (bytes != null) {
return BitmapFactory.decodeByteArray(bytes, 0, bytes.length);
}
return null;
}
private void initView() {
button1 = findViewById(R.id.but1);
button2 = findViewById(R.id.but2);
button3 = findViewById(R.id.but3);
image = findViewById(R.id.image);
}
}
AIDL 的三大权限
1 .在服务端注册Service服务
2 .注册权限在 Manifests 文件下定义权限 android:protectionLevel 表示权限等级
3. 在客户端使用这个权限
总结
以上是我使用AIDlCallBack 测试的Demo, 实现客户端和服务端通信, 使用中出现的问题就是 因为他是异步操作,不是按照代码的顺序执行,
因此想要把 他当同步执行很难.
解决办法
以下这两个函数会在你bindService 绑定成功之后运行,运行在主线程中
1.在onServiceConnected函数里定义一个boolean的成员变量当他是true 的时候才运行调aidl 的接口 如果这个函数调用了表示连接成功
2.在onServiceDisconnected函数里将服务质空 表示断开连接 或 系统资源不足, 要关闭一些Services, 刚好连接绑定的 Service 是被关闭者之一, 这个时候onServiceDisconnected() 就会被调用。


 8558
8558


 被折叠的 条评论
为什么被折叠?
被折叠的 条评论
为什么被折叠?
 到【灌水乐园】发言


