


后端部分
springboot
节省时间此次学习仅使用controller层
maven引入 fastjson
		<!--fastjson-->
        <dependency>
            <groupId>com.alibaba</groupId>
            <artifactId>fastjson</artifactId>
            <version> 1.2.54</version>
        </dependency>
TestController
使用@restController返回json
import org.springframework.ui.Model;
import org.springframework.web.bind.annotation.*;

import java.util.Arrays;
import java.util.HashMap;
import java.util.Map;
import java.util.logging.Logger;

//返回json格式控制器
@RestController
public class TestController {
    //跨域
    @CrossOrigin
    @RequestMapping(value = "/t3")
    public JSON getUser(@RequestParam(value="userId") int userId){

        String name="haoahohoa";
        int Id=userId;
        int password=123456;

        Map<Object,Object> map=new HashMap<>();
        map.put("Id",Id);
        map.put("name",name);
        map.put("password",password);
        JSONObject res=new JSONObject();
        res.put("result",map);
        return res;
    }
}
因为前后端分开部署,后端地址loaclhost:8080,前端地址localhost:8081,所以会产生跨域问题。前端调用后端时会爆红。

解决跨域问题有很多方法,这里偷懒采用springboot 的@CrossOrigin注解解决。
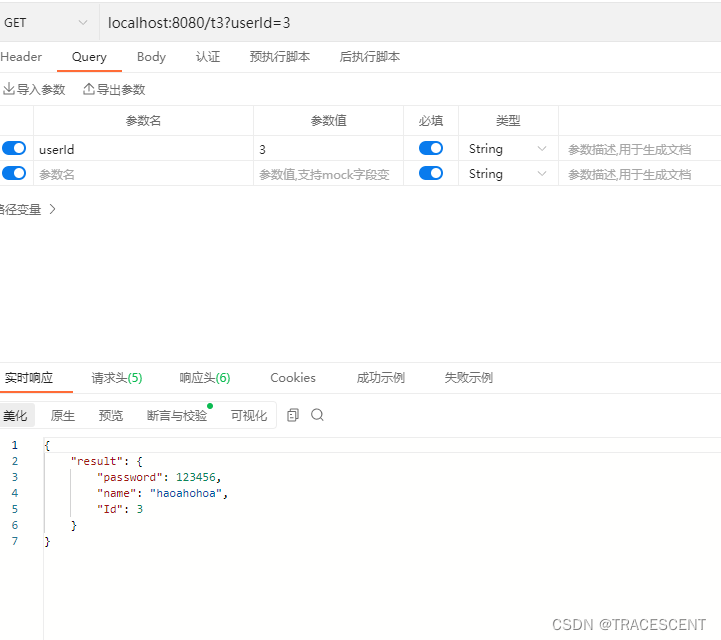 后端完成使用ApiPost测试
前端部分
Vue+axios
使用vuecli vue3快速搭建前端
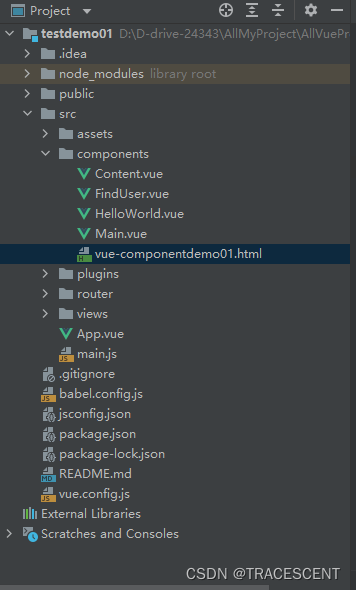
学习测试目录结构,此次学习只用到FindUser.vue+App.vue.
1.前期准备
安装router
使用router作为前端路由
使用vuecli高版本可以在vue ui中手动引入,也可以npm引入
npm install vue-router --save
安装axios
使用axios作为前后端通信
npm install axios
补充:引入vue- axios可解决下面问题
npm install axios vue-axios
将router,axios引入vue
main.js
import { createApp } from 'vue'
import App from './App.vue'
import router from './router'

/*
import axios from "axios"
这里我引入没效果不知道什么原因所以后面直接在组件里引入
*/


const app=createApp(App);
app.use(router);
/*
app.config.globalProperties.$axios=axios;
//这里我引入没效果不知道什么原因所以后面直接在组件里引入
*/

app.mount('#app');
补充:
import { createApp } from 'vue'
import App from './App.vue'
import router from './router'
import axios from 'axios' // 导入 axios
import VueAxios from 'vue-axios' // 导入 vue-axios


const app=createApp(App);

app.use(router);
app.use(VueAxios, axios);


app.mount('#app');
2.1建立FindUser组件
FindUser.vue
<template xmlns:v-bind="http://www.w3.org/1999/xhtml">
  <div id="test">
    <div id="name">{{result.name}}</div>
    <div id="password">{{result.password}}</div>
    <div id="userId" >{{result.Id}}</div>
  </div>
</template>

<script>

//引入axios
import axios from "axios";

export default {
  name: "FindUser",

  data(){
    return {
    //后端传回来的格式
      result:{
        name:'',
        password:'',
        Id:''
      }
      }
    },
    //created()当切换到该组件时调用
  created() {
    axios.get("http://localhost:8080/t3",{
    //前端向后端传参
        params:{
          userId:7
        }
    }).then(res=>{
    //调用返回值res修改前端
      this.result.password=res.data.result.password;
      this.result.name=res.data.result.name;
      this.result.Id=res.data.result.Id

      console.log(res,"相应信息")
    })
  }

}

</script>

<style scoped>

</style>
2.2将FindUser引入App.vue
App.vue
<template>
  <nav>
  //路由
    <router-link to="/">Home</router-link> |
    <router-link to="/findUser">Find</router-link>
  </nav>
  //路由显示
  <router-view/>
</template>

<style>
#app {
  font-family: Avenir, Helvetica, Arial, sans-serif;
  -webkit-font-smoothing: antialiased;
  -moz-osx-font-smoothing: grayscale;
  text-align: center;
  color: #2c3e50;
}

nav {
  padding: 30px;
}

nav a {
  font-weight: bold;
  color: #2c3e50;
}

nav a.router-link-exact-active {
  color: #42b983;
}
</style>
启动vue

后续
修改前端实现数据绑定传递
增加表单input
 <div>
    <input v-model="result.Id">
    <button v-on:click="setUser"></button>
  </div>
将created()修改为methods提交表单
methods:{
    setUser(){
      axios.get("http://localhost:8080/t3",{
        params:{
          userId:this.result.Id
        }
      }).then(res=>{
        this.result.password=res.data.result.password;
        this.result.name=res.data.result.name;
        this.result.Id=res.data.result.Id

        console.log(res,"相应信息")
      })
    }
  }
修改后
<template xmlns:v-bind="http://www.w3.org/1999/xhtml">
  <div>
    <input v-model="result.Id">
    <button v-on:click="setUser"></button>
  </div>
  <div id="test">
    <div id="name">{{result.name}}</div>
    <div id="password">{{result.password}}</div>


    <div id="userId" >{{result.Id}}</div>
  </div>
</template>

<script>

import axios from "axios";

export default {
  name: "FindUser",

  data(){
    return {
      result:{
        name:'',
        password:'',
        Id:''
      }
      }
    },
  methods:{
    setUser(){
      axios.get("http://localhost:8080/t3",{
        params:{
          userId:this.result.Id
        }
      }).then(res=>{
        this.result.password=res.data.result.password;
        this.result.name=res.data.result.name;
        this.result.Id=res.data.result.Id

        console.log(res,"相应信息")
      })
    }
  }

}

</script>

<style scoped>

</style>
后端做一点小修改
修改参数类型int->string
@CrossOrigin
    @RequestMapping(value = "/t3")
    //修改参数类型int->string
    public JSON getUser(@RequestParam(value="userId") String userId){

        String name="haoahohoa";
        //Id也要更改
        int Id=Integer.valueOf(userId);
        int password=123456;

        Map<Object,Object> map=new HashMap<>();
        //为体现Id已被修改,返回值Id+1
        map.put("Id",Id+1);
        map.put("name",name);
        map.put("password",password);
        JSONObject res=new JSONObject();
        res.put("result",map);
        return res;


    }
效果
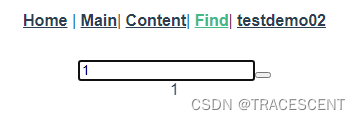
提交前

输入参数还未提交
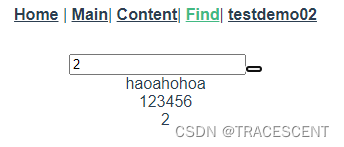
提交后


 508
508


 被折叠的 条评论
为什么被折叠?
被折叠的 条评论
为什么被折叠?
 到【灌水乐园】发言


