


 本文介绍了Android系统中的通知功能,通过一个项目演示如何创建和使用通知,包括使用NotificationCompat.Builder创建兼容各版本的Notification对象,以及利用PendingIntent实现点击通知后的响应。还涉及到布局文件和MainActivity.java的代码修改,以及NotificationCompat.Builder的常用API设置。
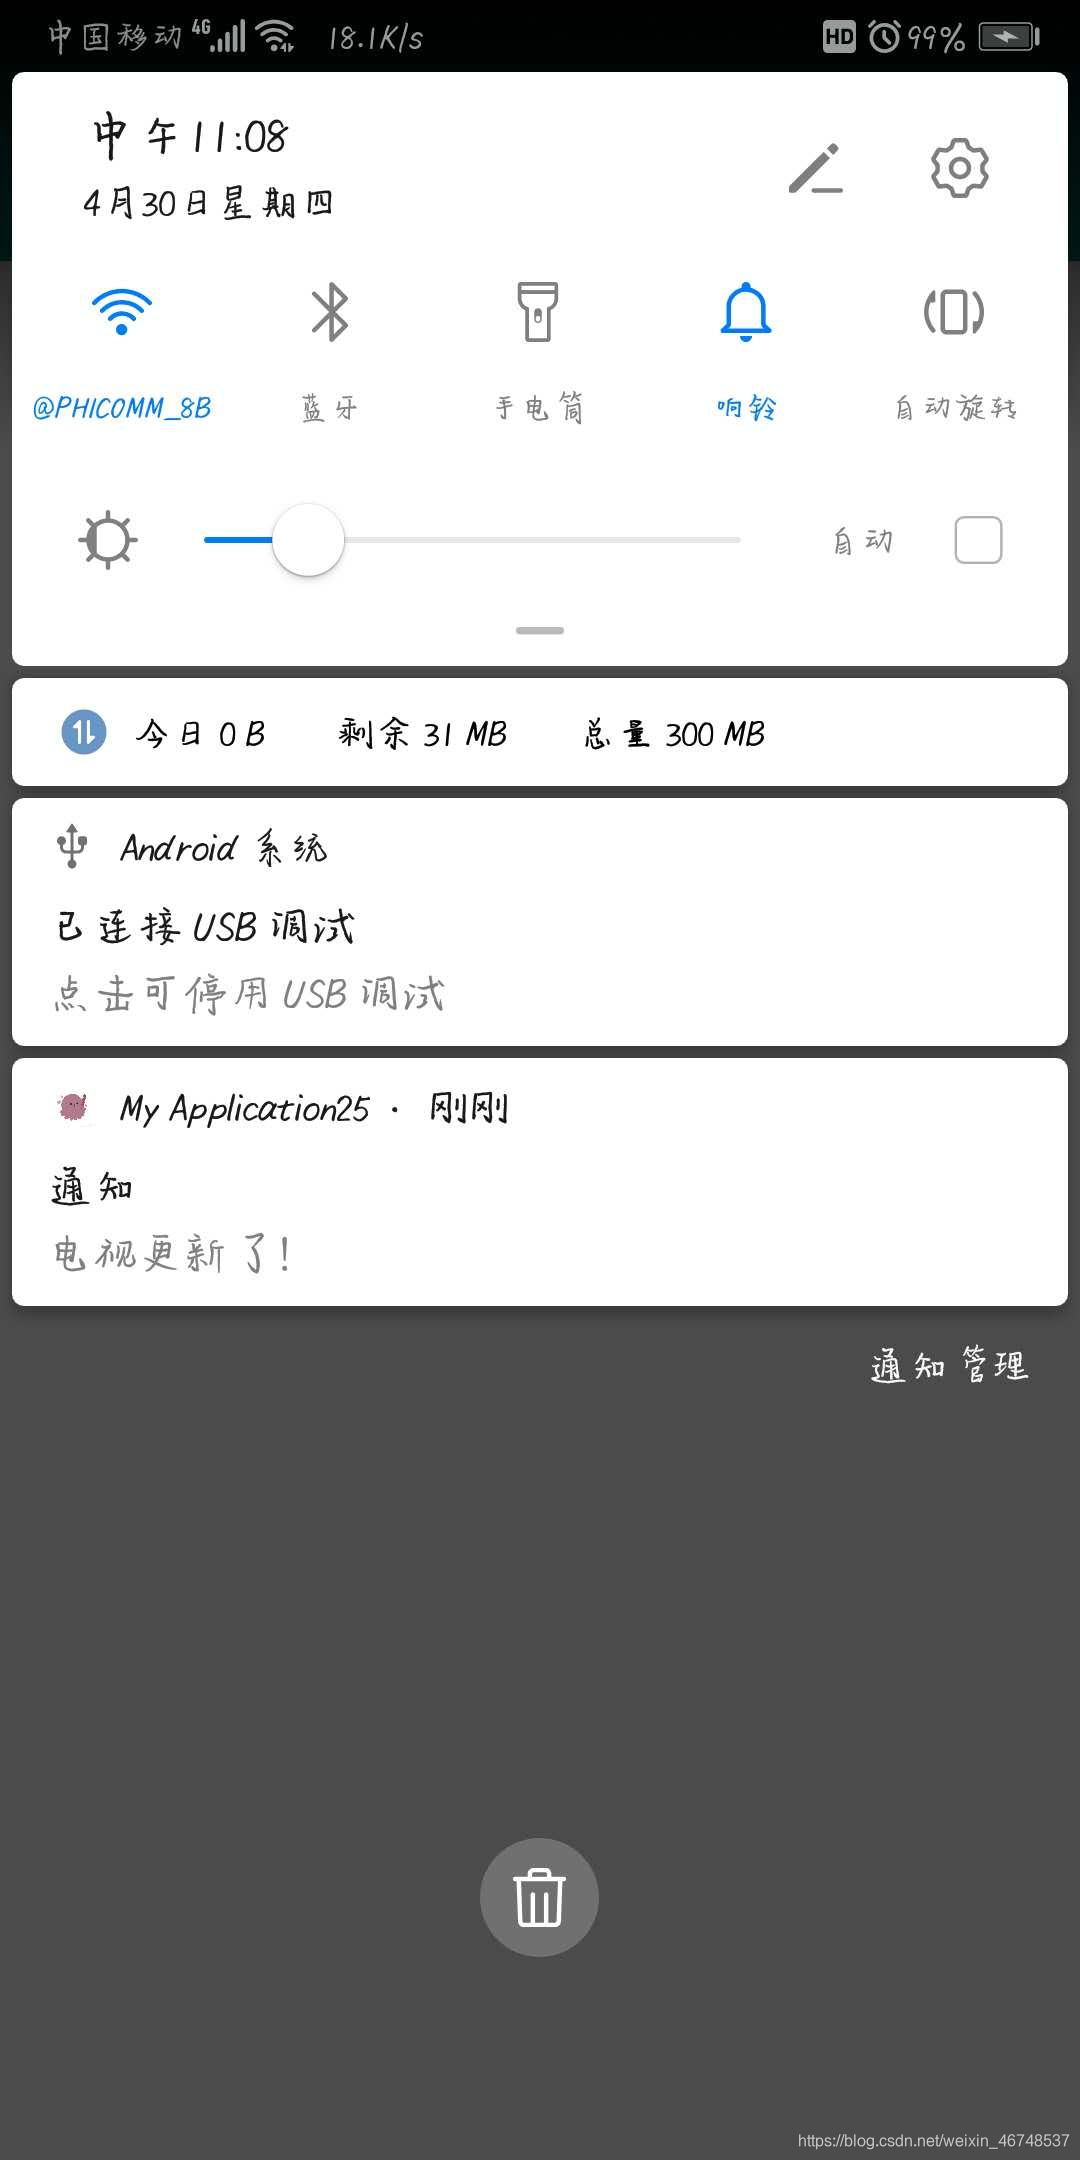
通知是Android系统中比较有特色的一个功能,当某个应用程序需要向用户发送一条提示信息的时候,而该程序又不在前台运行,就可以借助通知来实现。发送通知后,状态栏会显示一个特制的图标,下拉状态栏可以看到通知的详细内容。
我们通过一个项目来看下通知是怎么使用的吧!
布局文件activity_main.xml代码
<LinearLayout xmlns:android="http://schemas.android.com/apk/res/android"
xmlns:app="http://schemas.android.com/apk/res-auto"
xmlns:tools="http://schemas.android.com/tools"
android:layout_width="match_parent"
android:layout_height="match_parent"
android:orientation="vertical"
tools:context=".MainActivity">

<Button
    android:id="@+id/send_notice"
    android:layout_width="match_parent"
    android:layout_height="wrap_content"
    android:text="发送通知"/>

</LinearLayout>
一个按钮,用于发送这条通知。
MainActivity.java代码
public class MainActivity extends AppCompatActivity implements View.OnClickListener {

private Button send;
@Override
protected void onCreate(Bundle savedInstanceState) {
    super.onCreate(savedInstanceState);
    setContentView(R.layout.activity_main);
    send = findViewById(R.id.send_notice);
    send.setOnClickListener(this);
}

@Override
public void onClick(View v) {
    switch (v.getId()){
        case R.id.send_notice:
            //得到一个NotificationManager,用于管理通知
            NotificationManager manager=(NotificationManager) getSystemService(NOTIFICATION_SERVICE);

            //需添加的代码
            if (Build.VERSION.SDK_INT >= Build.VERSION_CODES.O){
                String channelId = "default";
                String channelName = "默认通知";
                manager.createNotificationChannel(new NotificationChannel(channelId, channelName, NotificationManager.IMPORTANCE_HIGH));
            }
            //
            //使用NotificationCompat.Builder构造器来创建Notification对象
            Notification notification =new NotificationCompat.Builder(this,"default")
                    .setContentTitle("通知")//通知的标题内容
                    .setContentText("电视更新了!") //通知的正文内容
                    .setWhen(System.currentTimeMillis()) //通知被创建的时间
                    .setSmallIcon(R.mipmap.tubiao) //设置通知的小图标
                    .setLargeIcon(BitmapFactory.decodeResource(getResources(),R.mipmap.ic_launcher))//设置通知的大图标
                    .setDefaults(NotificationCompat.DEFAULT_SOUND)//振动,音频,LED灯用系统默认的
                    .build();
            manager.notify(1,notification);//让通知显示出来
            break;
        default:
            break;

    }


}
}
具体解释我都在代码里做了解释,就不讲解了。这里我们要注意一下的就是,用了NotificationCompat.Builder来创建Notification对象,让我们的程序可以在所有的Android版本上都能运行。
现在我们运行一下程序,就可以在状态栏上看到这条通知了(但是这里需要注意一下,你把程序安装到手机后,你需要去允许这个程序在手机上通知,并且在状态栏显示,这样你点击发送通知,通知才会显示在你手机上!!)
但这个时候,我们这条通知是不能点击的,点击后没有任何反应的。如果我们想实现点击的效果,就要用到一个新的知识PendingIntent。他和Intent有点像,他们都可以去指明一个“意图”,乐意启动一个活动,一个服务,发送广播等。不同的是,Intent更加倾向于去立即执行某个动作,而PendingIntent更加倾向于在某个合适的时间去执行某个动作。所以,也可以把PendingIntent理解成延迟执行的Intent。
PendingIntent提供了几个静态方法去获取到PendingIntent的实例,可以根据你自己的需求来选择使用方法,方法有
getActivity(),getBroadcast(),getService()。
这几个方法的参数是一样的,
第一个参数是Context,场景。
第二个参数一般用不到,传0就可以了。
第三个参数是一个Intent对象,我们可以通过这个来构建出PendingIntent的“意图”。
第四个参数是用于确定PendingIntent的行为,有FLAG_ONE_SHOT、FLAG_NO_CREATE、FLAG_CANCEL_CURRENT和FLAG_UPDATE_CURRENT这四种值可以选择,具体含义可以百度,通常情况下传0就可以了。
现在我们就来修改一下上面的代码。先创建一个新的活动Main2Activity
然后修改他的布局文件activity_main2.xml
<RelativeLayout xmlns:android="http://schemas.android.com/apk/res/android"
xmlns:app="http://schemas.android.com/apk/res-auto"
xmlns:tools="http://schemas.android.com/tools"
android:layout_width="match_parent"
android:layout_height="match_parent"
tools:context=".Main2Activity">

<TextView
    android:layout_width="wrap_content"
    android:layout_height="wrap_content"
    android:layout_centerInParent="true"
    android:textSize="24sp"
    android:text="请前往爱奇艺app"/>

</RelativeLayout>
再来修改MainActivity.java里的代码
public class MainActivity extends AppCompatActivity implements View.OnClickListener {

private Button send;
@Override
protected void onCreate(Bundle savedInstanceState) {
    super.onCreate(savedInstanceState);
    setContentView(R.layout.activity_main);
    send = findViewById(R.id.send_notice);
    send.setOnClickListener(this);
}

@Override
public void onClick(View v) {
    switch (v.getId()){
        case R.id.send_notice:
            //得到一个NotificationManager,用于管理通知
            NotificationManager manager=(NotificationManager) getSystemService(NOTIFICATION_SERVICE);
            //跳转对象
             Intent intent = new Intent(this,Main2Activity.class);
            //得到PendingIntent实例,把跳转对象传进去
             PendingIntent pendingIntent = PendingIntent.getActivity(this,0,intent,0);

            //需添加的代码
            /**
            if (Build.VERSION.SDK_INT >= Build.VERSION_CODES.O){
                String channelId = "default";
                String channelName = "默认通知";
                manager.createNotificationChannel(new NotificationChannel(channelId, channelName, NotificationManager.IMPORTANCE_HIGH));
            }
             */
            //
            //使用NotificationCompat.Builder构造器来创建Notification对象
            Notification notification =new NotificationCompat.Builder(this,"default")
                    .setContentTitle("通知")//通知的标题内容
                    .setContentText("电视更新了!") //通知的正文内容
                    .setWhen(System.currentTimeMillis()) //通知被创建的时间
                    .setSmallIcon(R.mipmap.tubiao) //设置通知的小图标
                    .setLargeIcon(BitmapFactory.decodeResource(getResources(),R.mipmap.ic_launcher))//设置通知的大图标
                    .setContentIntent(pendingIntent) //设置点击信息后的跳转(意图)
                    .setAutoCancel(true)//当点击了通知后,让通知删除,要与setContentIntent连用
                    .setDefaults(NotificationCompat.DEFAULT_ALL)//振动,音频,LED灯用系统默认的
                    .build();
            manager.notify(1,notification);//让通知显示出来
            break;
        default:
            break;

    }


}
}
我们先用Intent表达出要启动Main2Activity的“意图”,然后将构建好的Intent对象传入 PendingIntent的getActivity()方法中去,以得到 PendingIntent实例。接着在NotificationCompat.Builder中调用setContentIntent()方法,把PendingIntent实例传进去。就实现了延迟的跳转,当你点击状态栏的通知时就可以跳转到Main2Activity中去。
NotificationCompat.Builder 常用API
| 设置属性 | 说明 |
|---|---|
| setAutoCancel(boolean autocancel) | 设置点击信息后自动清除通知 |
| setContent(RemoteView view) | 设置自定义通知 |
| SetContentIntent(PendingIntent intent) | 设置点击信息后的跳转(意图) |
| setContentTitle(String string) | 设置标题 |
| setContentText(String string) | 设置内容 |
| setPriority(int pri) | 设置通知的重要程度 |
| setWhen(long when) | 设置时间 |
| setStyle(Style style) | 设置样式 |
| setVisibility(int visibility) | 设置锁屏显示 |
| setDefault(int defaults) | 设置默认 |
| setLight(int argb, int onMs, int offMs) | 设置呼吸灯闪烁效果 |
| setSound(Uri sound) | 设置通知音效 |
| setVibrate(long [] pattern) | 设置震动效果 |
| setCategory(String category) | 设置通知类别 |
| setColor(int argb) | 设置通知栏颜色 |
| setFullScreenIntent(PendingIntent intent,boolean b) | 设置弹窗显示 |
设置样式有两种方法,这里我们简单讲一下。
setStyle()方法接收一个Notification-Compat.Style参数,他可以是长文本,图片等。
如果是长文本的话,他可以这样用:
.setStyle(new NotificationCompat.BigTextStyle().bigText("长内容长内容长	内容长内容长内容长内容长内容长内容长内容长内容长
内容长内容长内容长内容长内容长内容长内容长内容长内容长内容"))
如果是图片的话,这样用:
.setStyle(new NotificationCompat.BigPictureStyle().bigPicture(BitmapFactory.decodeResource(getResources(),R.drawable.index)))
如果想了解详细的API用法可以去下面这个网址看看
https://blog.csdn.net/weixin_30302609/article/details/95817411?
https://www.cnblogs.com/stars-one/p/8371051.html


 3403
3403

 被折叠的 条评论
为什么被折叠?
被折叠的 条评论
为什么被折叠?
 到【灌水乐园】发言


