


文章目录
1. Nginx目录索引
提前注意事项: 如果在location里开启了autoindex模块了,就不要再放代码的路径下不要有html文件, 就算你写或者不写index index.html 都会出现问题(如果写了,就会显示index.html界面,如果不写就会就不显示界面)
第一种方式:
(1)书写配置文件
[root@web01 module]# cat /etc/nginx/conf.d/autoindex.conf
server {
	listen 80;
	server_name module.oldboy.com;
	charset utf-8,gbk;

	location / {
		root /module;
		autoindex on;
		autoindex_exact_size off;
		autoindex_localtime on;
	}
}
(2)准备对应的目录,往目录中上传一点文件
mkdir /module/{centos,ubuntu,redhat}/ -p
(3)3.检查语法并重新加载Nginx
检查语法:	nginx -t
平滑加载:	systemctl reload nginx
第二种方式(常用):
(1)当输入网址 module.oldboy.com/down 然后自动匹配到第二个location下面,从而找到到了下载的页面
module.oldboy.com/download
[root@web01 module]# cat /etc/nginx/conf.d/autoindex.conf
server {
	listen 80;
	server_name module.oldboy.com;
	charset utf-8,gbk;

	location / {
		root /code;
		index index.html index.htm;
	}

	location /download {
		root /module;       # 做一个单独的子目录,如果这里的root换成alias,
		autoindex on;       # http会先匹配module.oldboy.com,然后就直接在/module下找
		autoindex_exact_size off;  # 文件,而不是想root在/module/download下面去找
		autoindex_localtime on;
	}
}
第三种方式:
(1) 多种域名的方式:就是访问一个网站download.dongkun.com就直接给我跳转到下载的页面
autoindex模块语法格式:
![[外链图片转存失败,源站可能有防盗链机制,建议将图片保存下来直接上传(img-sBOSKmvK-1675610807783)(163855C36AE04C3793494F279954893C)]](https://img-blog.csdnimg.cn/cc9a70fcf9214a039d74e83ab681180c.png)
2. Nginx状态监控
状态监控不能对外进行访问,或者指定固定的用户才能查看
(1)书写代码
	location /nginx_status {
		stub_status;
	}
(2)检查语法、平滑重启
    nginx -t
    systemctl reload nginx
(3)执行结果
down.donglinux.com/nginx_status
Active connections: 2
server accepts handled requests
		3 			3 	33
Reading: 0 Writing: 1 Waiting: 1
参数作用:
Active connections  # 当前活动客户端连接数,包括Waiting等待连接数。
accepts             # 已接受总的TCP连接数。
handled             # 已处理总的TCP连接数。
requests            # 客户端总的http请求数。

Reading             # 当前nginx读取请求头的连接数。
Writing             # 当前nginx将响应写回客户端的连接数。
Waiting             # 当前等待请求的空闲客户端连接数。
小提示:
一次TCP的连接,可以发起多次http的请求, 如下参数可配置进行验证
keepalive_timeout  0;   # 类似于关闭长连接
keepalive_timeout  65;  # 65s没有活动则断开连接
ngx_http_stub_status_module模块语法:
[外链图片转存失败,源站可能有防盗链机制,建议将图片保存下来直接上传(img-Tgwl466W-1675610807787)(94D032CCD1854D86A31A88D69FB12276)]
3. Nginx访问控制
第一种方式:
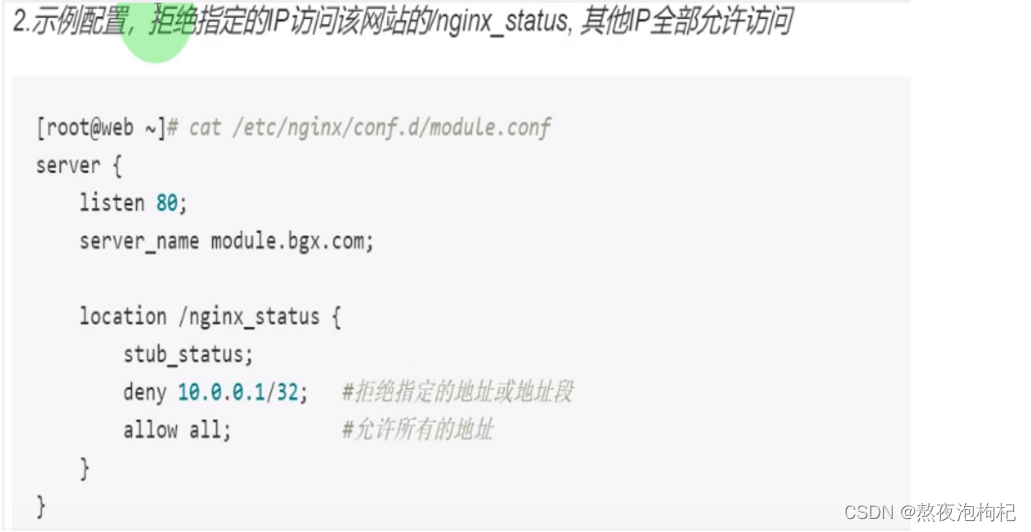
(1)拒绝10.0.0.1来源IP访问,其他人允许
location /nginx_status {
                stub_status;
                deny 10.0.0.1/32;
                allow all;
        }
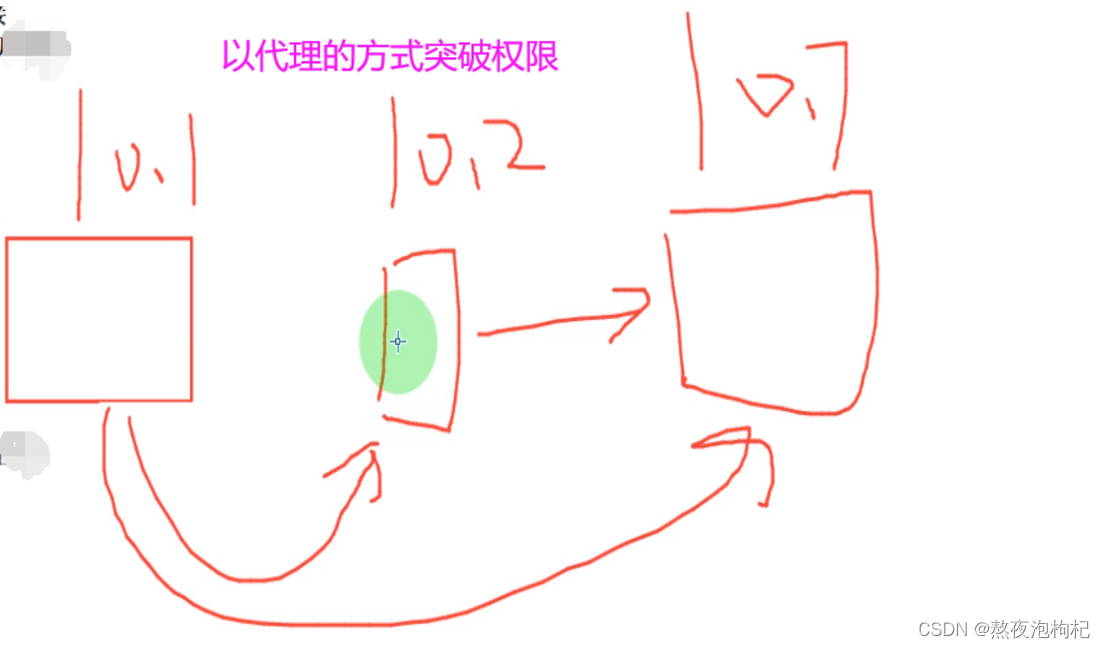
缺陷: 以代理的方式去突破权限,可以用lua脚本语言的高级限制模式。
第二种方式:
允许10.0.0.1来源IP访问,其他人全部拒绝。
location /nginx_status {
                stub_status;
                allow 10.0.0.1/32;
                deny all;
缺陷: 可以用拨号的方式突破限制
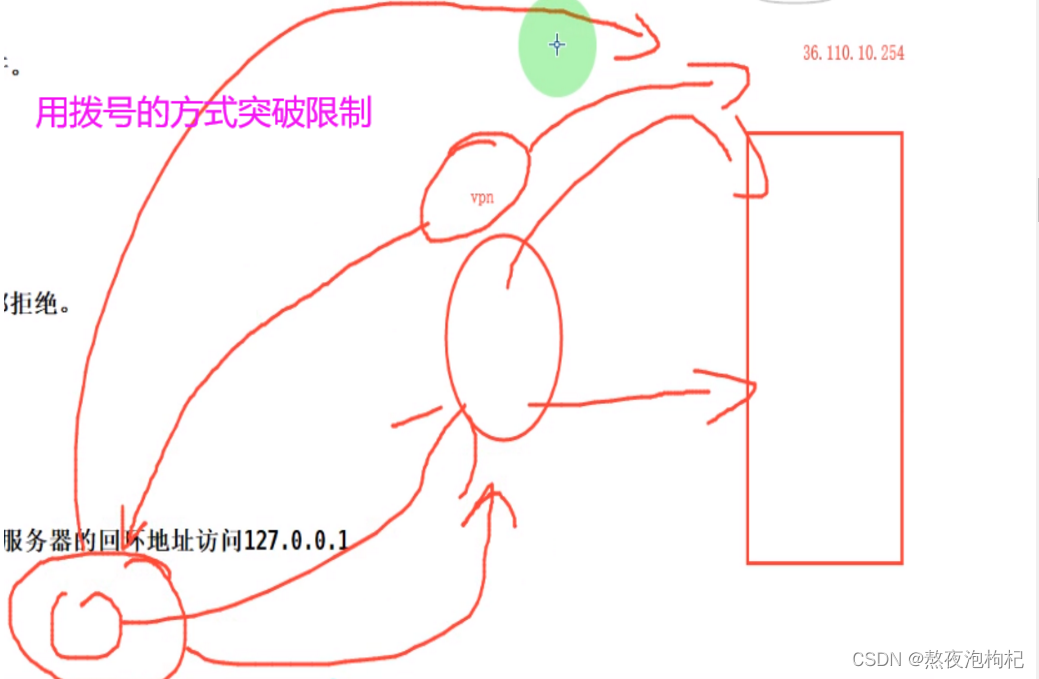
第三种方式:(实际用法)
回环网卡的方式才能连接,curl 172.0.0.1/nginx_status 在本机才能访问,如果想做高级的语言的话需要用到lua的脚本语言
实际配置监控Nginx状态时,仅允许该服务器的回环地址访问127.0.0.1
location /nginx_status {
                stub_status;
                allow 127.0.0.1;
                deny all;
实际线上的时候写:做监控的时候用到,做监控的时候,通过curl本地的状态,值用awk取出来,传给对应的服务器。
ngx_http_access_module模块语法:
![[外链图片转存失败,源站可能有防盗链机制,建议将图片保存下来直接上传(img-96evhinh-1675610807790)(8895CADCB67A4F4991AEE60FC7C1D51A)]](https://img-blog.csdnimg.cn/a534c2bf8f9a45798f109f9163ccad5d.png)
4. Nginx资源限制
一般坐在location层,因为我想让某一个网页不想让别人知道
(1)生成一个密码文件,密码文件的格式name:password(加密)(建议使用htpasswd)
	[root@web01 conf.d]# yum install httpd-tools -y
	[root@web01 conf.d]# htpasswd -c -b /etc/nginx/auth_conf oldboy oldboy  # 如果不加-b选项的话,交互界面输入密码,比较安全
	[root@web01 conf.d]# cat /etc/nginx/auth_conf
	oldboy:$apr1$Kp87VSae$658Nt5bm4iiblQkUvP7u61
(2)书写配置文件,.配置Nginx,限制对应的资源
	location /download {
		root /module;
		autoindex on;
		autoindex_exact_size off;
		autoindex_localtime on;

		auth_basic "Please Password!!!";
		auth_basic_user_file /etc/nginx/auth_conf; # 如果想写相对路径的话,如果你把文件写到/etc/nginx/的话,会默认从这里面找,所以以这里可以直接写auth_conf
	}
查命令所在的包: yum provides htpasswd
nginx连接局限性: 如果下次再用这个网站,那么还需要重新制定一个密码文件,要不密码都一样了。一般在location层添加,因为有不想让别人看的页面,所以才这样设置,或者资源不想让别人访问
5. Nginx访问限制
5.1 Nginx连接限制
(1)设置共享内存区域和给定键值的最大允许连接数。超过此限制时,服务器将返回错误以回复请求(503错误)
书写代码:
http{
    limit_conn_zone $binary_remote_addr zone=addr:10m;  # 开批一个新的空间,这些空间存的是一些ip地址($binary_remote_addr), 这个空间叫什么名字(叫addr),给他分配10M的内存
    #$binary_remote_addr比$remote_addr占用一个IP的字节数少
}
server {
    # 同一时刻只允许一个客户端连接
    limit_conn addr 1; # limit_conn调用addr这个空间,空间的来源ip不能超1

    location / {
        root /code;
        index index.html;
    }
(2)使用ab工具进行压力测试
[root@xuliangwei ~]# yum install -y httpd-tools
[root@xuliangwei ~]# ab -n 500 -c 2  http://127.0.0.1/index.html

-n 20 -c 2 20个连接,同时并发两个

ab -n 500 -c2 -A dong:666 http://172.16.1.7/down.donglinux.com/download
-A dong:666 因为我做了认证,所以必须加用户密码
小提示:
一个连接可以产生多个请求,所以连接数不是很准,超过连接数会报503的错误
当nginx读取请求头的时候才算是连接上来了
本地访问本地,读取访问头的速度非常快,产生的连接数太少了,没有超过1秒,不会报错。在同一时刻,在一秒之内,有多少个连接建立了,没超过一秒建立这些连接也是可以的。在公网中中间有好多交换机,路由器,产生的有延时,所以公网测试比较准确。
语法格式:
![[外链图片转存失败,源站可能有防盗链机制,建议将图片保存下来直接上传(img-gbTNSr1R-1675610807791)(04D715F69D664E5F9263453524C5B961)]](https://img-blog.csdnimg.cn/0fcdb81391844491854bb8e8a979b469.png)
![[外链图片转存失败,源站可能有防盗链机制,建议将图片保存下来直接上传(img-kcygqAyW-1675610807791)(F05B41D7B371430B89C9958C9381D4AE)]](https://img-blog.csdnimg.cn/d6a945d4b516483aa846050a3d4a4097.png)
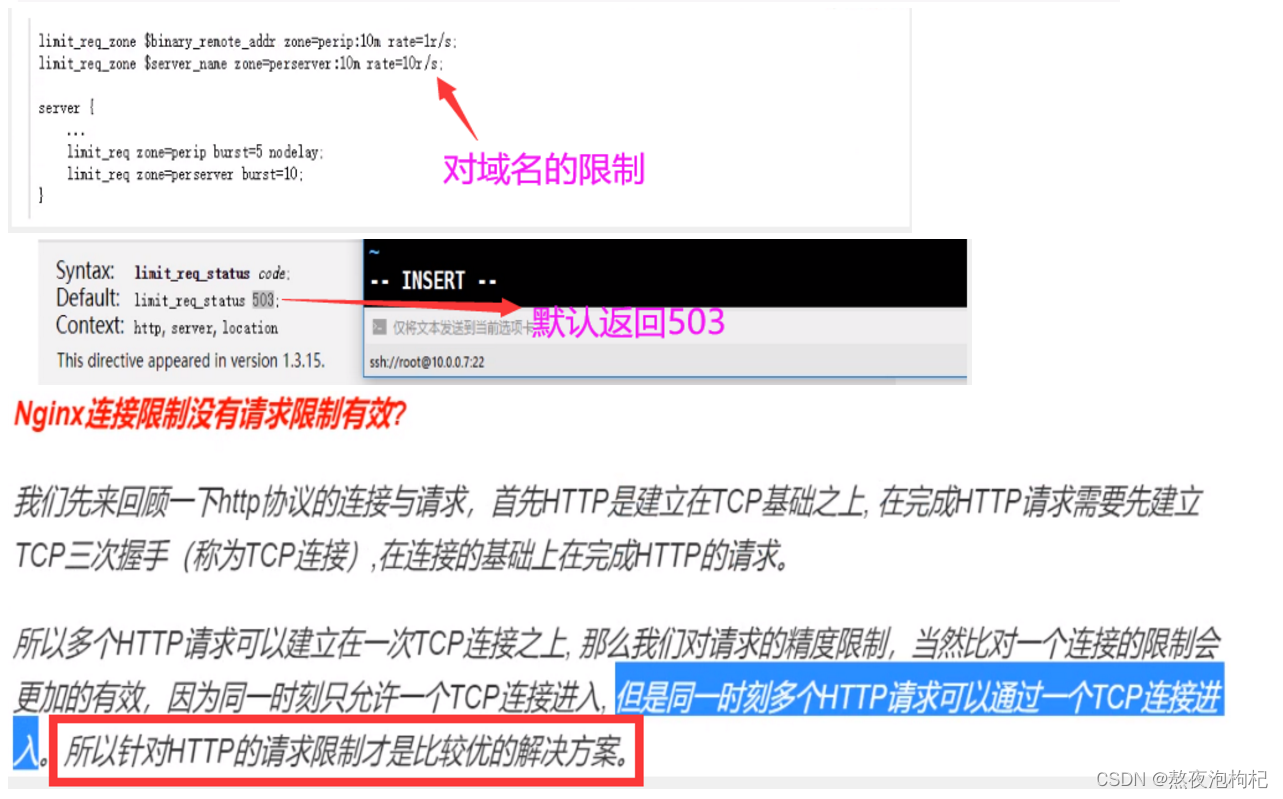
5.2 Nginx请求限制(常用)
(1)书写配置文件,定义限制的key(基于什么来做限制,IP地址)
[root@web01 conf.d]# cat test1.oldboy.com.conf
limit_req_zone $binary_remote_addr zone=req_zone:10m rate=1r/s;
# 定义一个key,key就是我们限制的一个对象,开辟一个空间,名称是req_zone,10m是大小,
#rate传输的速率(限制一秒最多一个ip请求),必须放在http层,定义放在http层,定义只能写一次,其他的层如果想定义的话,直接调用就可以了。限制的是本服务器的资源,如果不是在本服务器上的资源是访问不到的
server {
	listen 80;
	server_name test1.oldboy.com;

	limit_req zone=req_zone burst=5 nodelay;
# burst=5  nodelay允许延迟处理五个,剩下的直接被拒绝,马上就拒绝对请求做限制比对连接做限制要精准一些。请求超过1r/s,剩下的将别延迟处理,请求超过burst定义的数量,多余的请求返回503
	limit_req_status 412;
	error_page 412 /err.html;    #这个文件必须存在/code/test1/err.html

	location / {
		root /code/test1;
		index index.html;
	}
}
(2)填写hosts域名解析
echo "10.0.0.7 test1.oldboy.com" >> /etc/hosts
(3)进行简单的压力测试
ab -n 50 -c 20 http://test1.oldboy.com/index.html
语法格式:
![[外链图片转存失败,源站可能有防盗链机制,建议将图片保存下来直接上传(img-0aOAn3Q4-1675610807792)(78095553231A439C8C531D1921DE88C7)]](https://img-blog.csdnimg.cn/ac4dcc0ca649496ead4684cd1442adf5.png)
![[外链图片转存失败,源站可能有防盗链机制,建议将图片保存下来直接上传(img-2RIF8EeP-1675610807793)(73DC77FAEF394AA8B6CC5E64960000E7)]](https://img-blog.csdnimg.cn/55de28f12f6f401a99e9bc87a4eca37d.png)
6. Nginx限速模块
limit_rate_after 800M; 下载达到多少之后限速
limit_rate       200k;
7. Nginx Location
使用Nginx Location可以控制访问网站的路径,但是那是一个server可以有多个location配置,多个locatio是有优先级的。
(1)Location语法示例
		location [=|^~|~|~*|!~|!~*|/] /uri/ { ...
		}

域名后面就是uri
(2)location语法优先级排列
匹配符	匹配规则					优先级
=		精确匹配						1
^~		以某个字符串开头				2
~		区分大小写的正则匹配			3
~*		不区分大小写的正则匹配			4
!~		区分大小写不匹配的正则			5
!~*		不区分大小写不匹配的正则		6
/		通用匹配,任何请求都会匹配到	7
(3)举个栗子
# 通用匹配,任何请求都会匹配到
location / {
    ...
}

# 严格区分大小写,匹配以.php结尾的都走这个location
location ~ \.php$ {
    ...
}
# 严格区分大小写,匹配以.jsp结尾的都走这个location
location ~ \.jsp$ {
    ...
}
# 不区分大小写匹配,只要用户访问.jpg,gif,png,js,css 都走这条location
location ~* .*\.(jpg|gif|png|js|css|mp4)$ {
    ...
}

# 不区分大小写匹配
location ~* "\.(sql|bak|tgz|tar.gz|.git)$" {
    ...
}
/ ~ 用的比较多
8. 回顾知识点
(1)小总结:
nginx目录索引-->autoindex
	资源下载
	本地yum仓库
nginx状态模块-->stub_status
	keepalive_timeout
nginx访问控制
	基于来源的IP地址限制		-->allow deny
	基于用户名和密码限制		-->basic_auth
nginx访问限制
	连接	limit_conn
	请求	limit_req
nginx location
	优先级
	语法示例
(2)rsync拉取网络上资源,放到/code/mirrors:
[root@web01 mirrors]# rsync -avz rsync://mirrors.tuna.tsinghua.edu.cn/centos/ /code/mirrors/
(3)小知识点
nginx所有的功能都是用模块实现的,识别不了.db的文件,然后就是下载了.
nginx -V来看参数
swapoff -a 把swap分区给关了
free -m
nginx状态监控模块(ngx_http_stub_status_module)yum装的自动把这个模块集成进来了,如果源码安装的话,必须加上–with-http_stub_status_module配置参数来指定它
一个连接会产生n多个请求,requests 客户端总的http请求数。一次连接可以产生多个请求
/etc/nginx/nginx.conf在这个配置文件中改为timeout改成0就行,systemctl restart nginx
yum provides htpasswd 查看一个命令来源于那个包,现在这个服务器已有的仓库里查
htpasswd -c -b /etc/nginx/auth_conf oldboy oldboy
-c 创建一个文件
-b 在命令行指定用户和密码
auth_basic_user_file /etc/nginx/auth_conf; 或者写auth_conf相对路径
默认会去/etc/nginx/下面去找,因为/etc/nginx是他的一个安装路劲(用户身份验证的局限性: 如果在弄一个网站,在做一次验证,就不能用到这个文件了
如果用了,密码就一样了,还需在生成一个。如果资源不想给被人看,就可以加
一个密码)
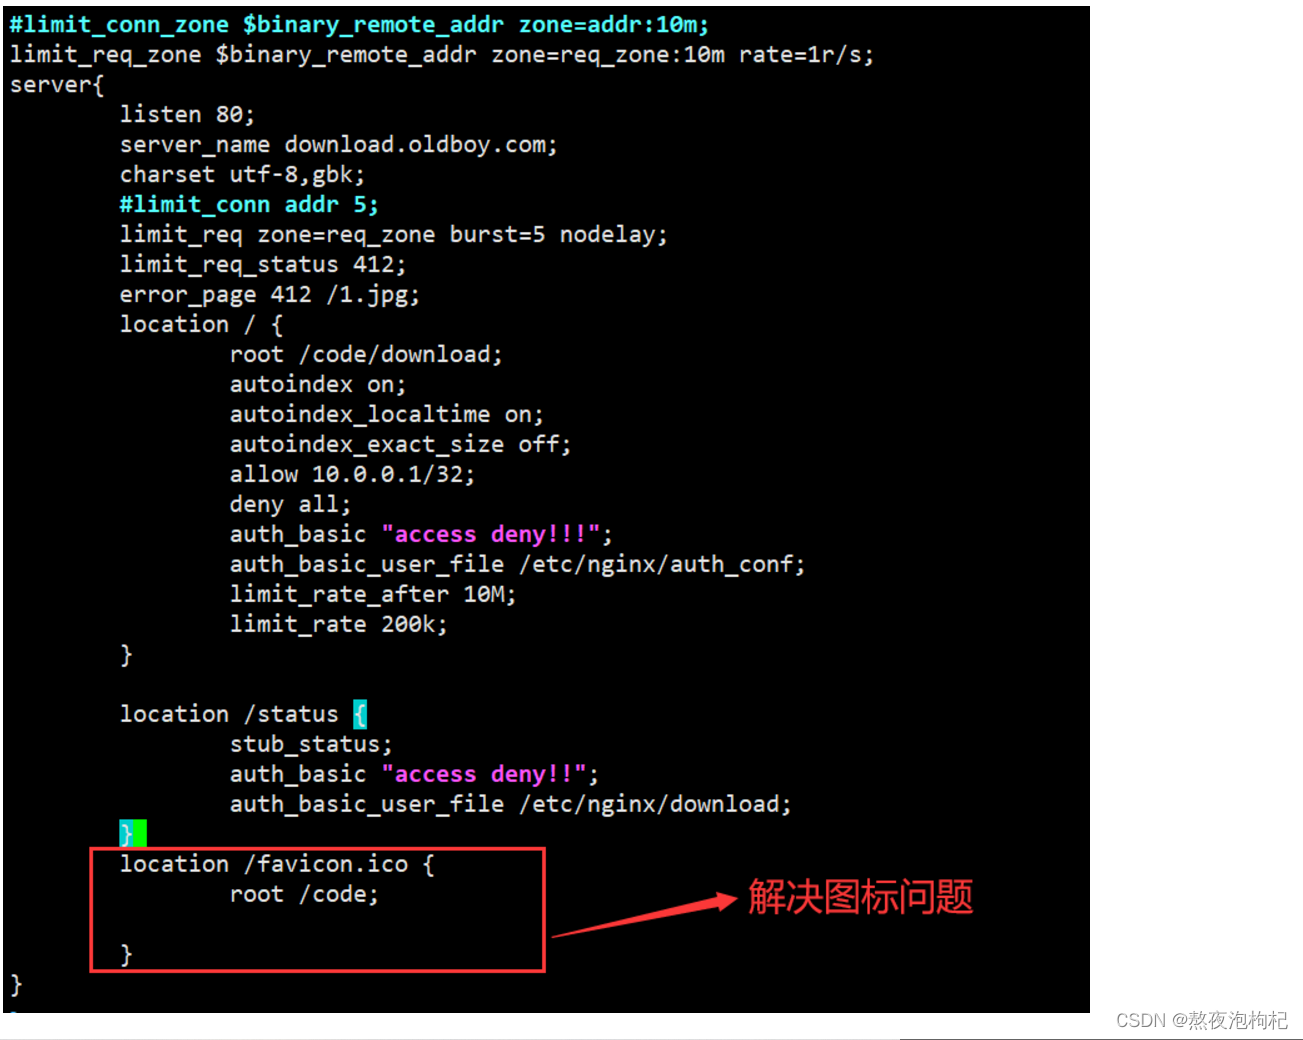
(4)运用所学模块写个server
#limit_conn_zone $binary_remote_addr zone=addr:10m;
limit_req_zone $binary_remote_addr zone=req_zone:10m rate=1r/s;
server{
        listen 80;
        server_name download.oldboy.com;
        charset utf-8,gbk;
        #limit_conn addr 5;
        limit_req zone=req_zone burst=5 nodelay;
        limit_req_status 412;
        error_page 412 /1.jpg;
        location / {
                root /code/download;
                autoindex on;
                autoindex_localtime on;
                autoindex_exact_size off;
                allow 10.0.0.1/32;
                deny all;
                auth_basic "access deny!!!";
                auth_basic_user_file /etc/nginx/auth_conf;
                limit_rate_after 10M;
                limit_rate 200k;
        }

        location /status {
                stub_status;
                auth_basic "access deny!!";
                auth_basic_user_file /etc/nginx/download;
        }
        location /favicon.ico {
                root /code;

        }
}


 2497
2497


 被折叠的 条评论
为什么被折叠?
被折叠的 条评论
为什么被折叠?
 到【灌水乐园】发言


