


为了满足论文对比原始标注的需求,我特地从现有代码中提炼出一个简明脚本,旨在实现标签的可视化呈现。如下:
from ultralytics.utils.plotting import  colors  #  需要引用代码原来的模块
names = ['bridge', 'ship', 'airplane', 'oil tank']  # 换成自己的类别
import os
import cv2
import torch

def find_txt_by_image_name(image_name, labels_folder):
    """根据图片名称在指定的标签文件夹中查找对应的txt文件路径"""
    txt_name = os.path.splitext(image_name)[0] + '.txt'  # 移除图片扩展名并加上.txt
    return os.path.join(labels_folder, txt_name)


def convert_to_absolute_coords(image_path,  labels_folder):
    """
    读取YOLov8的.txt标签,并将相对坐标转换为绝对坐标。
    假设图片与txt文件名相同(不包括扩展名)。
    """
    # 获取图片的宽度和高度
    img = cv2.imread(image_path)
    height, width, _ = img.shape

    # 确保对应的txt文件存在并读取坐标信息
    txt_path = find_txt_by_image_name(os.path.basename(image_path), labels_folder)
    if not os.path.exists(txt_path):
        print(f"Warning: TXT file not found for image {os.path.basename(image_path)}")
        return []

    with open(txt_path, 'r') as file:
        lines = file.readlines()

    absolute_boxes = []
    for line in lines:
        data = line.strip().split()
        class_id = int(data[0])
        center_x_rel = float(data[1])
        center_y_rel = float(data[2])
        width_rel = float(data[3])
        height_rel = float(data[4])

        center_x_abs = center_x_rel * width
        center_y_abs = center_y_rel * height
        x1_abs = center_x_abs - (width_rel * width / 2)
        y1_abs = center_y_abs - (height_rel * height / 2)
        x2_abs = center_x_abs + (width_rel * width / 2)
        y2_abs = center_y_abs + (height_rel * height / 2)

        absolute_boxes.append([(class_id, x1_abs, y1_abs, x2_abs, y2_abs)])

    return absolute_boxes


# 图片和标签文件夹路径
images_folder = 'C:XXXX'  #  你图片的路径
output_folder = 'C:/XXXX'  # 标签的路径
labels_folder = 'C:XXXX'  #  绘制好图片保存的路径


def box_label(img, box, label="", color=(128, 128, 128), txt_color=(255, 255, 255), rotated=False):
    """Add one xyxy box to image with label."""
    if isinstance(box, torch.Tensor):
        box = box.tolist()
    lw = max(round(sum(img.shape) / 2 * 0.003), 2)
    tf = max(lw - 1, 1)  # font thickness
    sf = lw / 3  # font scale
    p1, p2 = (int(box[0]), int(box[1])), (int(box[2]), int(box[3]))
    cv2.rectangle(img, p1, p2, color, thickness=lw, lineType=cv2.LINE_AA)
    w, h = cv2.getTextSize(label, 0, fontScale=sf, thickness=tf)[0]  # text width, height
    outside = p1[1] - h >= 3
    p2 = p1[0] + w, p1[1] - h - 3 if outside else p1[1] + h + 3
    cv2.rectangle(img, p1, p2, color, -1, cv2.LINE_AA)  # filled
    cv2.putText(
        img,
        label,
        (p1[0], p1[1] - 2 if outside else p1[1] + h + 2),
        0,
        sf,
        txt_color,
        thickness=tf,
        lineType=cv2.LINE_AA,
    )


# 遍历图片文件夹
for filename in os.listdir(images_folder):
    if filename.endswith('.jpg') or filename.endswith('.png'):
        image_path = os.path.join(images_folder, filename)

        boxes = convert_to_absolute_coords(image_path, labels_folder)
        print(f"Image: {filename}, Boxes: {boxes}")
        img = cv2.imread(image_path)


        for d in reversed(boxes):
            for i in d:
                c= int(i[0])
                name =  names[c]
                label = f"{name} "
                box = i[1:5]
                box = torch.tensor(box, dtype=torch.float32)
                box_label(img,box, label, color=colors(c, True), rotated=False)
        save_path = os.path.join(output_folder, filename)
        cv2.imwrite(save_path, img)
只需要更改自己类别的映射和对应文件的位置即可
生成的图片如下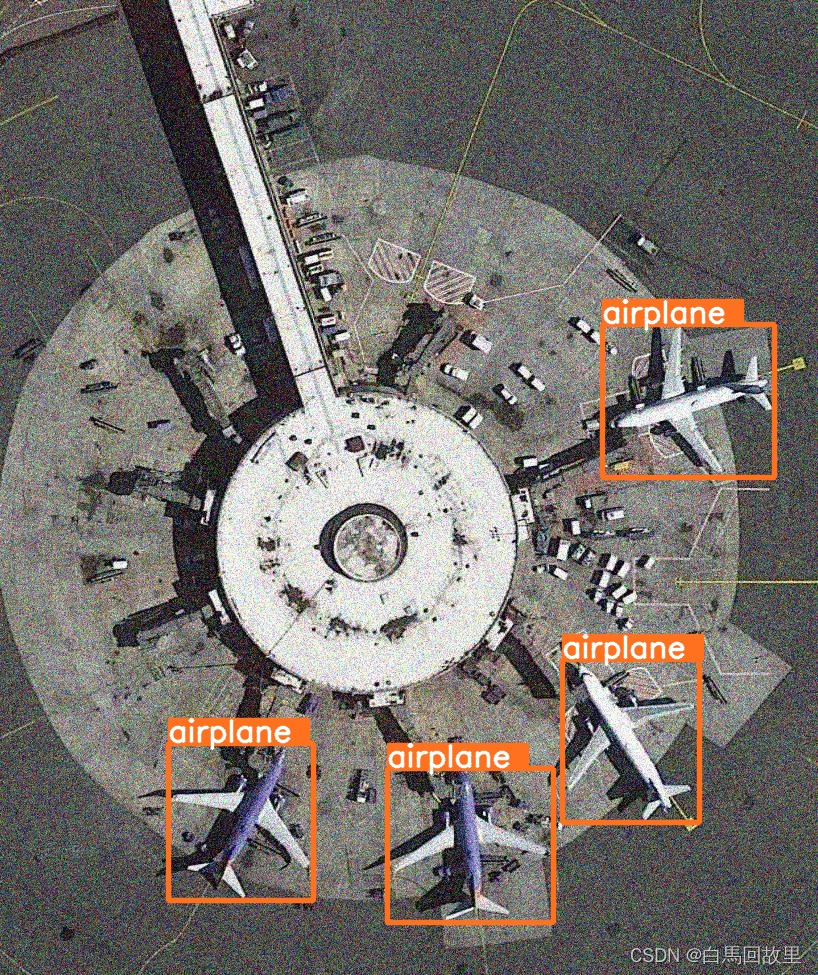


 1136
1136

 被折叠的 条评论
为什么被折叠?
被折叠的 条评论
为什么被折叠?
 到【灌水乐园】发言


