


ClickHouse的安装以及简单使用
1、docker-compose安装clickhouse
(1)安装docker
(2)安装docker-compose
(3)安装clickhouse
1.编写docker-compose.yml配置文件
version: '3'
services:
  clickhouse:
    image: yandex/clickhouse-server:21.3.20.1 #指定clickhouse版本
    hostname: clickhouse #容器的主机名
    container_name: clickhouse #容器名称
    expose:
      - "9000" #暴露的端口
    user: root #容器内部使用root用户运行
    privileged: true #赋予容器特权模式(会影响容器的安全性和隔离性。这个选项应该谨慎使用,因为容器在特权模式下可以执行更多的操作,包括对主机系统修改)
    ports: #进行端口映射
      - "8123:8123"
      - "9008:9000"
    volumes: #挂载容器目录到本地
      - /home/clickhouse/data/:/var/lib/clickhouse
      - /home/clickhouse/log/:/var/log/clickhouse-server/
      - /home/clickhouse/etc/clickhouse-server/:/etc/clickhouse-server/
    environment: #设置容器的时区为上海
      - TZ=Asia/Shanghai
    ulimits:
      nofile: #设置容器的文件句柄限制
        soft: 262144
        hard: 262144
查看主机端口占用情况
$ lsof -i: 端口
或者
$ netstat -tunlp | grep 端口号
2.启动容器修改挂载的下来配置文件
$ sudo docker pull yandex/clickhouse-server3
#创建挂载目录
$ sudo mkdir /home/clickhouse/data/
$ sudo mkdir /home/clickhouse/log/
$ sudo mkdir -p /home/clickhouse/etc/clickhouse-server/
#临时启动
$ docker run -d --name clickhouse --ulimit nofile=262144:262144 yandex/clickhouse-server:21.3.20.1
#复制文件到挂载目录
$ sudo docker ps
$ sudo docker cp 29a40b8fffe4:/etc/clickhouse-server/ /home/clickhouse/etc/clickhouse-server/
$ sudo docker cp 29a40b8fffe4:/var/lib/clickhouse/ /home/clickhouse/data/
#停止并删除服务
$ sudo docker stop 29a40b8fffe4
$ sudo docker rm 29a40b8fffe4
(1)更改用户名和密码:
进入挂载的/etc/clickhouse-server/users.xml文件
修改users标签下的default标签为自己的的用户名clickhouse
 <!-- Users and ACL. -->
    <users>
        <!-- If user name was not specified, 'default' user is used. -->
        <clickhouse>
               ........
        </clickhouse>
     </users>
修改password标签里的内容为自己的密码或者密文
      <!-- See also the files in users.d directory where the password can be overridden.

                 Password could be specified in plaintext or in SHA256 (in hex format).

                 If you want to specify password in plaintext (not recommended), place it in 'password' element.
                 Example: <password>qwerty</password>.
                 Password could be empty.

                 If you want to specify SHA256, place it in 'password_sha256_hex' element.
                 Example: <password_sha256_hex>65e84be33532fb784c48129675f9eff3a682b27168c0ea744b2cf58ee02337c5</password_sha256_hex>
                 Restrictions of SHA256: impossibility to connect to ClickHouse using MySQL JS client (as of July 2019).

                 If you want to specify double SHA1, place it in 'password_double_sha1_hex' element.
                 Example: <password_double_sha1_hex>e395796d6546b1b65db9d665cd43f0e858dd4303</password_double_sha1_hex>

                 If you want to specify a previously defined LDAP server (see 'ldap_servers' in the main config) for authentication,
                  place its name in 'server' element inside 'ldap' element.
                 Example: <ldap><server>my_ldap_server</server></ldap>

                 If you want to authenticate the user via Kerberos (assuming Kerberos is enabled, see 'kerberos' in the main config),
                  place 'kerberos' element instead of 'password' (and similar) elements.
                 The name part of the canonical principal name of the initiator must match the user name for authentication to succeed.
                 You can also place 'realm' element inside 'kerberos' element to further restrict authentication to only those requests
                  whose initiator's realm matches it.
                 Example: <kerberos />
                 Example: <kerberos><realm>EXAMPLE.COM</realm></kerberos>

                 How to generate decent password:
                 Execute: PASSWORD=$(base64 < /dev/urandom | head -c8); echo "$PASSWORD"; echo -n "$PASSWORD" | sha256sum | tr -d '-'
                 In first line will be password and in second - corresponding SHA256.

                 How to generate double SHA1:
                 Execute: PASSWORD=$(base64 < /dev/urandom | head -c8); echo "$PASSWORD"; echo -n "$PASSWORD" | sha1sum | tr -d '-' | xxd                  -r -p | sha1sum | tr -d '-'
                 In first line will be password and in second - corresponding double SHA1.
            -->
      <password>123456</password> #这里采用明文

wq保存退出
进入/etc/clickhouse-server/config.xml下放开
<listen_host>::</listen_host>
标签的注释
(2)重新启动容器
$ sudo docker-compose -f docker-compose.yml up -d
#docker-compose.yml为你文件的位置,我这就在当前目录下
#-d表示后台启动
#查看容器启动状态
#clickhouse为我们为容器起的名字或者直接使用容器id
$ sudo docker ps
$ sudo docker stats clickhouse
CONTAINER ID   NAME         CPU %     MEM USAGE / LIMIT     MEM %     NET I/O       BLOCK I/O       PIDS
29a40b8fffe4   clickhouse   1.82%     4.616GiB / 15.36GiB   30.06%    111GB / 2GB   61GB / 22.1MB   57
#查看容器日志
$ sudo docker logs clickhouse
2.clickhouse的使用
官方文档:https://clickhouse.com/docs/en/intro
(1)开始
#进入容器内部
$ sudo docker exec -it clickhouse /bin/bash
#使用客户端连接服务
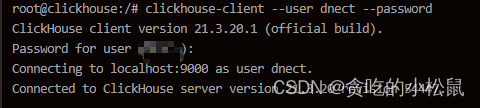
$ clickhouse-client --user 刚才设置的用户名 --password -> 回车
输入刚才设置的密码 -> 回车
#然后就成功进入内部,我们可以使用以下命名查看当前有哪些数据库
$ show databases

clickhouse整体的语法和mysql的大部分相同,default这个数据库为默认的数据库,单独创表在不指定数据库的情况下创建的表会默认放到这个数据库中。
(2)数据库的创建,表的创建
#创建数据库test
CREATE DATABASE IF NOT EXISTS test
#创建表my_first_tables
CREATE TABLE IF NOT EXISTS test.my_first_table
(
    user_id UInt32,
    message String,
    timestamp DateTime,
    metric Float32
)
ENGINE = MergeTree() #选用MergeTree的存储引擎(平时基本使用这个)
PRIMARY KEY (user_id, timestamp) #设置主键
关于clickhouse的数据类型大家可以参照官网:https://clickhouse.com/docs/zh/sql-reference/data-types
(3)插入数据
您可以在 ClickHouse 中使用熟悉的INSERT INTO TABLE命令,但重要的是要了解每次插入表中都会导致在存储中创建MergeTree一个**部分。**即使对于一个简单的示例,我们也可以一次插入多行,需要注意clickhouse支持重复的数据,包括设置的主键也是可以重复的。
INSERT INTO test.my_first_table (user_id, message, timestamp, metric) VALUES
    (101, 'demo',now(),-1.0),
    (102, 'demo',yesterday(), 1.41421),
    (102, 'demo',today(),2.718),
    (101, 'demo',now() + 5,3.14159)
- 请注意,该
timestamp列是使用各种日期和日期时间函数填充的。ClickHouse 有数百个有用的函数,您可以在函数部分查看。
让我们验证它是否有效 - 您应该看到插入的四行数据。
SELECT * FROM test.my_first_table
每批插入大量行 - 一次插入数万甚至数百万行。别担心 - ClickHouse 可以轻松处理这种类型的卷!
(4)更新和删除
尽管 ClickHouse 面向大量分析工作负载,但在某些情况下可以修改或删除现有数据。这些操作被标记为“突变”并使用命令执行ALTER TABLE。您还可以DELETE使用 ClickHouse 的轻量级删除功能来删除行。所以尽量不要使用clickhouse处理经常变化的数据,对性能有很大的影响。
更新操作
#标准语法
ALTER TABLE [<database>.]<table> UPDATE <column> = <expression> WHERE <filter_expr>
#例子
ALTER TABLE test.my_first_table UPDATE message = "test" WHERE user_id = "101"
删除操作
#标准语法
ALTER TABLE [<database>.]<table> DELETE WHERE <filter_expr>
#例子
ALTER TABLE test.my_first_table DELETE WHERE user_id in (101, 102)
#轻量级删除语法
DELETE FROM [db.]table [ON CLUSTER cluster] [WHERE expr]
#轻量级删除例子
DELETE FROM test.my_first_table WHERE user_id in (101, 102)
轻量级删除只适用于MergeTree表引擎系列,默认是进行异步的,设置
mutations_sync为 1 则等待一个副本处理该语句,设置mutations_sync为 2 则等待所有副本。
其他的使用请大家参考官方文档!
参考文档
- clickhouse官方文档


 1万+
1万+


 被折叠的 条评论
为什么被折叠?
被折叠的 条评论
为什么被折叠?
 到【灌水乐园】发言


