


前言
详细知识推荐阅读:详细分析Element Plus中的ElMessageBox弹窗用法(附Demo及模版)
MessageBox则常用于Vue2
1. 基本知识
MessageBox 是 Element UI 提供的一个全局方法,用于创建各种对话框,如消息提示、确认框和输入框
MessageBox 可以通过引入 MessageBox 组件来使用,也可以通过全局挂载的方式使用 this.$confirm 等快捷方法
常用的方法如下:
MessageBox.alert(message, title, options):显示一个消息提示框MessageBox.confirm(message, title, options):显示一个确认对话框MessageBox.prompt(message, title, options):显示一个输入框
具体的参数说明如下:
message:对话框的内容,可以是字符串或 HTML 片段title:对话框的标题options:配置对象,用于定制对话框的行为和样式,包括以下常用选项:
confirmButtonText:确认按钮的文本
cancelButtonText:取消按钮的文本
type:消息类型(success, warning, info, error)
callback:按钮点击后的回调函数
dangerouslyUseHTMLString:是否将 message 作为 HTML 片段
对应的返回值如下:返回一个 Promise,点击确认按钮会 resolve,点击取消按钮会 reject
2. Demo
2.1 确认框
<template>
  <div>
    <el-button @click="handleDelete(1)">Delete Item 1</el-button>
    <el-table :data="list">
      <el-table-column prop="name" label="Name"></el-table-column>
      <el-table-column label="Actions">
        <template slot-scope="scope">
          <el-button @click="handleDelete(scope.row.id)" type="danger" size="small">Delete</el-button>
        </template>
      </el-table-column>
    </el-table>
  </div>
</template>

<script>
import { MessageBox, Message } from 'element-ui';

export default {
  data() {
    return {
      list: [
        { id: 1, name: 'Item 1' },
        { id: 2, name: 'Item 2' },
        { id: 3, name: 'Item 3' },
      ],
    };
  },
  methods: {
    handleDelete(id) {
      MessageBox.confirm('Are you sure you want to delete this item?', 'Warning', {
        confirmButtonText: 'Yes',
        cancelButtonText: 'No',
        type: 'warning',
      }).then(() => {
        // Simulate an API call to delete the item
        this.list = this.list.filter(item => item.id !== id);
        Message({
          type: 'success',
          message: 'Item deleted successfully!',
        });
      }).catch(() => {
        Message({
          type: 'info',
          message: 'Deletion cancelled',
        });
      });
    },
  },
};
</script>

<style>
@import '~element-ui/lib/theme-chalk/index.css';
</style>
2.2 警告框
<template>
  <div>
    <el-button @click="showAlert">Show Alert</el-button>
  </div>
</template>

<script>
import { MessageBox } from 'element-ui';

export default {
  methods: {
    showAlert() {
      MessageBox.alert('This is a warning message', 'Warning', {
        confirmButtonText: 'OK',
        type: 'warning',
      });
    },
  },
};
</script>

<style>
@import '~element-ui/lib/theme-chalk/index.css';
</style>
2.3 对话框
<template>
  <div>
    <el-button @click="showPrompt">Show Prompt</el-button>
  </div>
</template>

<script>
import { MessageBox } from 'element-ui';

export default {
  methods: {
    showPrompt() {
      MessageBox.prompt('Please input your name', 'Prompt', {
        confirmButtonText: 'OK',
        cancelButtonText: 'Cancel',
      }).then(({ value }) => {
        this.$message({
          type: 'success',
          message: 'Your name is: ' + value,
        });
      }).catch(() => {
        this.$message({
          type: 'info',
          message: 'Input cancelled',
        });
      });
    },
  },
};
</script>

<style>
@import '~element-ui/lib/theme-chalk/index.css';
</style>
3. this.$confirm
在 Vue 2 中使用 Element UI 时,可以通过全局方法 this.$confirm 等快捷方式来调用这些对话框,以简化代码并提升开发效率
实际上它是 MessageBox.confirm 的一个封装
具体的Demo如下:
<template>
  <div>
    <el-button @click="handleDelete(1)">Delete Item 1</el-button>
    <el-table :data="list">
      <el-table-column prop="name" label="Name"></el-table-column>
      <el-table-column label="Actions">
        <template slot-scope="scope">
          <el-button @click="handleDelete(scope.row.id)" type="danger" size="small">Delete</el-button>
        </template>
      </el-table-column>
    </el-table>
  </div>
</template>

<script>
export default {
  data() {
    return {
      list: [
        { id: 1, name: 'Item 1' },
        { id: 2, name: 'Item 2' },
        { id: 3, name: 'Item 3' },
      ],
    };
  },
  methods: {
    handleDelete(id) {
      this.$confirm('Are you sure you want to delete this item?', 'Warning', {
        confirmButtonText: 'Yes',
        cancelButtonText: 'No',
        type: 'warning',
      }).then(() => {
        // Simulate an API call to delete the item
        this.list = this.list.filter(item => item.id !== id);
        this.$message({
          type: 'success',
          message: 'Item deleted successfully!',
        });
      }).catch(() => {
        this.$message({
          type: 'info',
          message: 'Deletion cancelled',
        });
      });
    },
  },
};
</script>

<style>
@import '~element-ui/lib/theme-chalk/index.css';
</style>
同步对比其差异:
<template>
  <div>
    <el-button @click="handleDelete(1)">Delete Item 1</el-button>
    <el-table :data="list">
      <el-table-column prop="name" label="Name"></el-table-column>
      <el-table-column label="Actions">
        <template slot-scope="scope">
          <el-button @click="handleDelete(scope.row.id)" type="danger" size="small">Delete</el-button>
        </template>
      </el-table-column>
    </el-table>
  </div>
</template>

<script>
import { MessageBox, Message } from 'element-ui';

export default {
  data() {
    return {
      list: [
        { id: 1, name: 'Item 1' },
        { id: 2, name: 'Item 2' },
        { id: 3, name: 'Item 3' },
      ],
    };
  },
  methods: {
    handleDelete(id) {
      MessageBox.confirm('Are you sure you want to delete this item?', 'Warning', {
        confirmButtonText: 'Yes',
        cancelButtonText: 'No',
        type: 'warning',
      }).then(() => {
        // Simulate an API call to delete the item
        this.list = this.list.filter(item => item.id !== id);
        Message({
          type: 'success',
          message: 'Item deleted successfully!',
        });
      }).catch(() => {
        Message({
          type: 'info',
          message: 'Deletion cancelled',
        });
      });
    },
  },
};
</script>

<style>
@import '~element-ui/lib/theme-chalk/index.css';
</style>
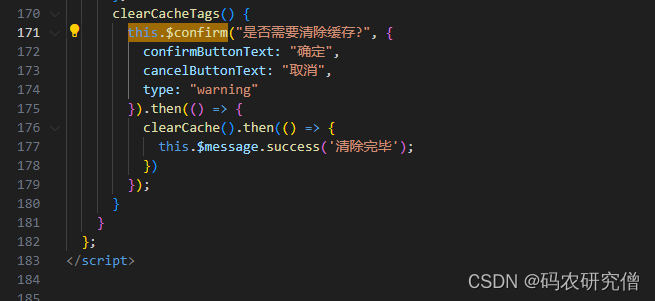
实战中类似的截图如下:


 被折叠的 条评论
为什么被折叠?
被折叠的 条评论
为什么被折叠?
 到【灌水乐园】发言


