


一直遇到的问题是,我重装咯3次虚拟环境,在window和ubantu 系统都遇到这个问题:
 File "C:\Users\HP\AppData\Local\Temp\pip-build-env-_u60y33_\overlay\Lib\site-packages\setuptools\build_meta.py", line 338, in run_setup
      exec(code, locals())
    File "<string>", line 5, in <module>
  ModuleNotFoundError: No module named 'torch'
  error: subprocess-exited-with-error

  × Getting requirements to build editable did not run successfully.
  │ exit code: 1
  ╰─> See above for output.

  note: This error originates from a subprocess, and is likely not a problem with pip.
  full command: 'D:\anaconda3\envs\vedadet\python.exe' 'D:\anaconda3\envs\vedadet\lib\site-packages\pip\_vendor\pyproject_hooks\_in_process\_in_process.py' get_requires_for_build_editable 'C:\Users\HP\AppData\Local\Temp\tmpyge6zm3k'
  cwd: D:\Vir_env\vedadet-main
  Getting requirements to build editable ... error
error: subprocess-exited-with-error

× Getting requirements to build editable did not run successfully.
│ exit code: 1
╰─> See above for output.

note: This error originates from a subprocess, and is likely not a problem with pip.
cwd: C:\Users\HP\AppData\Local\Temp\pip-install-mwuj0gs3\mmpycocotools_e4f4efa3382448a99d5d82096e7a9c2a\
Building wheel for mmpycocotools (setup.py) ... error
ERROR: Failed building wheel for mmpycocotools
Running setup.py clean for mmpycocotools
Running command python setup.py clean
running clean
removing 'build\temp.win-amd64-cpython-38' (and everything under it)
removing 'build\lib.win-amd64-cpython-38' (and everything under it)
'build\bdist.win-amd64' does not exist -- can't clean it
'build\scripts-3.8' does not exist -- can't clean it
removing 'build'
Failed to build mmpycocotools
ERROR: Could not build wheels for mmpycocotools, which is required to install pyproject.toml-based projects尝试咯网上很多的解决方式,都不行。然后我就不按照官网说的安装环境,直接就是按照mmdetetion的环境安装环境,最后环境是装好咯。
接下来时安装环境的步骤:
①下载安装包:
官网的网址:https://github.com/Media-Smart/vedadet/tree/main/configs/trainval/tinaface
在官网下载安装包:Media-Smart/vedadet: A single stage object detection toolbox based on PyTorch (github.com)

②下载虚拟环境
然后打开mmdetection的官网按照这个步骤下载:GET STARTED — MMDetection 3.1.0 documentation
记得在下载cuda和pytorch的时候选择10.2,官网是在1.6版本测试的,反正cuda版本一定要选择10.2,因为我在后面时候发现莫名其妙会说你的cuda版本是10.2,就算你的不是。如果不信你可以下其他的,回来给我反馈是不是我的问题。这个过程可能还是遇到pytorch版本不适配,多下几次就行哈哈。
旧版本的pytorch下载网址:Previous PyTorch Versions | PyTorch
我下载cuda10.2,pytorch1.6是可以的,但是mmdetection要求pytorch1.8以上,所以我尝试下载1.8的,但是遇到我的cuda 不存在这个情况,我人麻咯:

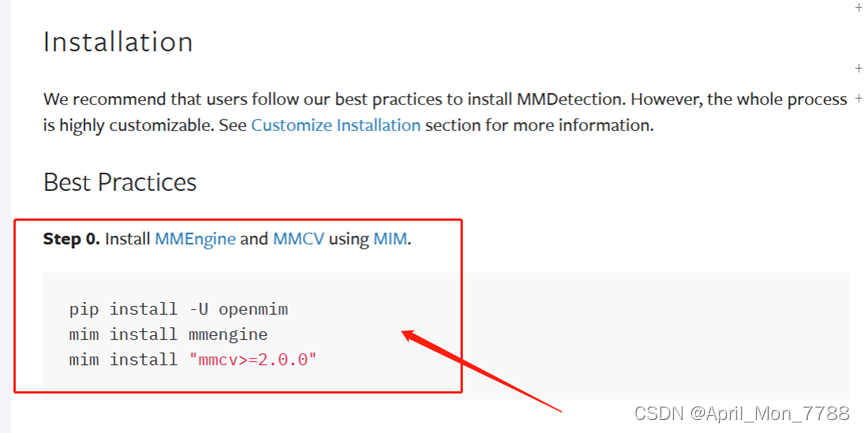
pip install -U openmim
mim install mmengine
mim install "mmcv>=2.0.0"
再按照tinafce官网下载vedadet: Media-Smart/vedadet: A single stage object detection toolbox based on PyTorch (github.com)
③下载数据集和权重文件:
按照这个步骤把数据放在对应的位置(一定要严格按照这个来操作)
在这个网址下载训练权重:tinaface - Google 云端硬盘
在这个网址下载数据集:wider_face |TensorFlow Datasets
在这个网址下载数据集的annotation:GitHub - sovrasov/wider-face-pascal-voc-annotations: WIDER FACE annotations converted to the Pascal VOC XML format
将WIDER_train_annotations 和 WIDER_val_annotations文件名更改为Annotations,并分别放置在WIDER_train 和 WIDER_val两个文件下,并将改名前WIDER_train_annotations 和 WIDER_val_annotations两个文件夹中的train.txt和val.txt分别移动至data/WIDERFace/WIDER_train和WIDER_val文件下。(反正你在代码里面写的路径要和你放的路径一样)
记着这里有一个坑:就是在train.txt和val.txt文档文件上面的最后一行分别有train和val这2行,要删掉不然会报错说没有train.xml这个文件的。

④训练和测试
测试:我用的是tinaface做训练和测试:(不是retinanet下面这2指令都可以用来测试)
CUDA_VISIBLE_DEVICES="0" python tools/infer.py configs/infer/tinaface/tinaface_r50_fpn_bn.py picture/face.jpg(换成你的图片路径)

CUDA_VISIBLE_DEVICES="0" python tools/infer.py configs/infer/tinaface/tinaface_r50_fpn_gn_dcn.py picture/face.jpg(换成你的图片路径)
训练:我用的是tinaface做训练和测试:(不是retinanet)这2个都可以用来训练)
CUDA_VISIBLE_DEVICES="0" python tools/trainval.py configs/trainval/tinaface/tinaface_r50_fpn_bn.py

CUDA_VISIBLE_DEVICES="0" python tools/trainval.py configs/trainval/tinaface/tinaface_r50_fpn_gn_dcn.py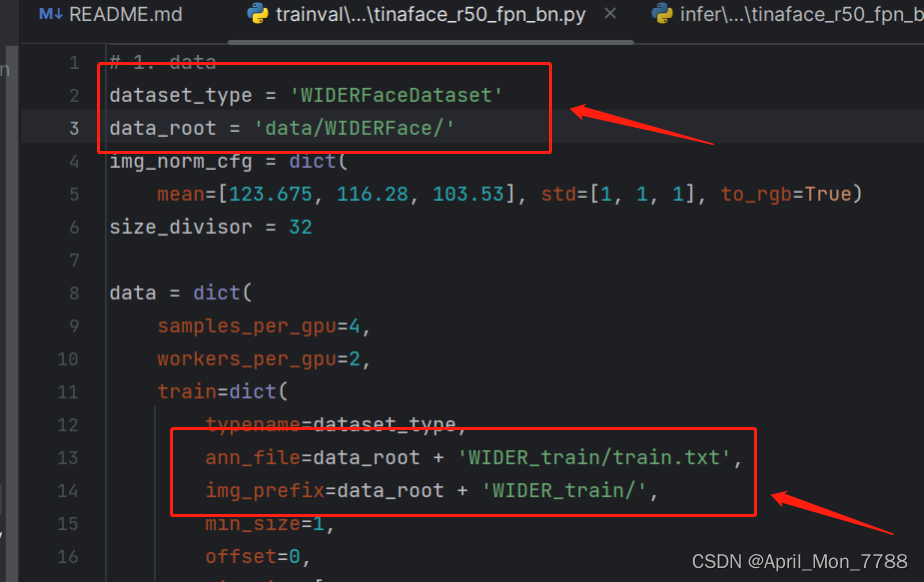
 参考链接:
参考链接:


 1万+
1万+


 被折叠的 条评论
为什么被折叠?
被折叠的 条评论
为什么被折叠?
 到【灌水乐园】发言


