


一、crawlspider的使用
crawlspider是scrpay另一种爬取数据的方式,它继承于spider这个爬虫类。
它的特点:自动根据规则提取链接发送给引擎。
适用场景:url的规律比较容易用正则来实现(正则一定要写对)
#详情页的url
https://so.gushiwen.cn/shiwenv_6e63ab5e275c.aspx
https://so.gushiwen.cn/shiwenv_00336ce41916.aspx
https://so.gushiwen.cn/shiwenv_986da243bcf8.aspx

https://so.gushiwen.cn/shiwenv_\w+.aspx
1、如何创建crawlspider
scrapy genspider -t crawl xx xx.com(-t表示是什么模式;crawl表示具体模式)
2、案例:(以爬取古诗文网站为例)
(1)scrapy startproject gsw
(2)scrapy genspider -t crawl cgs gushiwen.org
之后可以看到文件架构和spider是一样的,我们具体打开爬虫文件可以看到:
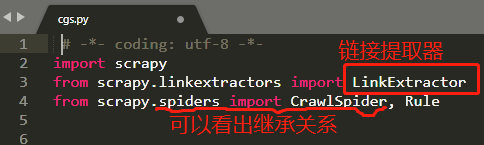
rules中的参数:
LinkExtractor 链接提取器 ,用于设置链接提取的规则;
callback实现回调的方法,注意这里是个字符串;
follow 决定是否在链接提取器提取的链接继续跟进,True就跟进(比如需要翻页时,就要设置成True);
(注意rules是一个元组,当只有一个规则时,不要忘记末尾的逗号)

二、scrapy模拟登陆
1、模拟登陆的3种方法:
(1) 直接向目标url发起请求并携带cookie,用scrapy.Request
(2)向目标url发送post请求携带data(账号和密码),用scrapy.FormRequest
(3)通过selenium来模拟登录 (input标签 切换登录方式 找到用户名和密码的输入框 定位按钮)
其中前2种是scrapy的常用方法。
1.1
第(1)种方法:
目标url:https://user.qzone.qq.com/192149641
scrapy 直接就会得到一个respons对象
思路:
① 因为pares方法里面直接拿到的就是start_urls的response .所以我们要在它之前携带cookie
②通过分析源码找到了一个方法叫做 tart_requests()方法直接携带cooke 在像start_urls发请求,这个时候response就是已经携带好cookie的了,如下:

打开并发现:

③那么去哪里找cookie呢?如下图:

④在scrapy中 cookie需要 以字典格式呈现
最终的爬虫文件如下:

# -*- coding: utf-8 -*-
import scrapy


class QzoneSpider(scrapy.Spider):
    name = 'qzone'
    allowed_domains = ['qq.com']
    start_urls = ['https://user.qzone.qq.com/192149641']
    # 携带cookie
    # 重写start_requests()方法
    def start_requests(self):
        # cookie在scrapy当中要以字典的类型呈现
        cookies = 'pgv_pvi=225631232; pgv_pvid=3623680301; RK=TYZUGzQ3QB; ptcz=237e85c55089b96cc7064002ea3d08b08ce735ca2eba518b13b4280097904bc3; QZ_FE_WEBP_SUPPORT=1; tvfe_boss_uuid=2346e65d4114028d; LW_uid=01v5p9u7y342R3C1u5B107k433; eas_sid=p1f5i9k7v3U2E3Q1D5q167Q5k2; iip=0; pac_uid=1_378110341; livelink_pvid=2660289536; o_cookie=378110341; ied_qq=o0192149641; __Q_w_s__QZN_TodoMsgCnt=1; nutty_uuid=df85c844-0c6a-4cd8-891e-f13e7322e341; qz_screen=1366x768; ptui_loginuin=378110341; Qs_lvt_323937=1611384174%2C1611665667%2C1617629806%2C1618812254%2C1622096214; Qs_pv_323937=3235112205715580400%2C3742927204160170000%2C820459265641302400%2C403055695262391800%2C1978804417902919700; LW_sid=W1U6Q2g2q182K4D044M6b5n1q0; luin=o0378110341; lskey=00010000f3b05d9b59e2b6aa0dba2c8409431c23907eb00efbf45105f1687bca7d8e70b3a8e712b046be2106; _qpsvr_localtk=0.9563249296320062; pgv_info=ssid=s2794478150; uin=o0192149641; skey=@O3mDMCGnR; p_uin=o0192149641; pt4_token=cyLoQou4IcUFiADXykpz1VeW*XWVwTMAKqHP9AyOlos_; p_skey=*iAEoWdPw0AXu967mPcXO88Uhrju*lBmEDNEsf28UNw_; Loading=Yes; 192149641_todaycount=0; 192149641_totalcount=2000; cpu_performance_v8=24'
        cookies = {i.split('=')[0]:i.split('=')[1] for i in cookies.split('; ')}

        # 发送请求
        yield scrapy.Request(
            url=self.start_urls[0],
            callback=self.parse,
            cookies=cookies
        )

    def parse(self, response):
        with open('qzone.html','w',encoding='utf-8') as file_obj:
            file_obj.write(response.text)
1.2
第(2)种方法:以模拟登陆github.com为例
https://github.com

点击进入登录页面:https://github.com/login
右键检查
再输入账号:Zwleasing
以及错误的密码。

点击登录。
结果:提示我们密码错误,并且我们发现网址变成了:https://github.com/session

我们在network中的session中找到Form Data:

即:(密码不正确)
commit: Sign in
authenticity_token: uNu8G5VGV+RPkc434Th/Unp5CSMGlXti83uQxhKHl5TcMyFBP3ckbJfb3TH9/QE8yCNEo0TheA/r+rVcvVyHqg==
login: Zwleasing
password: zq12345678zq99
trusted_device:
webauthn-support: supported
webauthn-iuvpaa-support: unsupported
return_to: https://github.com/login
allow_signup:
client_id:
integration:
required_field_c191:
timestamp: 1632110343507
timestamp_secret: 4b82cef56c1de1511269604cb53da0ee8b1aaca4866ef1ea75c548e7f1c7072c
又从下图知道,Data中的某些值,是可以通过xpath定位得到的。

所以,思路:
start_urls:https://github.com/login
目标url:https://github.com/session
需要携带的数据data(正确的账户和密码)
完整的爬虫文件代码:
# -*- coding: utf-8 -*-
import scrapy

class GithubSpider(scrapy.Spider):
    name = 'github'
    allowed_domains = ['github.com']
    start_urls = ['https://github.com/login']		#创建之后,记得按上述思路修改

    def parse(self, response):
        # authenticity_token = response.xpath('//input[@name="authenticity_token"]/@value').get()
        # print(authenticity_token)
        commit = 'Sign in'
        authenticity_token = response.xpath("//input[@name='authenticity_token']/@value").extract_first()
        login = 'Zwleasing'
        password = 'zq12345678zq'	#这里是正确的密码
        timestamp = response.xpath("//input[@name='timestamp']/@value").extract_first()
        timestamp_secret = response.xpath("//input[@name='timestamp_secret']/@value").extract_first()
        data = {
            'commit': commit,
            'authenticity_token': authenticity_token,
            'login': login,
            'password': password,
            'webauthn-support': 'supported',
            'webauthn-iuvpaa-support': 'unsupported',
            'timestamp': timestamp,
            'timestamp_secret': timestamp_secret,
        }

        # 携带数据发送post请求
        yield scrapy.FormRequest(
            # 目标Url
            url='https://github.com/session',
            # 提交的数据
            formdata=data,
            # 响应的方法
            callback=self.after_login

        )

    def after_login(self,response):
        # 保存文件
        with open('githubzwlasing.html','w',encoding='utf-8') as file_obj:
            file_obj.write(response.text)
结果:

在邮箱中找打验证码,登录成功。
另外,因为Data数据在网页源码中都有,也可以用下面的方法:

# -*- coding: utf-8 -*-
import scrapy


class Github2Spider(scrapy.Spider):
    name = 'github2'
    allowed_domains = ['github.com']
    start_urls = ['https://github.com/login']

    def parse(self, response):
        yield scrapy.FormRequest.from_response(
            # 请求的响应结果
            response=response,
            # 提交数据
            formdata={'login':'Zwleasing','password':'zq12345678zq'},
            # 回调方法
            callback=self.after_login
        )

    def after_login(self,response):
        # 保存文件
        with open('github2.html','w',encoding='utf-8') as file_obj:
            file_obj.write(response.text)
补充:pycharm使用查找和替换功能转化字典格式
将Data数据保存到txt文件中,在pycharm中打开,并ctrl+f(查找),ctrl+r(替换)。


 4209
4209


 被折叠的 条评论
为什么被折叠?
被折叠的 条评论
为什么被折叠?
 到【灌水乐园】发言


