uniapp 点击按钮打开地图,显示当前定位 和 指定标点

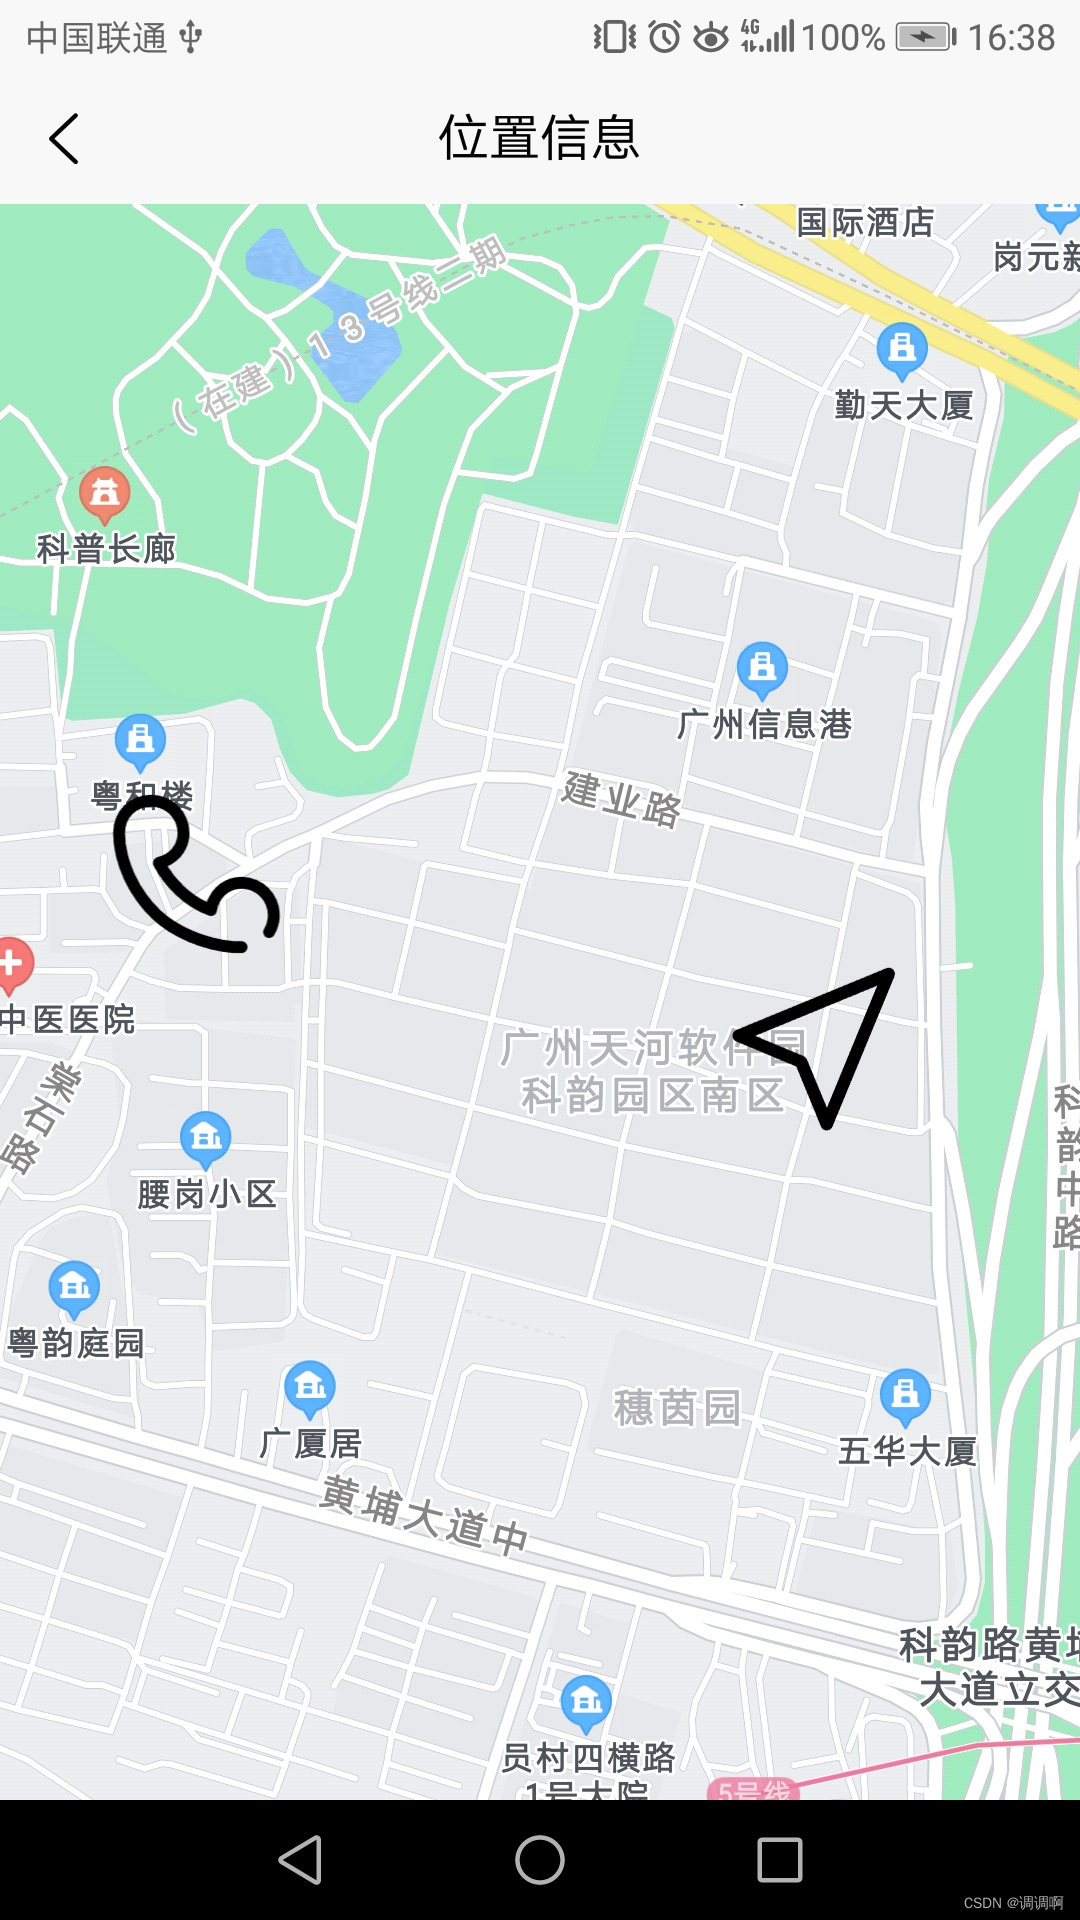
效果如图 ,  左边是我指定的标点位置, 右边是我自己的定位位置

研究了一整天,终于搞出来了, 刚开始以为要用第三方插件,一直在试高德,腾讯这些, 都没搞好,结果发现根本不用第三方 。。。 很简单的

上代码。  

直接复制粘贴,就是我上图的效果

 1 , iconPath 是标注点图标 ,要改成自己目录下的图片 ,默认的图标很丑,我自己改了

2 , 自定义标记点 , 我这里是写死的经纬度,实际开发可以发请求用接口返回的经纬度 

3 ,markers 就是标记点数组, id是唯一标识

4 , :scale 是地图的缩放比例,自己去调,看怎么样最好

<template>
	<view>
		<map
			class="map"
			:longitude="longitude"
			:latitude="latitude"
			:show-location="true"
			:markers="markers"
			:scale="16"
            style="width: 100%; height: 450px;"
			
		></map>
	</view>
</template>


<script>
export default {
	data() {
		return {
			// 用户当前定位信息
			latitude:"",
			longitude:"",
			// 自定义标记点
			markers: [{
				id: 2,
				latitude: '23.124088',
				longitude: '113.369389',
				iconPath:'../../static/phone.jpg',
				width: 30,
				height: 30,
			}]
		}
	},
	onLoad() {
		this.init()
	},
	methods: {
		// 初始化
		init() {
			let that = this
			// 拿到用户所在位置信息
			uni.getLocation({
				type: 'gcj02',
				success:(res)=> {
					
						this.latitude=res.latitude,
						this.longitude=res.longitude,
					that.markers.push({
						id:1,
						latitude:this.latitude,
						longitude:this.longitude,
						iconPath:'../../static/location.jpg',
						width: 30,
						height: 30,
					})
				}
				
			
			})
		}

	}
}

</script>

<style scoped>
map{
	width: 100%;
	height:600px
}
</style>

  • 3
    点赞
  • 19
    收藏
    觉得还不错? 一键收藏
  • 4
    评论
好的,这是一个比较复杂的问题,需要结合 React 和 OpenLayers 来实现。下面是一个简单的实现步骤: 1. 在 React 项目中引入 OpenLayers 库。可以使用 npm 安装 openlayers 包,然后在项目中引入: ``` import 'ol/ol.css'; import Map from 'ol/Map'; import View from 'ol/View'; import VectorLayer from 'ol/layer/Vector'; import VectorSource from 'ol/source/Vector'; import Feature from 'ol/Feature'; import Point from 'ol/geom/Point'; import Overlay from 'ol/Overlay'; ``` 2. 创建一个 div 容器用于显示地图: ``` <div id="map" style={{ width: '100%', height: '500px' }}></div> ``` 3. 在 React 组件的 componentDidMount 方法中初始化地图标点: ``` componentDidMount() { const map = new Map({ target: 'map', layers: [ new TileLayer({ source: new OSM(), }), ], view: new View({ center: [0, 0], zoom: 2, }), }); const vectorSource = new VectorSource({ features: [], }); const vectorLayer = new VectorLayer({ source: vectorSource, }); map.addLayer(vectorLayer); const marker = new Feature({ geometry: new Point([0, 0]), }); vectorSource.addFeature(marker); const popup = new Overlay({ element: document.getElementById('popup'), autoPan: true, autoPanAnimation: { duration: 250, }, }); map.addOverlay(popup); map.on('click', (event) => { const feature = map.forEachFeatureAtPixel(event.pixel, (f) => f); if (feature === marker) { popup.setPosition(event.coordinate); popup.getElement().innerHTML = 'This is a marker.'; } else { popup.setPosition(undefined); } }); } ``` 4. 在 render 方法中创建一个 div 用于显示悬浮框: ``` render() { return ( <div> <div id="map" style={{ width: '100%', height: '500px' }}></div> <div id="popup" className="ol-popup"> <a href="#" className="ol-popup-closer"></a> <div className="ol-popup-content"></div> </div> </div> ); } ``` 这样就可以在地图上添加一个标点,并且点击标点时会弹出一个悬浮框显示内容。当然,这只是一个简单的实现,具体还需要根据实际需求进行调整。

“相关推荐”对你有帮助么?

  • 非常没帮助
  • 没帮助
  • 一般
  • 有帮助
  • 非常有帮助
提交
评论 4
添加红包

请填写红包祝福语或标题

红包个数最小为10个

红包金额最低5元

当前余额3.43前往充值 >
需支付:10.00
成就一亿技术人!
领取后你会自动成为博主和红包主的粉丝 规则
hope_wisdom
发出的红包
实付
使用余额支付
点击重新获取
扫码支付
钱包余额 0

抵扣说明:

1.余额是钱包充值的虚拟货币,按照1:1的比例进行支付金额的抵扣。
2.余额无法直接购买下载,可以购买VIP、付费专栏及课程。

余额充值